This post contains affiliate links.
Hello rainbows 🌈
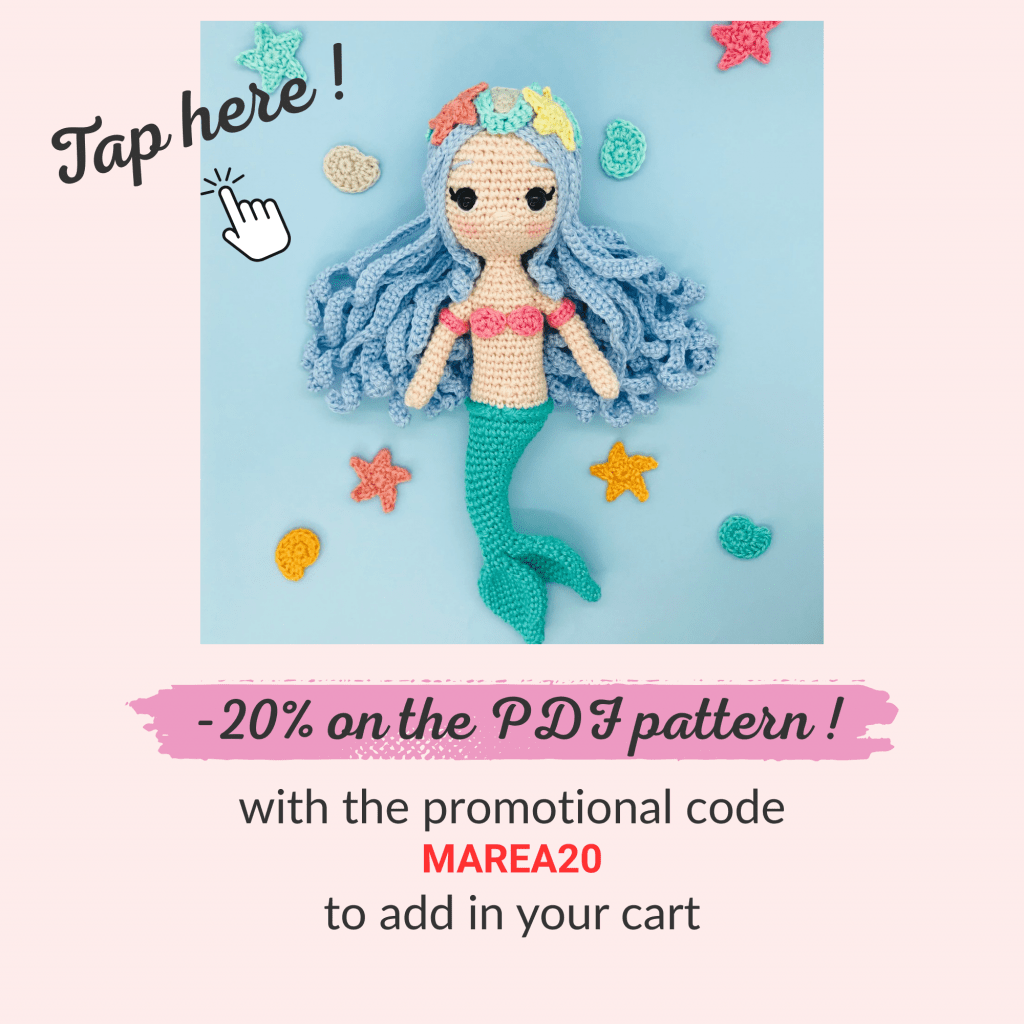
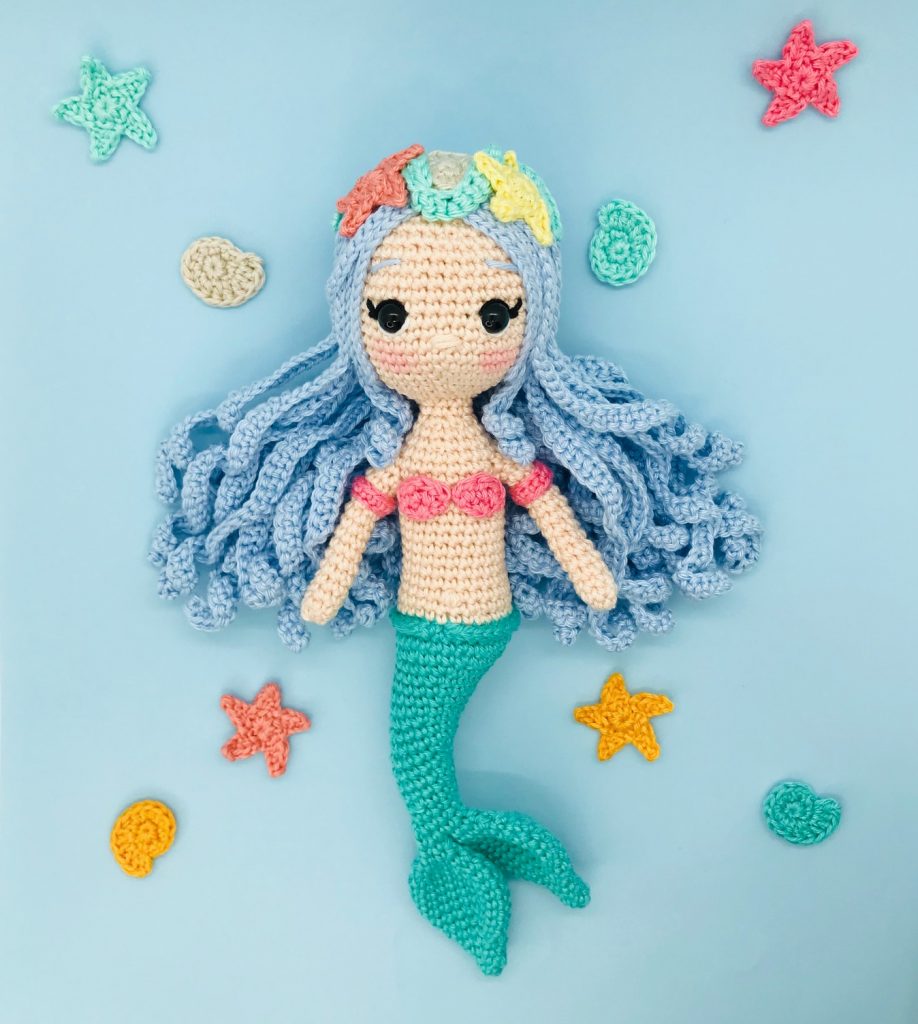
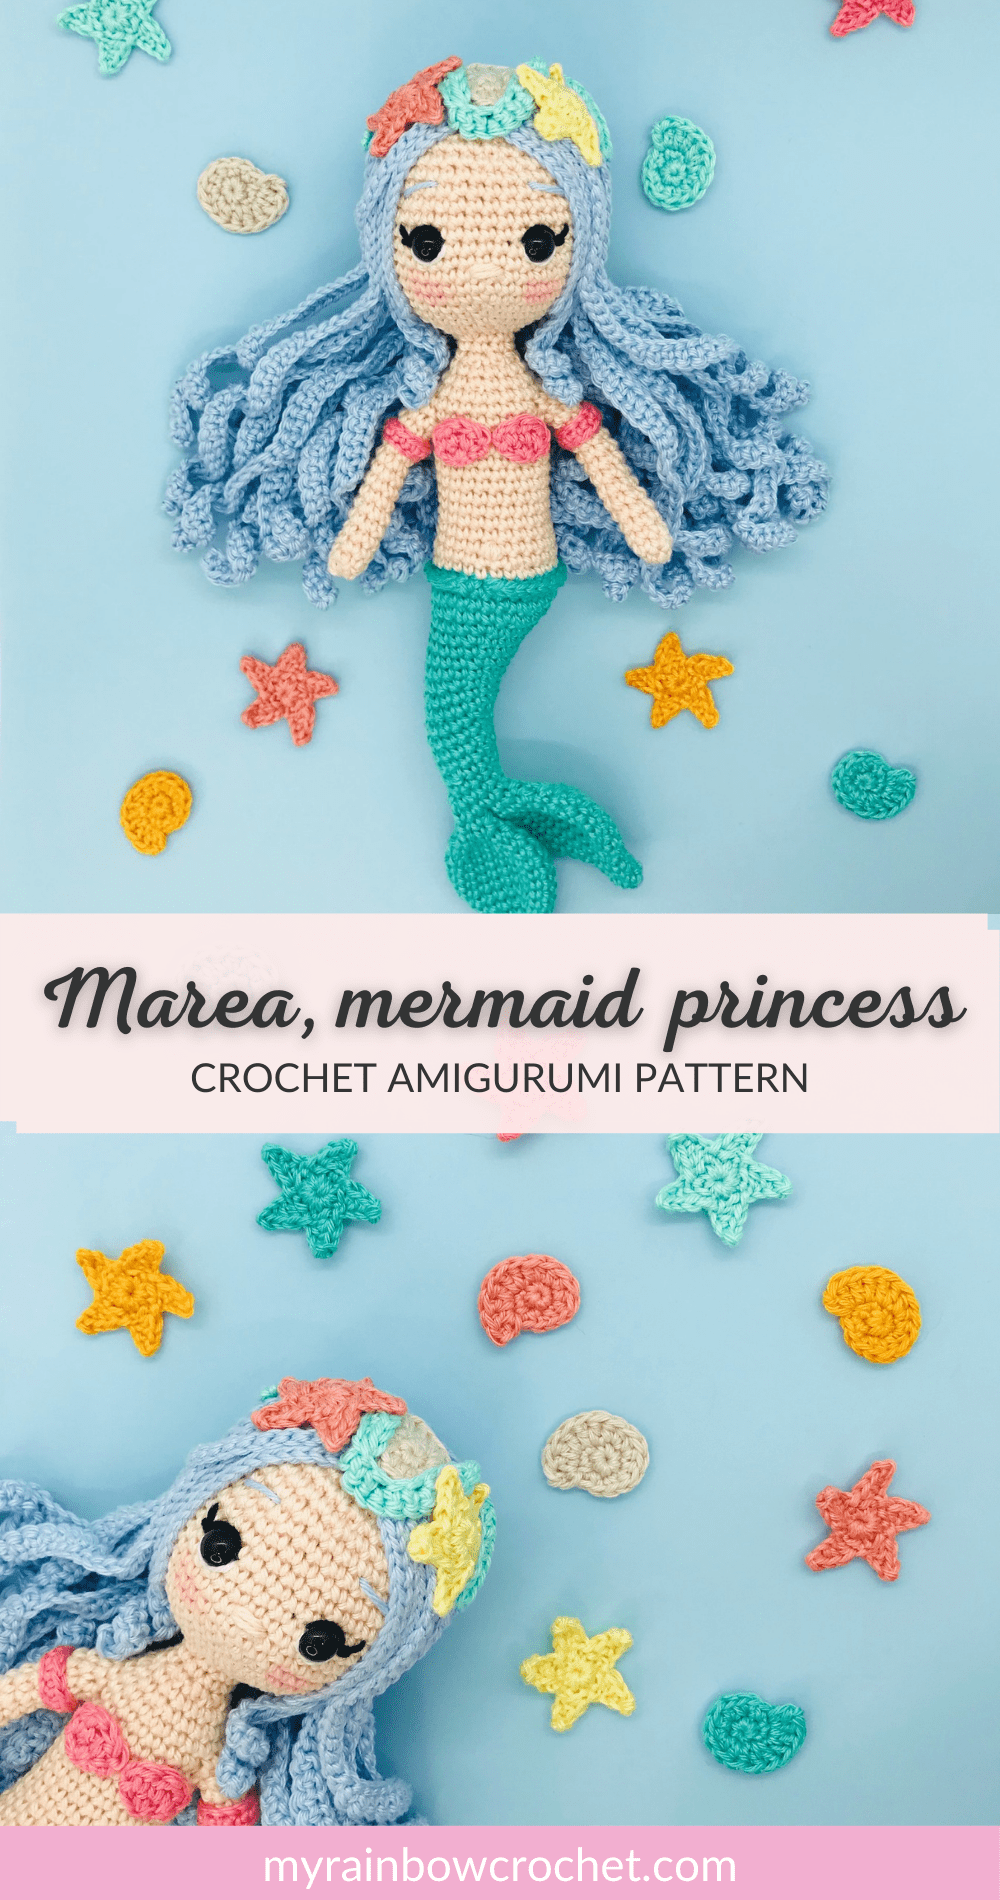
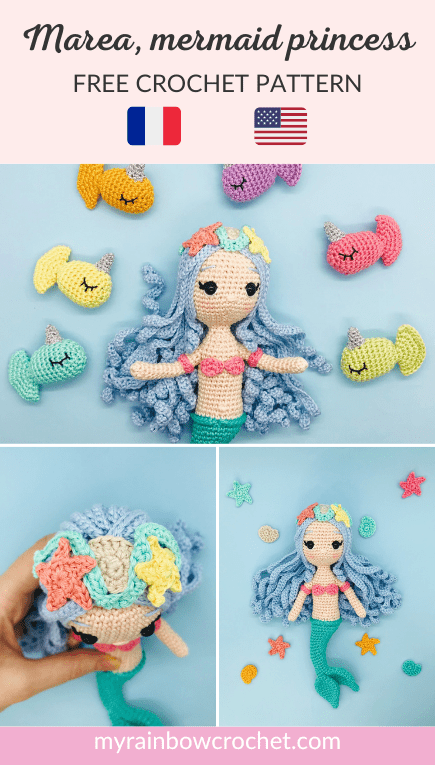
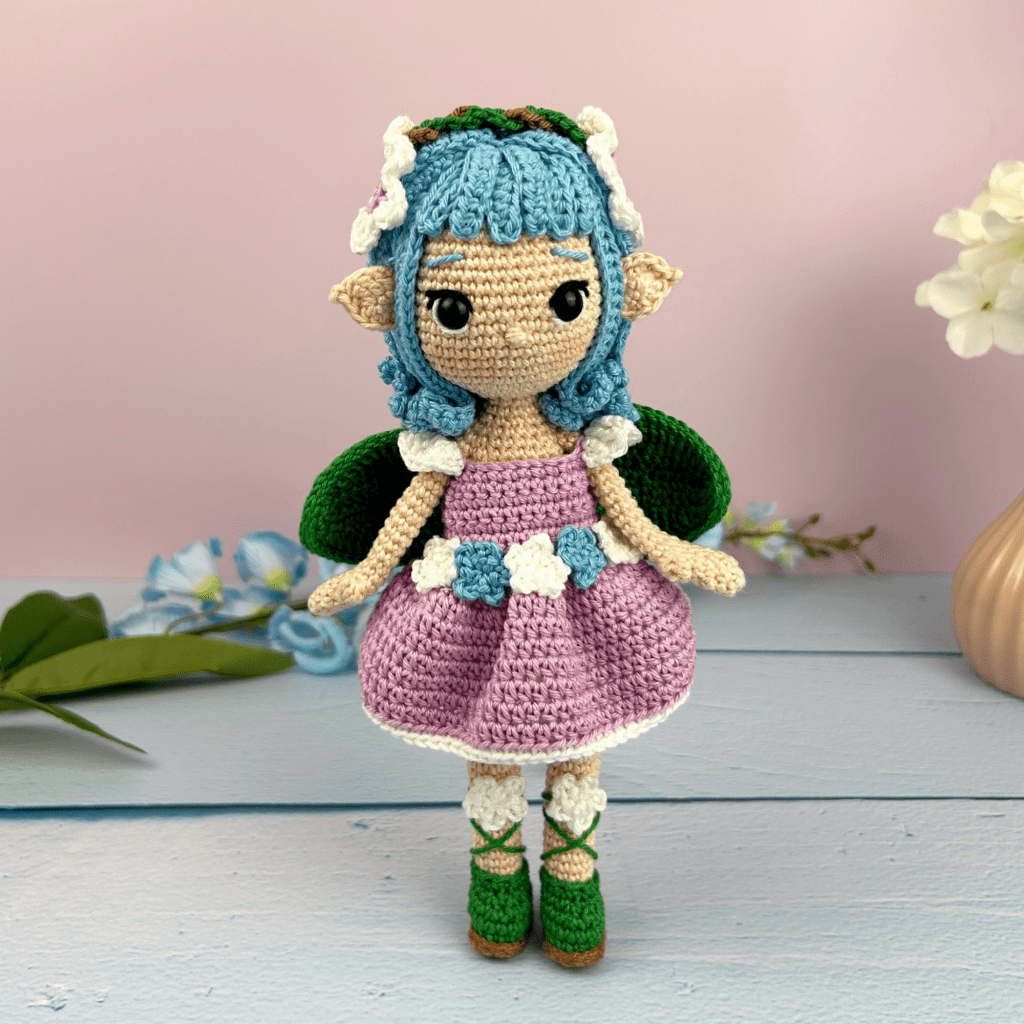
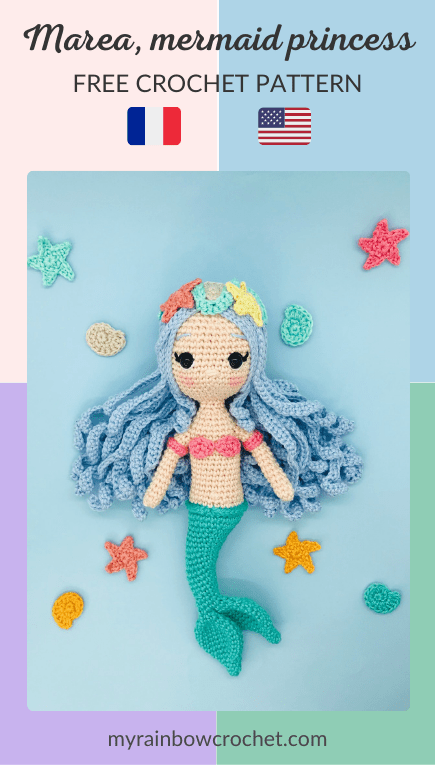
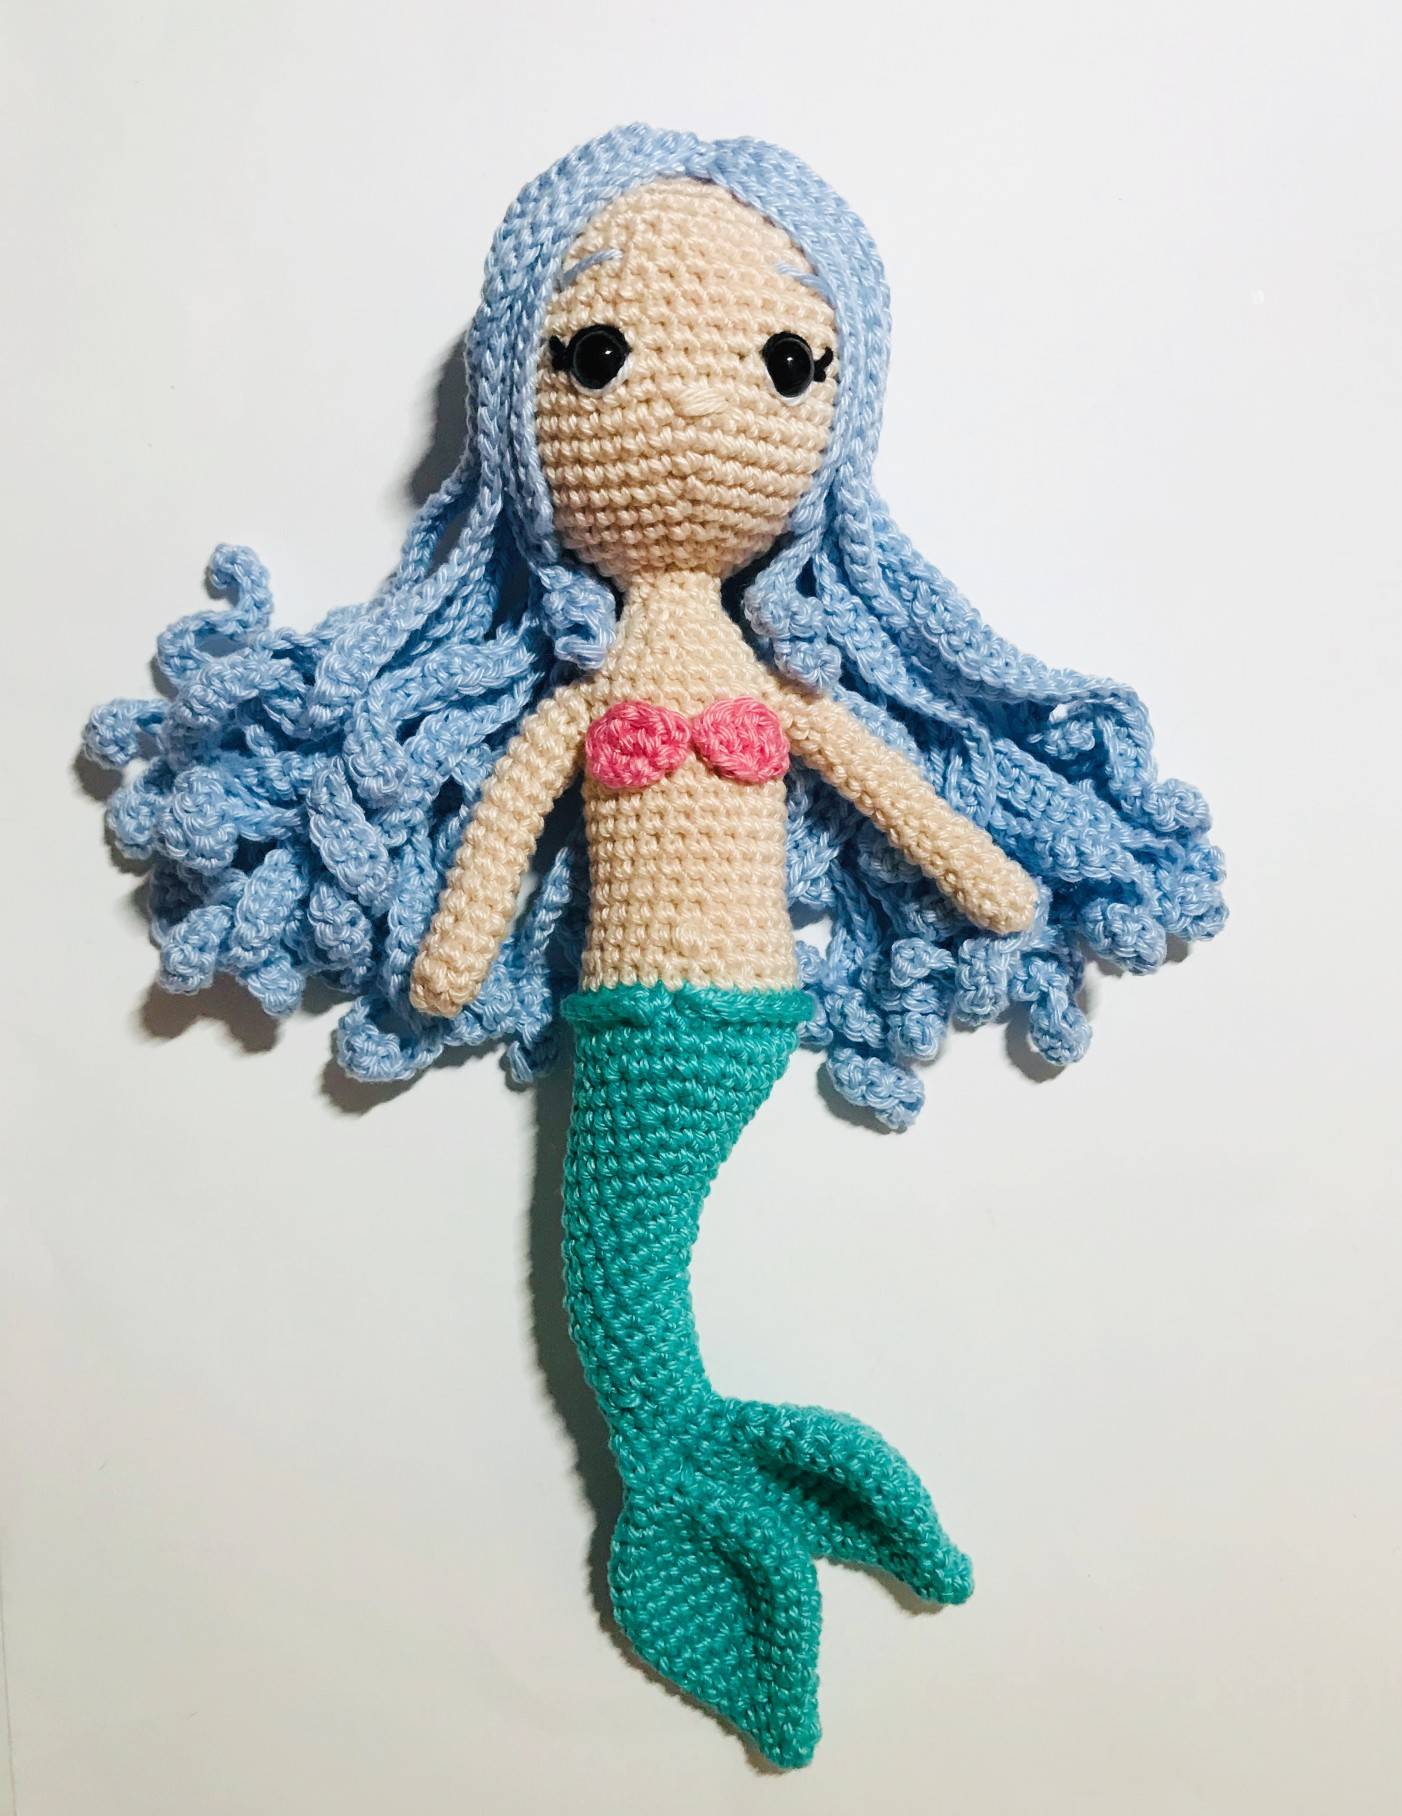
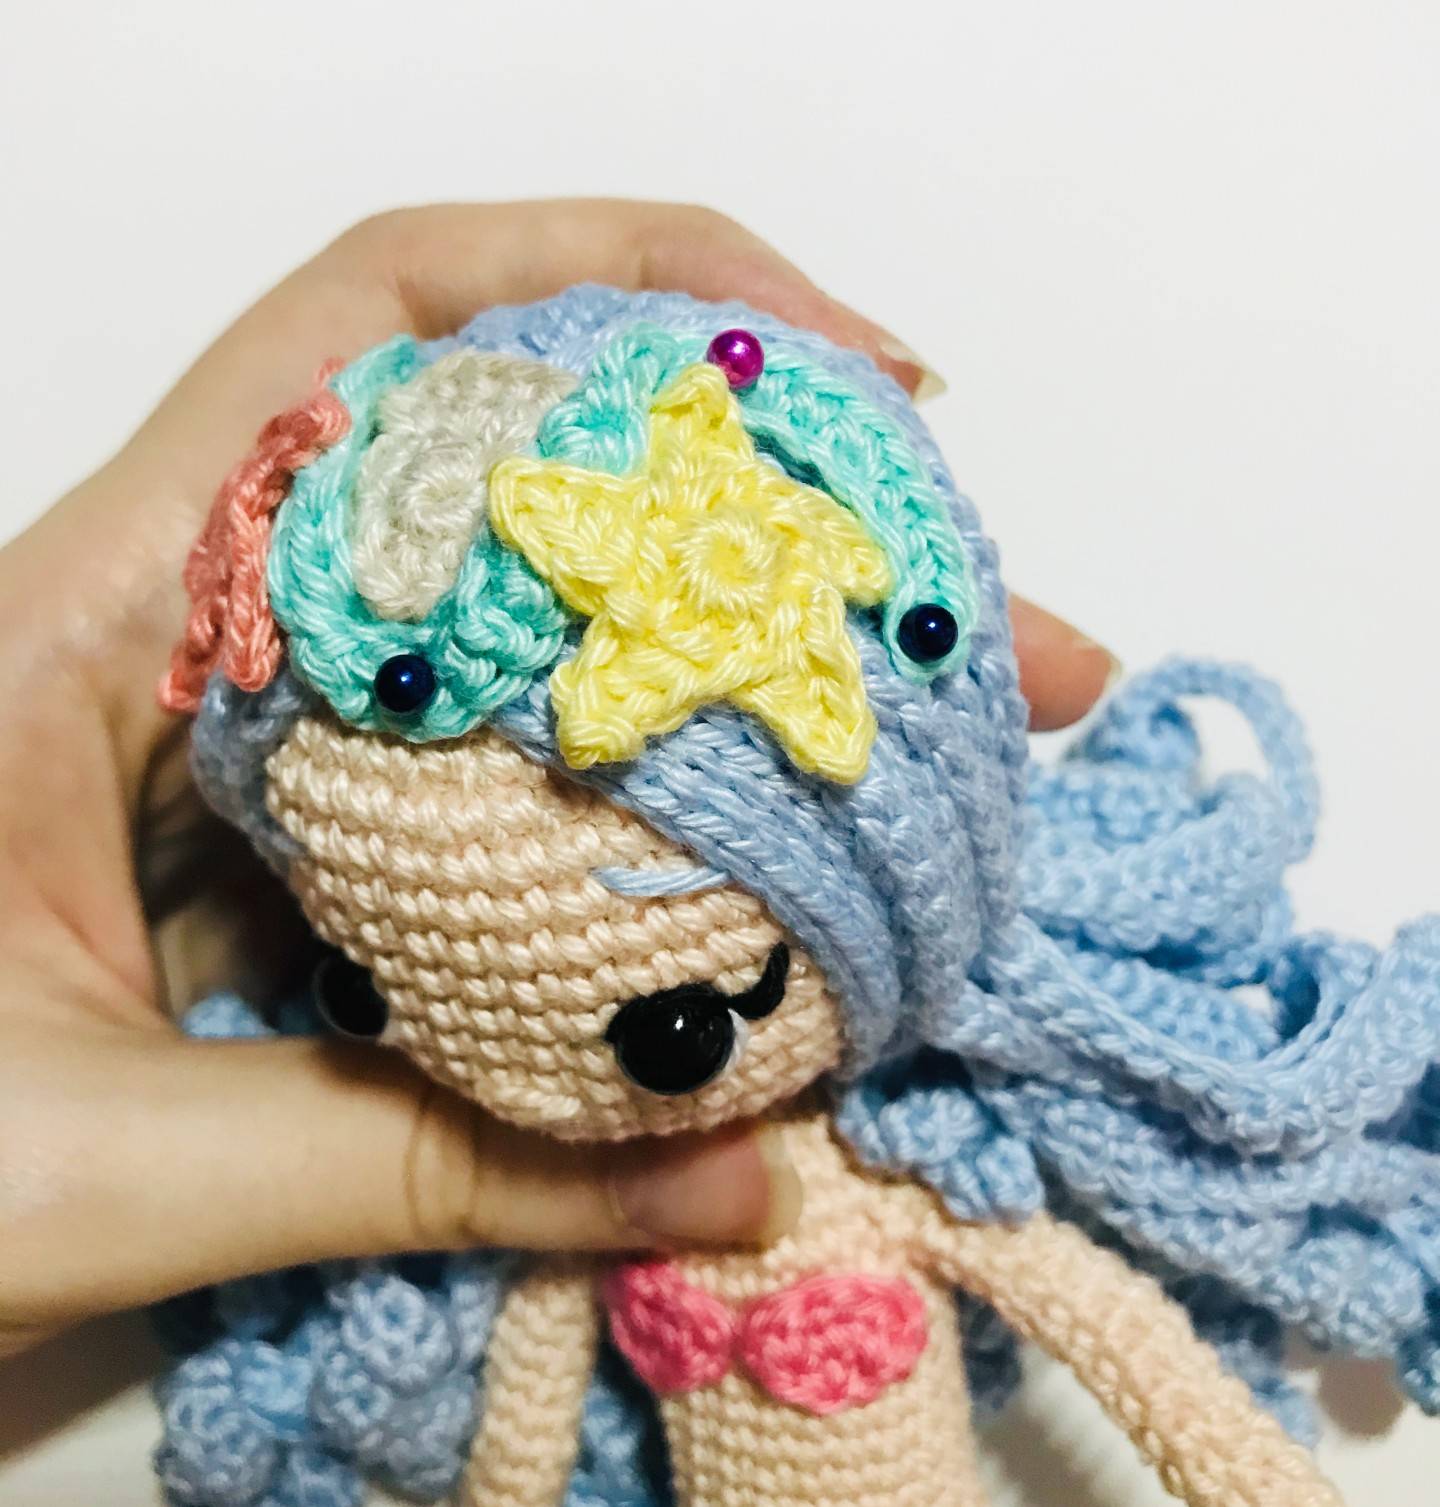
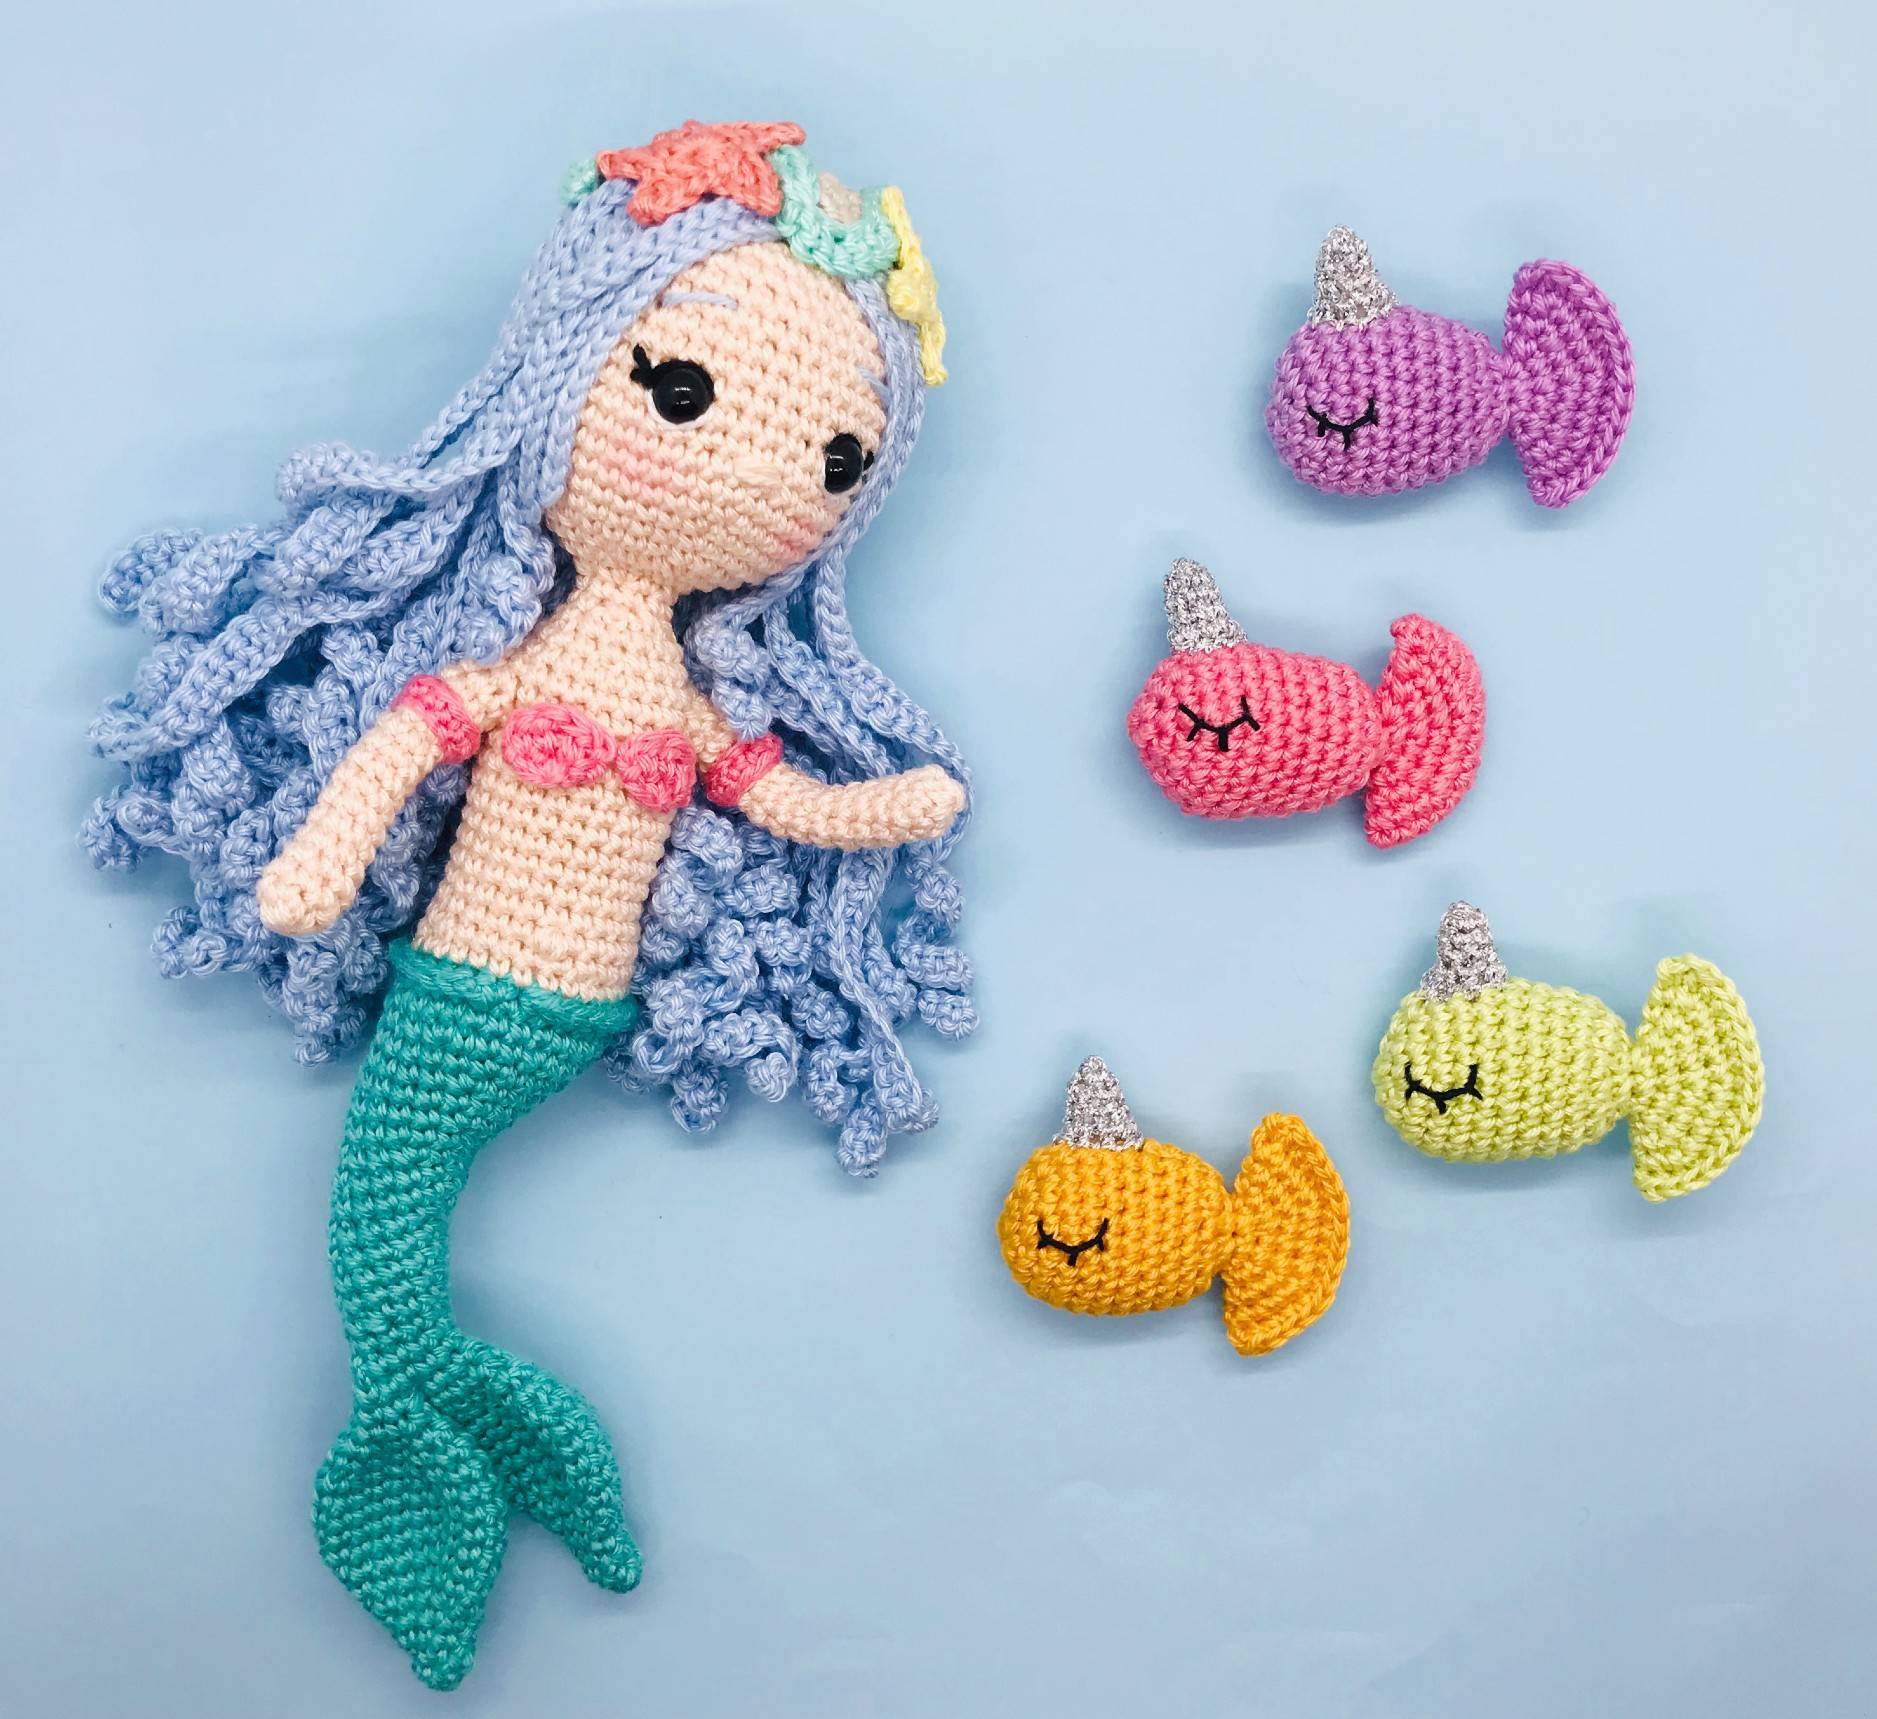
Today I present to you a pattern that smells of summer and the sea: Marea, the mermaid princess 🧜♀️. A mermaid with abundant hair that ripples in the water adorned with a sea crown composed of starfish, a shell and algae. With this new doll, I put the spotlight on the mermaids who are also part of the elementals such as fairies or unicorns.
The crochet pattern of Marea, the mermaid princess, is available for free below and in PDF format in my shop!


🧜♀️ Its little story 🧜♀️
“Marea is a mermaid princess from a kingdom in the Mediterranean Sea. Far from the image of the tempting mermaid that attracts sailors, the mermaids of this kingdom live in peace, harmony and in the Love of the Whole.
Their role is to spread this Love in this sea but also to protect the marine species found there to safeguard this ecosystem from all harmful human intrusions. Marea and all her mermaid sisters invite you to connect with them in an exchange of Love at any time and even more if you pass on a beach or at sea.
Maybe you will see one😉“
To see her in more detail, I made a little video for you 😊
Its pattern is suitable for people with an intermediate level in crochet.
🧜♀️ Some technical details about Marea 🧜♀️

🐚 Finished size 🐚
Height: 25 cm (9.84 inches)
Width: 4 cm at the hips (1.57 inches) and 8 cm with open arms (3.14 inches)

⭐ Material you need ⭐
If you want to use the same material as mine, I am attaching few links below.
These are affiliate links on Amazon. As an Amazon Associate I earn from qualifying purchases.
- Crochet/hook size 2.5 mm et Crochet/Hook 2 mm
- Cotton threads (fingering) : Withe, Black, Beige, Dark blue green, Light blue green, Pink, Yellow, Coral, Light blue, Light grey
- Yarn needle
- Stitch markers
- Stuffing
- Glue or textile adhesive
- A pair of 0.8 cm safety eyes
- Pink blush
- Pipe cleaner or wire
🧜♀️ Abbreviations used 🧜♀️
R : Row
sc : Single crochet
Inc : Increase
Dec : Decrease
SlSt : Slip stitch
CH : Chain
Hdc : Half double crochet
dc : Double crochet
*…* : Repeat around the row
[..] : Work in the same stitch
She was the pattern for the months of August / September 2021.
🐚 The pattern in PDF format 🐚
🔽 The PDF file of the pattern is available by clicking on the image below 🔽
🐚 Written explanations 🐚
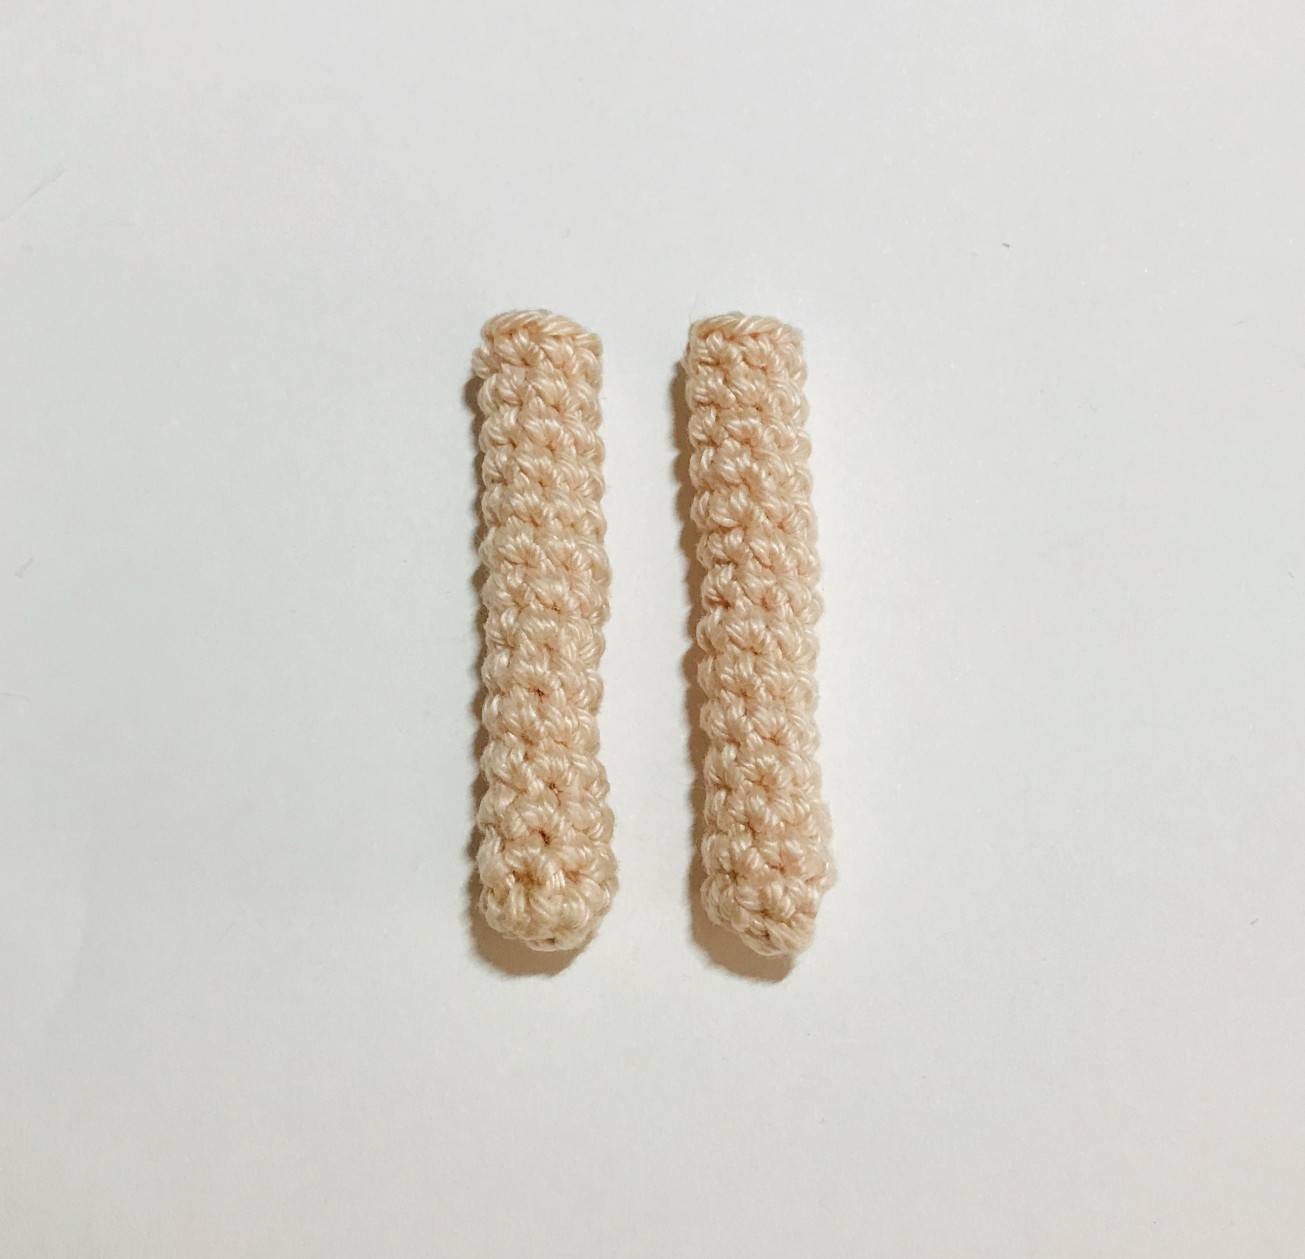
⭐ Arms
(to be done with beige cotton yarn and crochet hook 2.5 mm)
R1: magic ring with 7 sc
R2 to R15: sc in each sc (7)
🐚 Mermaid tail
(to be done with dark blue green cotton yarn and crochet hook 2.5 mm)
The fins x2:
R1: magic ring with 6sc
R2: sc in each sc (6)
R3: *1 sc, 1 Inc* x3 (9)
R4: sc in each sc (9)
R5: *2 sc, 1 Inc* x3 (12)
R6: 2 sc, 1 Inc, *3 sc, 1 Inc* x2, 1 sc (15)
R7: *4 sc, 1 Inc* x3 (18)
R8: 4 sc, 1 Inc, *5 sc, 1 Inc* x2, 1 sc (21)
R9 to R11: sc in each sc (21)
R12: *5 sc, 1 dec* x3 (18)
R13: 3 sc, 1 dec, *4 sc, 1 dec* x2, 1 sc (15)
R14: *3 sc, 1 dec* x3 (12)
R15: *2 sc, 1 dec* x3 (9)
R16: *1 sc, 1 dec* x3 (6)
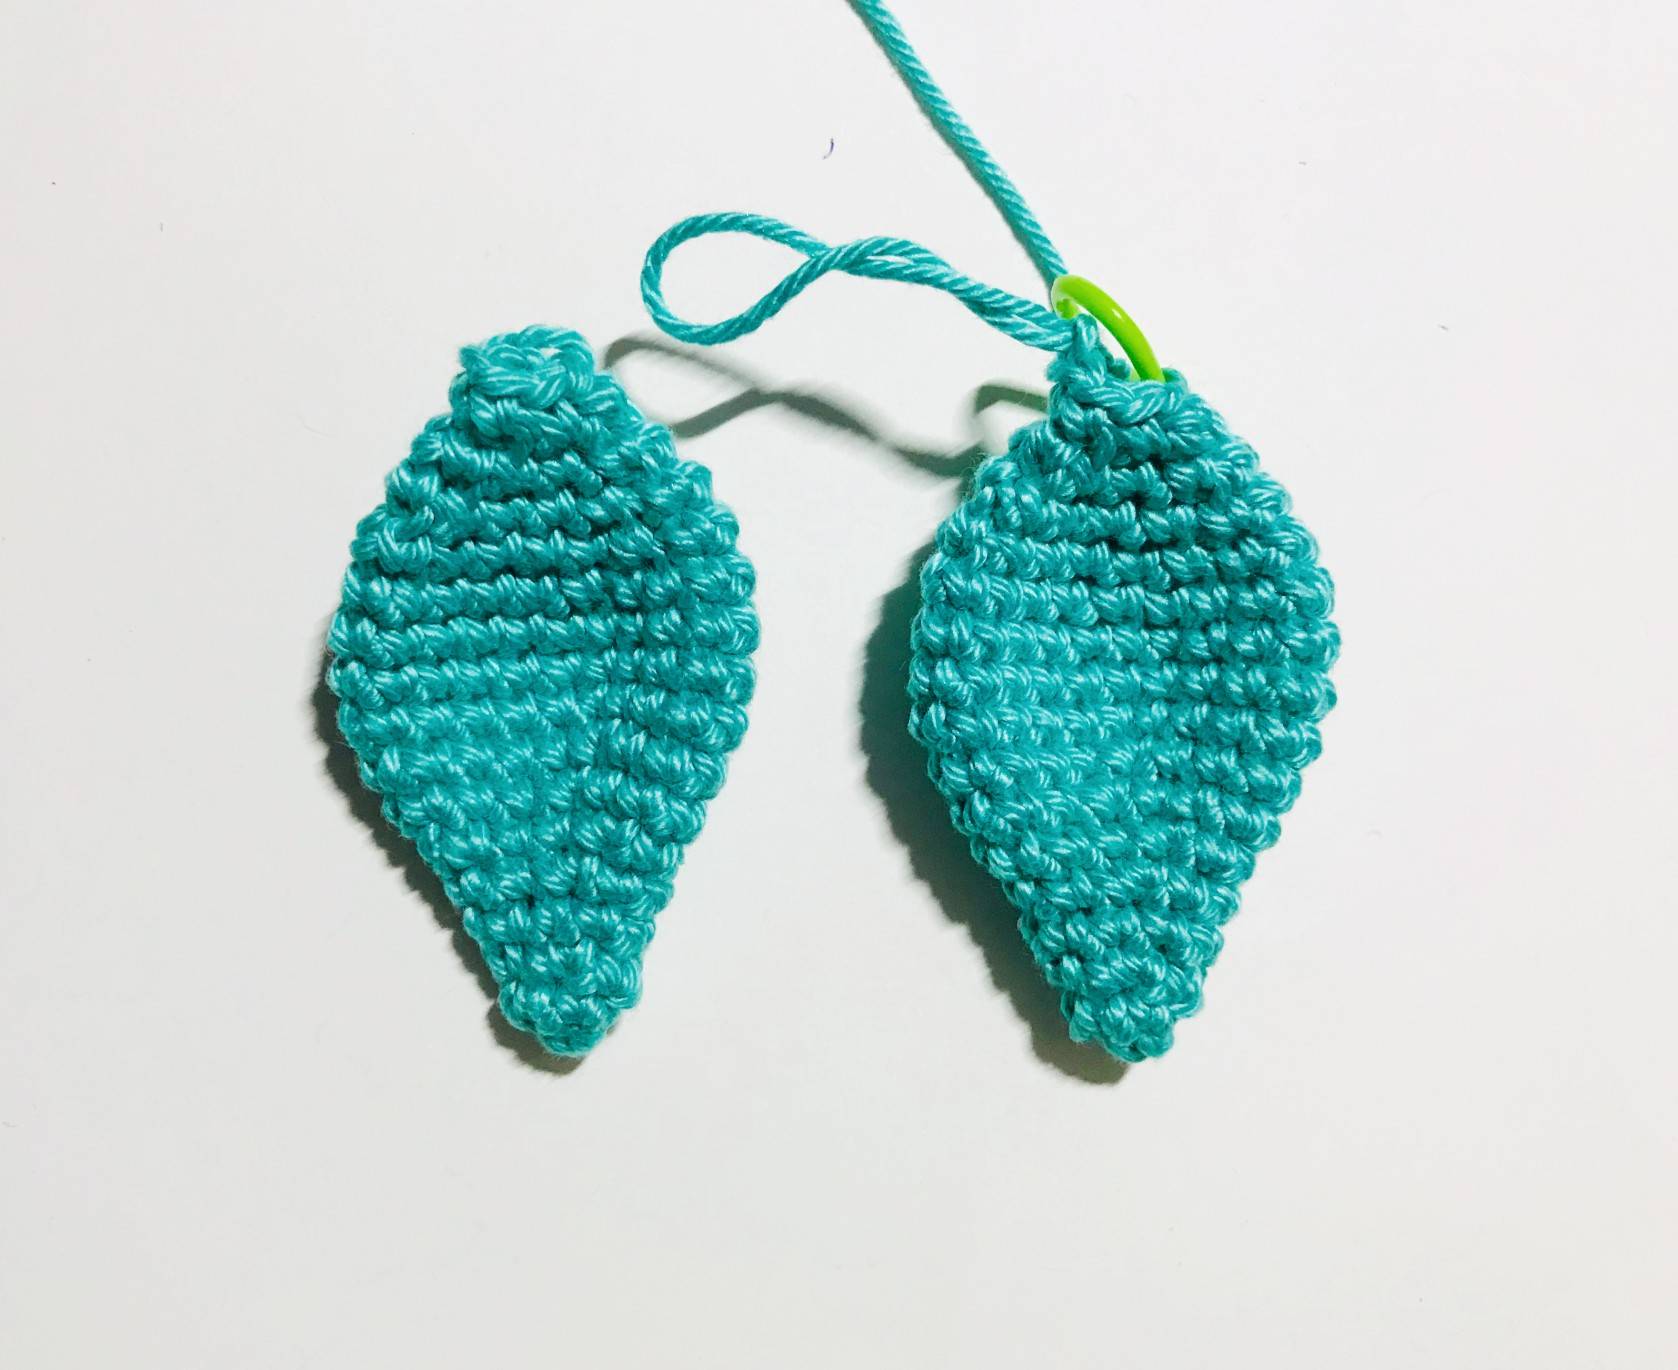
-> Don’t stuff.
-> Fasten off and weave in ends for one of the fins. Keep the yarn with the second and continue with the next step.
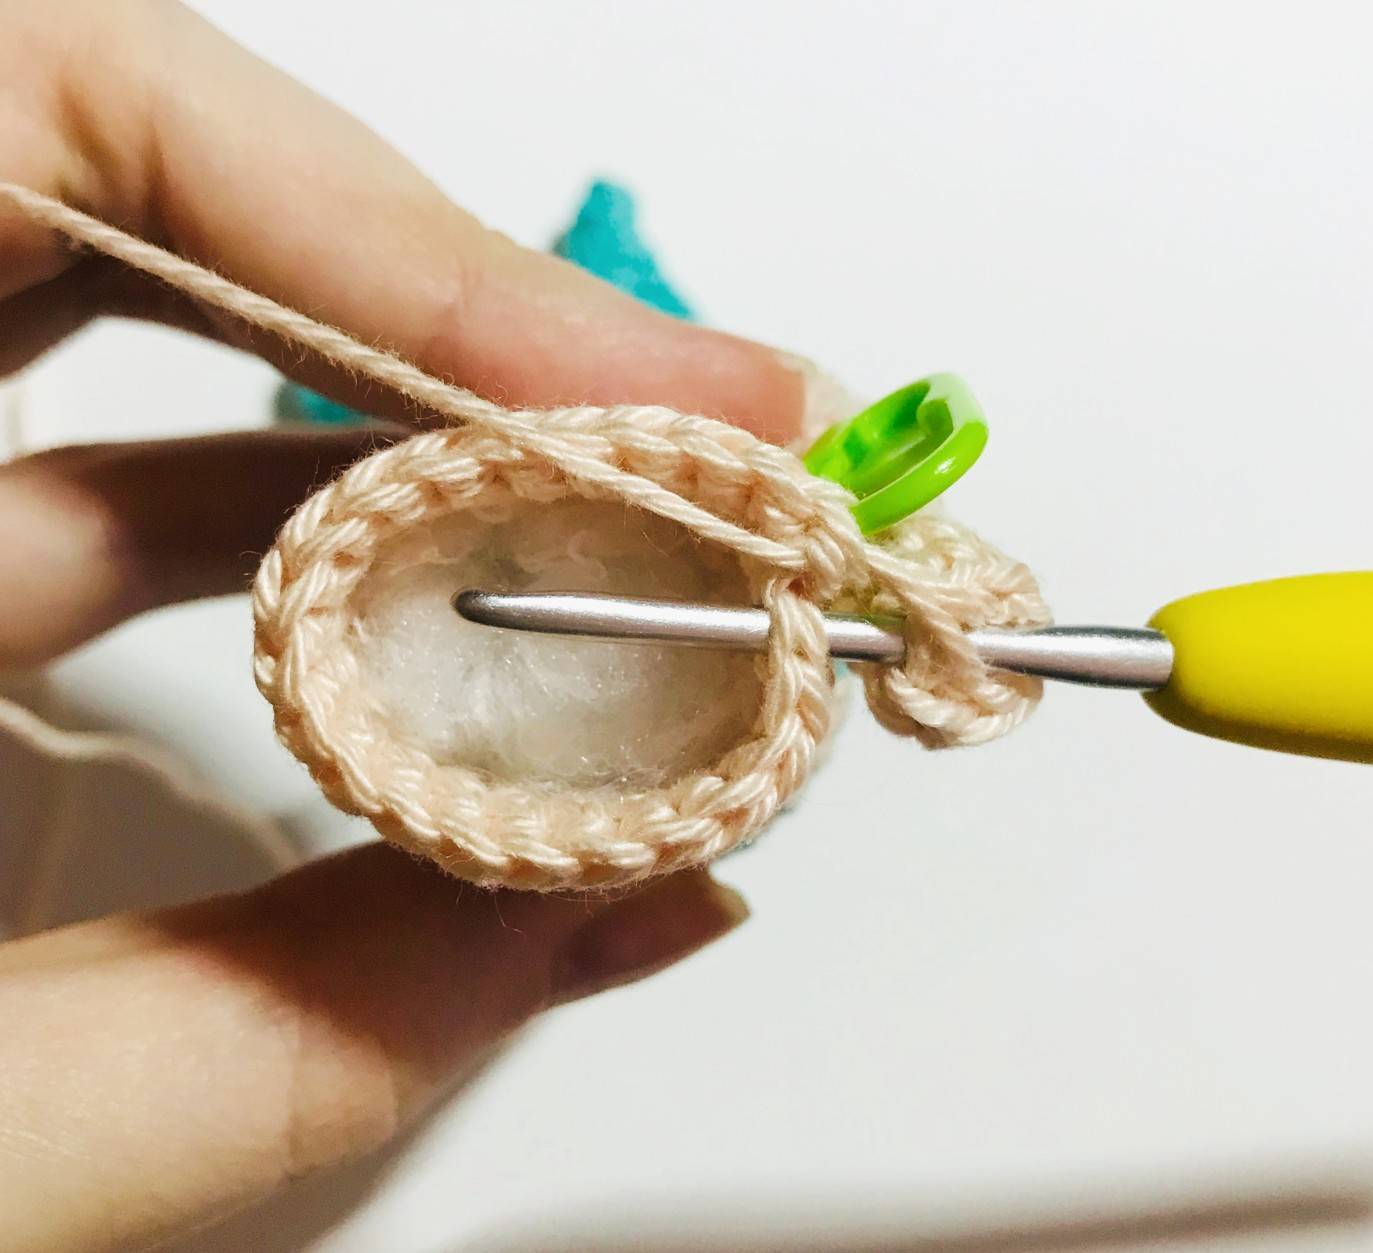
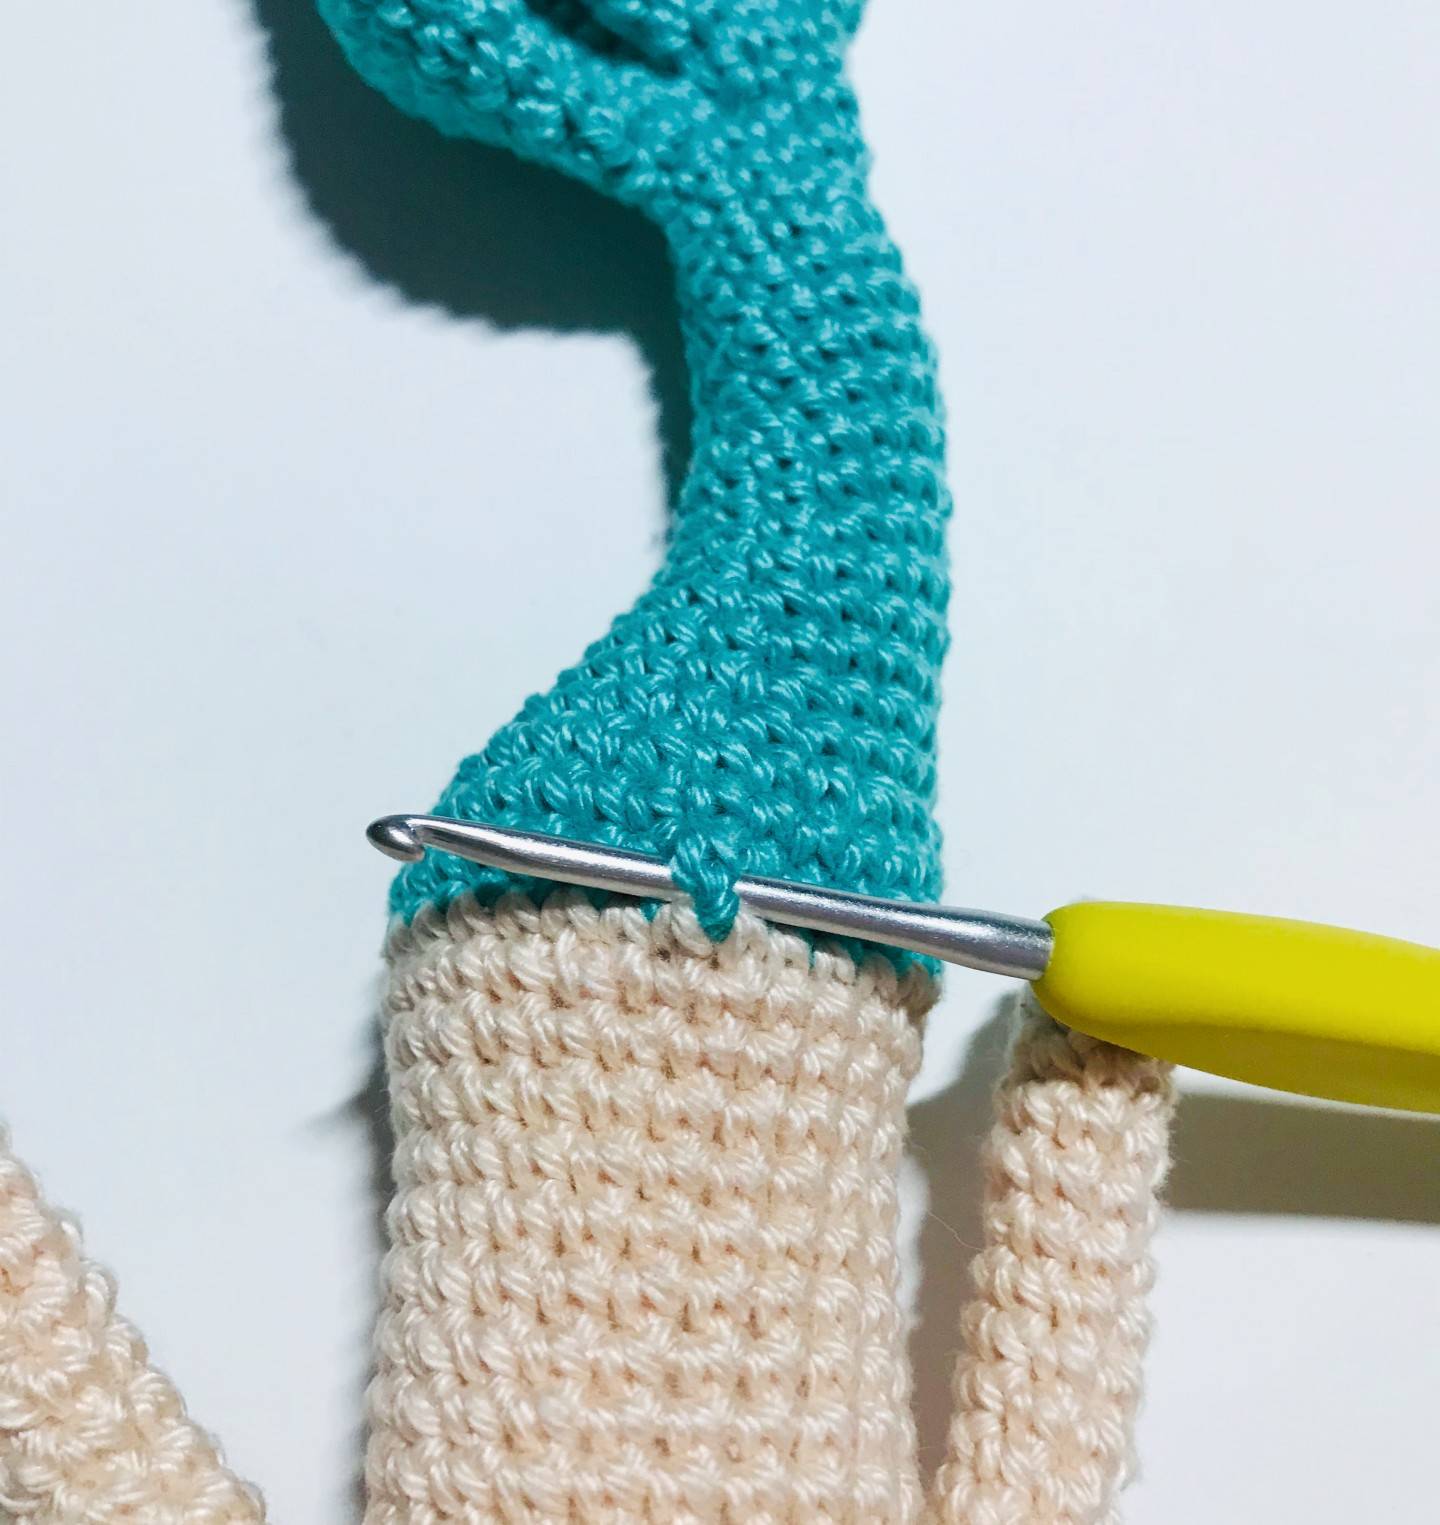
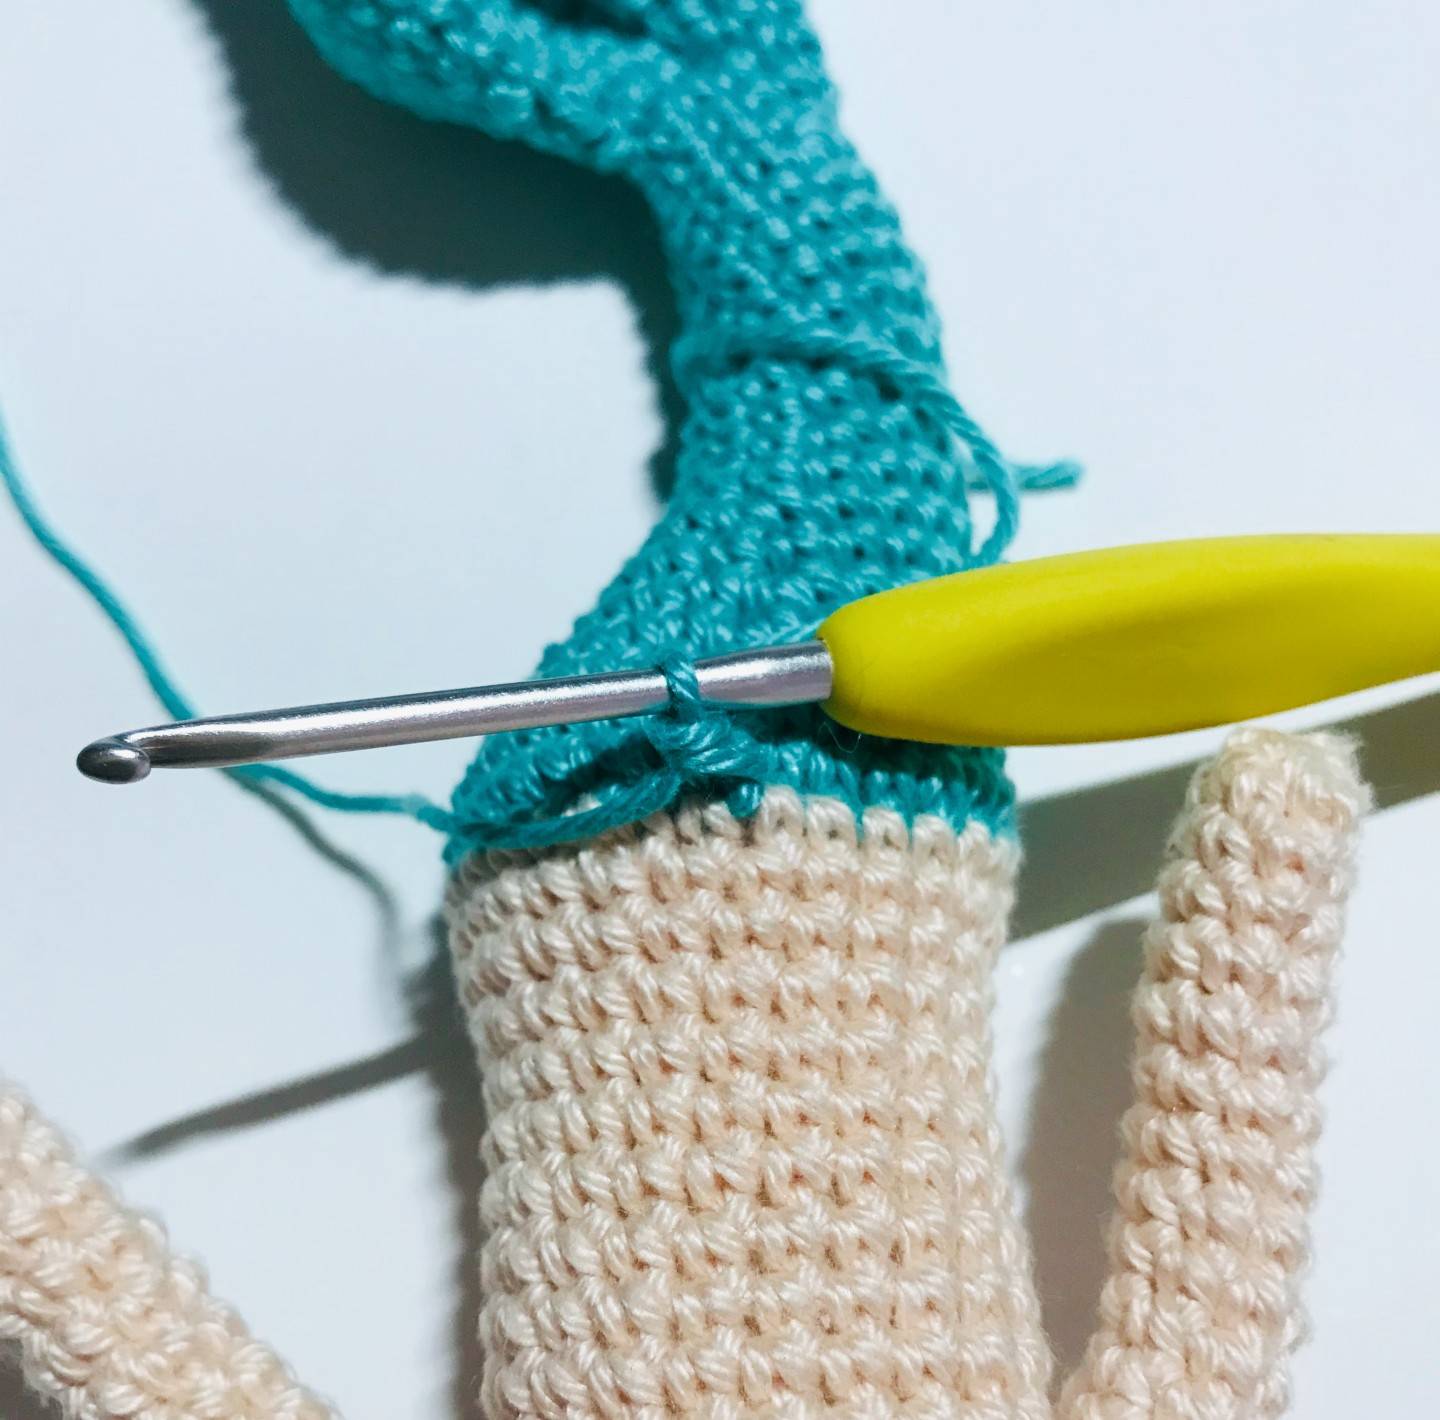
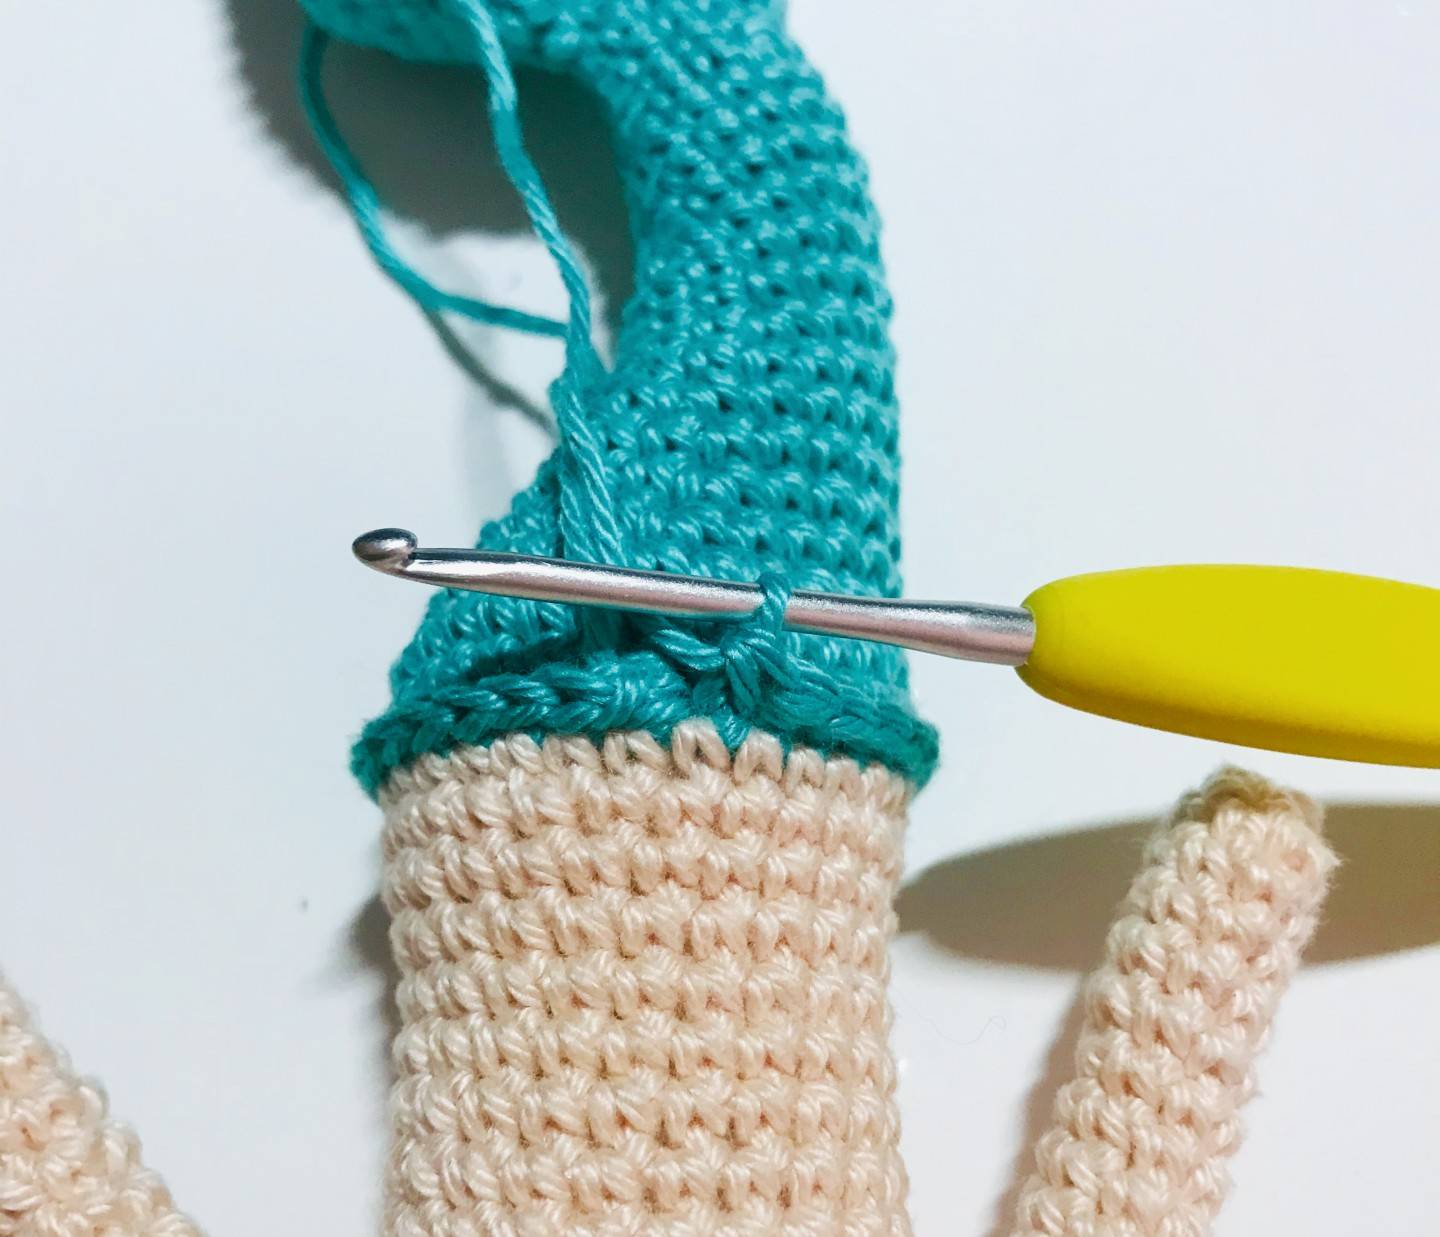
The top of the tail:
R17: join the 2 fins together by inserting your hook into the fin where you inserted the thread then enter the one where you kept the thread and do 1 sc (mark the 1st sc on the row). Then, make 11 sc going around the 2 fins (12)
R18: 3 sc, 1 dec, 4 sc, 1 Inc, 2 sc (12)
R19: 2 sc, 1 dec, 5 sc, 1 Inc, 2 sc (12)
R20: 2 sc, 1 dec, 5 sc, 1 Inc, 3 sc (12)
R21: 1 Inc, 1 sc, 1 dec, 4 sc, 2 Inc, 2 sc (14)
R22: 2 sc, 1 dec, 6 sc, 1 Inc, 3 sc (14)
R23: 2 sc, 1 dec, 6 sc, 1 Inc, 3 sc, 2 Inc, 3 sc (16)
R24: 1 sc, 1 dec, 2 sc, 1 Inc, 3 sc, 2 Inc, 3 sc (16)
R25: 1 sc, 1 dec, 7 sc, 1 Inc, 5 sc (16)
R26: 1 sc, 1 dec, 7 sc, 1 Inc, 5 sc (16)
R27: 1 dec, *3 sc, 1 Inc* x3, 2 sc (18)
R28: 1 dec, 8 sc, 1 Inc, 7 sc (18)
R29: 1 dec, 4 sc, 1 Inc, 2 sc, 1 Inc, 3 sc, 1 Inc, 4 sc (20)
R30: 1 dec, 8 sc, 1 Inc, 9 sc (20)
R31: 1 dec, 3 sc, *1 Inc, 4 sc* x3 (22)
R32: 1 dec, *4 sc, 1 Inc* x3, 5 sc (24)
R33: 4 sc, 1 Inc, 5 sc, 1 inc, 1 sc, *3 sc, 1 Inc* x2, 1 Inc, 1 sc, 1 dec (28)
R34 and R35: sc in each sc (28)

-> Stuff the tail without stuff the fins.
All rights reserved. You can not resell, share, modify or publish this pattern.
This pattern is for PERSONAL use only. The pattern may not be, in whole or in part, reproduced, published (online or printed), modified or resold according to article L.122-4 of the french intellectual property code.
You can sell the finished products, if they are made by you, in limited quantities and by providing the name of the designer. Please add the following information to the description of the amigurumi sold:
“This plushie was handmade by … (your name) from a pattern created by My Rainbow Crochet”
Copyright 2021 MyRainbowCrochet
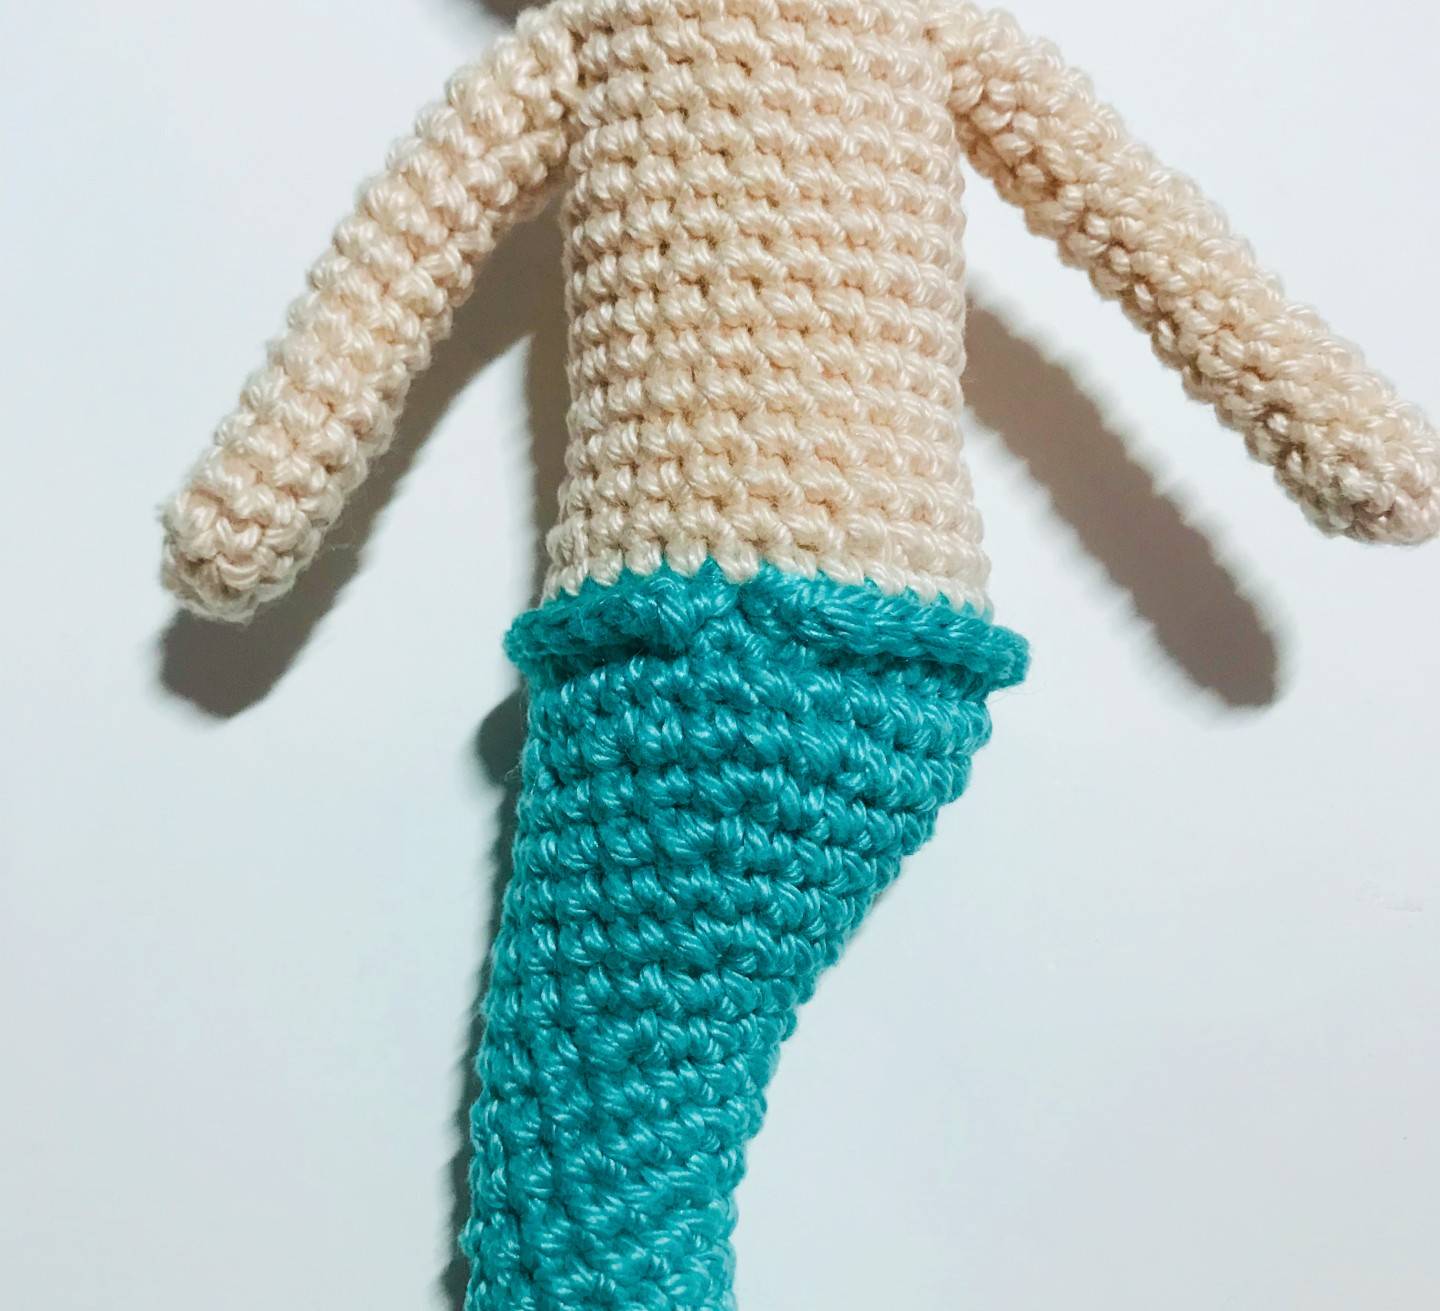
⭐The top of the body
(to be done with beige cotton yarn and crochet hook 2.5 mm)
-> In row 48, we will join the two arms to the body.
-> If the indications do not correspond completely to the result you have, follow the explanations added in italics to give you the marks for each row of decreases.
R36: sc in each sc (28)
R37: *5 sc, 1 dec* x4 (23)
R38: sc in each sc (23)
R39: *1 dec, 10 sc* x2 (21)
Gradually stuff.
R40 to R47: sc in each sc (21)
R48: we join the 2 arms to this row.
1 sc, 3 sc by joining the 1st arm, 8 sc, 3 sc by joining the 2nd arm, 7 sc (schema: 8sc, 3 sc with arms x2)
R49: sc in each sc (by taking the circumference of the arms with their 4 sc each) (24)
R50: 2 sc, 1 dec, 10 sc, 1 dec, 8 sc (22) (schema: 1 dec on each arm)
Insert at this step your pipe cleaner or wire (details explanations below).
R51: 2 sc, 1 dec, 4 sc, 1 dec, 3 sc, 1 dec, 4 sc, 1 dec, 1 sc (18) (schema: 1 dec on each arm and 1 dec in front and back)
R52: sc in each sc (18)
R53: 9 decreases (9)
-> Keep the thread for the continuation with the head.
🧜♀️ Explanations for pipe cleaner
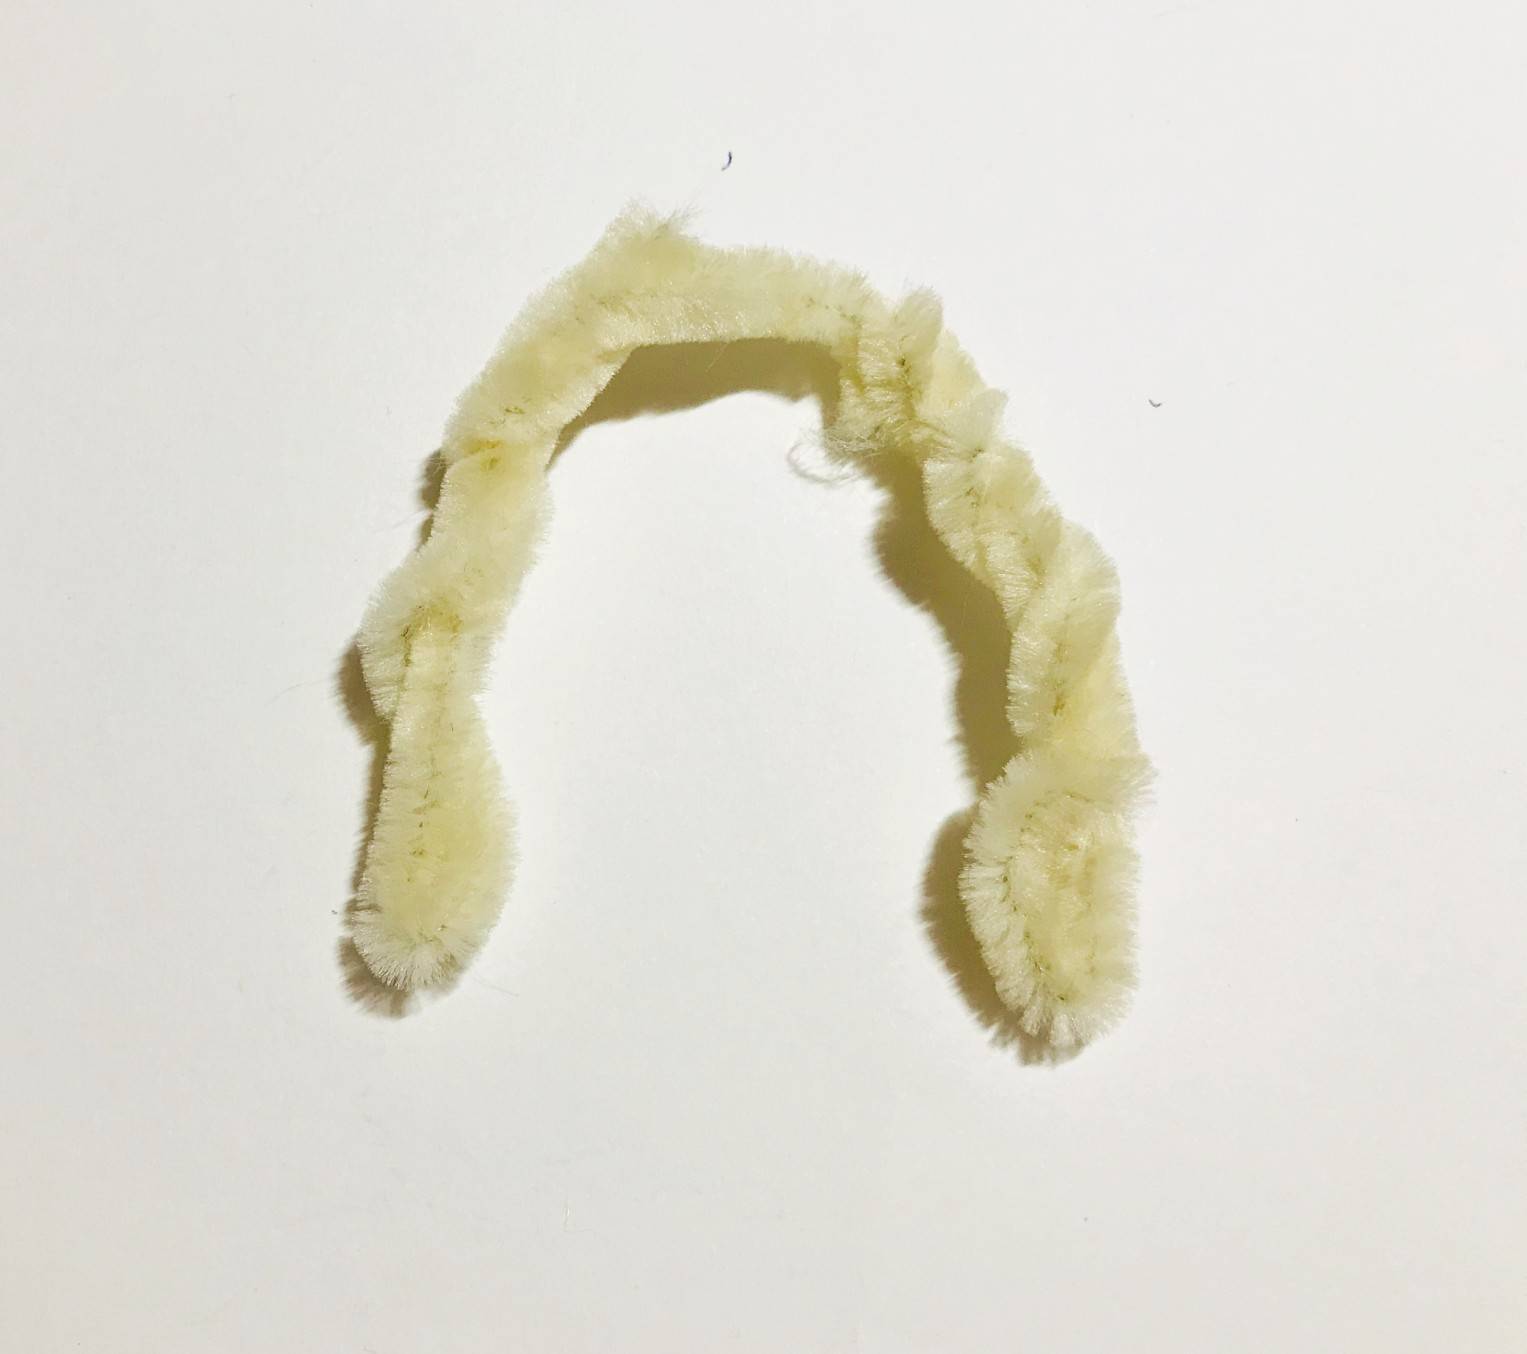
Take pipe or aluminum wire about 31 cm in length (12.20 inch) . Make a loop on each side for the hands and twist the rest of the thread along the length to make a double thickness.
Insert each side into the arms. Each loop should reach the bottom of the arms.
It must only exceed the middle of the thread which passes through the middle of the body.
🐚 The head
(to be done with beige cotton yarn and crochet hook 2.5 mm)
We continue with the head with the same thread as the body, without sew.
R54 and R55: sc in each sc (9)
R56: 9 increases (18)
R57: *2 sc, 1 Inc* x6 (24)
R58: 2 sc, 1 Inc, *3 sc, 1 Inc* x5, 1 sc (30)
R59: *4 sc, 1 Inc* x6 (36)
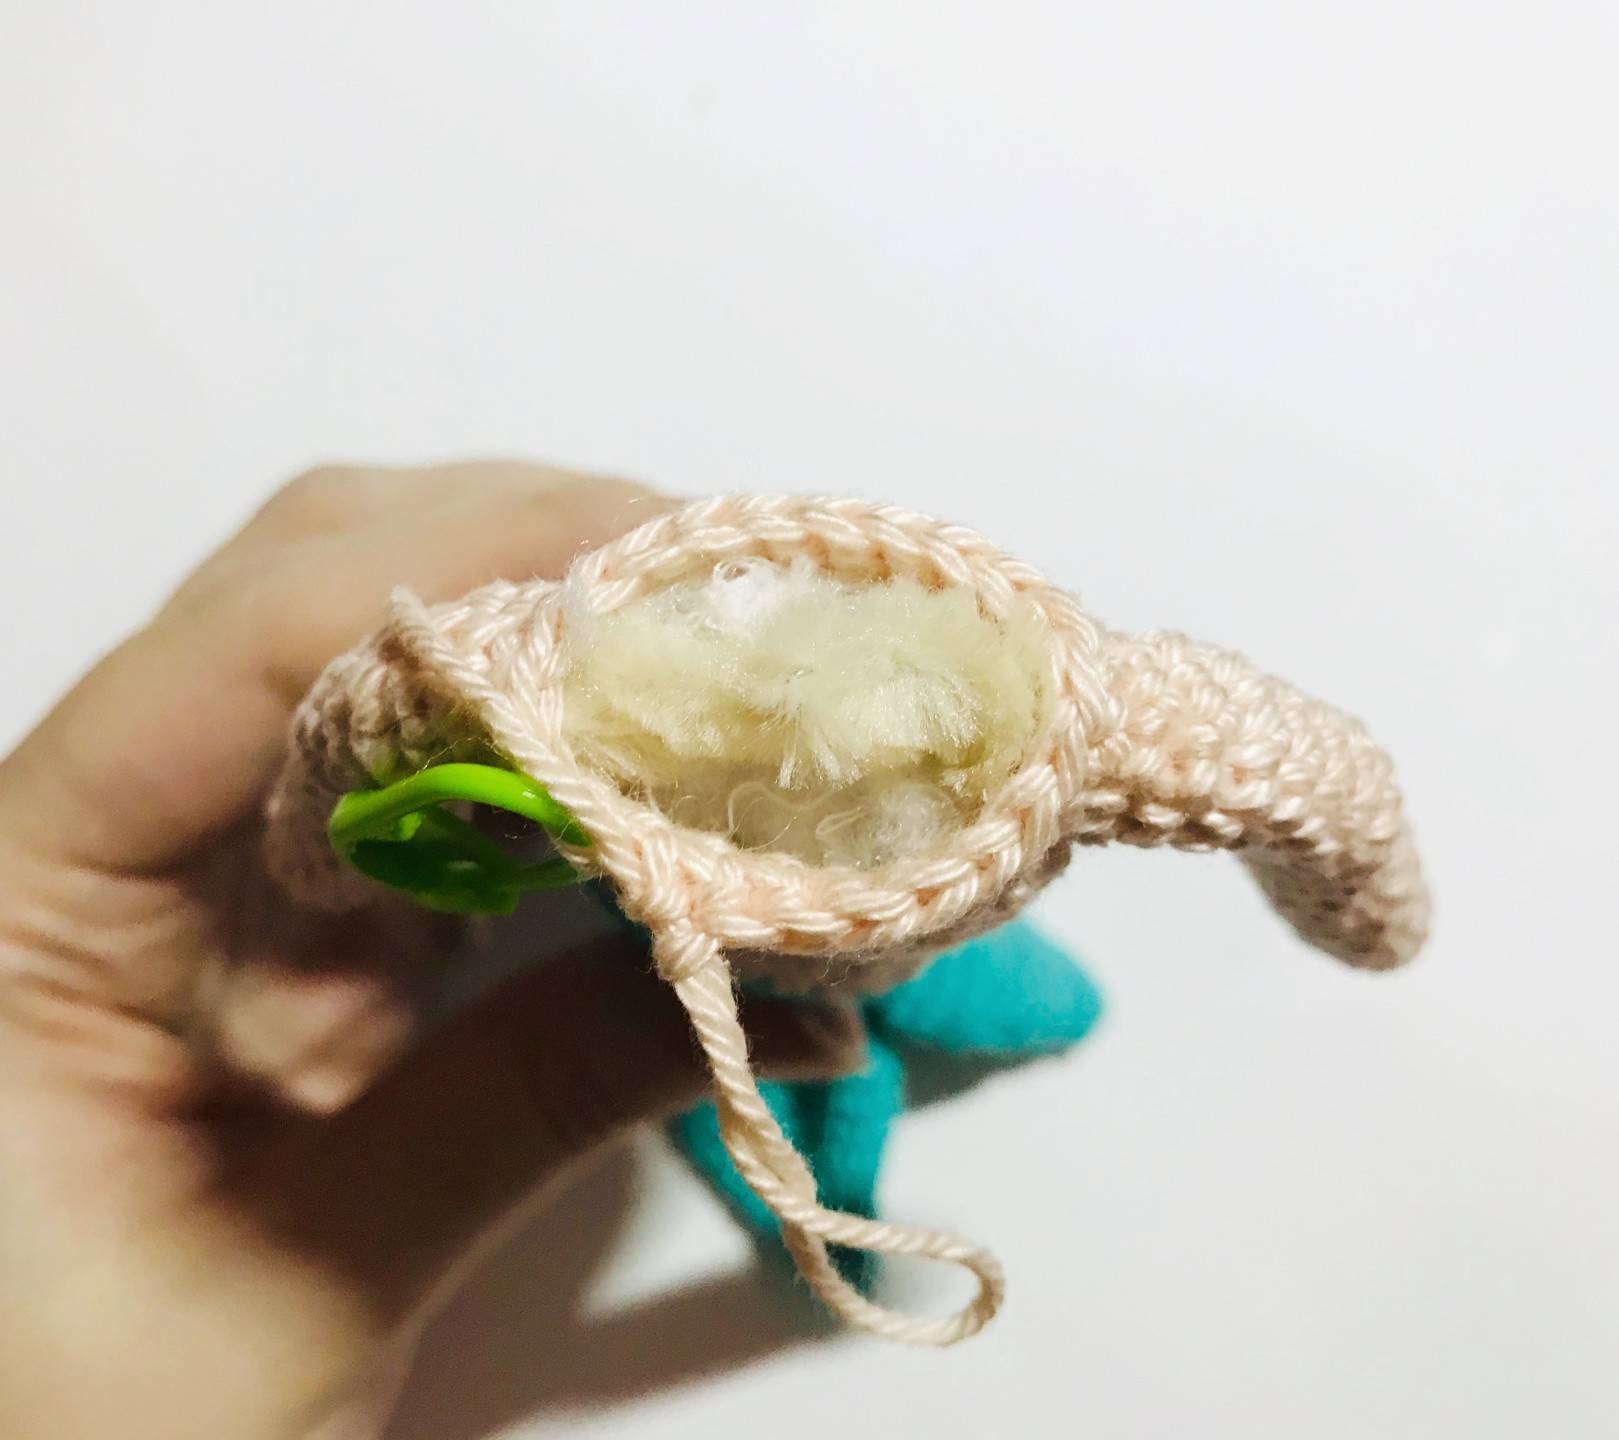
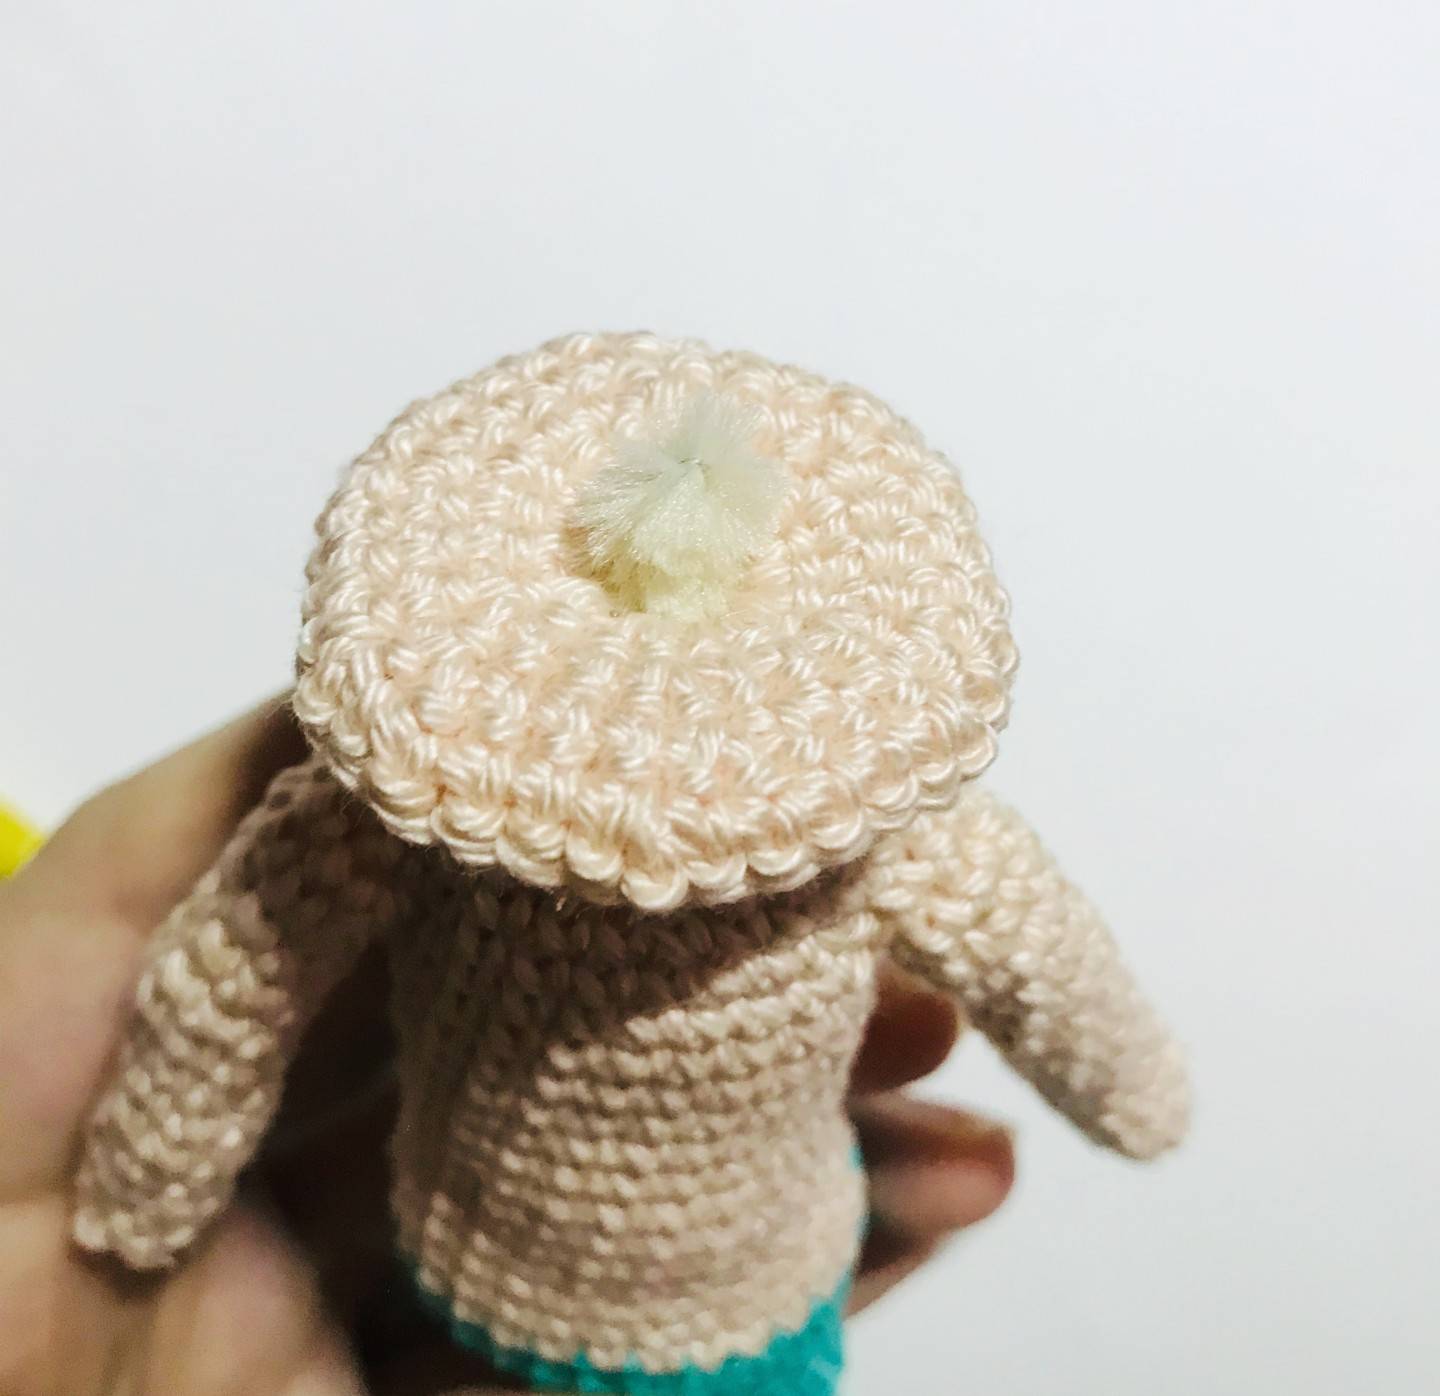
Insert a piece of pipe cleaner or iron wire about 7 cm into the neck, twisted on itself for the stability of the neck and stuff it firmly.
R60: *8 sc, 1 Inc* x4 (40)
R61: 8 sc, 1 Inc, *9 sc, 1 Inc* x3, 1 sc (44)
R62 to R71: sc in each sc (44)
R72: *9 sc, 1 dec* x4 (40)
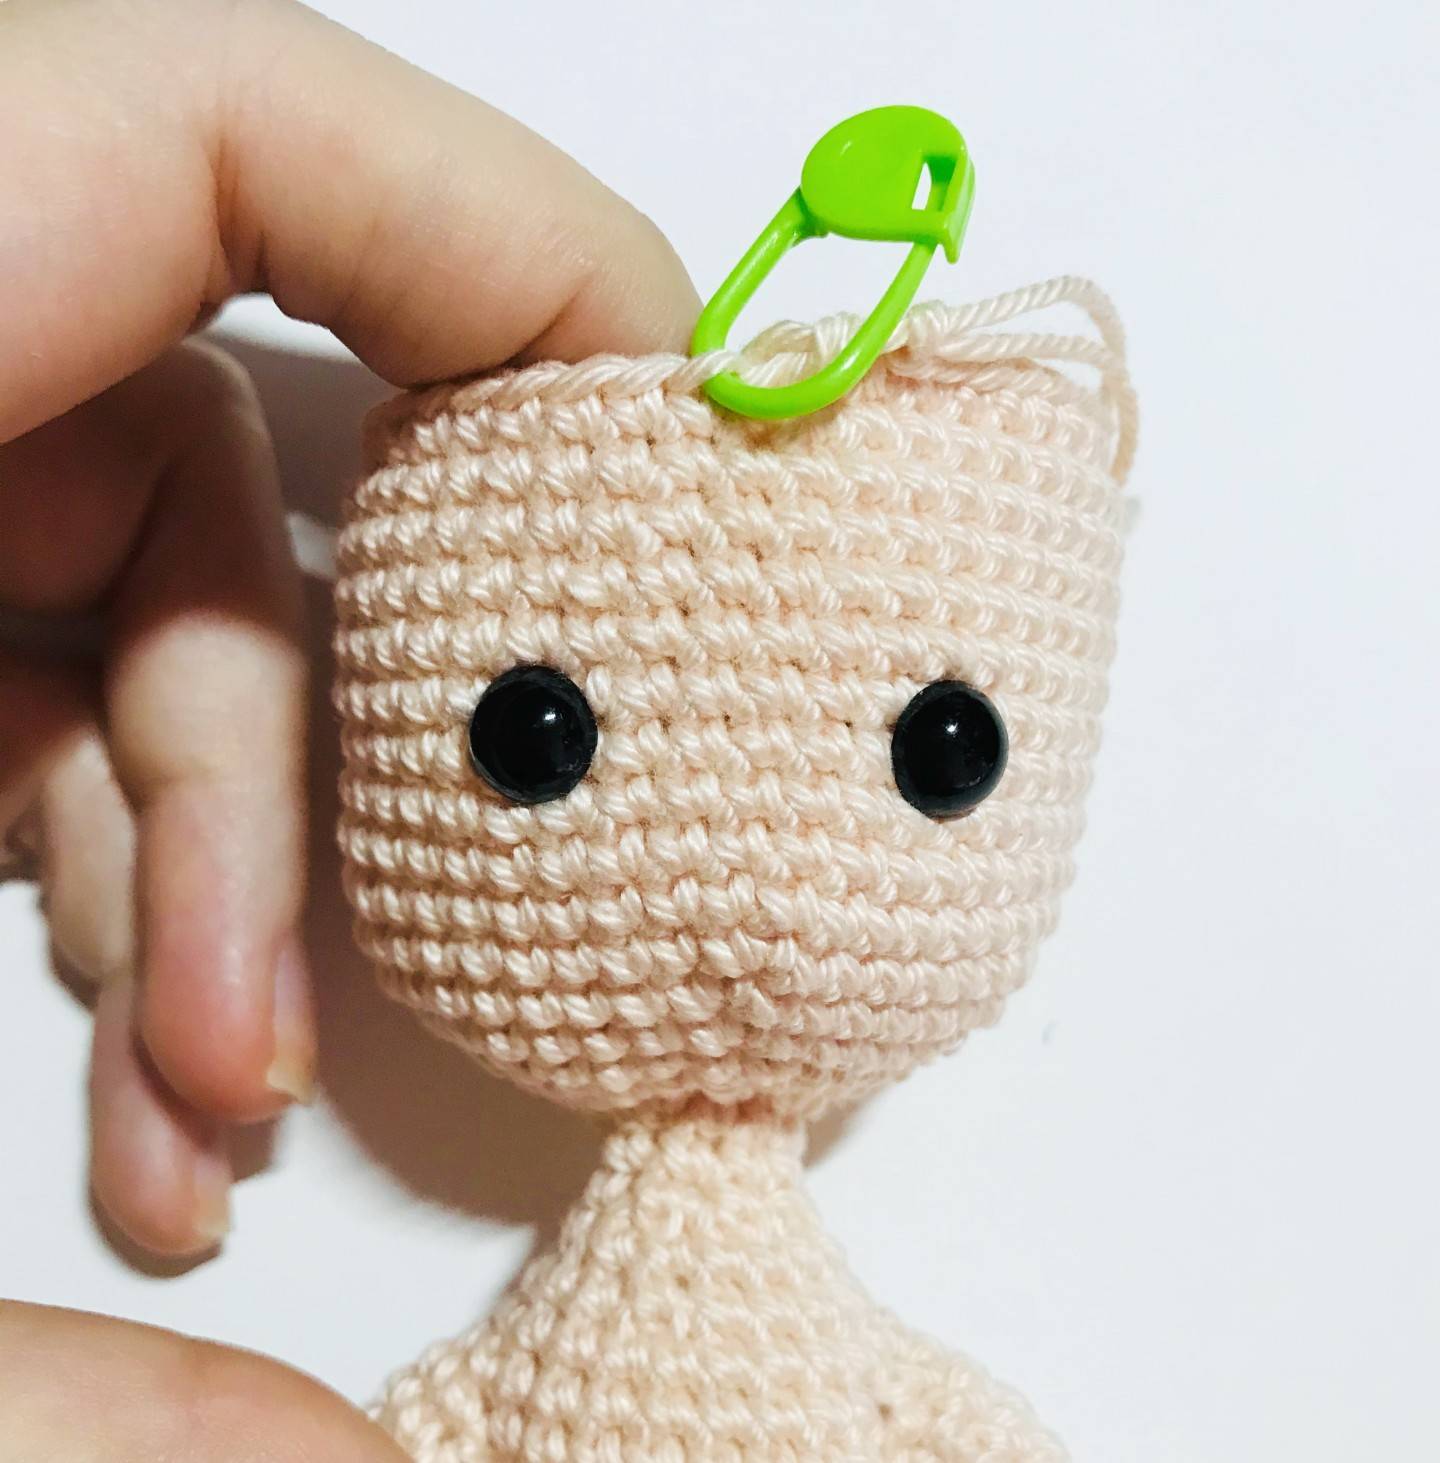
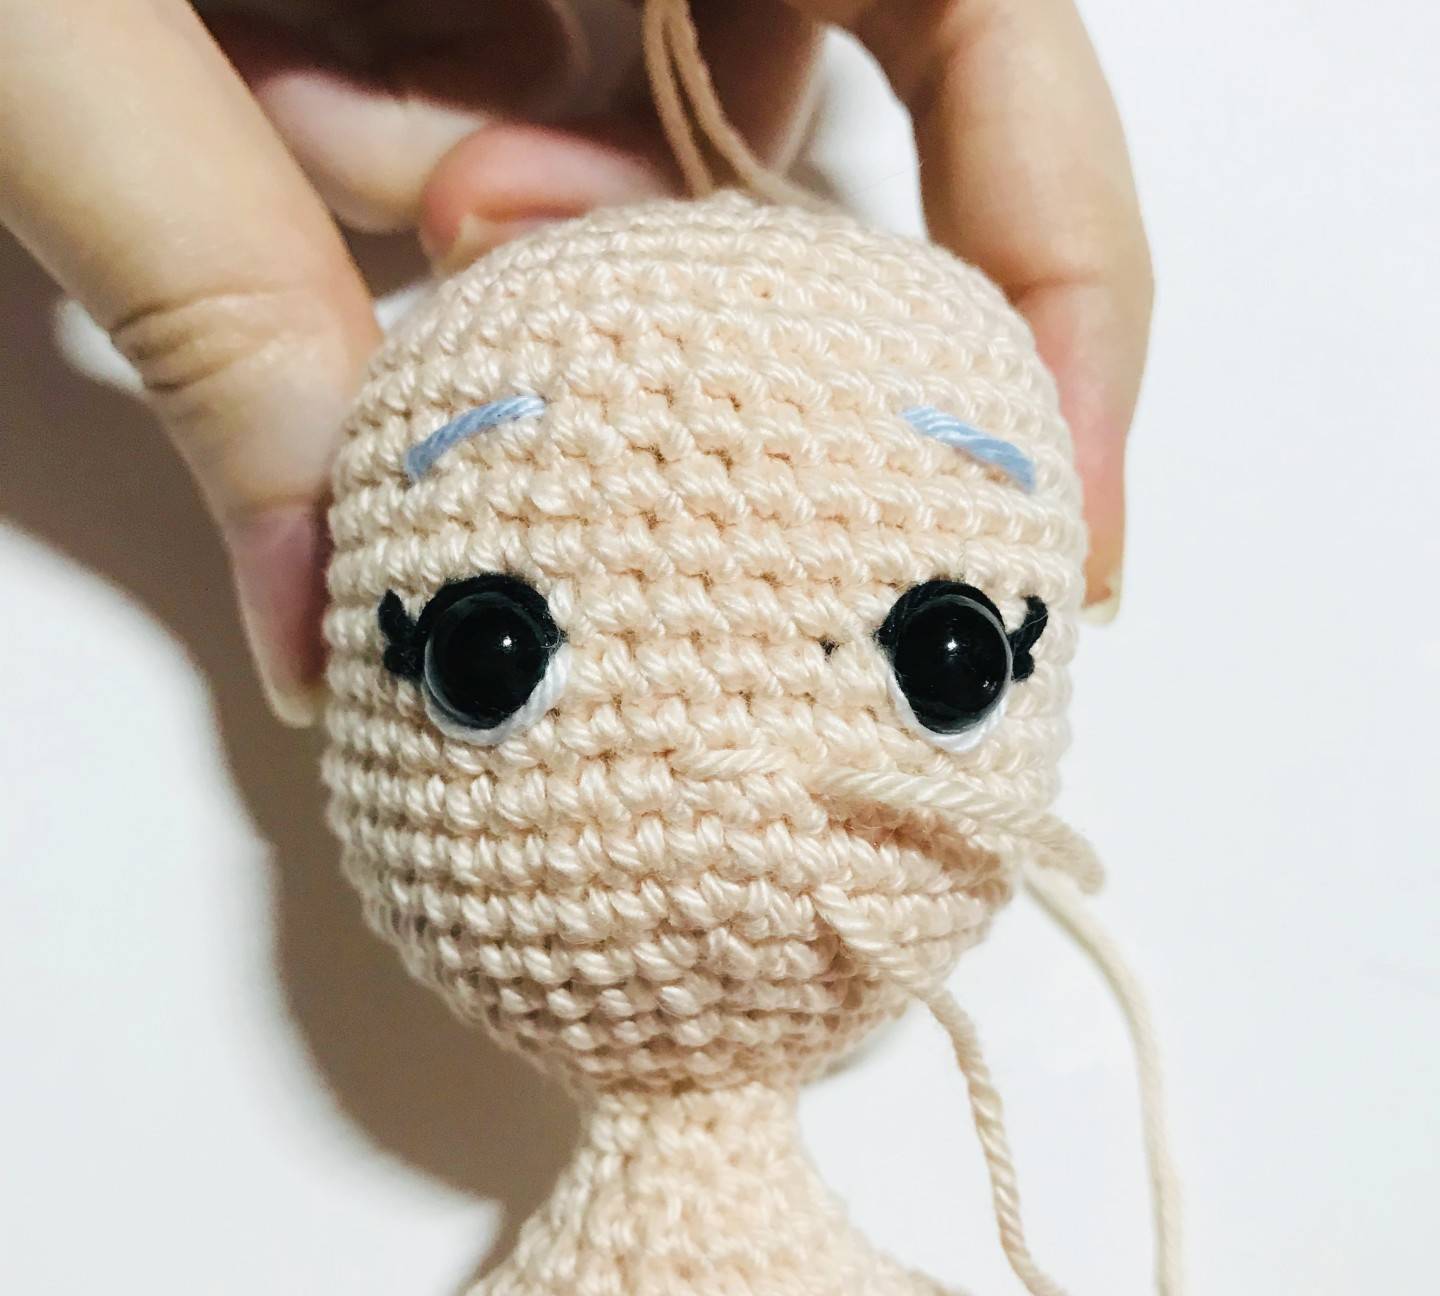
Place the safety eyes on R65 with a gap of 6 sc between the two eyes. Embroider eyes (see detailed explanations below).
R73: *8 sc, 1 dec* x4 (36)
R74: *4 sc, 1 dec* x6 (30)
R75: *3 sc, 1 dec* x6 (24)
R76: *2 sc, 1 dec* x6 (18)
R77: *1 sc, 1 dec* x6 (12)
Finish stuffing.
R78: 6 decreases (6)
R79: fasten off and insert it into the front loops of the 6 remaining stitches then tighten to close and
weave in ends.
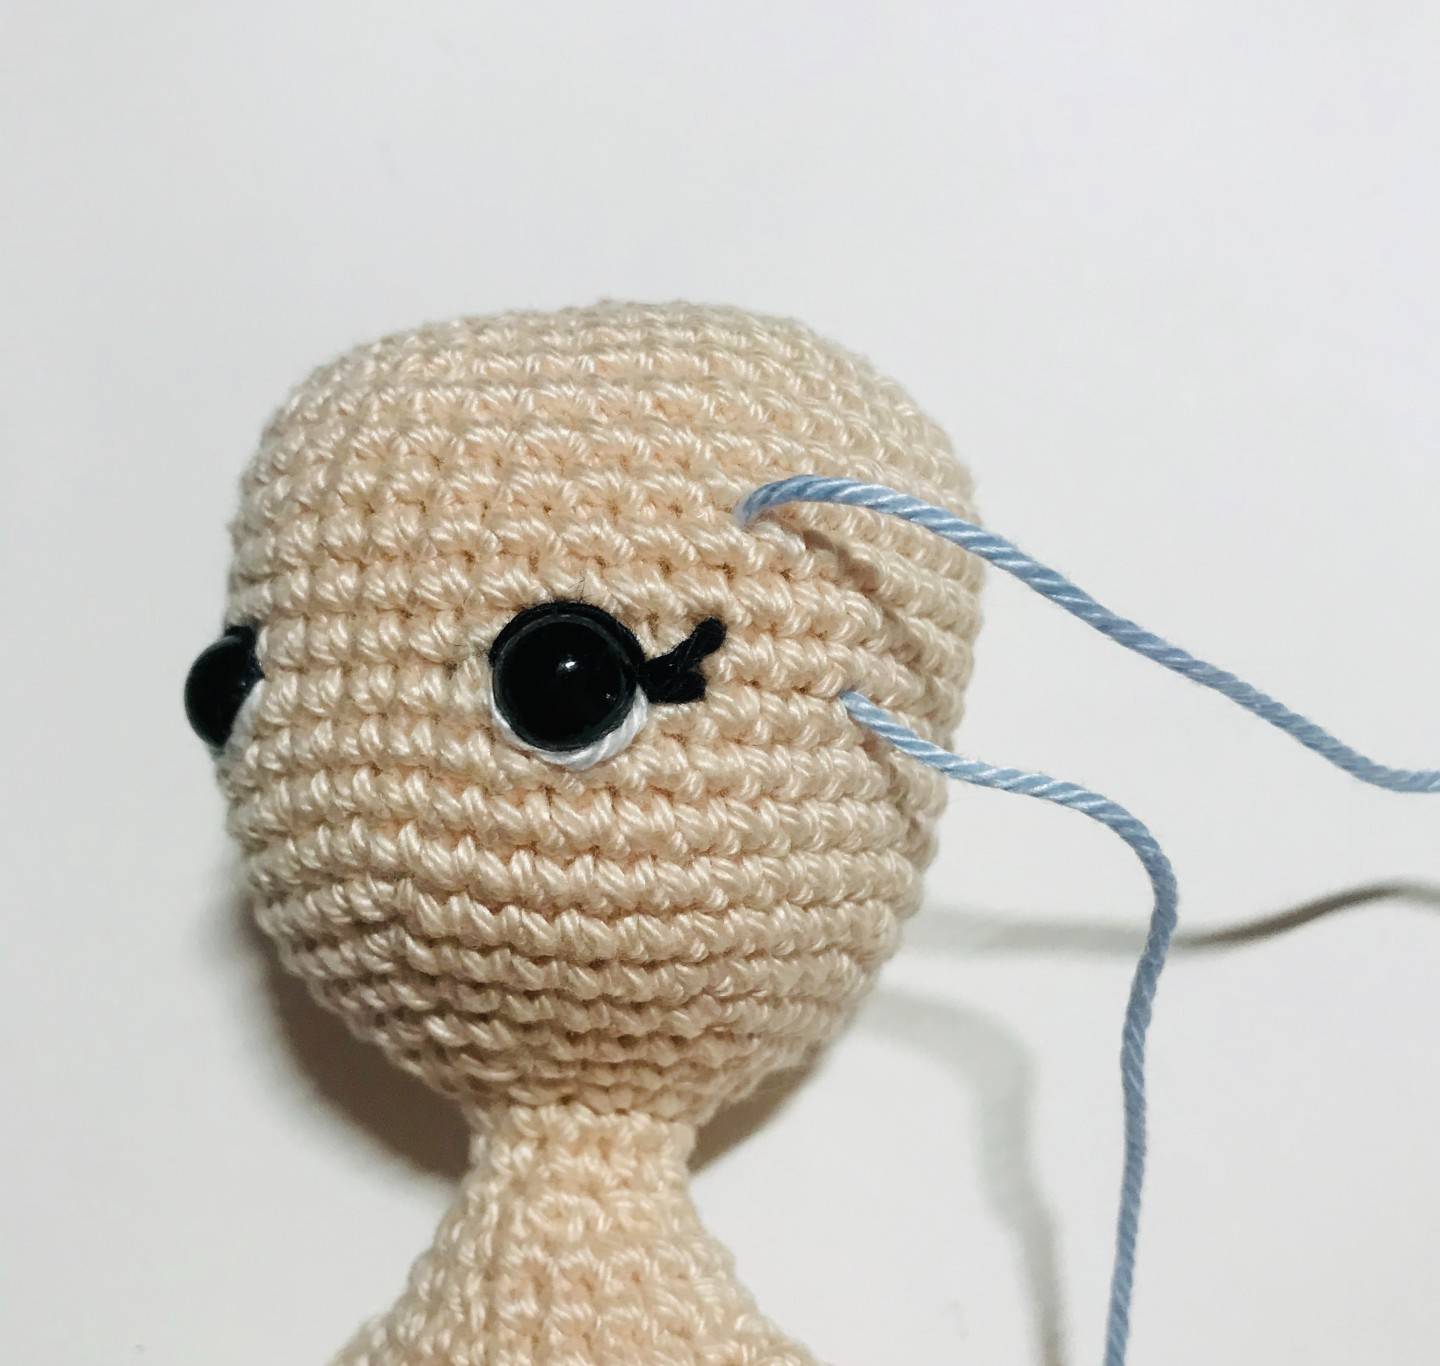
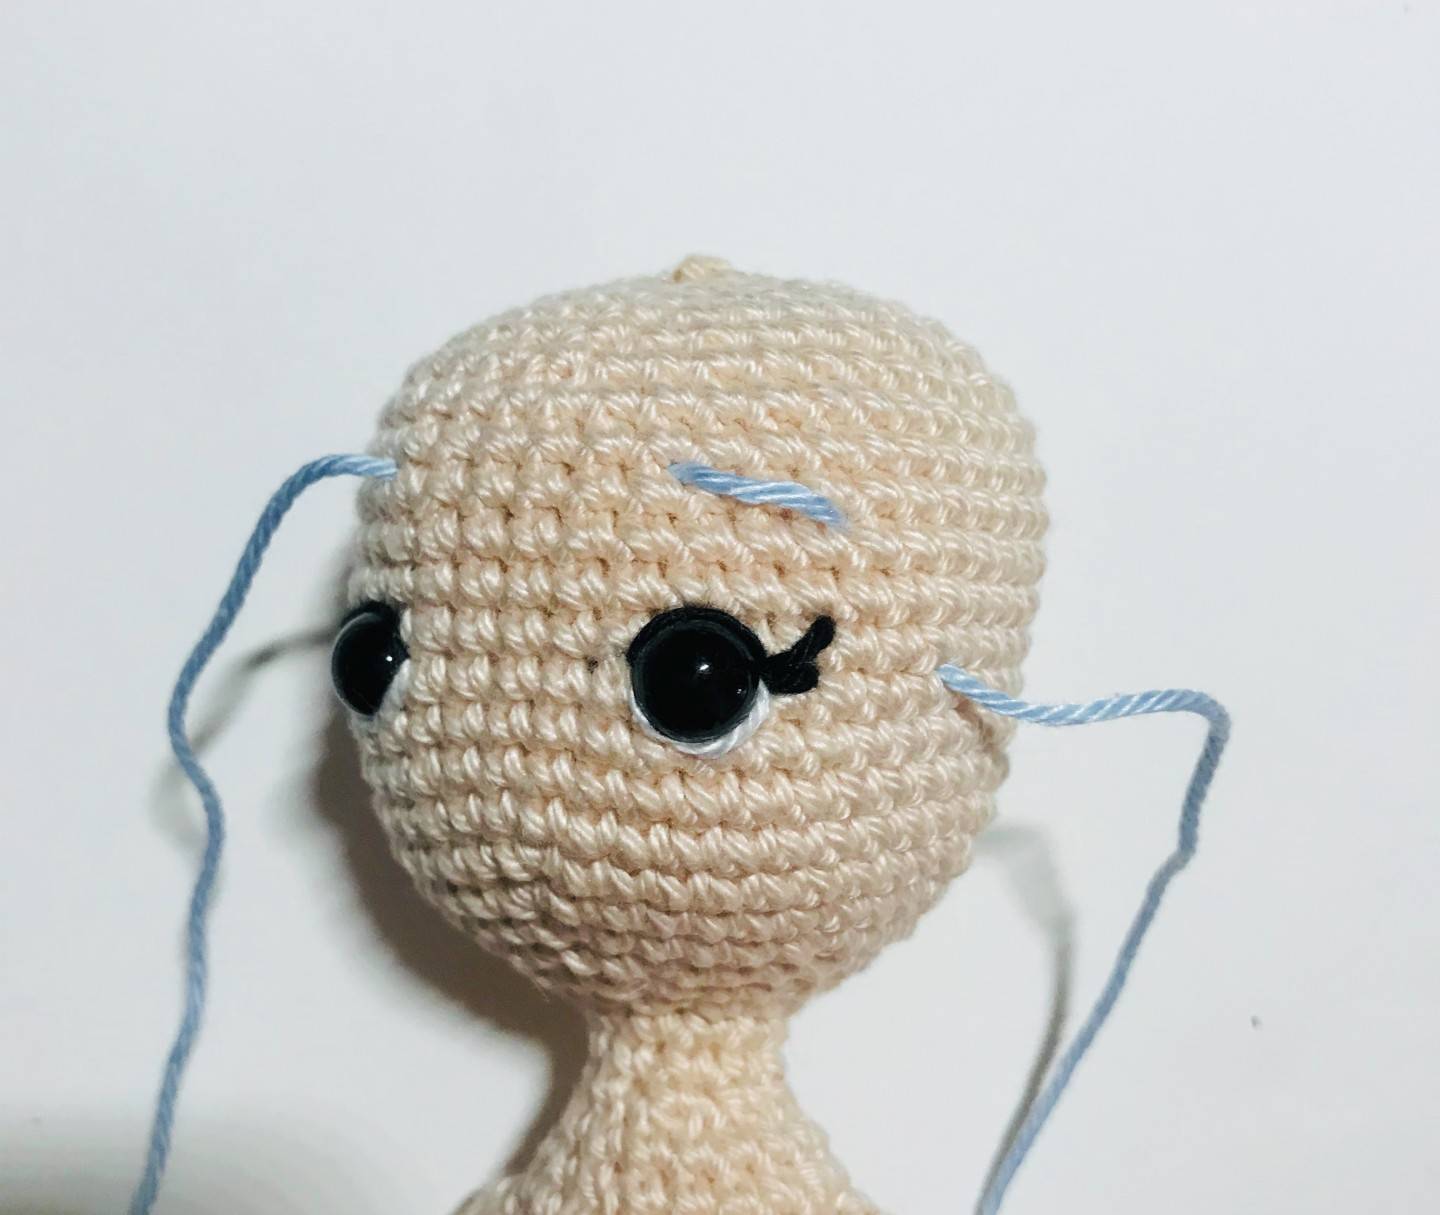
🧜♀️ Eye embroidery explanations
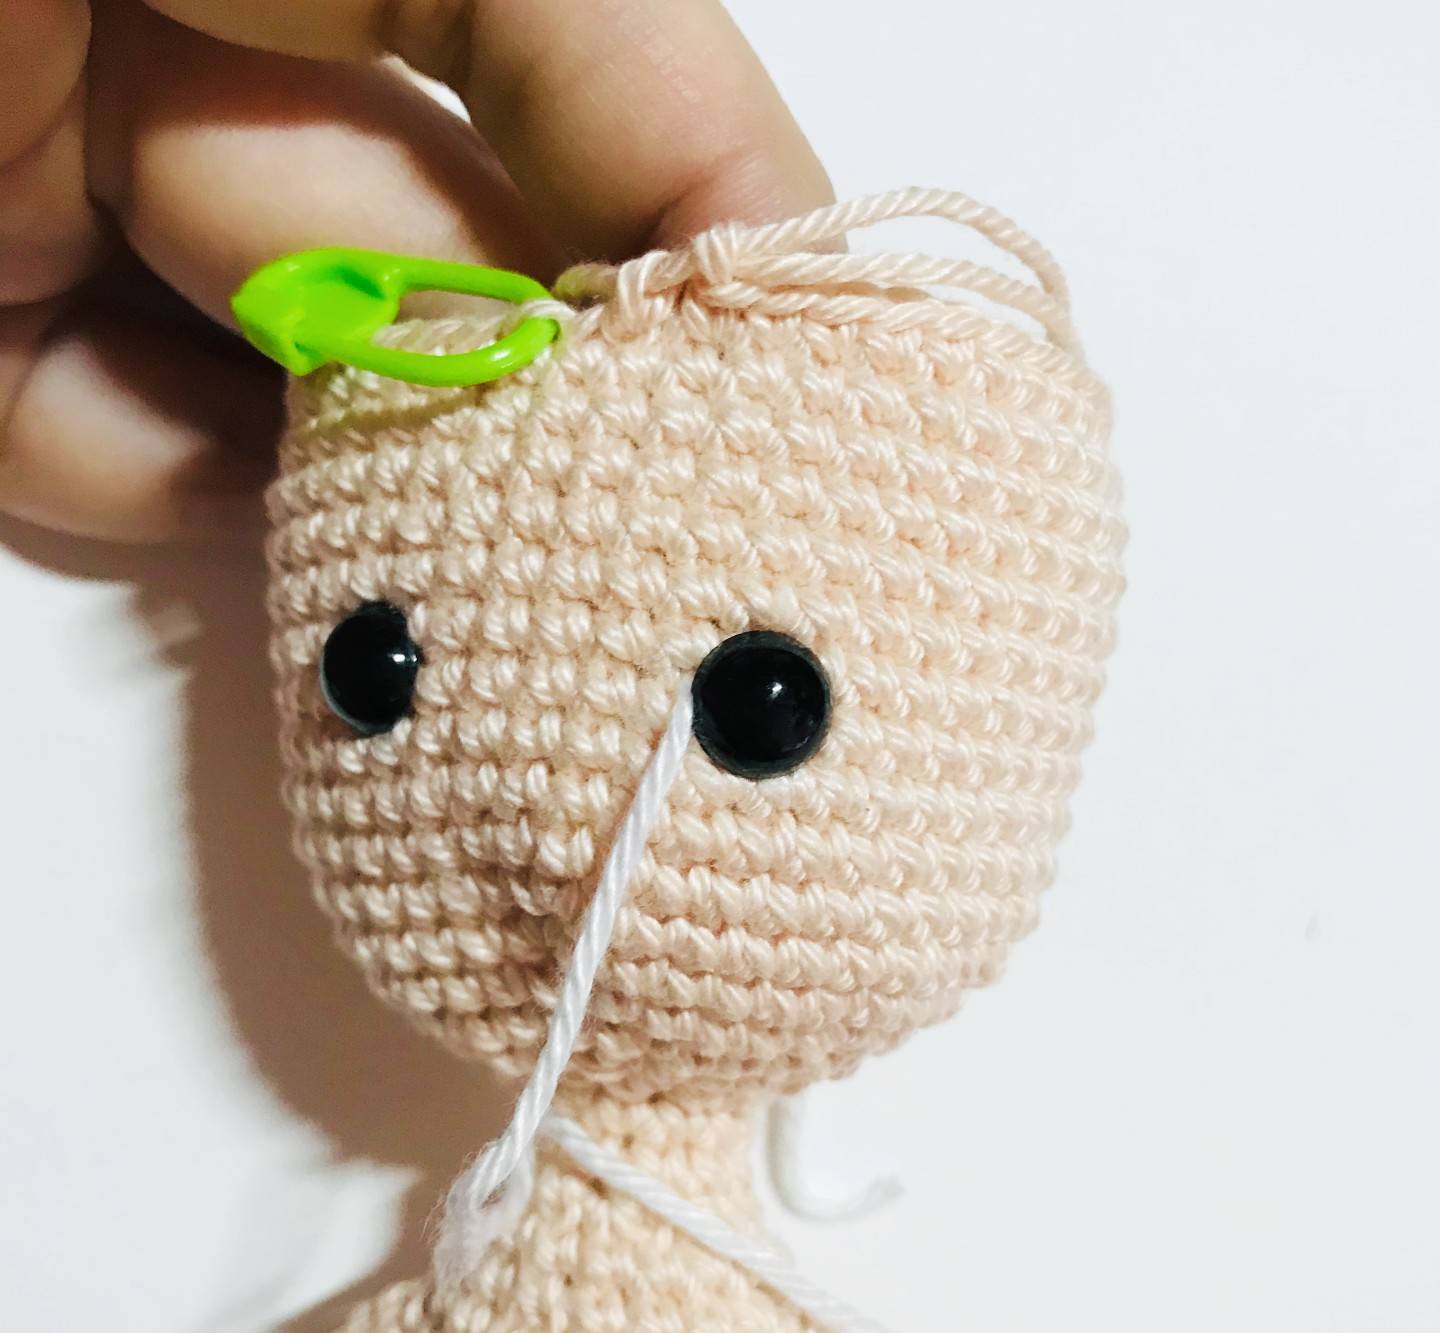
Insert your white thread into the stitch that is at the level of the middle of the eye, to its left.
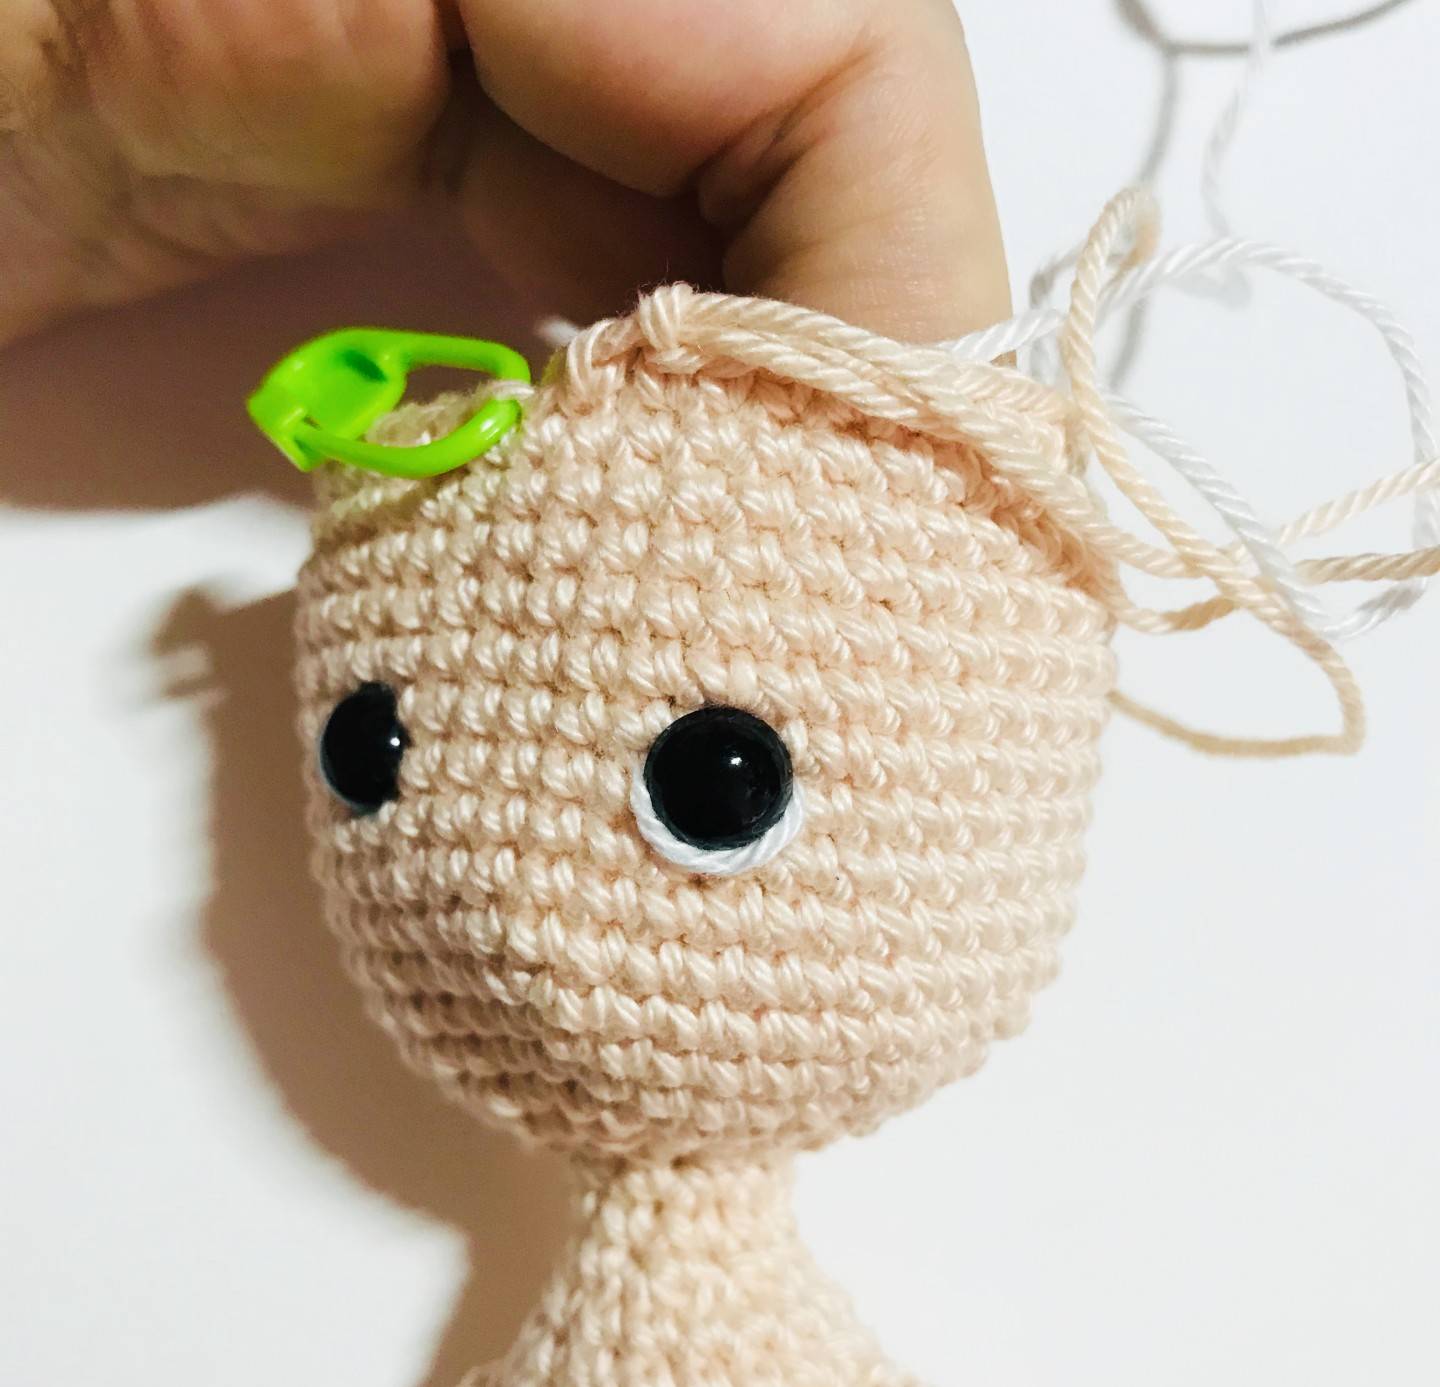
Go around the eye in a semi-circle and tuck your thread also in the stitch which is at the level of the
middle of the eye but on the right side this time.
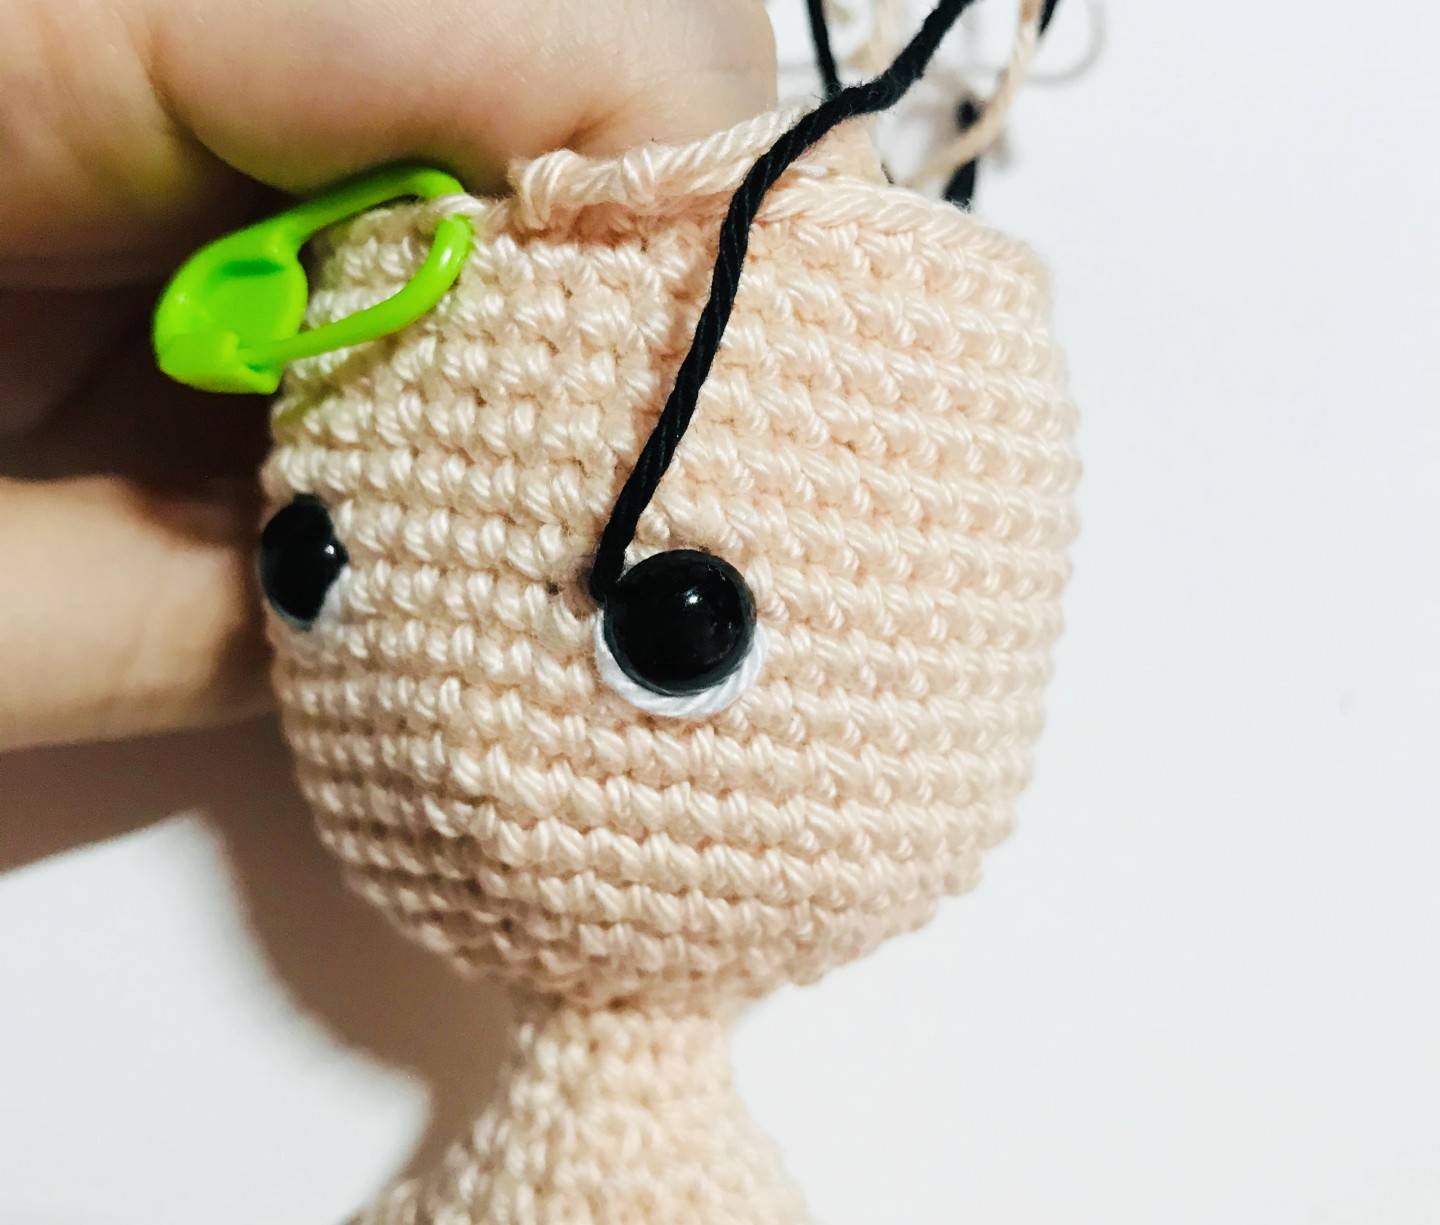
Insert your black thread into the stitch that is at the level of the middle of the eye, to its left, in the
same where the white thread is.
Go around the eye in a semi-circle and tuck your thread also in the stitch which is at the level of the
middle of the eye but on the right side this time.
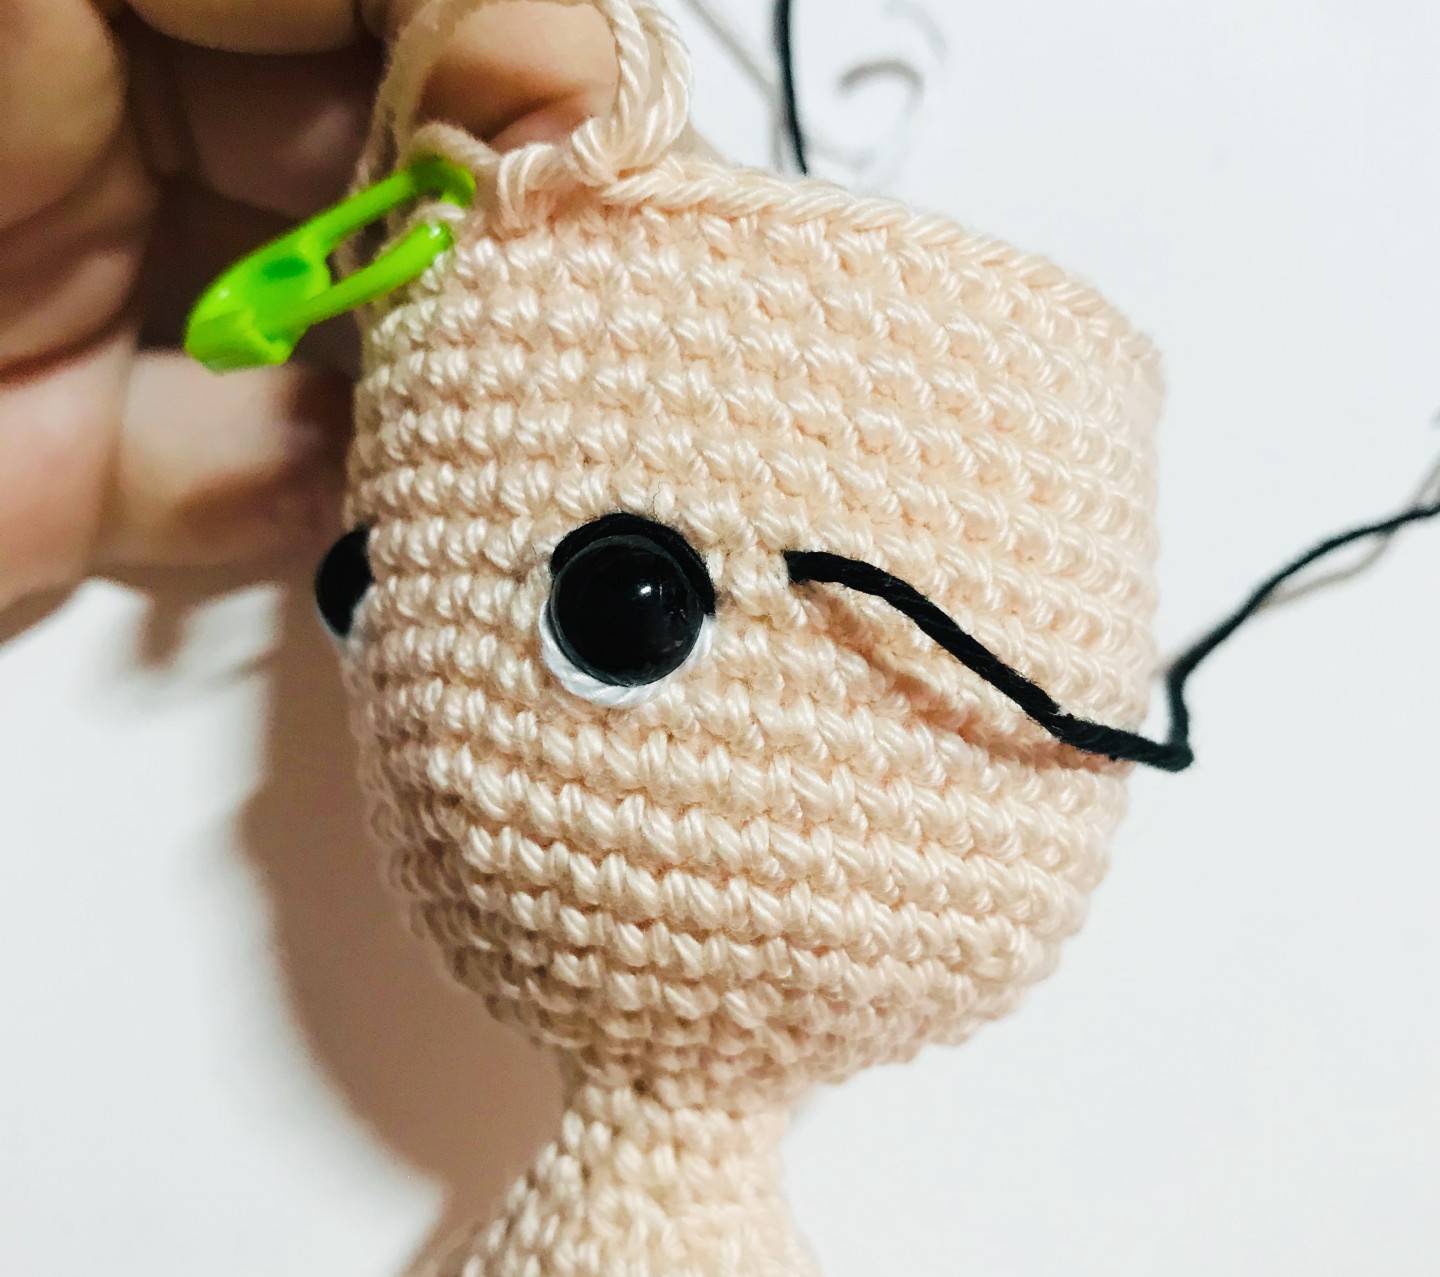
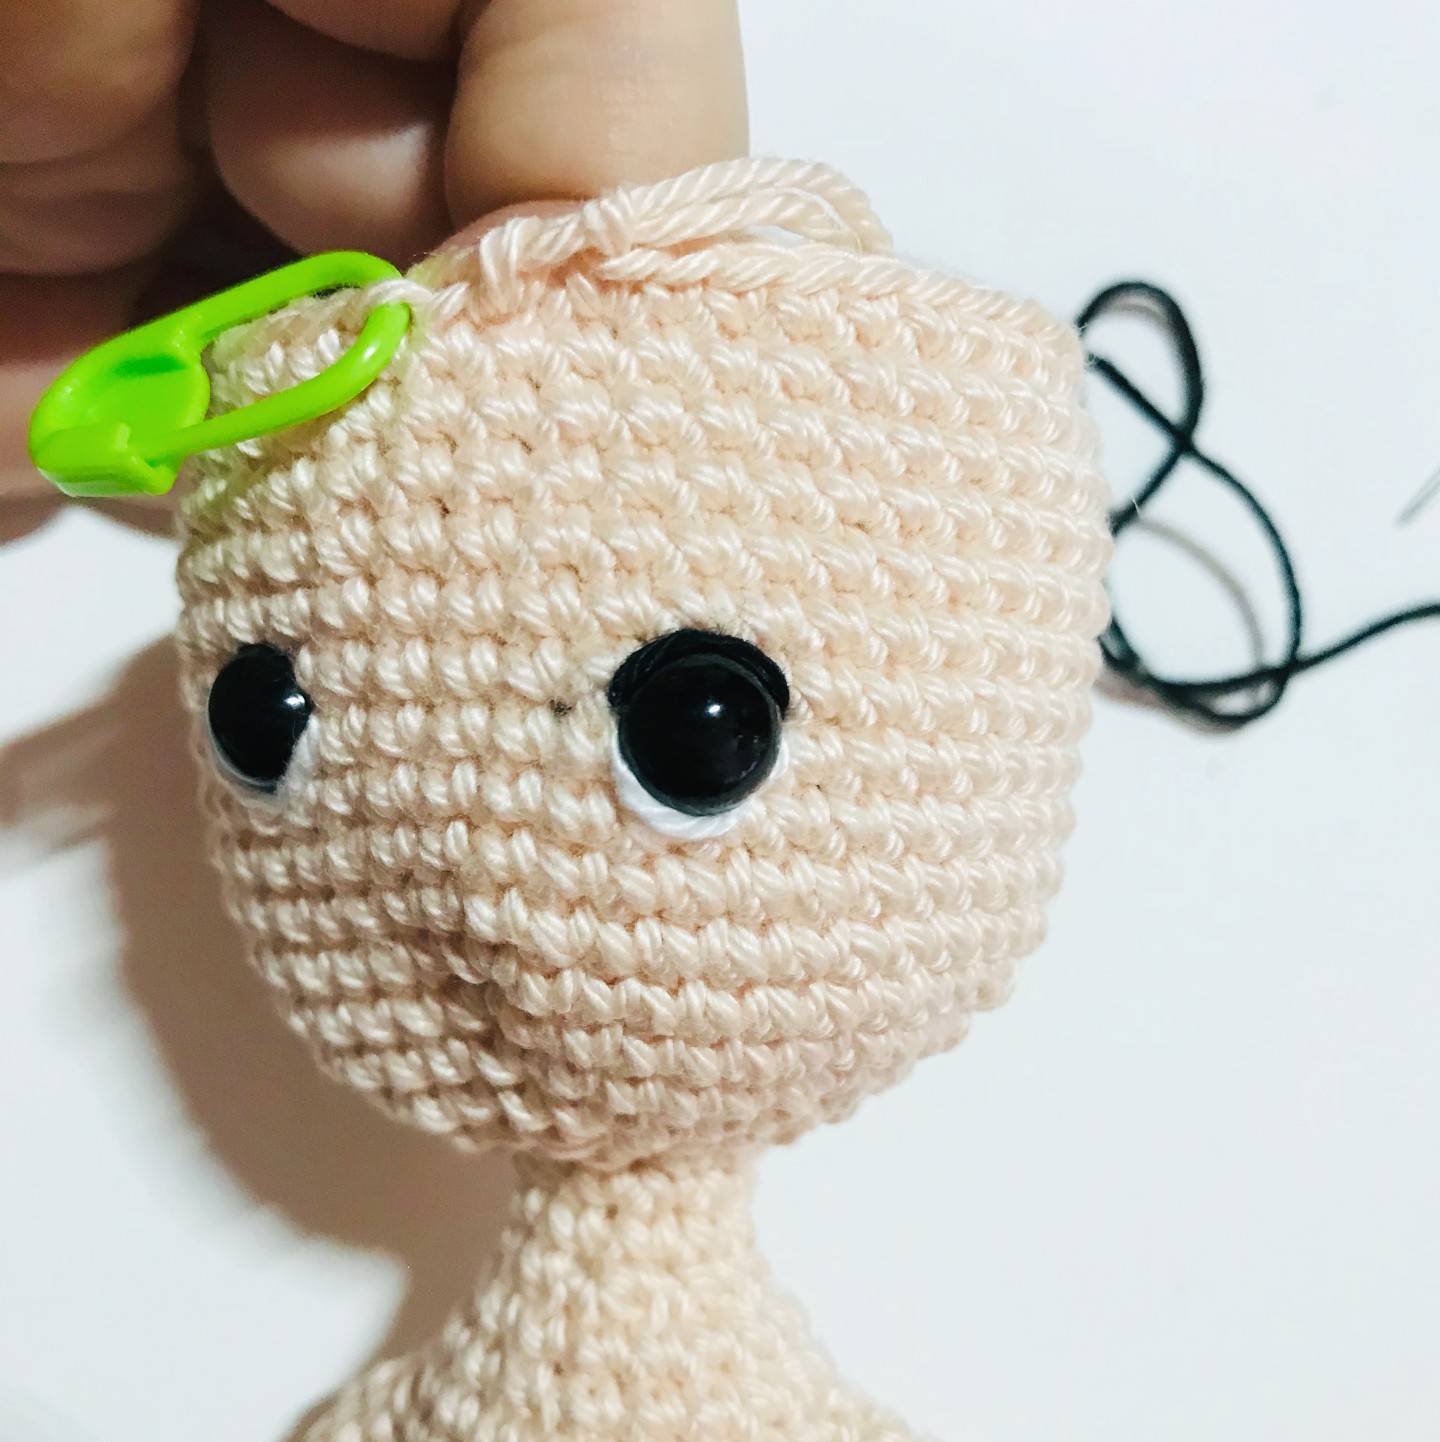
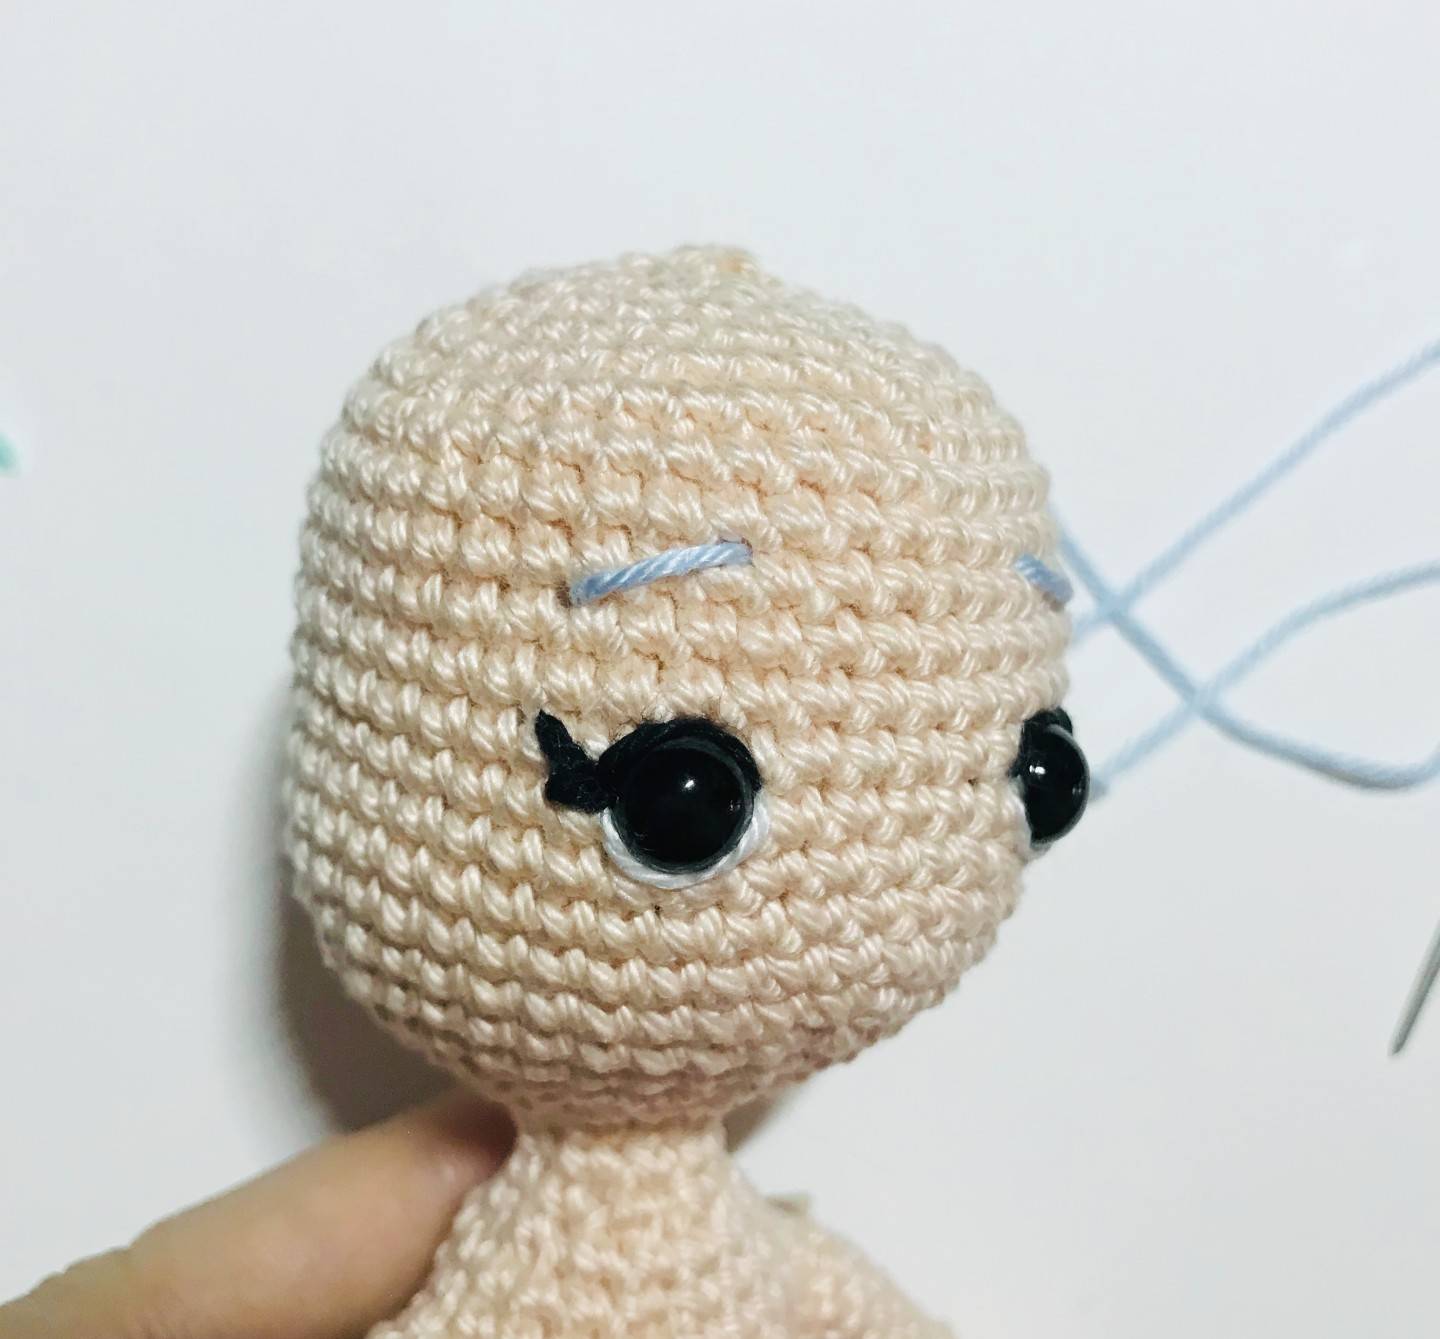
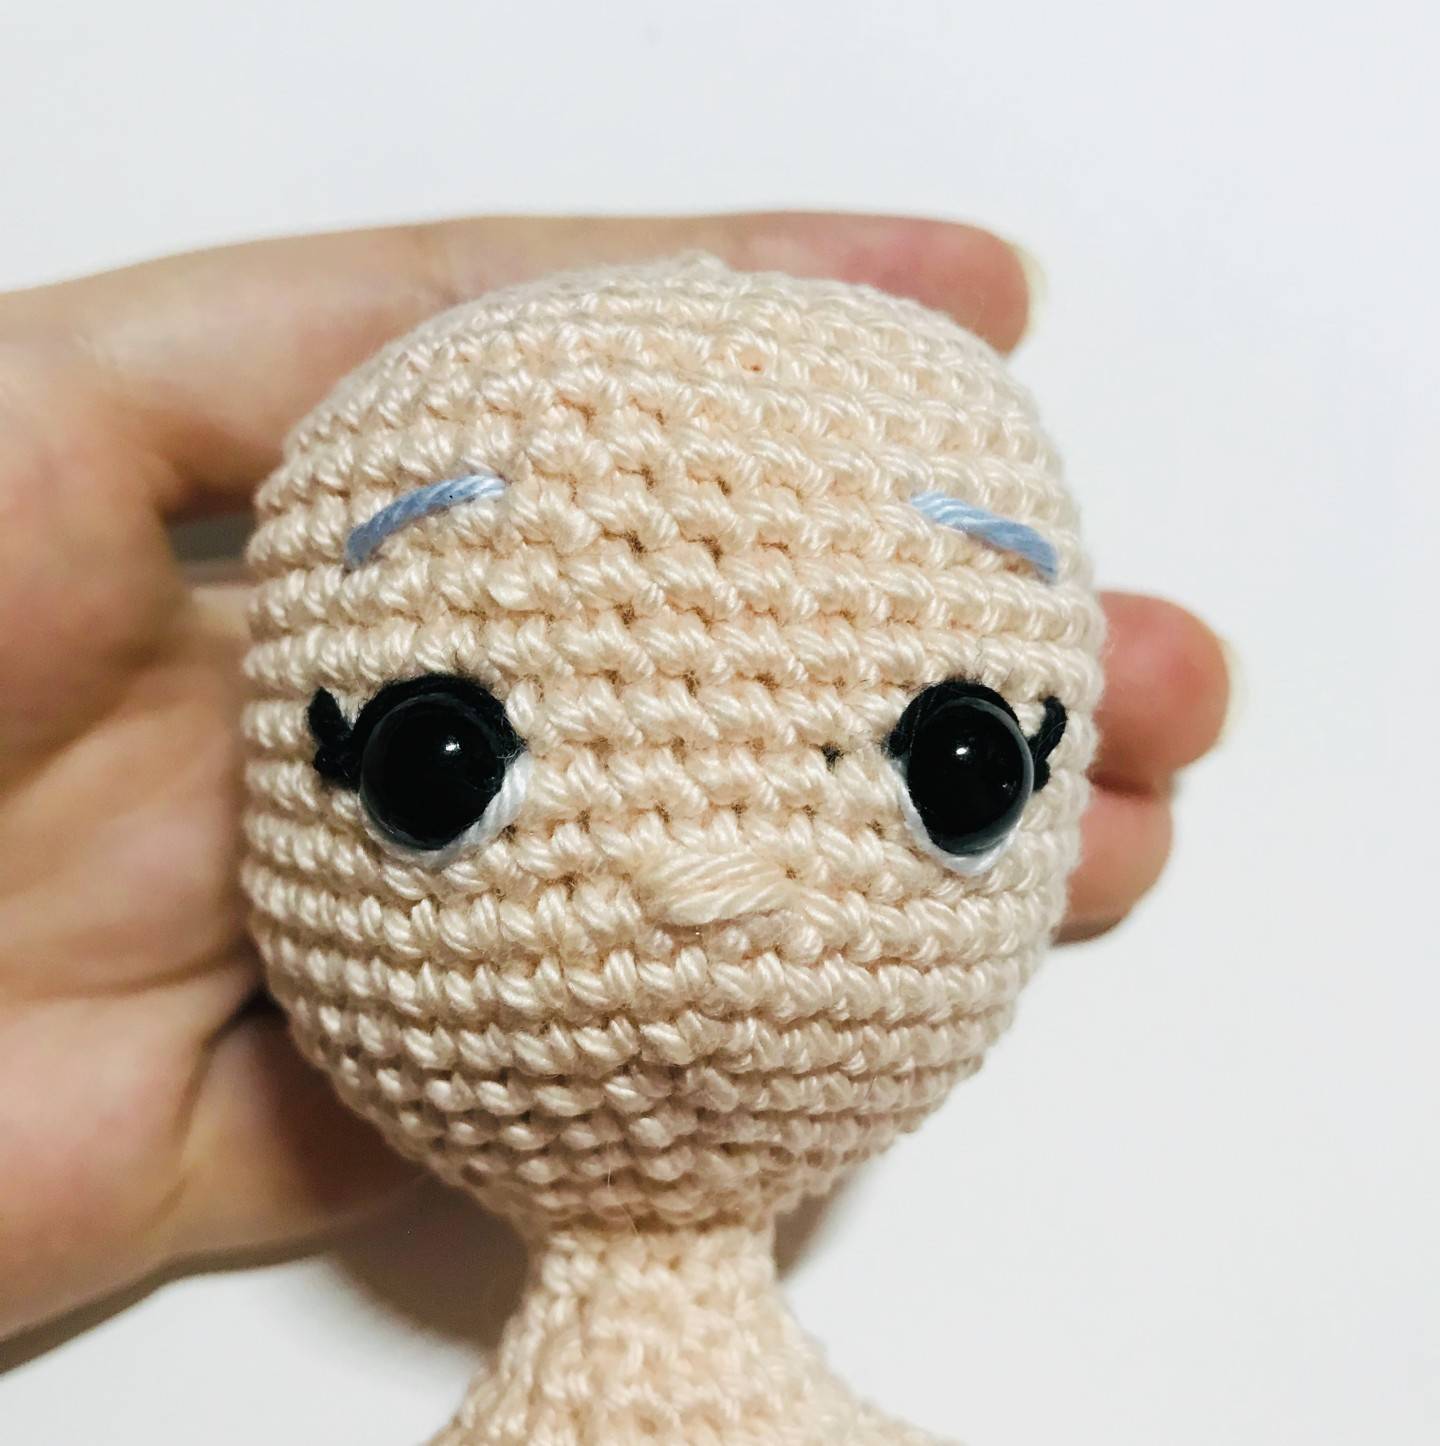
Taking 2 sc apart on the horizontal axis, bring out your black wire at 1 sc from the level of the middle of the eye on the vertical axis.

And tuck it into the stitch at the middle of the eye.
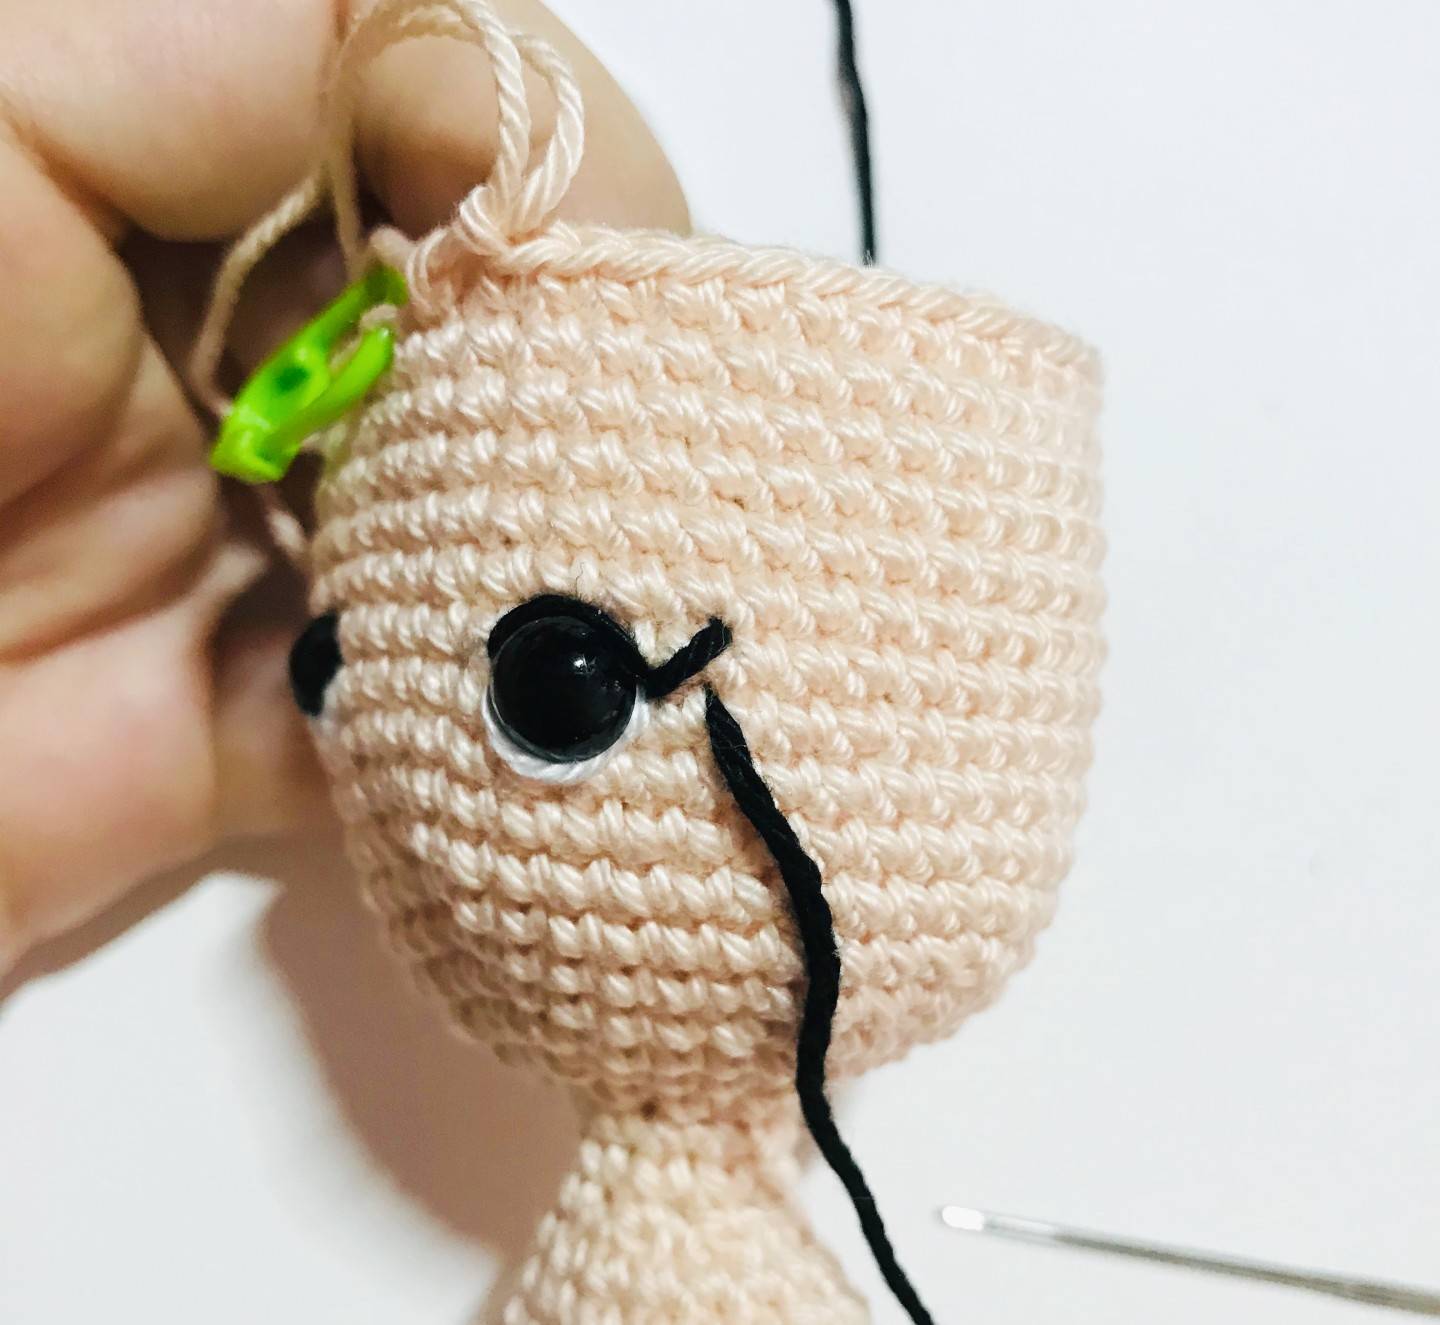
Taking 1 sc apart on the horizontal axis, bring out your black wire in the same axis as the middle of the
eye.

And tuck it into the stitch at the middle of the eye.
Do the same for the left eye.
Find more magic patterns ✨
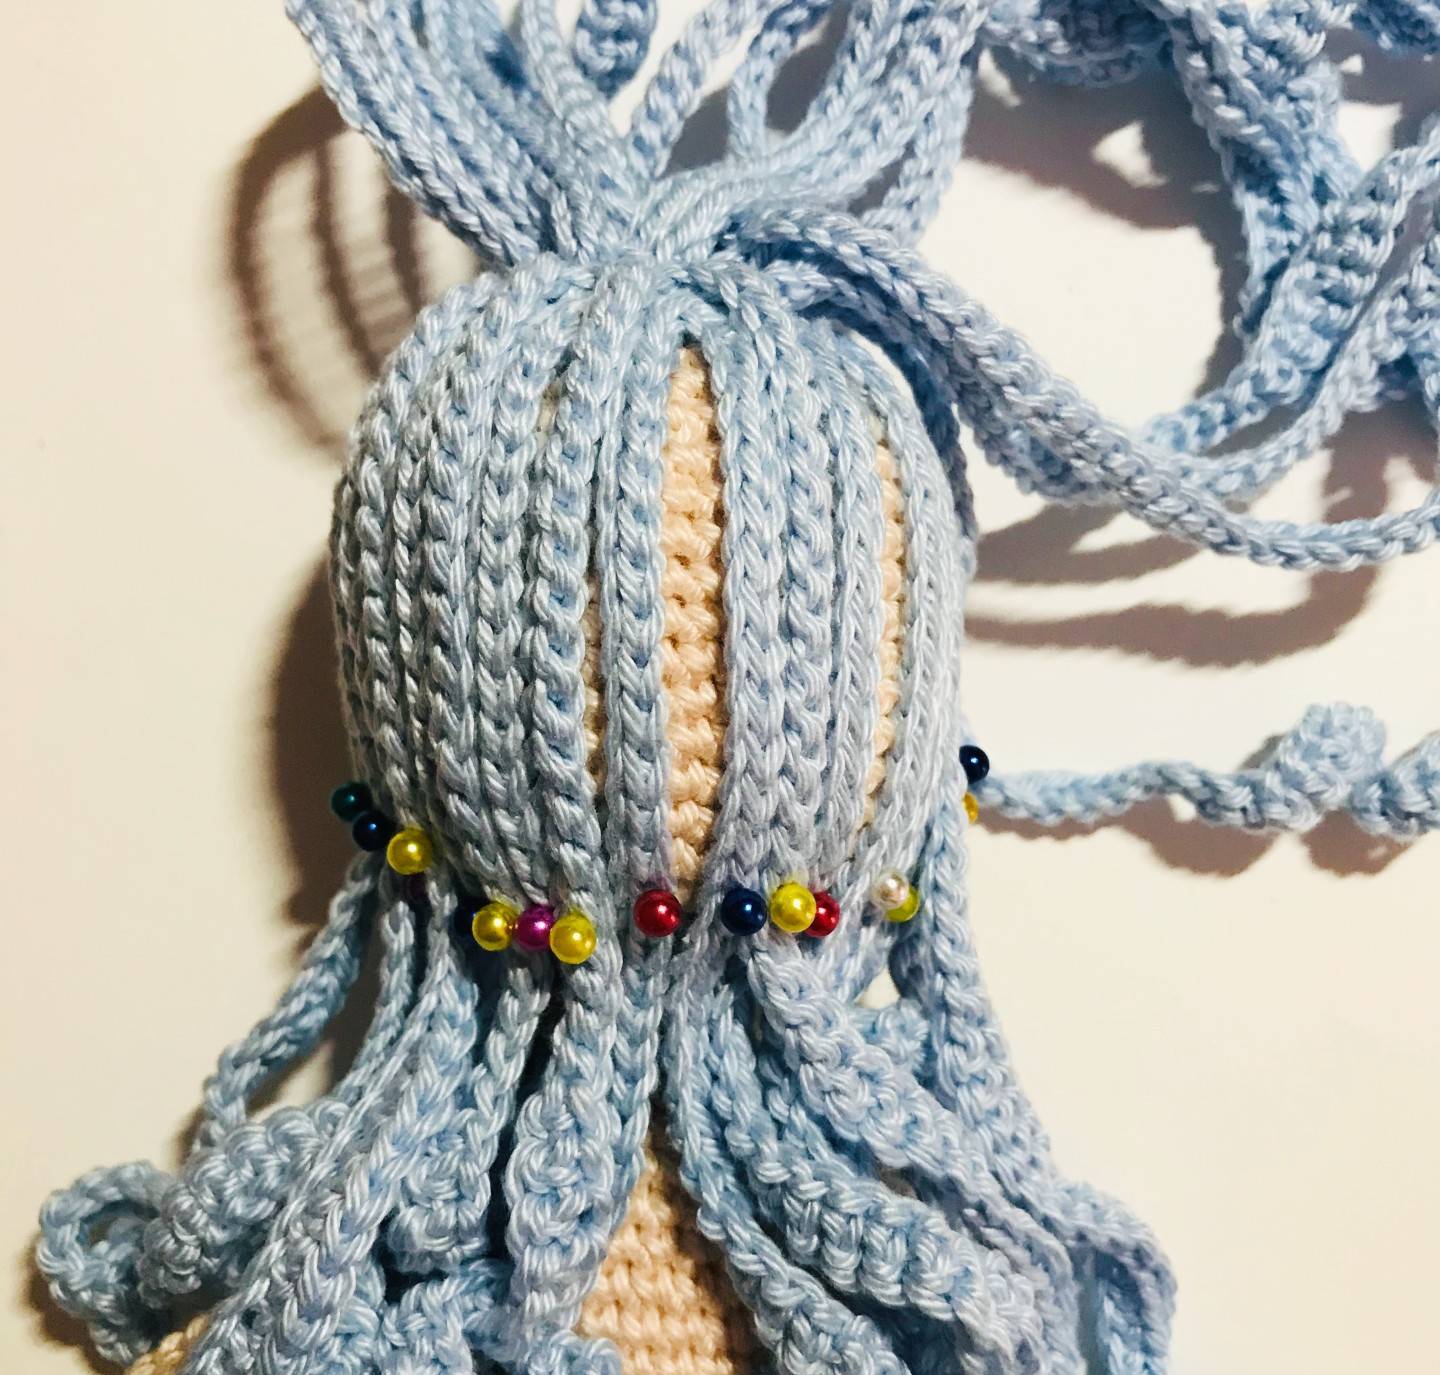
⭐ Hair
(to be done with light blue cotton yarn and crochet hook 2.5 mm)
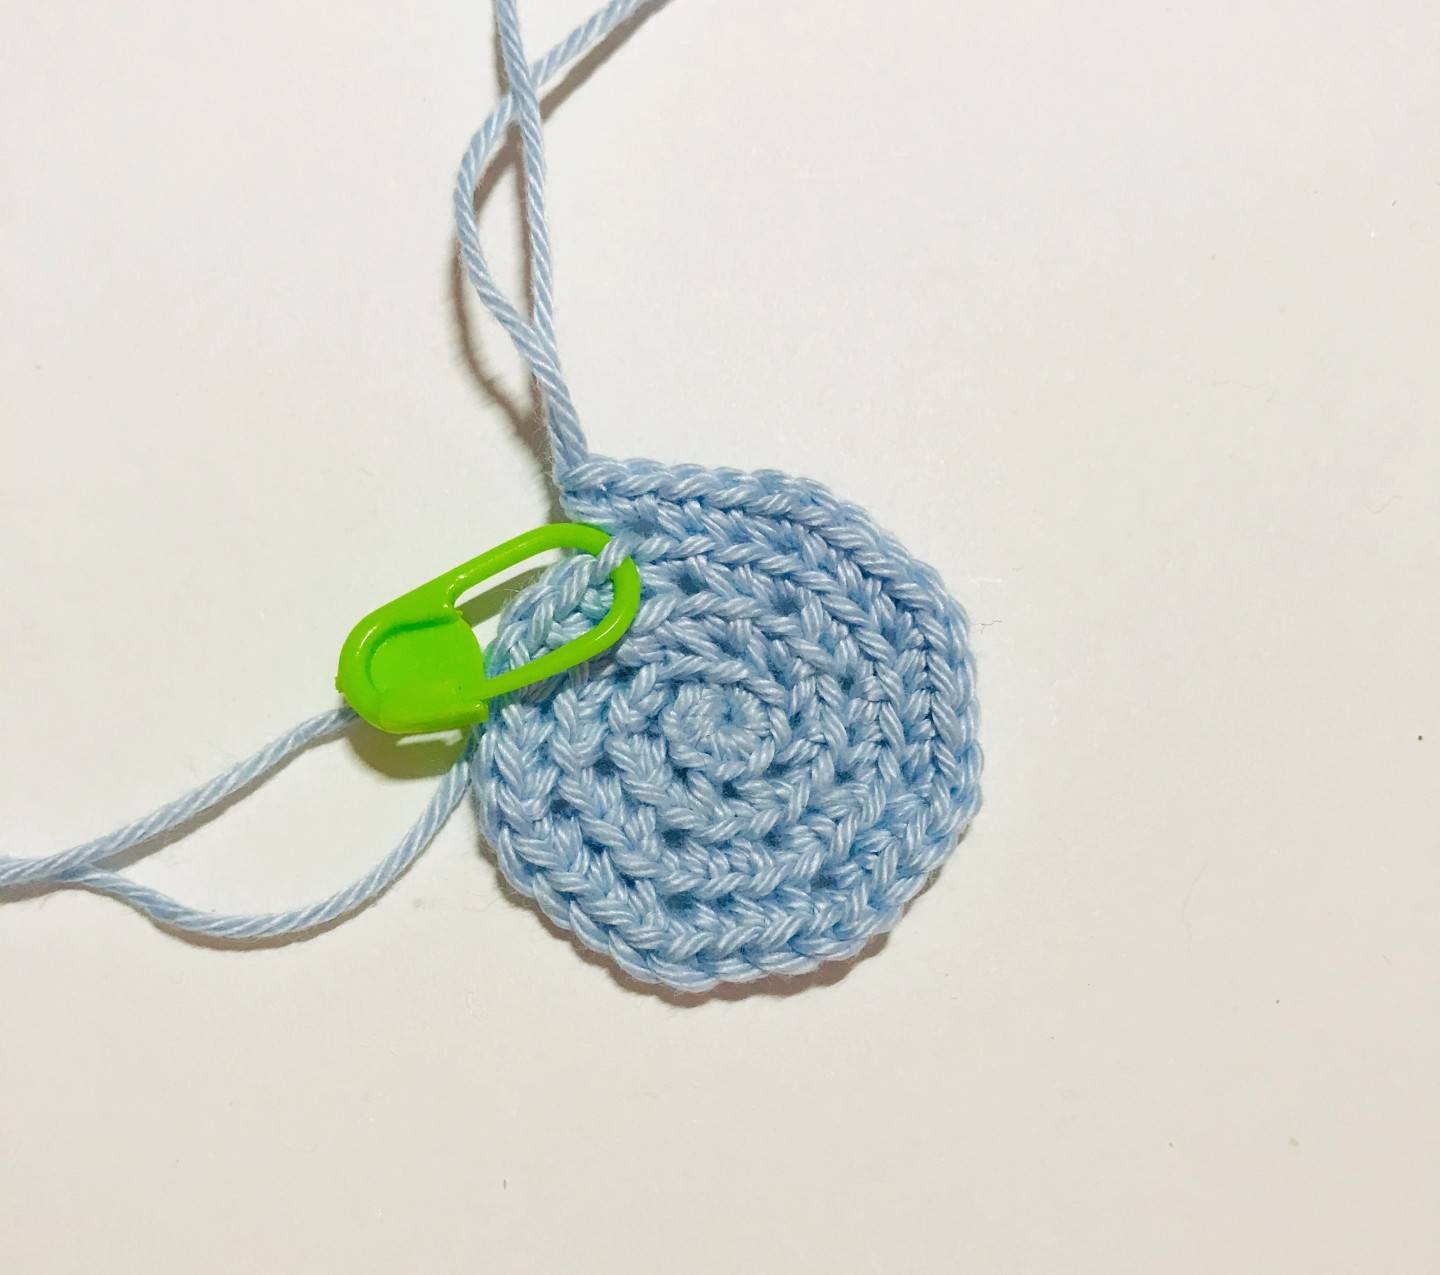
The base of the hair:
R1: magic ring with 8 sc
R2: only in the back loop, 1 Inc in each sc (16)
R3: only in the back loop, *1 sc, 1 Inc* x8 (24)
R4: only in the back loop, *2 sc, 1 Inc* x8 (32)
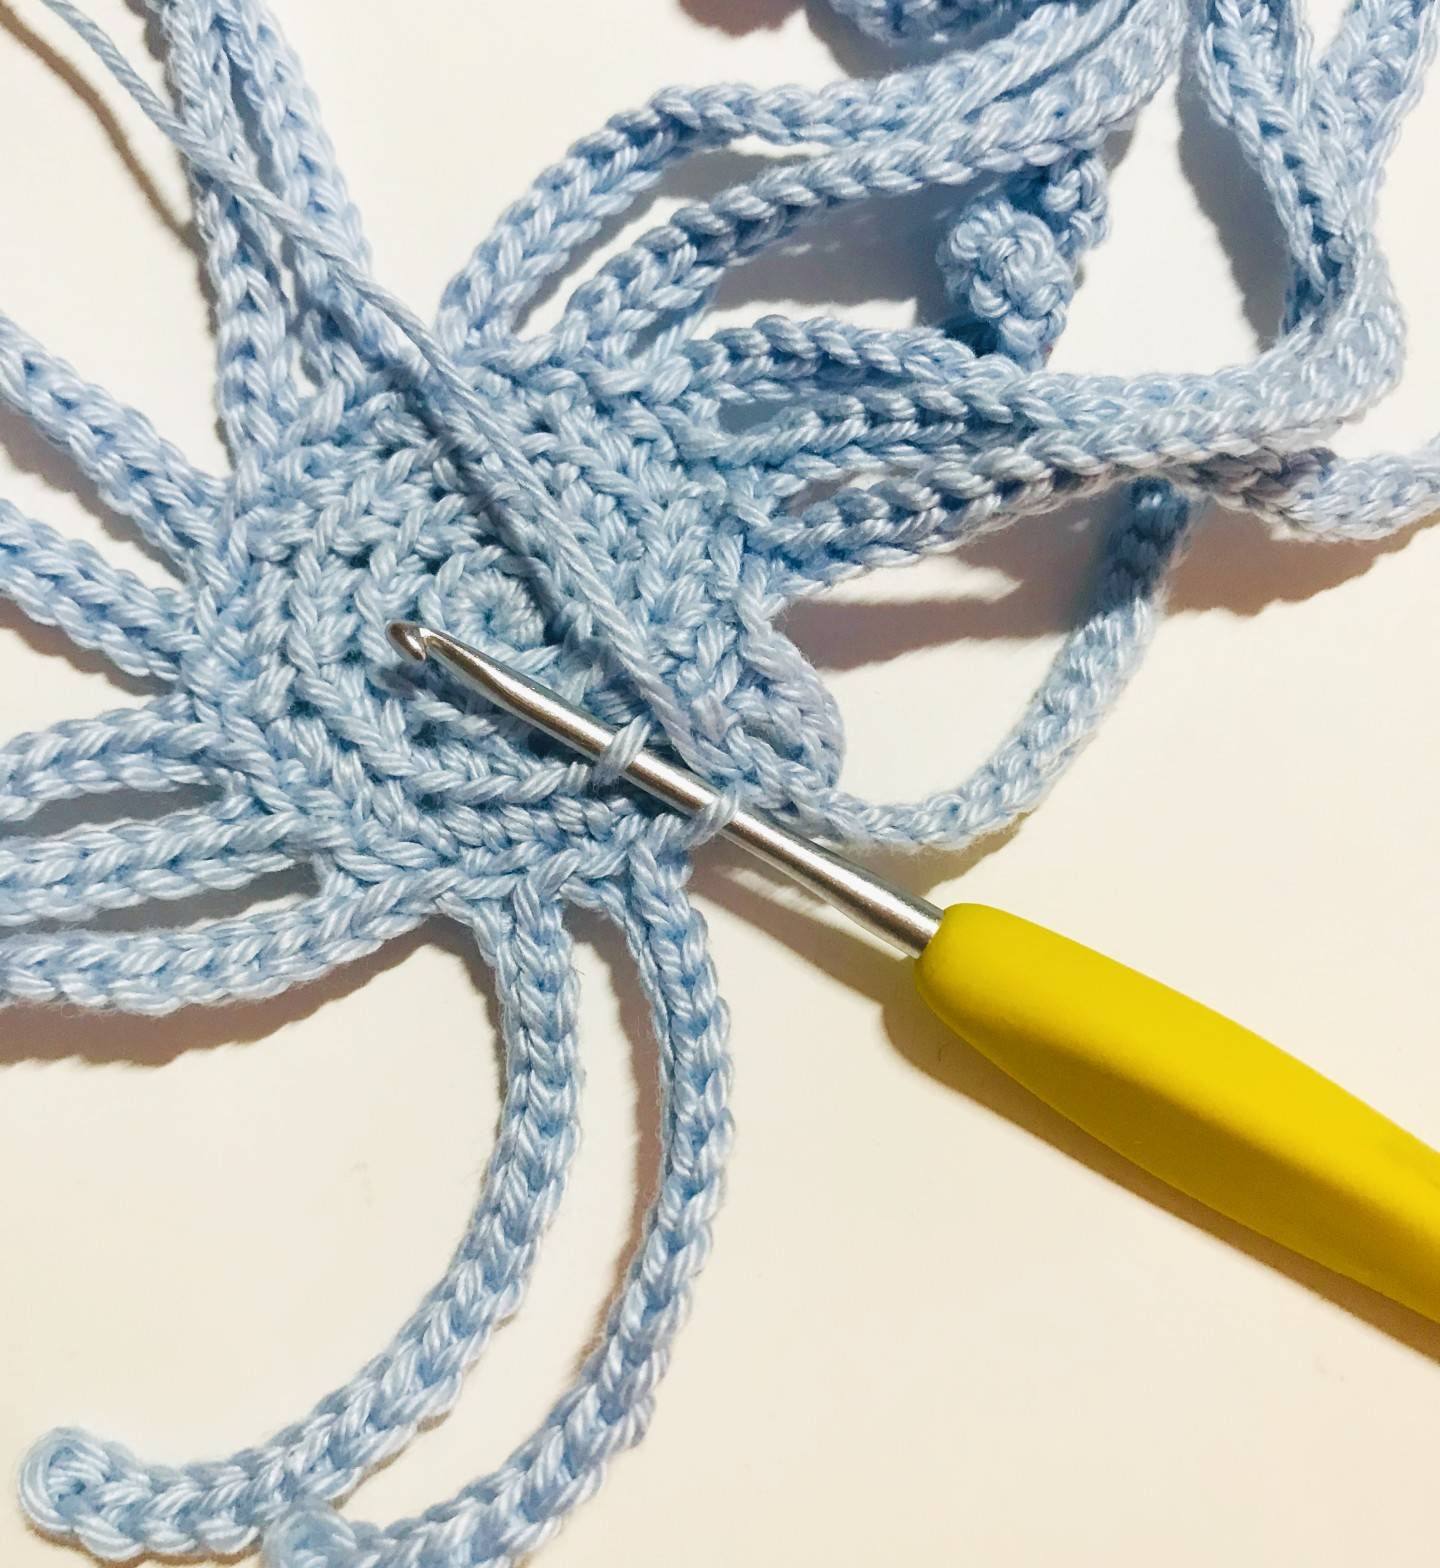
The strands of hair:
-> Starting from where we left off with the base, we
will directly mount the CH as follows:
On the first row (outer row)
Strand 1: CH 19. from the 2nd stitch, 1 SlSt then 17 SlSt. Finish with 1 SlSt on the base by skipping 1
stitch.
Strand 2: CH 32. from the 2nd stitch, 1 SlSt then 11 sc and 19 SlSt. Finish with 1 SlSt on the base by
skipping 1 stitch.
Strand 3 to Strand 11: CH 55. from the 2nd stitch, 1 SlSt then 32 sc and 21 SlSt. Finish with 1 SlSt on the base by skipping 1 stitch.
Strand 12: CH 32. from the 2nd stitch, 1 SlSt then 11 sc and 19 SlSt. Finish with 1 SlSt on the base by
skipping 1 stitch.
Strand 13 to Strand 16: CH 19. from the 2nd stitch, 1 SlSt then 17 SlSt. Finish with 1 SlSt on the base by skipping 1 stitch.
Keep the thread to continue in the inner row below.
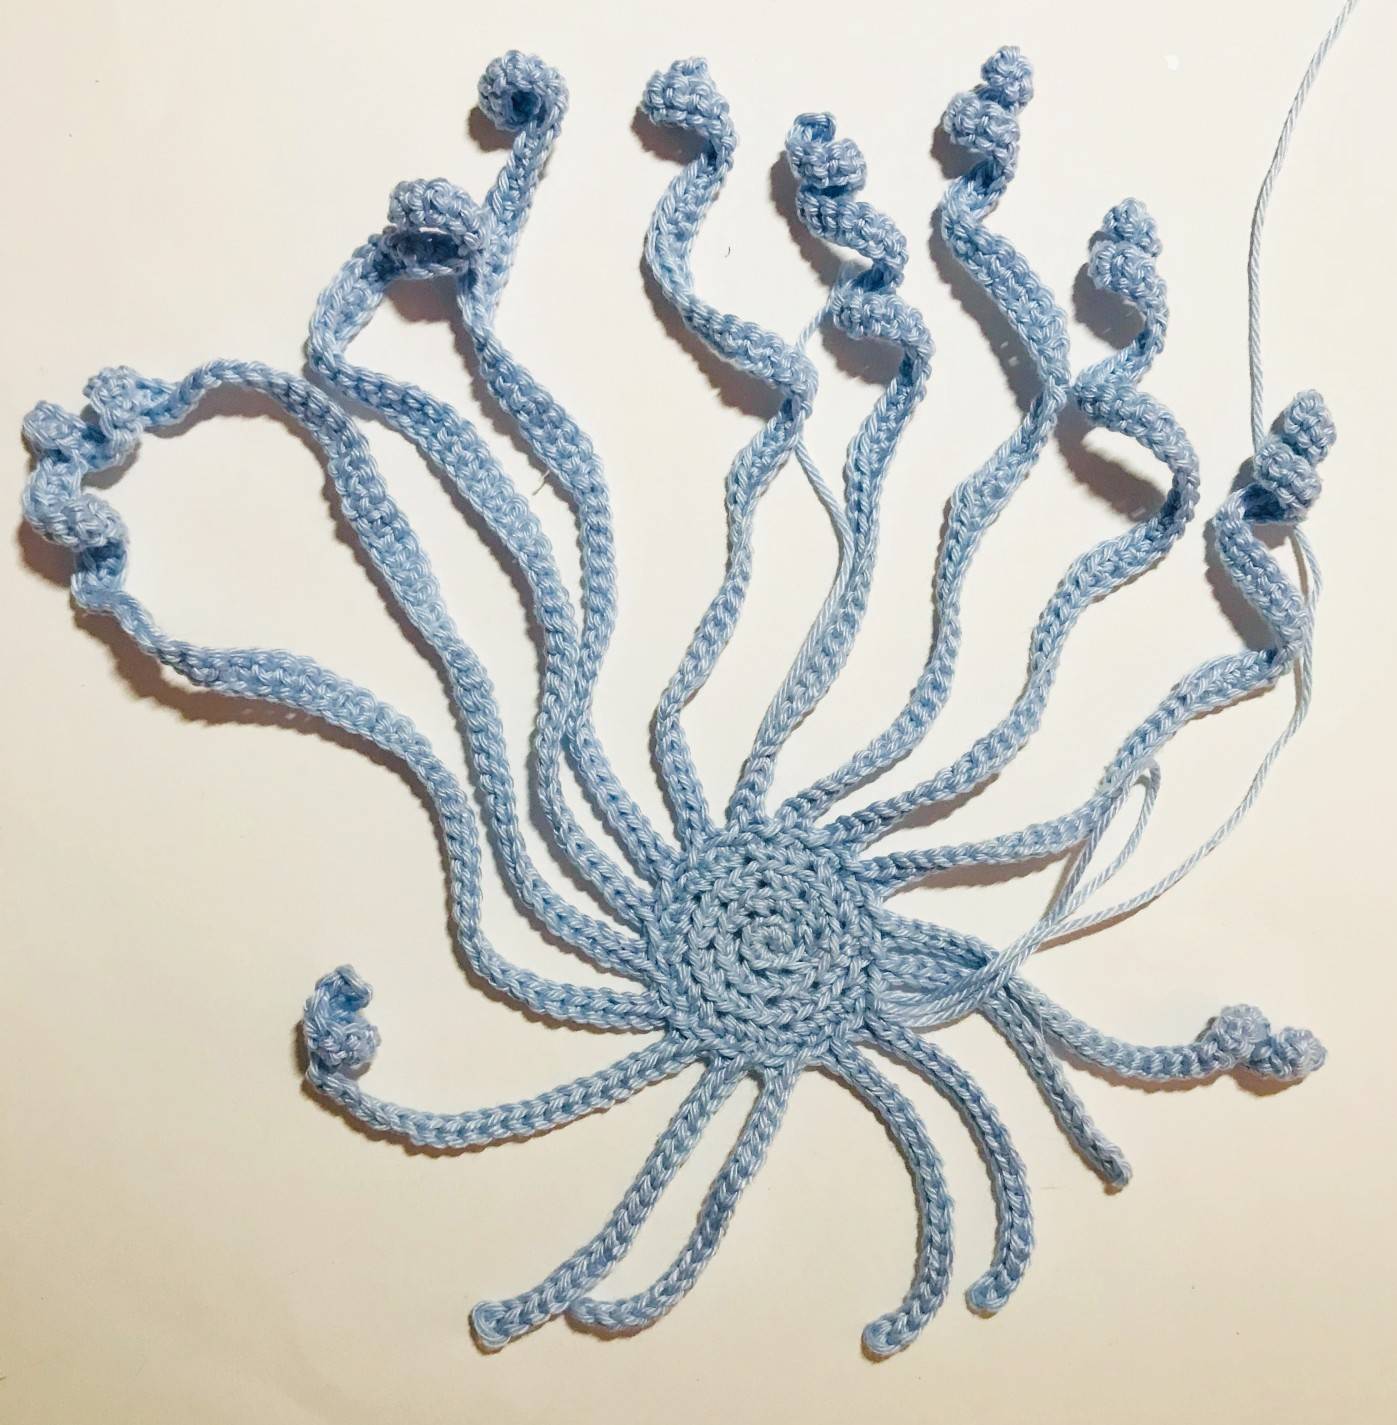
-> We will then return to the inner rows by taking only the loops which exceeds.
We position ourselves on the loop which is at the level of the first strand made, that is to say where the “spiral” begins.
On the inner rows:
Strand 17 to Strand 40: CH 55. from the 2nd stitch, 1 SlSt then 32 sc and 21 SlSt. Finish with 1 SlSt on the base by skipping 1 stitch.
Fasten off and weave in ends.
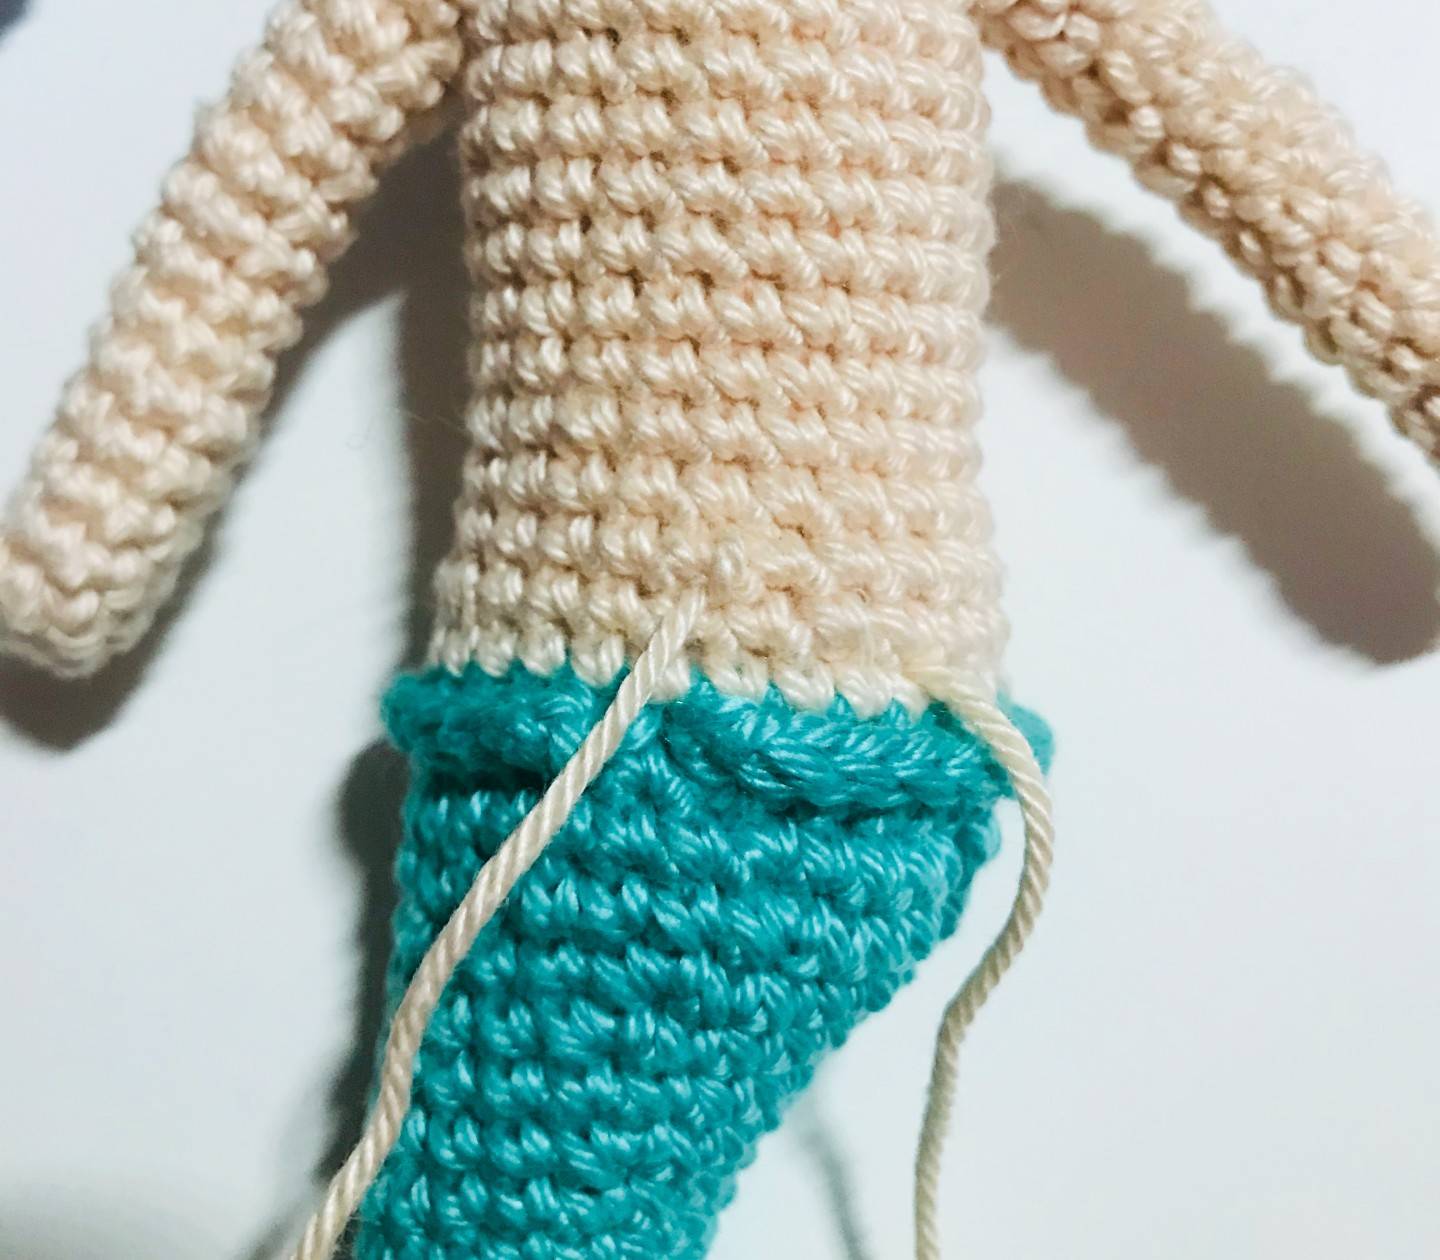
🐚 The edge of the tail
(to be done with dark blue green cotton yarn and crochet 2.5 mm)
Turn the doll upside down to have the tail up and tuck in your hook by placing yourself in the last row of the tail and in the middle of it on the front of the mermaid.
Make CH 1 and 1 sc in the same entry stitch.
Continue to make sc the entire row over 27 sc and leave the 28th empty.
Ch 1, turn and from the 2nd stitch, make 1 SlSt and continue the entire row with SlSt.
Fasten off and weave in ends.
✨ Receive your Magic e-book with 5 free patterns! ✨
⭐ The seashells of the chest x2
(to be done with pink cotton yarn and crochet 2.5 mm)
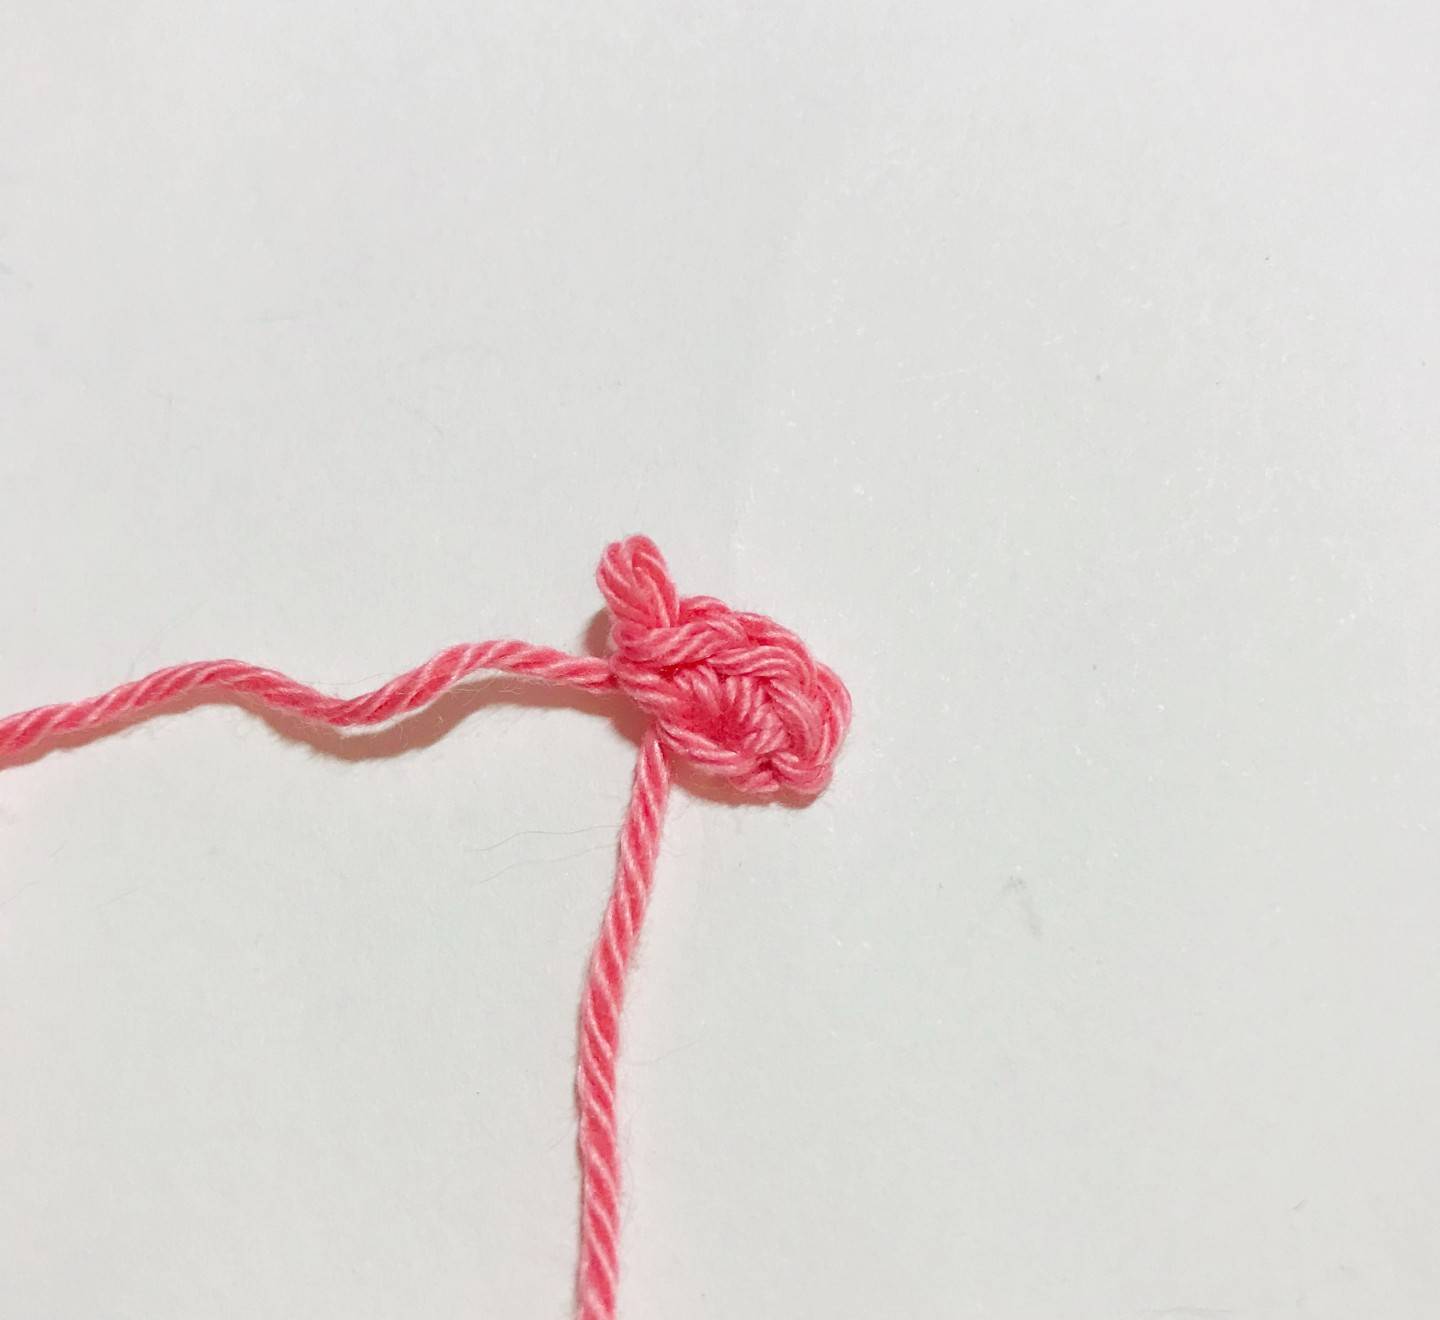
Make a magic ring with 3 sc then tighten it.
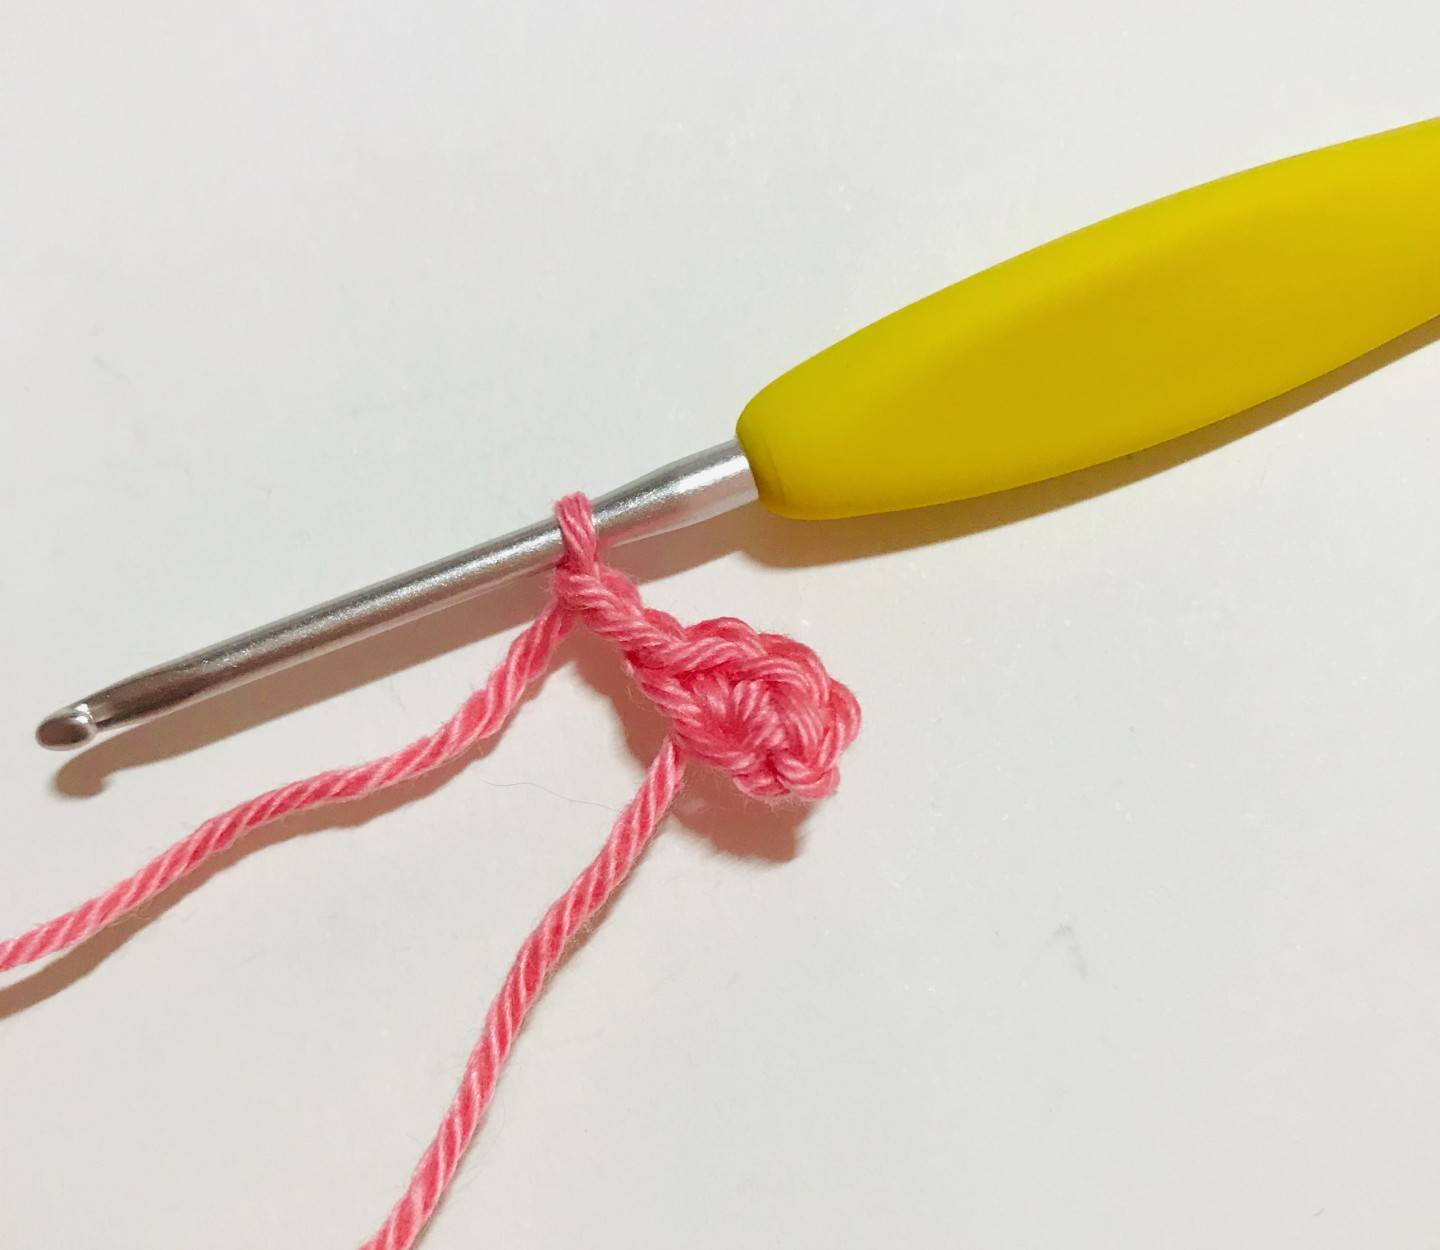
Then make CH 2.
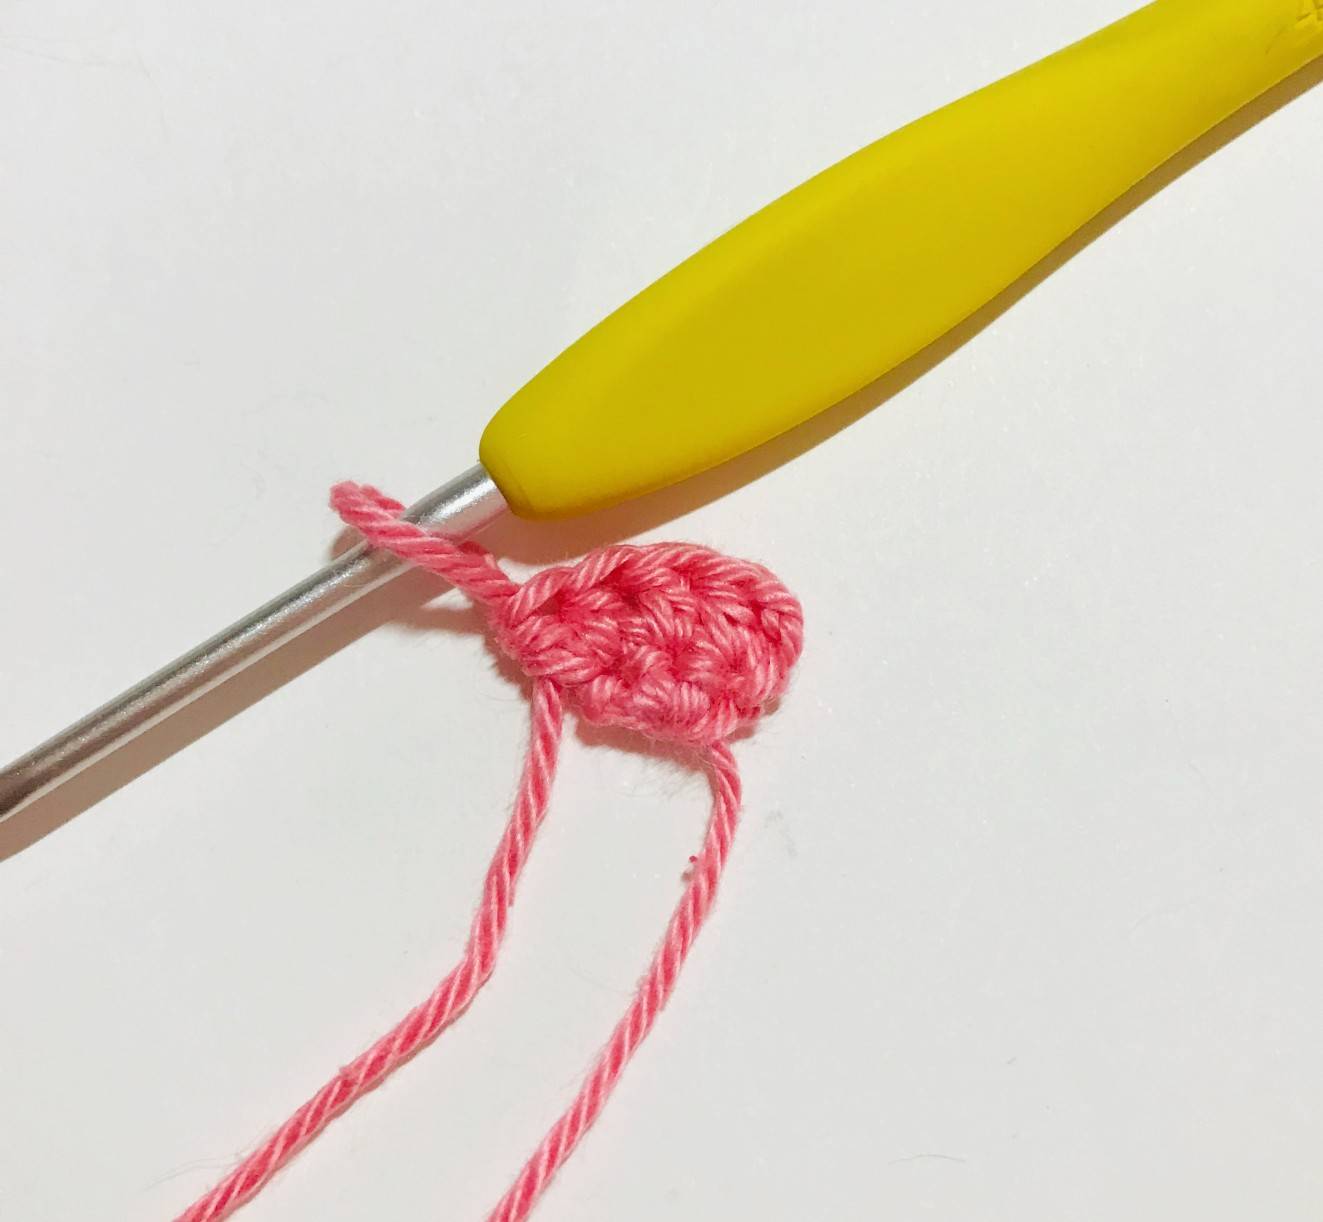
Turn and make the following process:
-> 1 hdc in the same stitch where the CH 2
are located
-> 1 Double crochet
-> 2 hdc in the same stitch
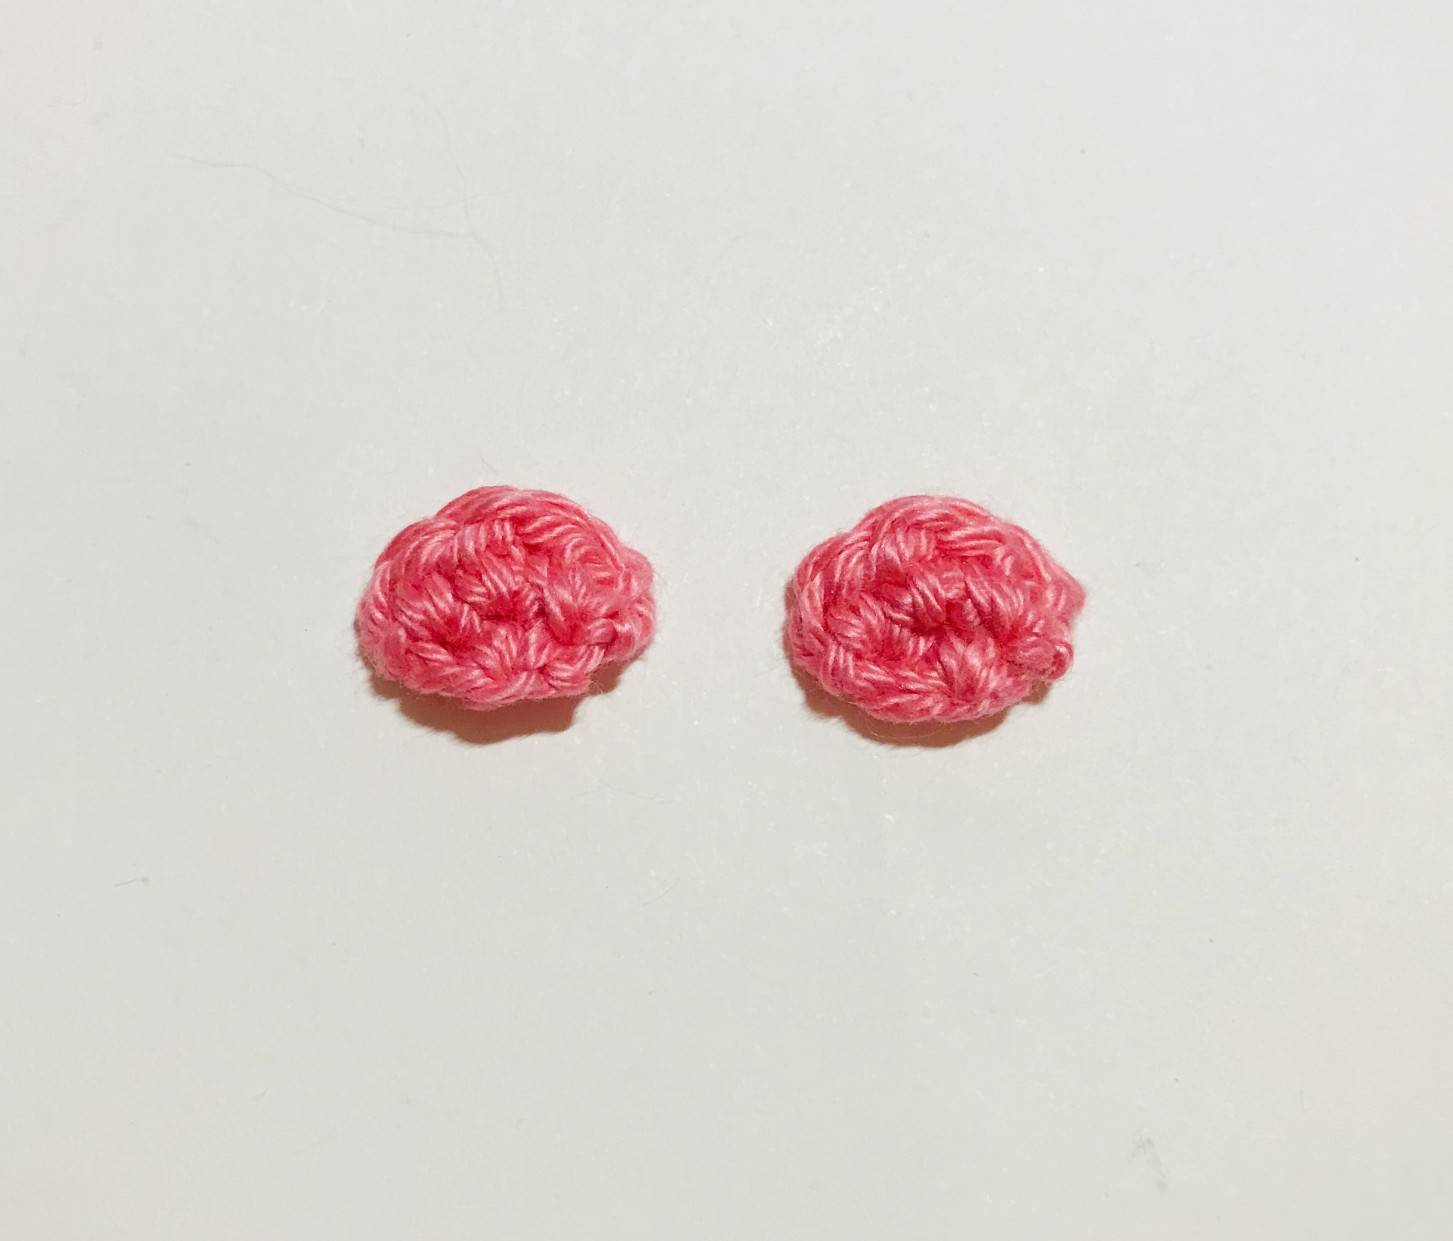
Fasten off and weave in ends.
Make a second seashell.
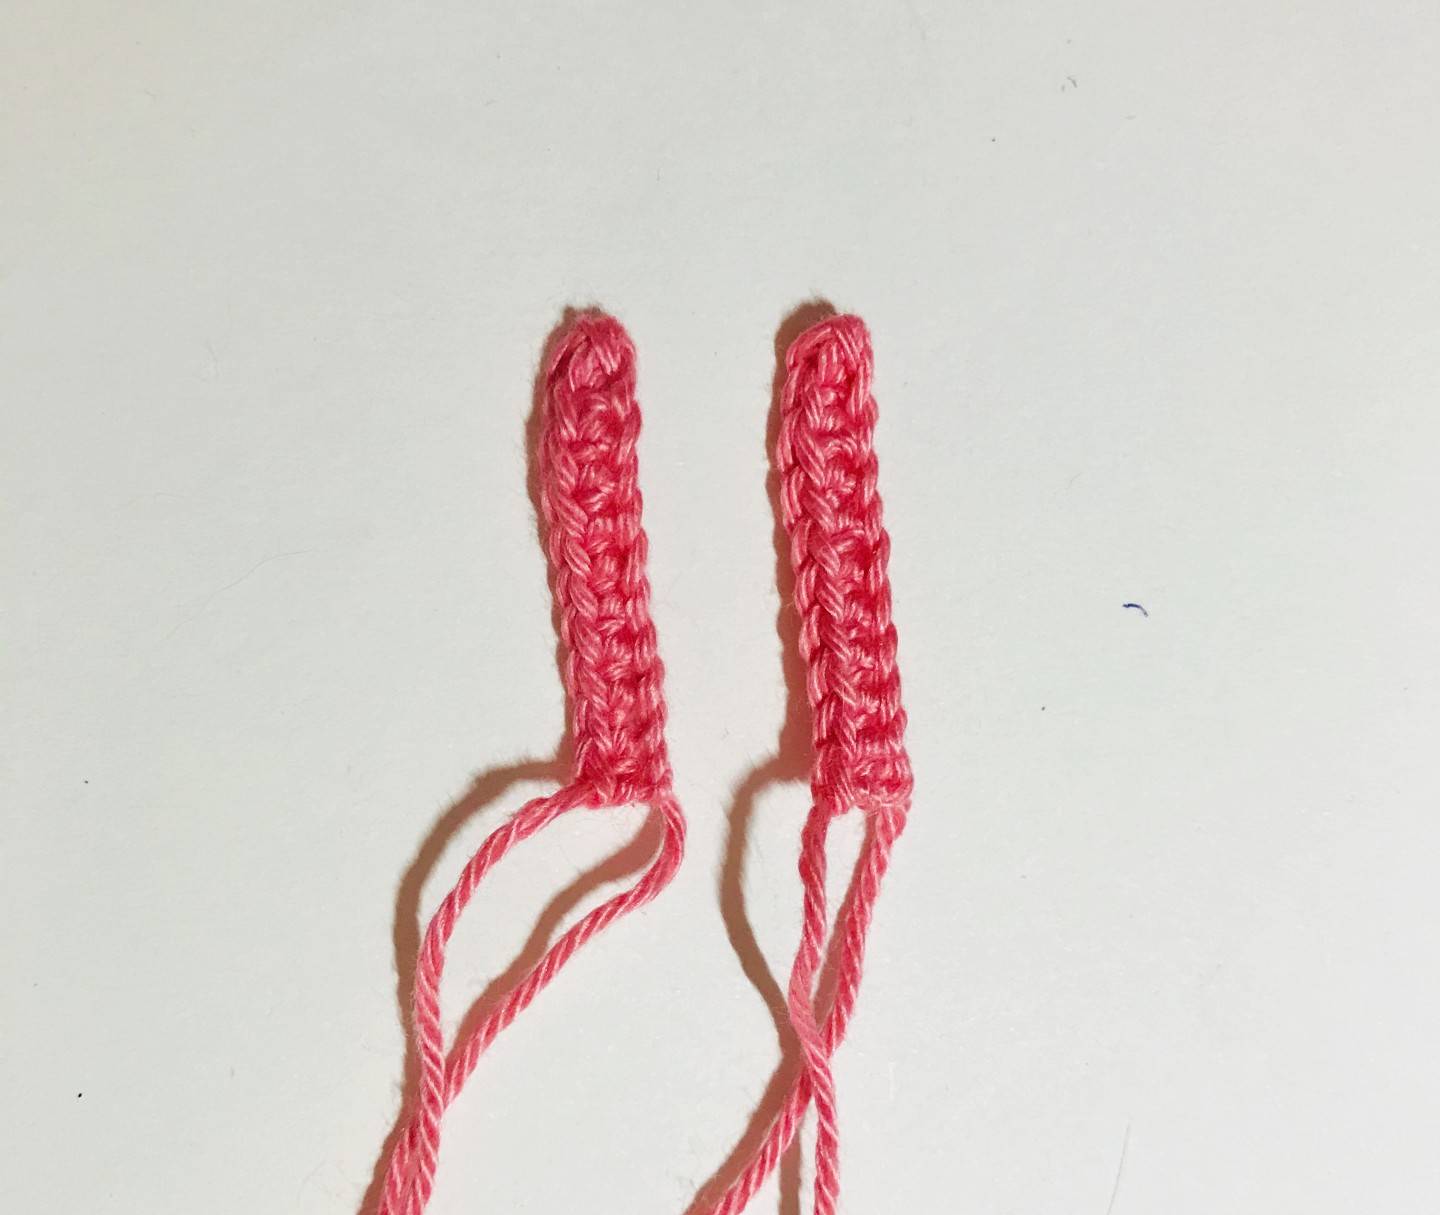
🐚 Arm bracelets x2
(to be done with pink cotton yarn and crochet hook 2 mm)
R1: CH 11
R2: from the 2nd stitch, 1 sc then 9 sc
Fasten off by keeping enough thread for sewing later.
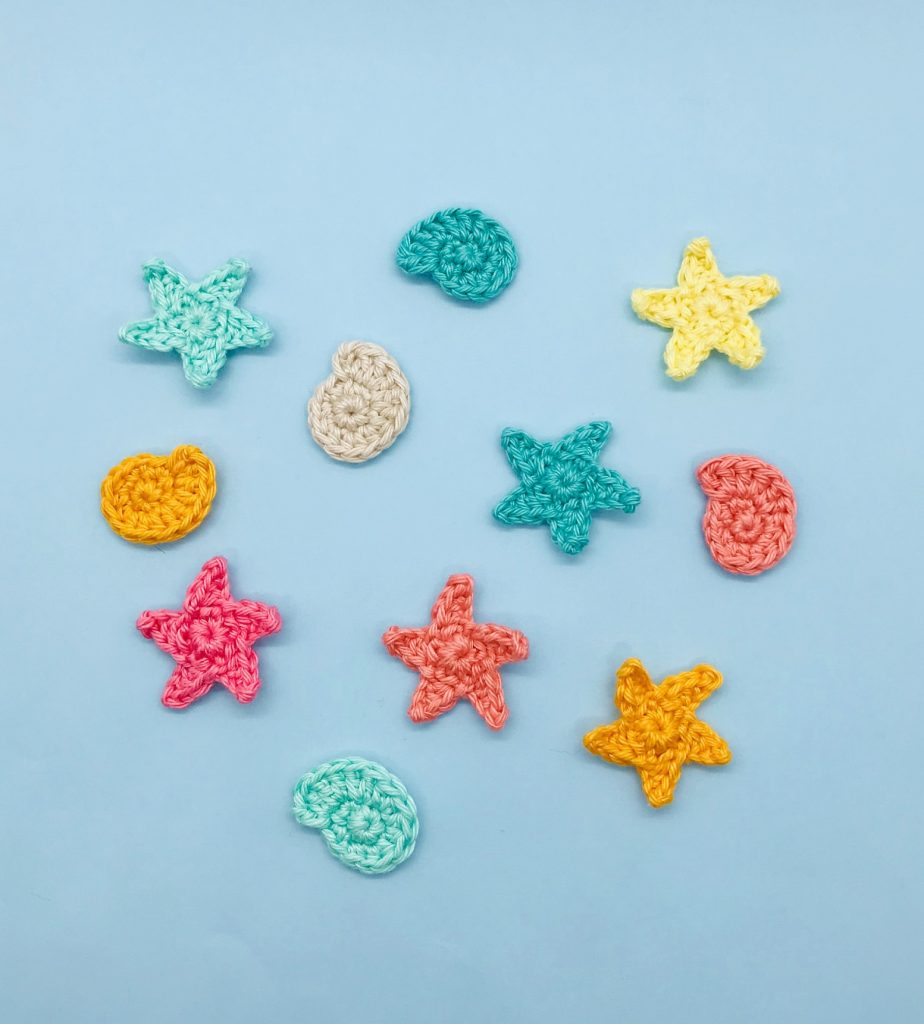
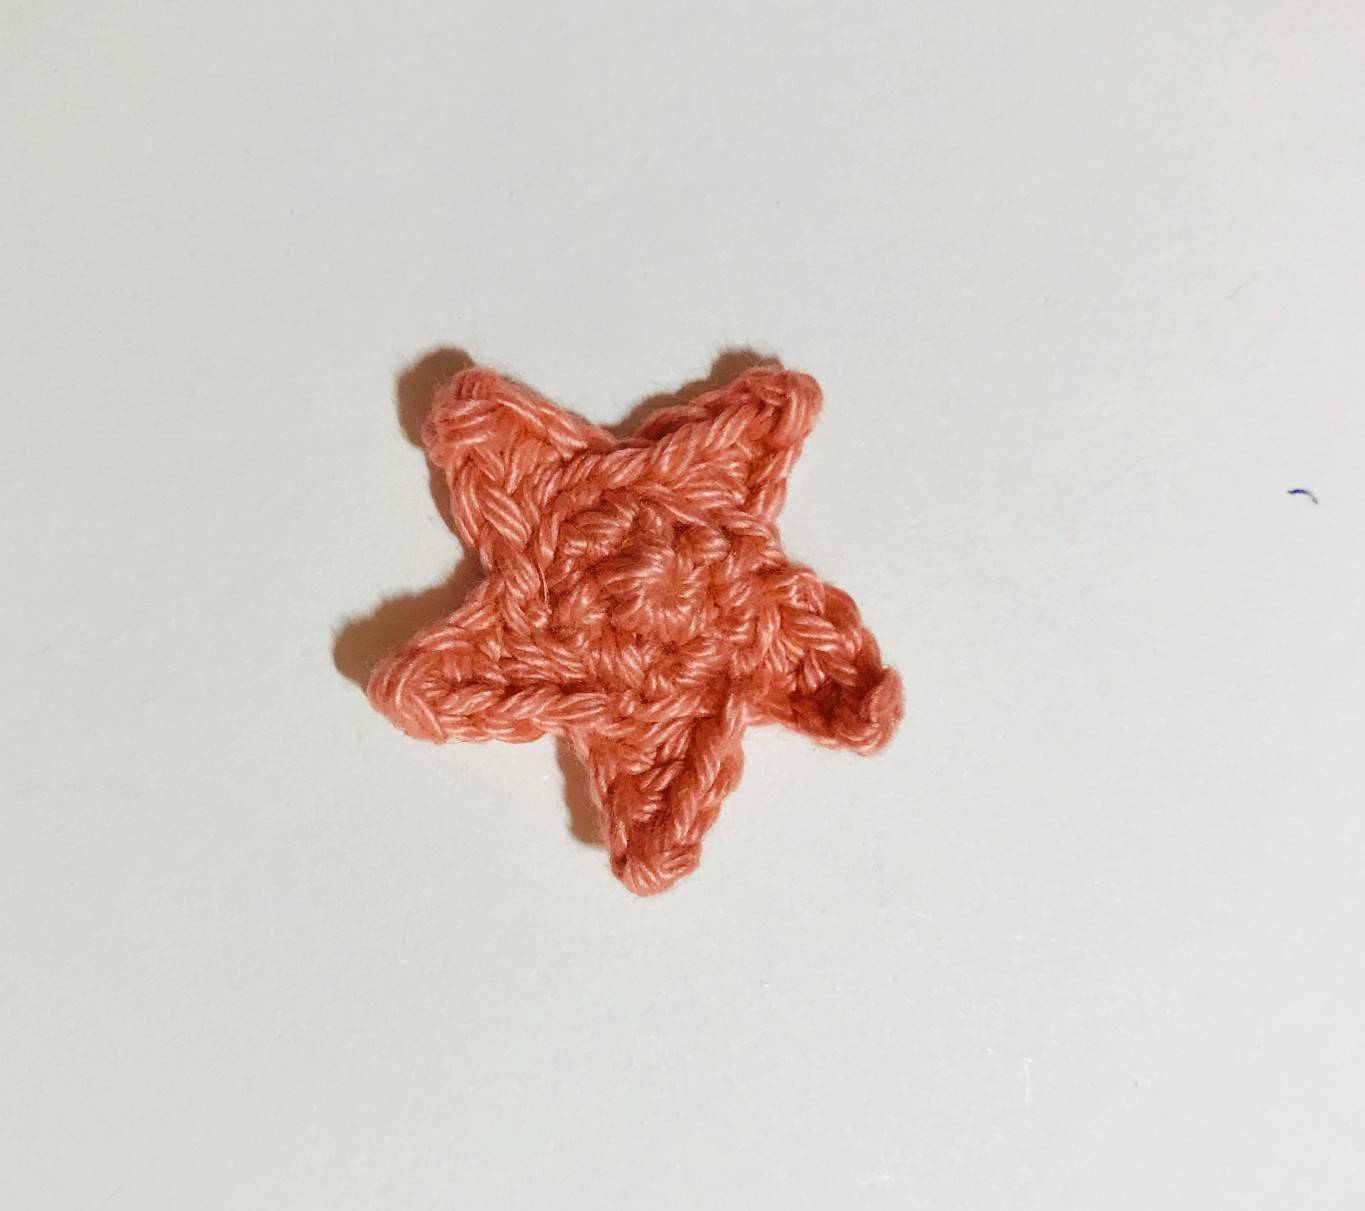
⭐ Starfish x2
(to be donne with yellow and coral cotton yarn and crochet hook 2 mm)
-> Make 1 star in coral color and 1 in yellow.
R1: magic ring with 10 sc and 1 SlSt to close the row
R2: CH 4. from the 2nd stitch, 1 SlSt then 1 sc, 1 hdc -> skip 1 stitch on the base and make 1 SlSt.
-> This process is to be carried out 5 times for the 5 branches of the stars.
-> Fasten off and weave in ends.
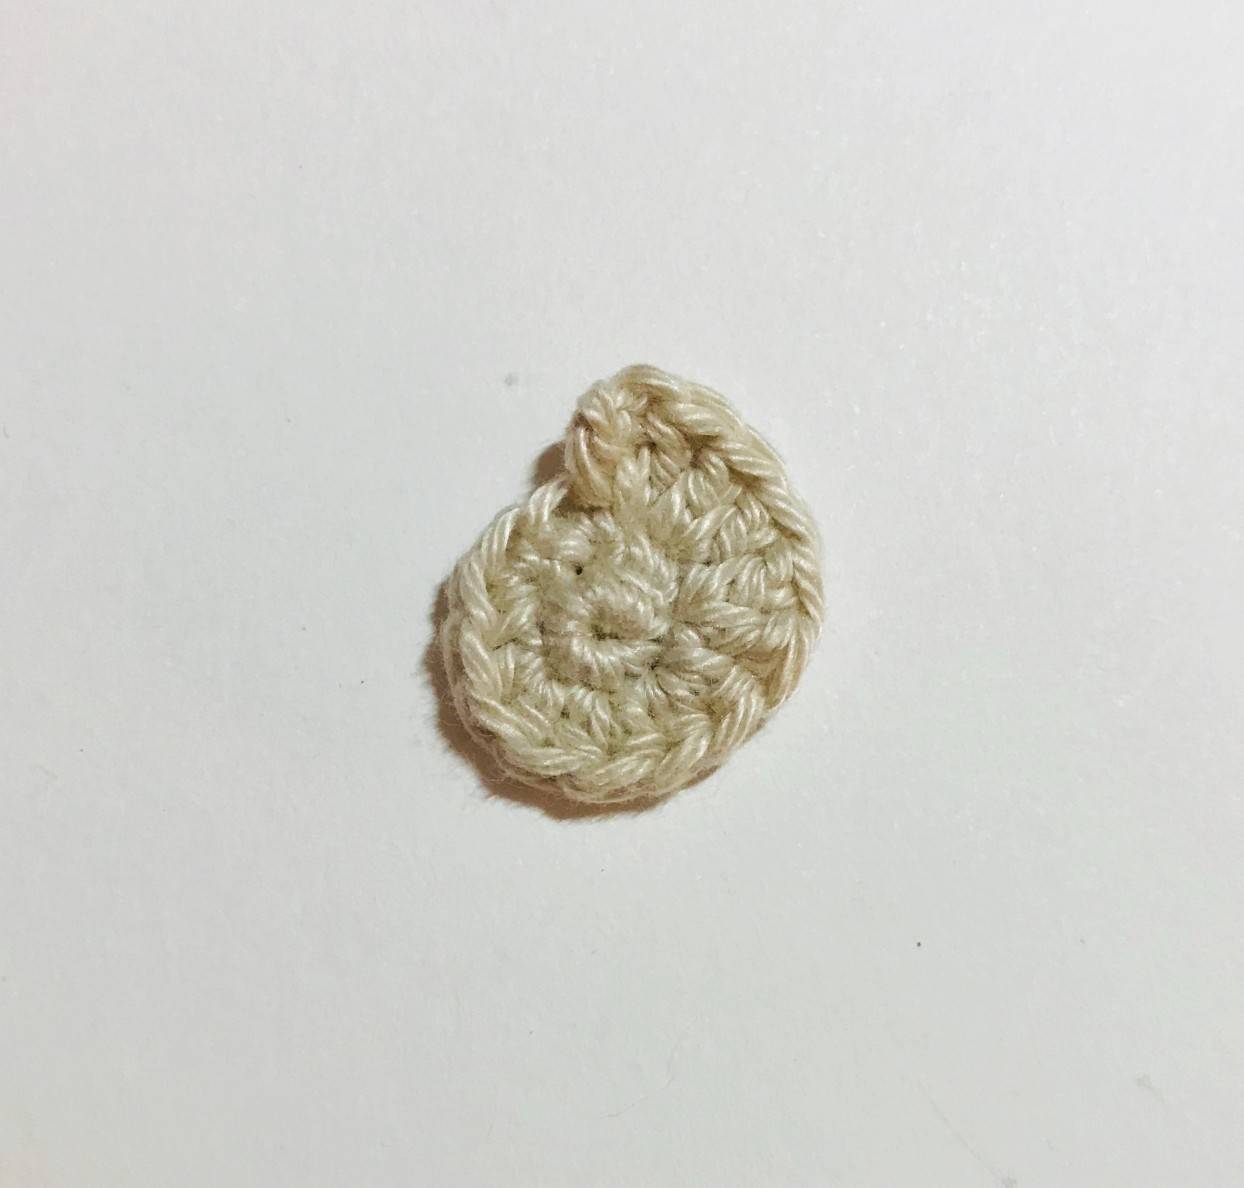
🐚 The seashell of the hair
(to be done with light grey cotton yarn and crochet hook 2 mm)
R1: magic ring with 6 sc
R2: 3 Inc in sc, [2 hdc] x3
R3: [2 dc] x3
Fasten off and weave in ends.
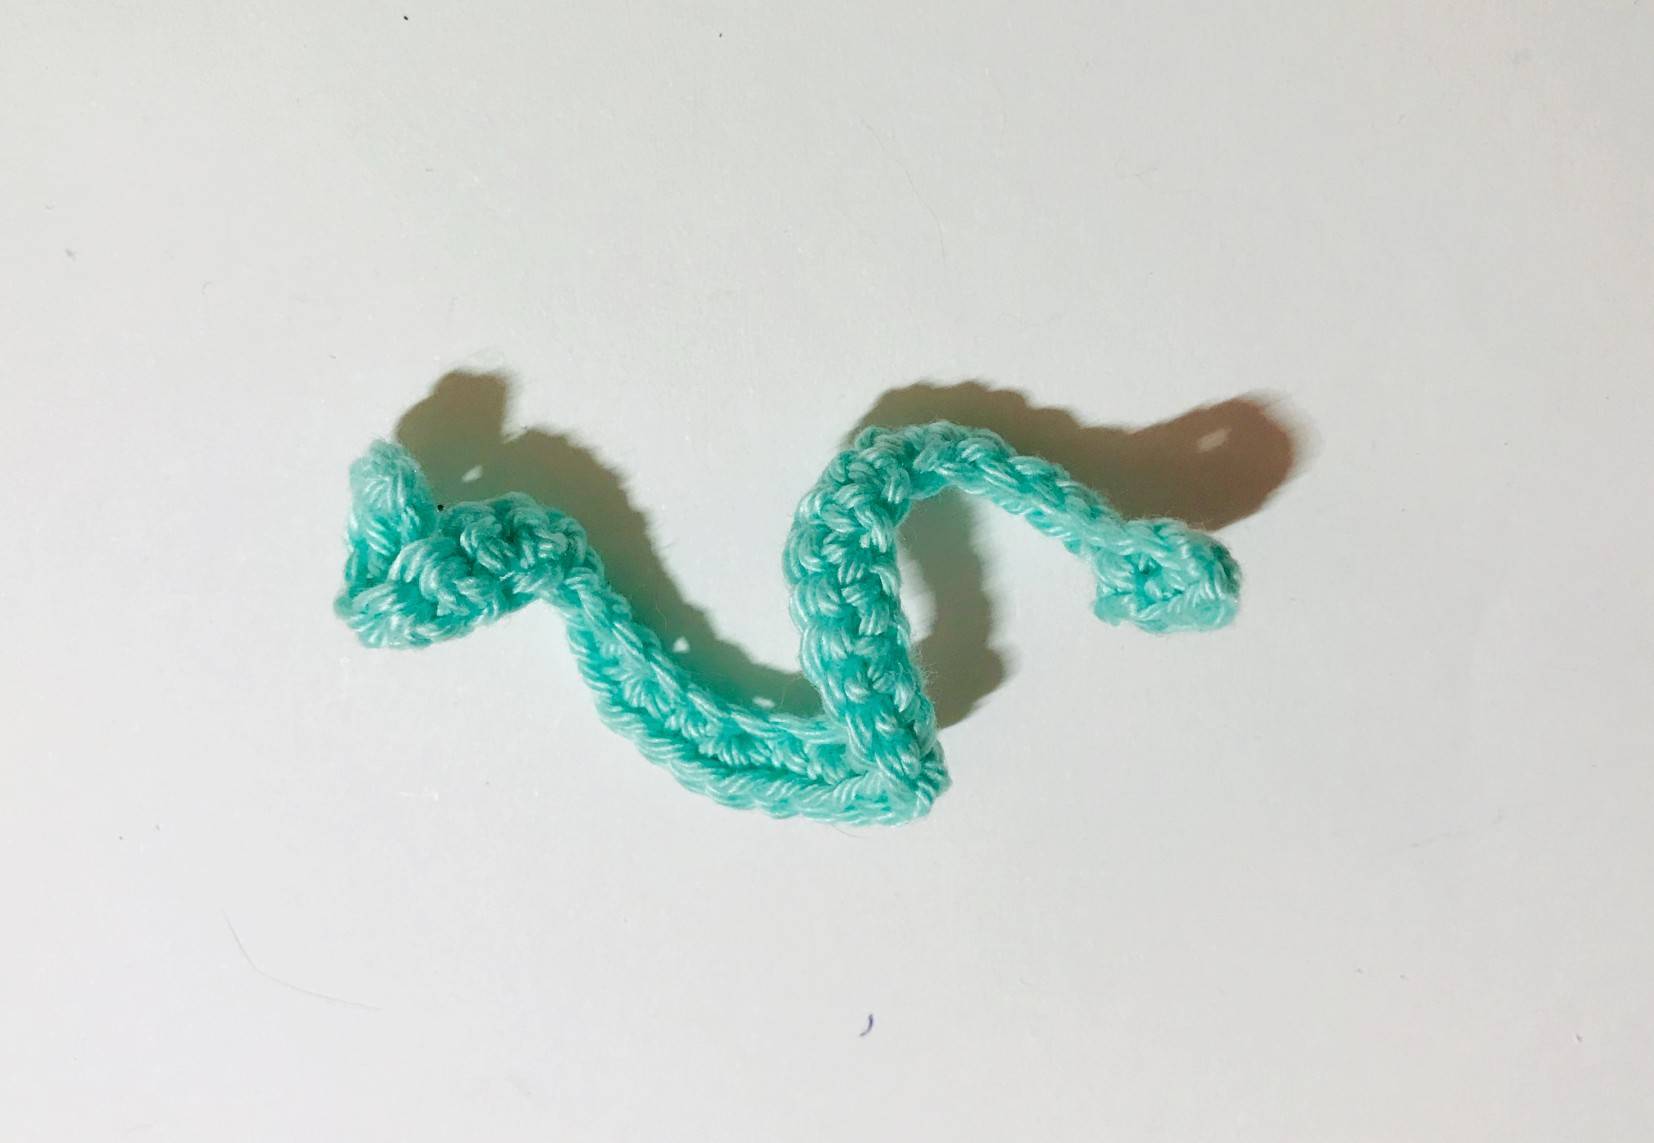
⭐ Seaweed in the hair
(to be done with light blue green cotton yarn an crochet hook 2.5 mm)
R1: CH 30
R2: from the 2nd stitch, 1 sc then *1 Inc, 1 sc* x13 and finish with 1 SlSt.
Fasten off and weave in ends.
Find more magic patterns ✨

🧜♀️ Assembly and finishes🧜♀️
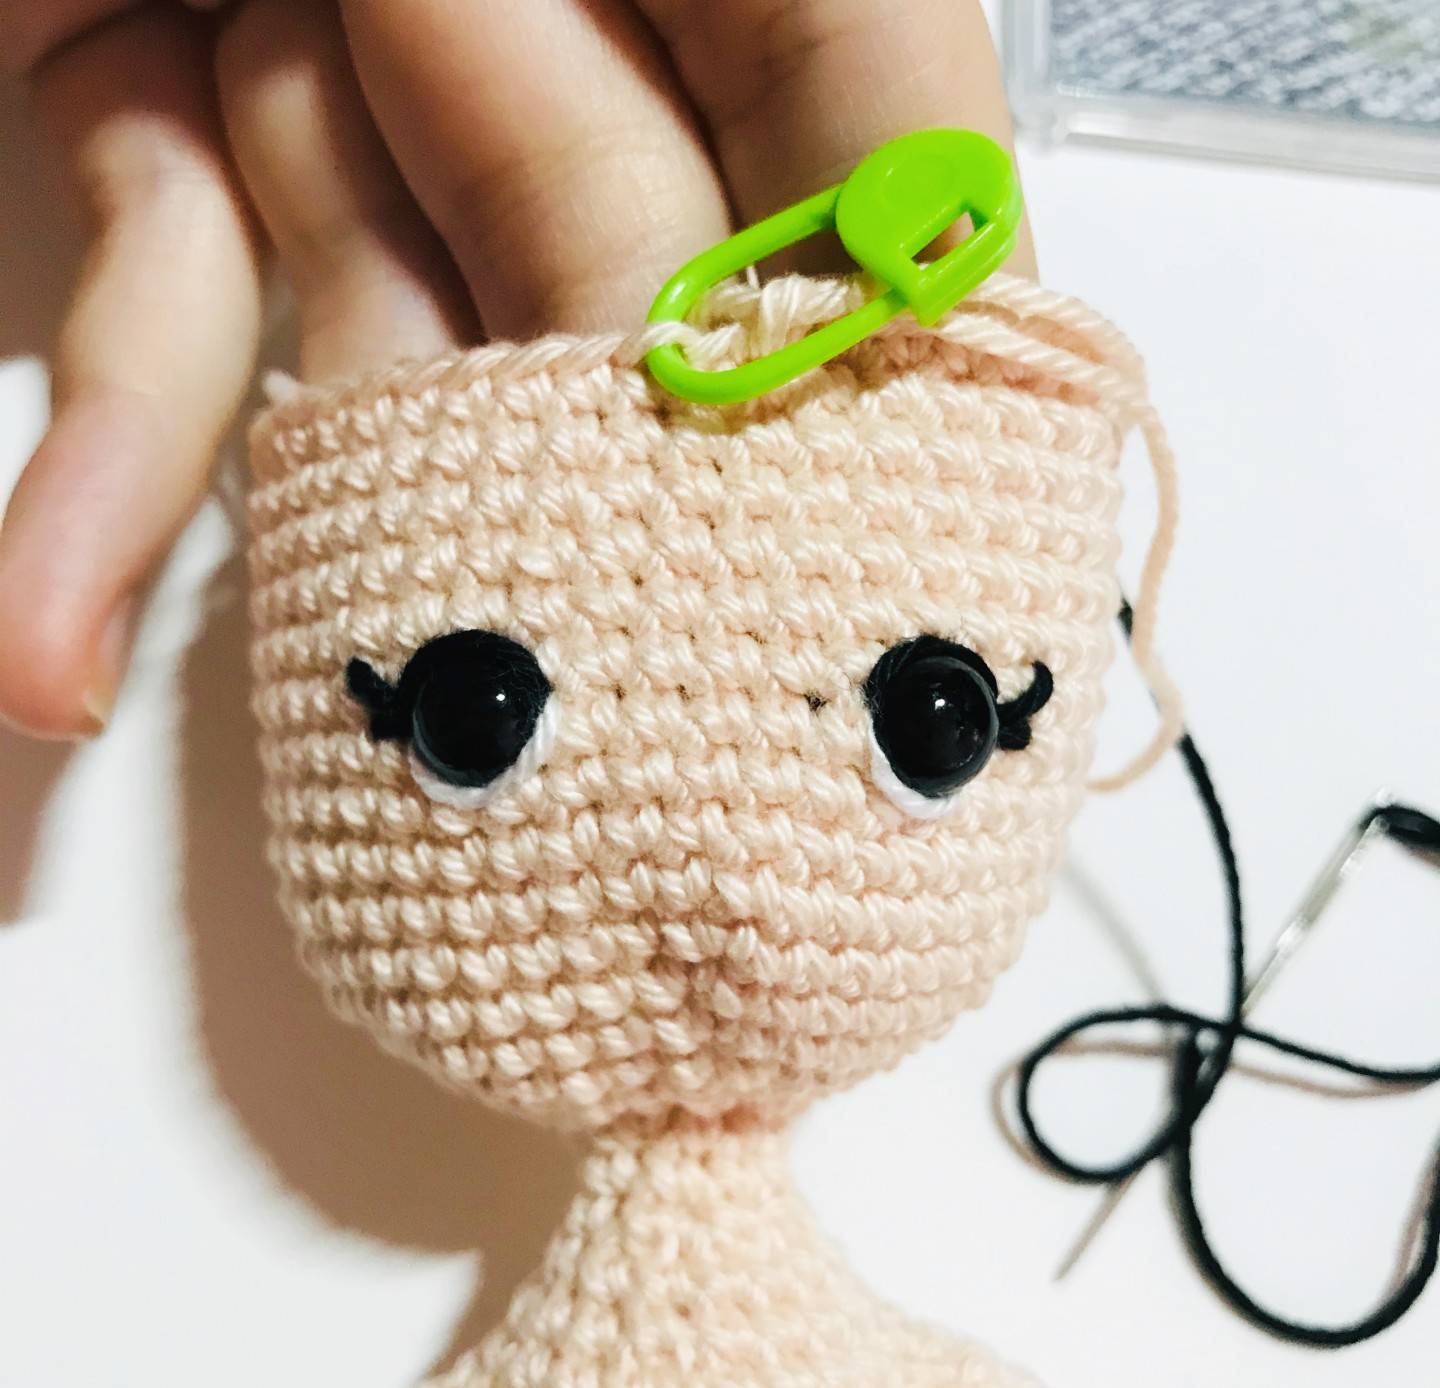
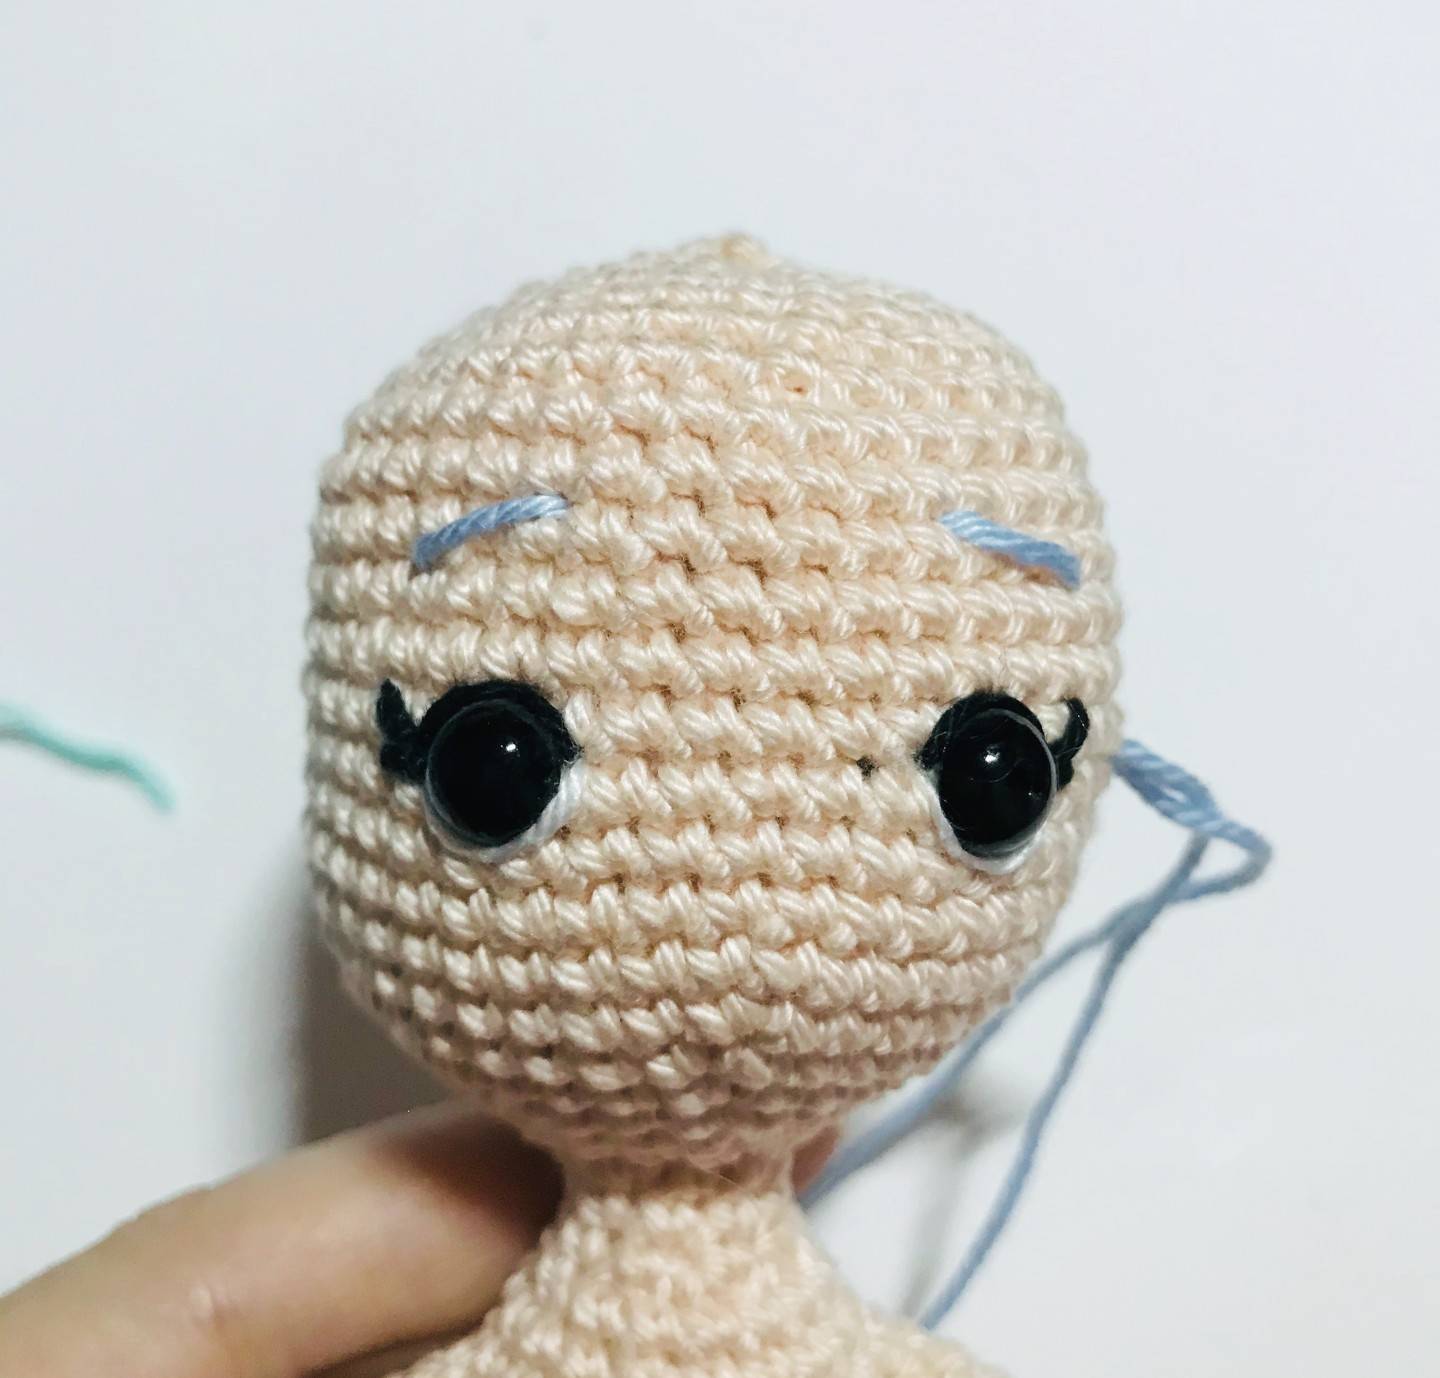
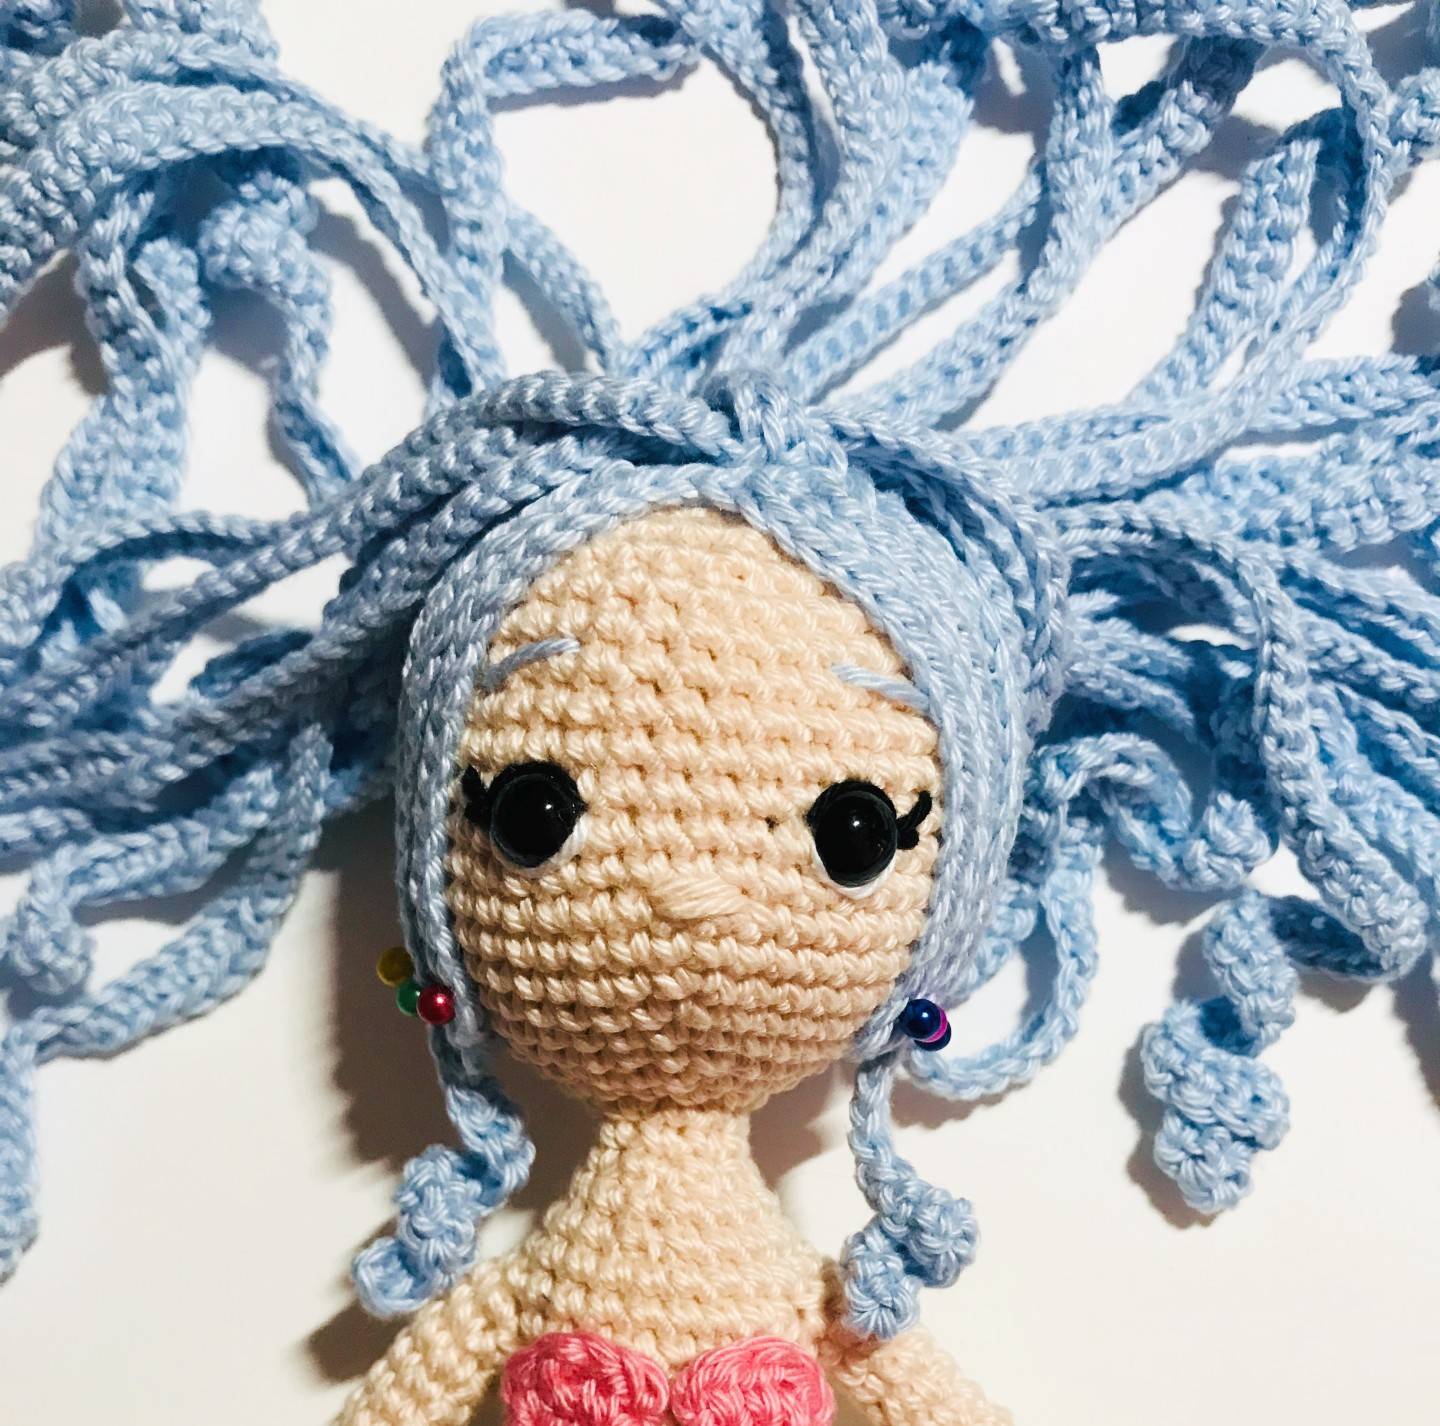
⭐ Face details
The eyebrows
With light blue thread, pull it in to bring it out 3 rows above the eyes and 1 sc from the edge of the eye horizontally.
Pull it out 1 row vertically below, 3 sc in width, and parallel to the other outer edge of the eye.
Continue by making the second eyebrow above the second eye.
Pull out the thread in the same place where you entered it at the very beginning. Tie a knot, cut and
pull in the remaining thread.
The nose
Position yourself 1 row under the eyes, between the two eyes to bring out your beige thread.
With 2 sc in width, pass the yarn 3 times. Take it out at the entry point, tie a knot and weave in ends.
Les joues
With pink blush, apply to the cheeks, positioning yourself under the eyes.
Apply about 3 rows height and 3 rows width.
🐚 Details of the body
The navel
Position yourself 2 rows above the edge of the tail and horizontally in the middle of the belly.

Pass the thread 5 times to a height of 1 stitch.
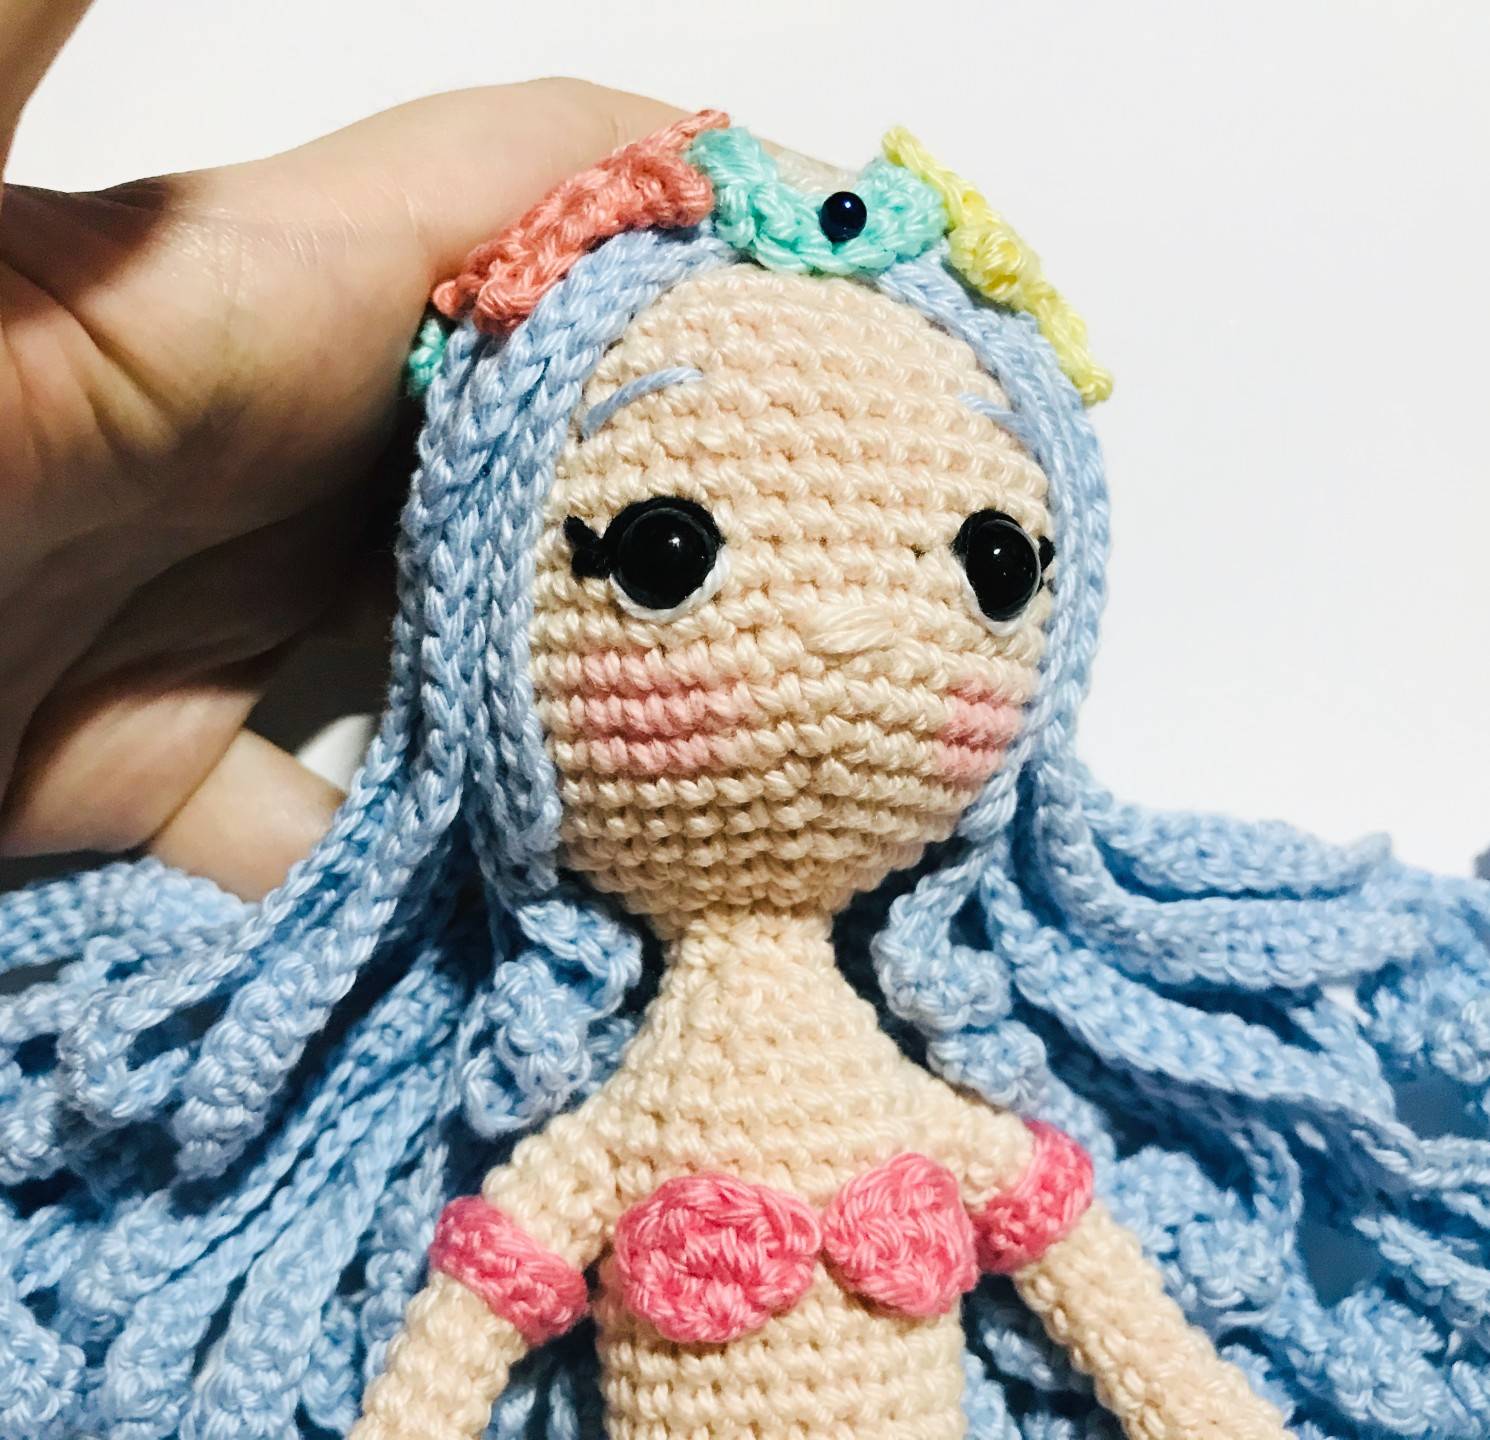
⭐ Seashell breast
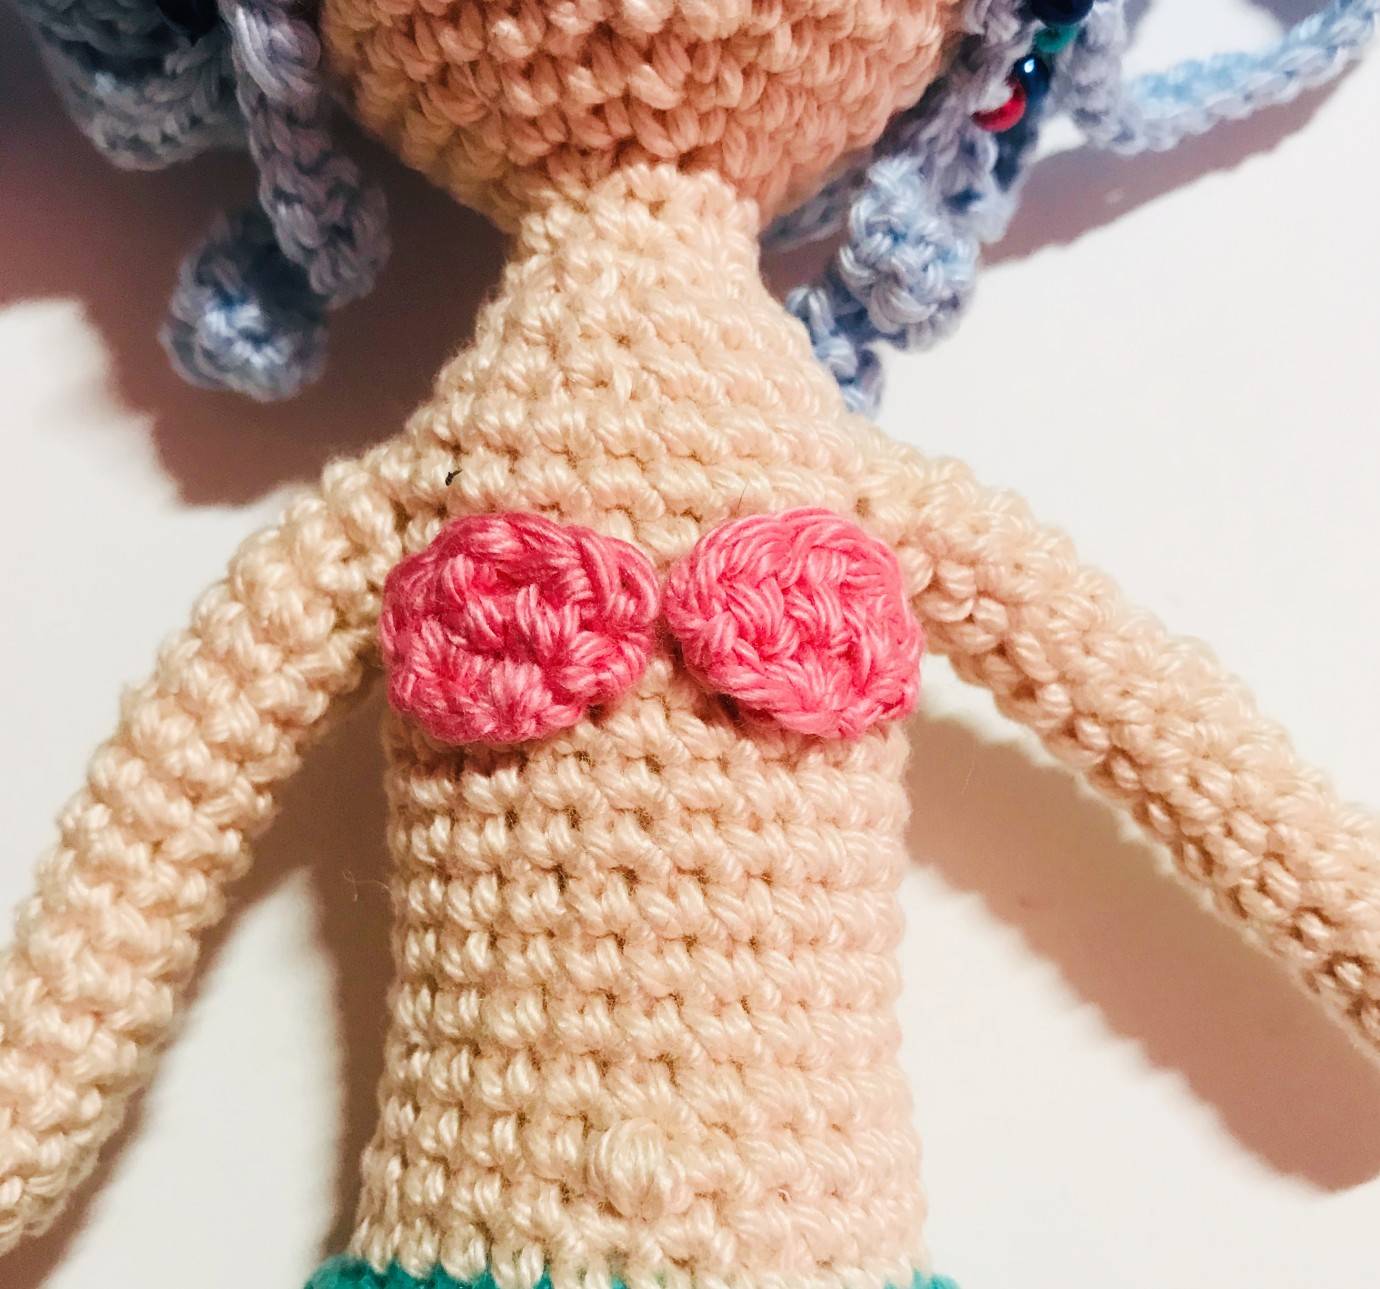
Count 9 rows above the navel (9 being the middle of the seashells) and glue the two seashells one next
to the other.
🐚 Hair
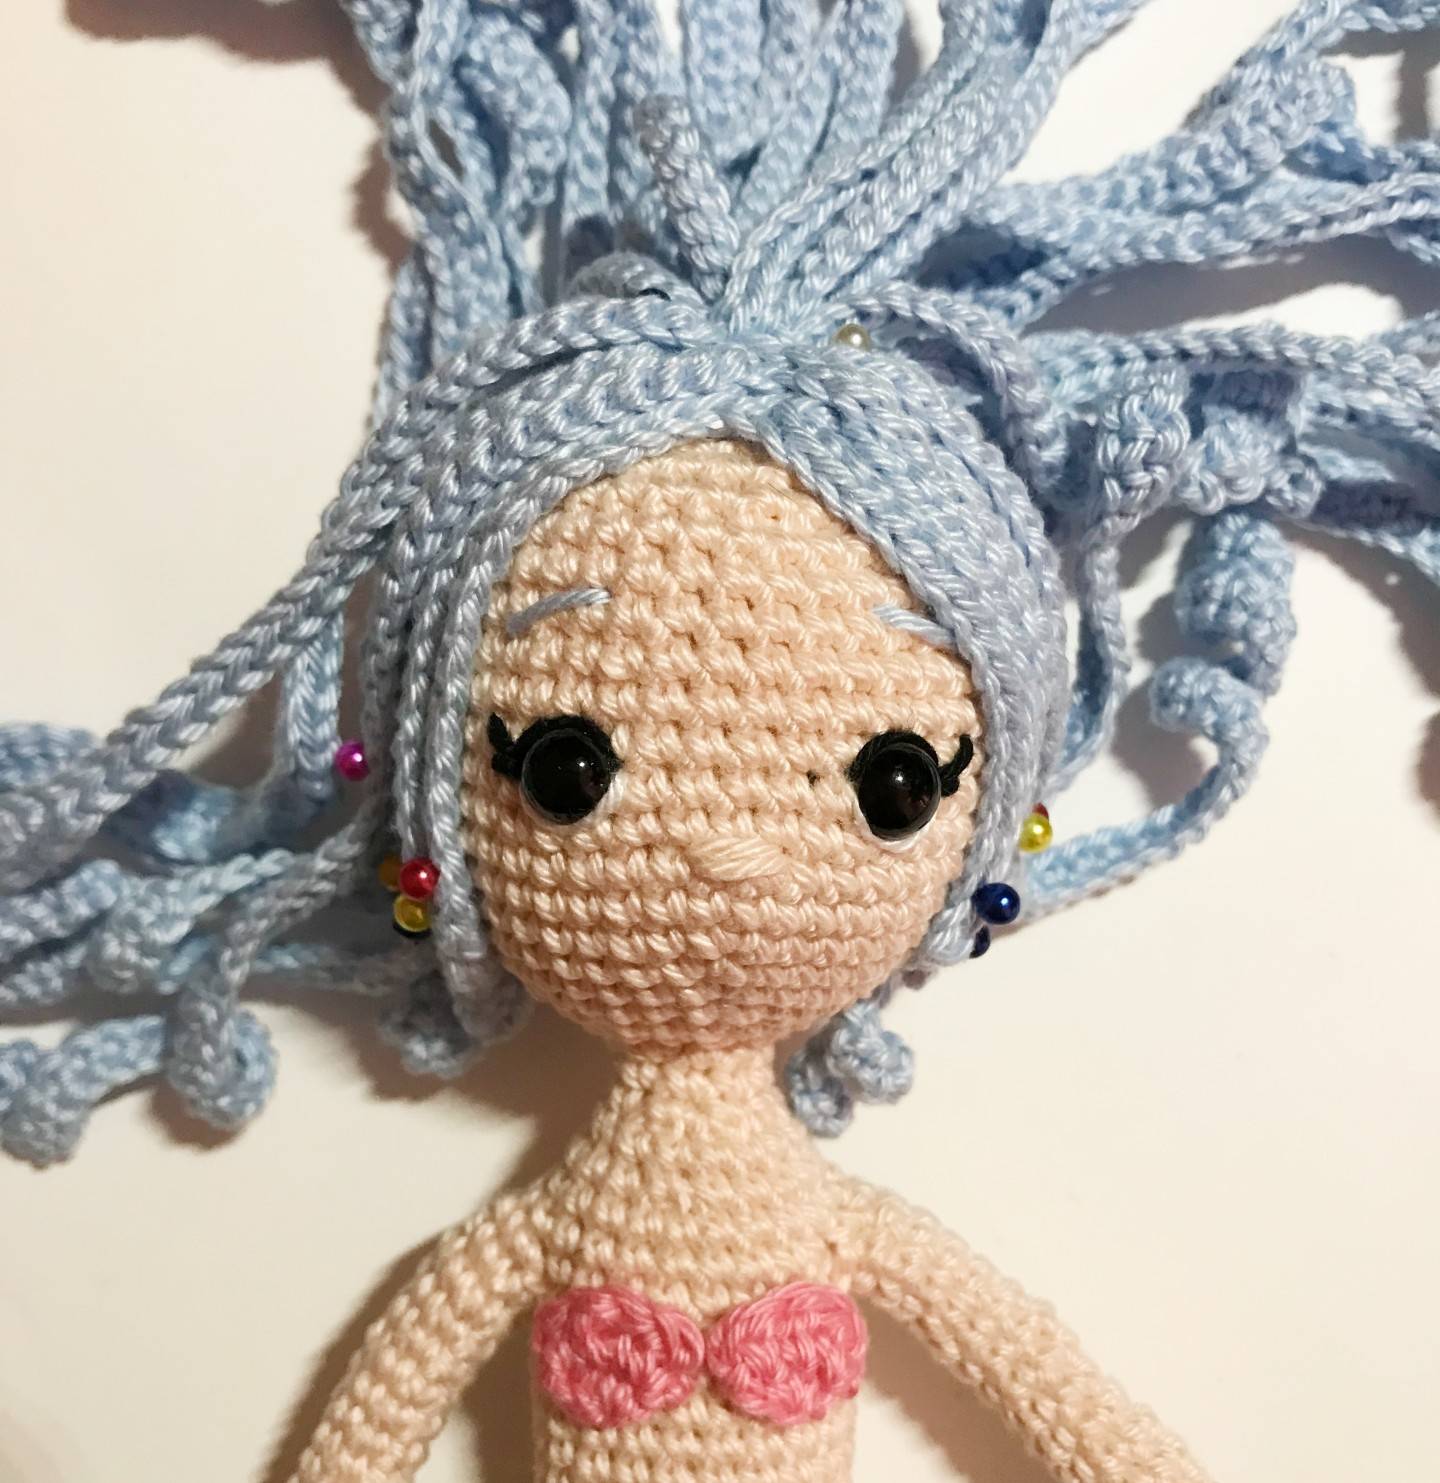
-> Position the hair so that there are in front and on your left 2 short strands and 1 half long and on the
right 3 short strands and 1 half long.
-> Glue the base of the hair by positioning the middle of the base with the middle of the top of the
head.
-> First glue the short and half long strands on the face as close as possible to the eyelashes as in the photo over about 5 cm in length for the half long
strands and over the entire length for the short ones.
-> the half long strands must be present at the front to fall naturally on her shoulders.
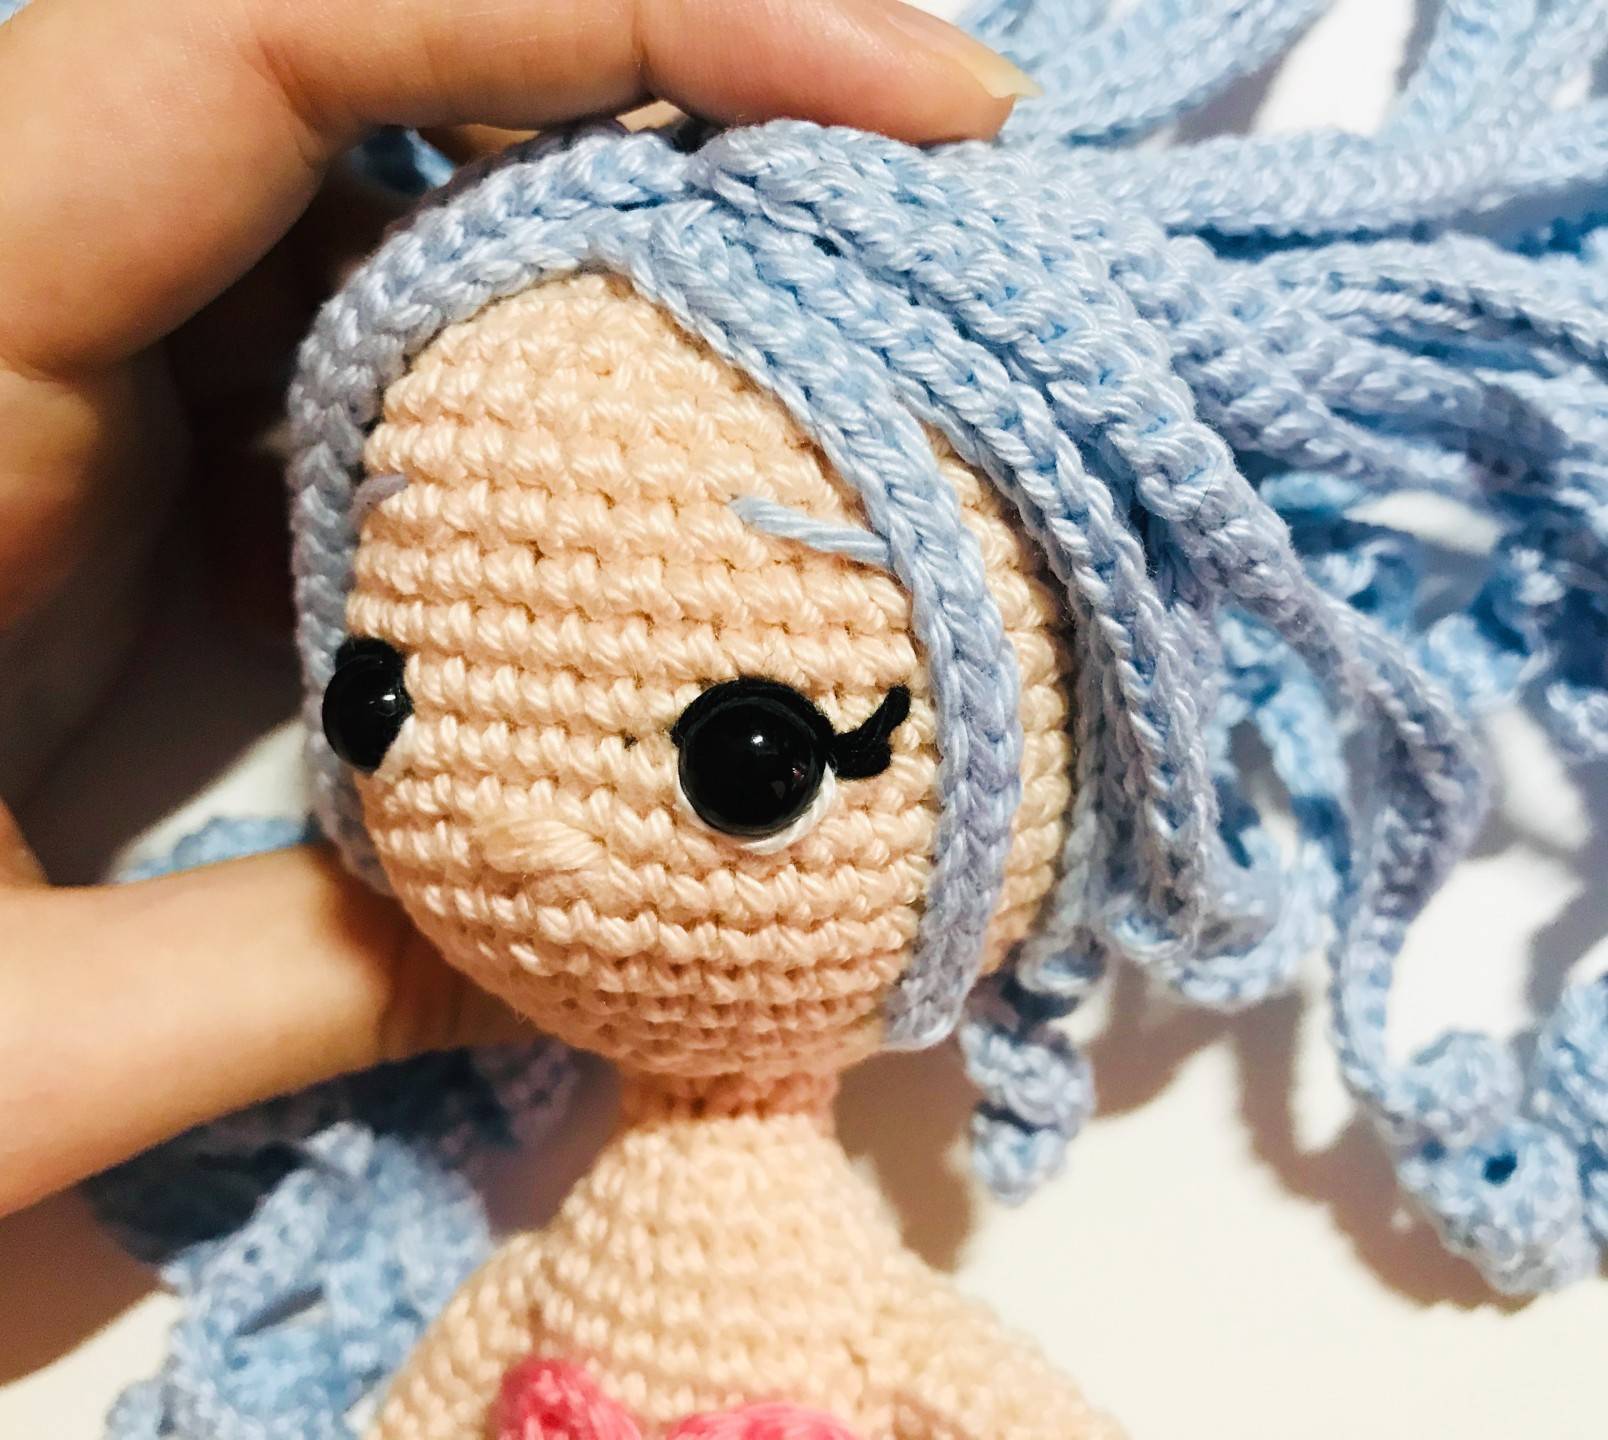
-> Then glue the other strands, strand by strand, starting with the left side of the face and those of the outer row. Glue them on about 5 cm in length. Then fill in the spaces with the strands from the
inner row.
-> Use pins to hold the strands together while the glue dries.
Gluing the strands one by one.
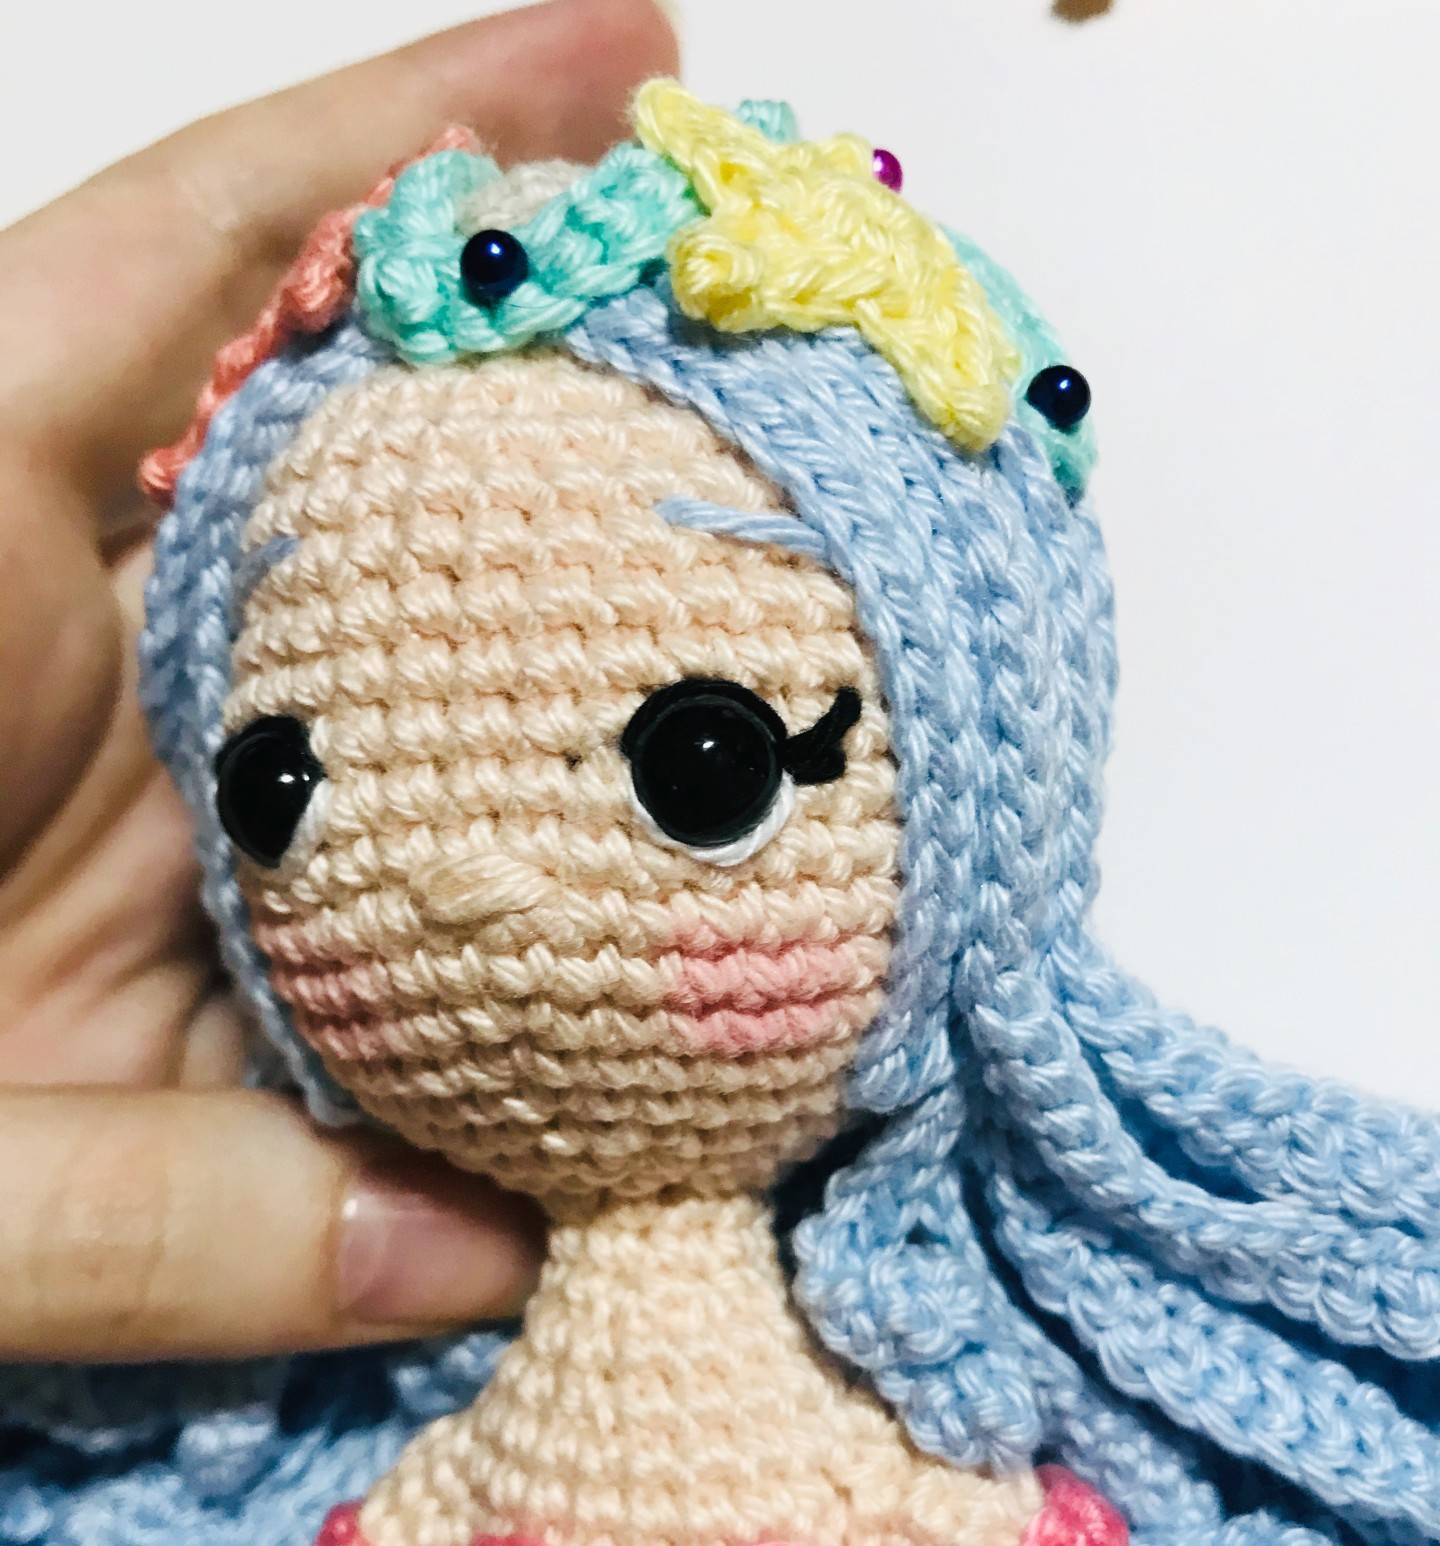
Hair details with sea crown
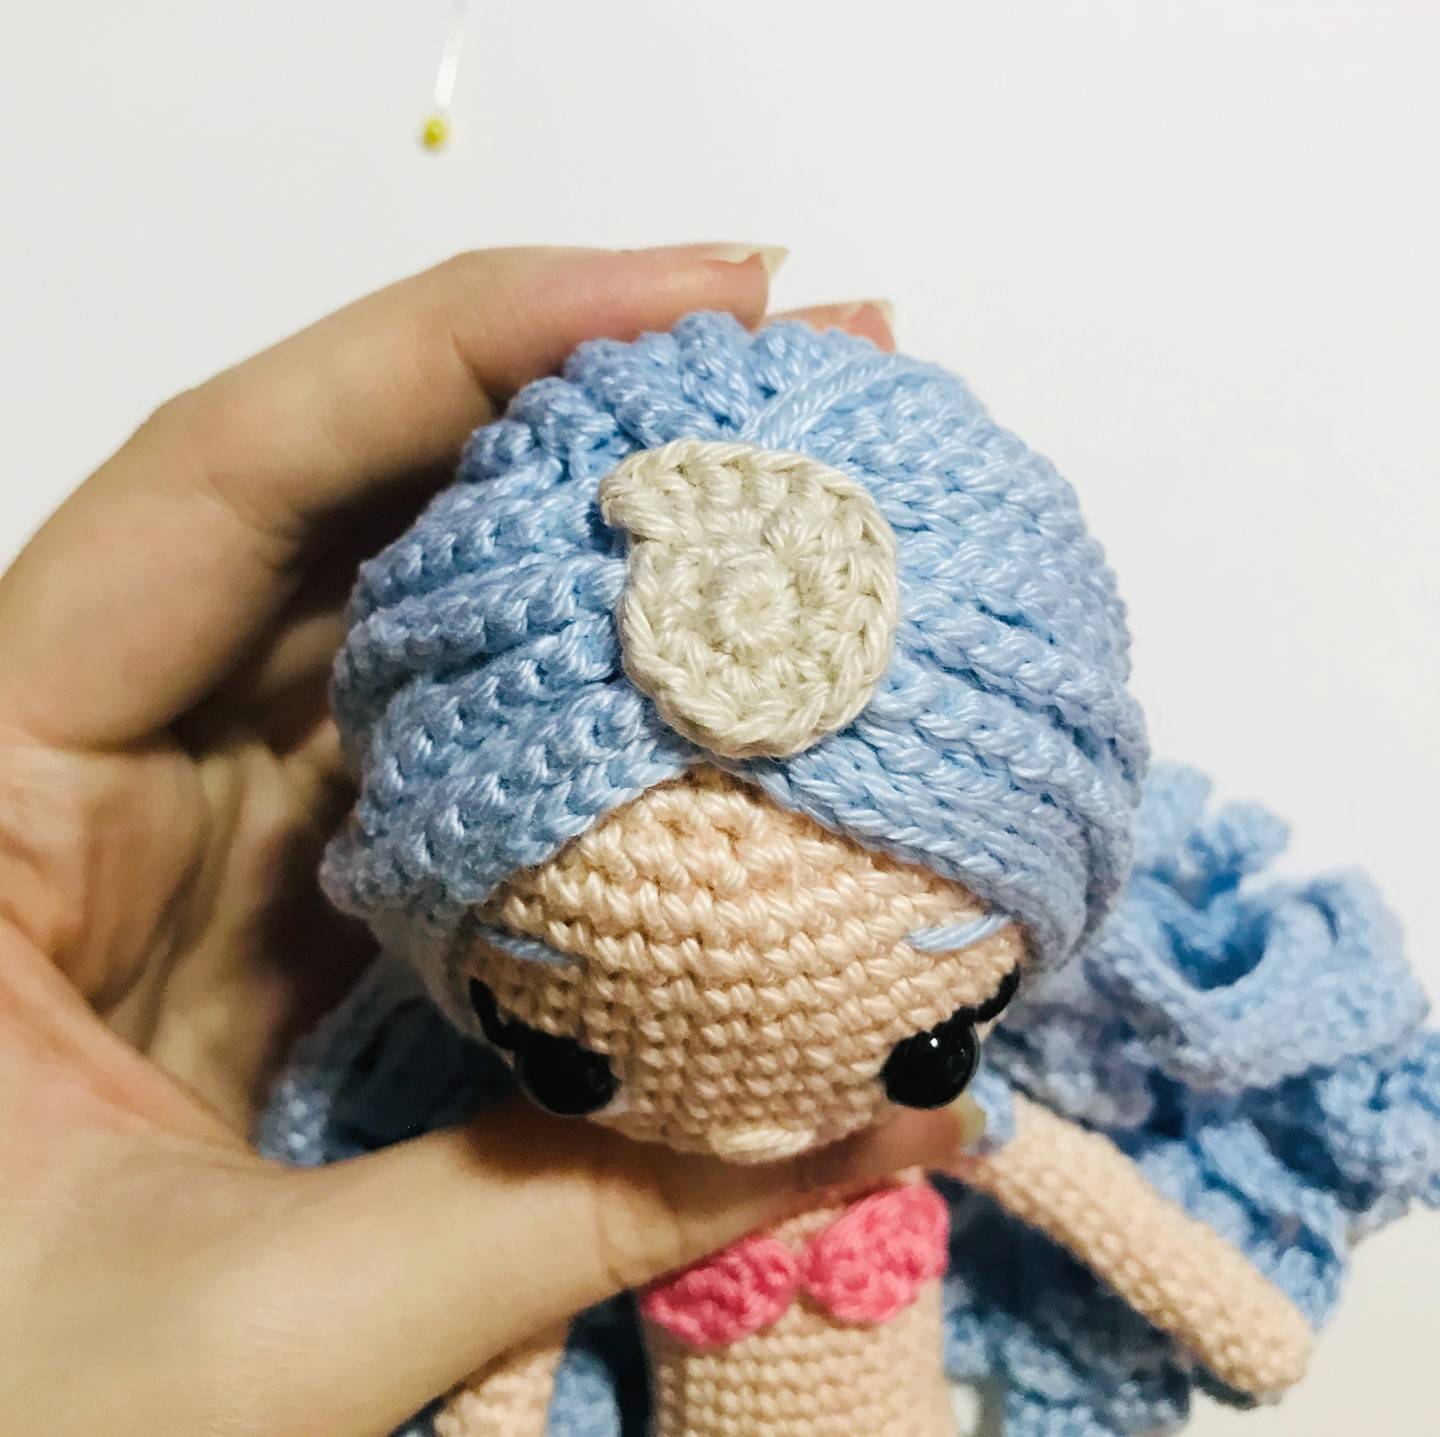
First glue the seashell on the middle and at the end of the hair in the front.
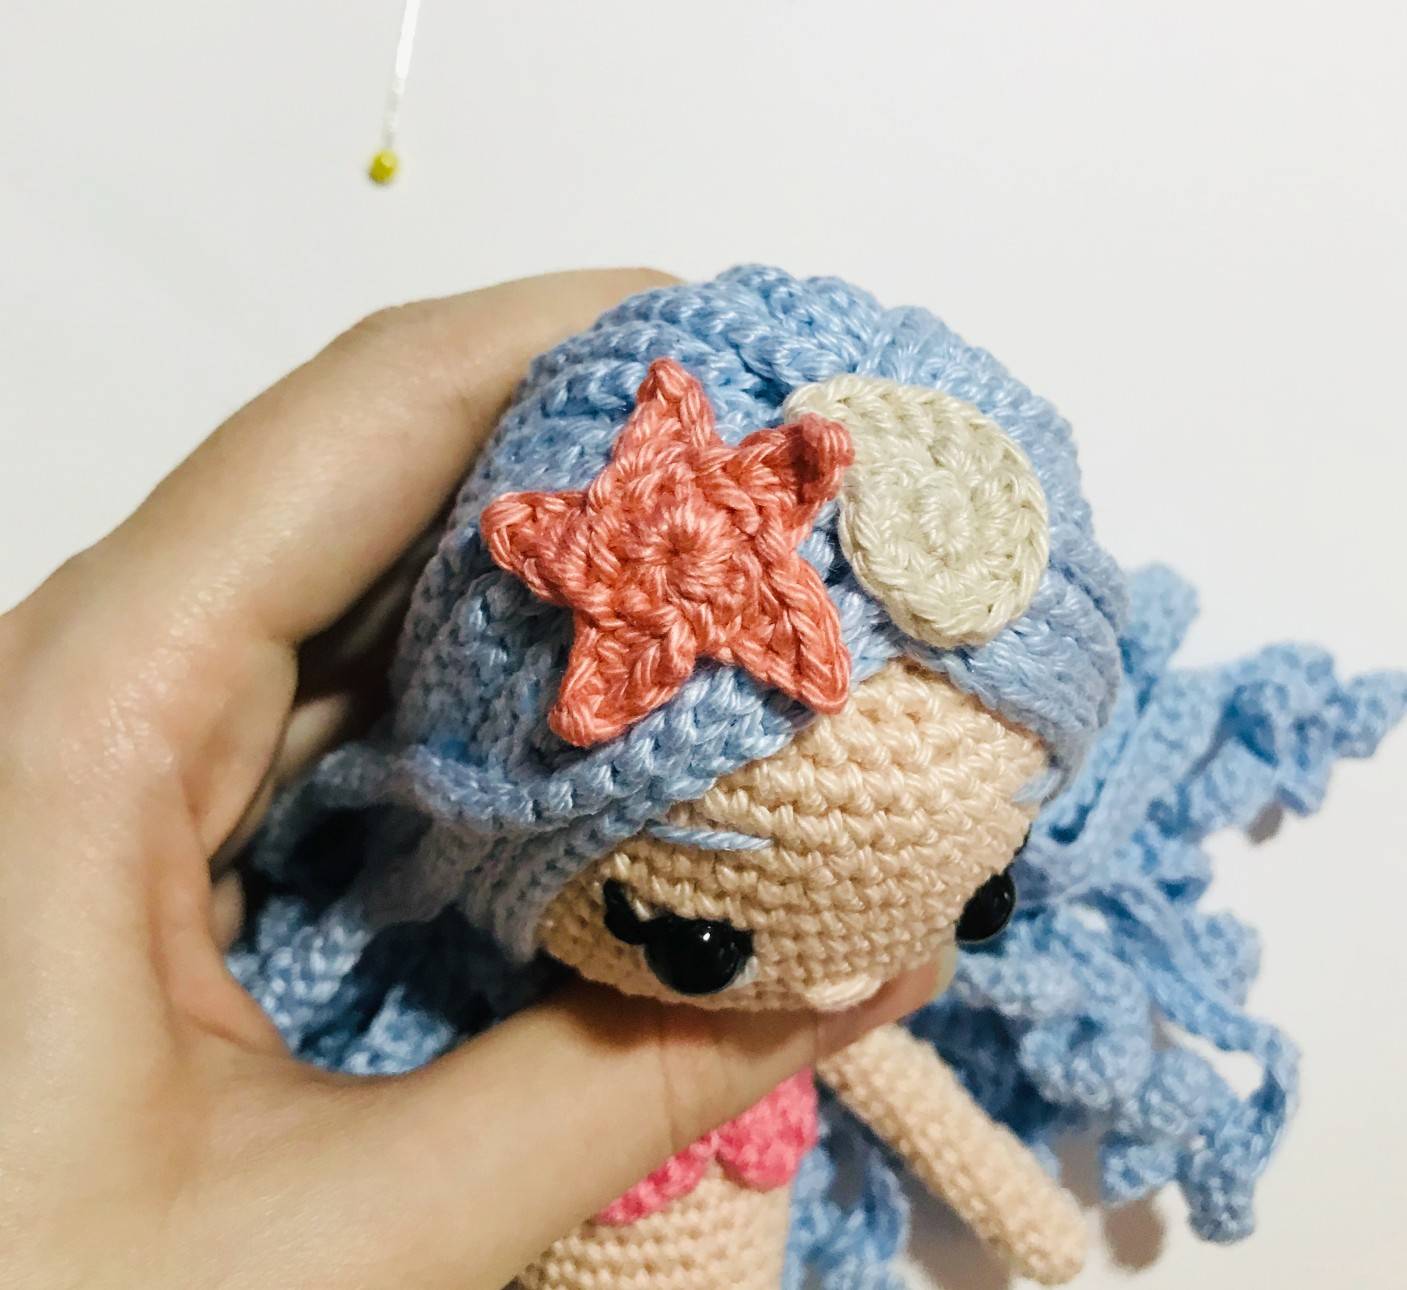
Then glue the coral-colored starfish to the left of the seashell, leaving its right branch without glue.
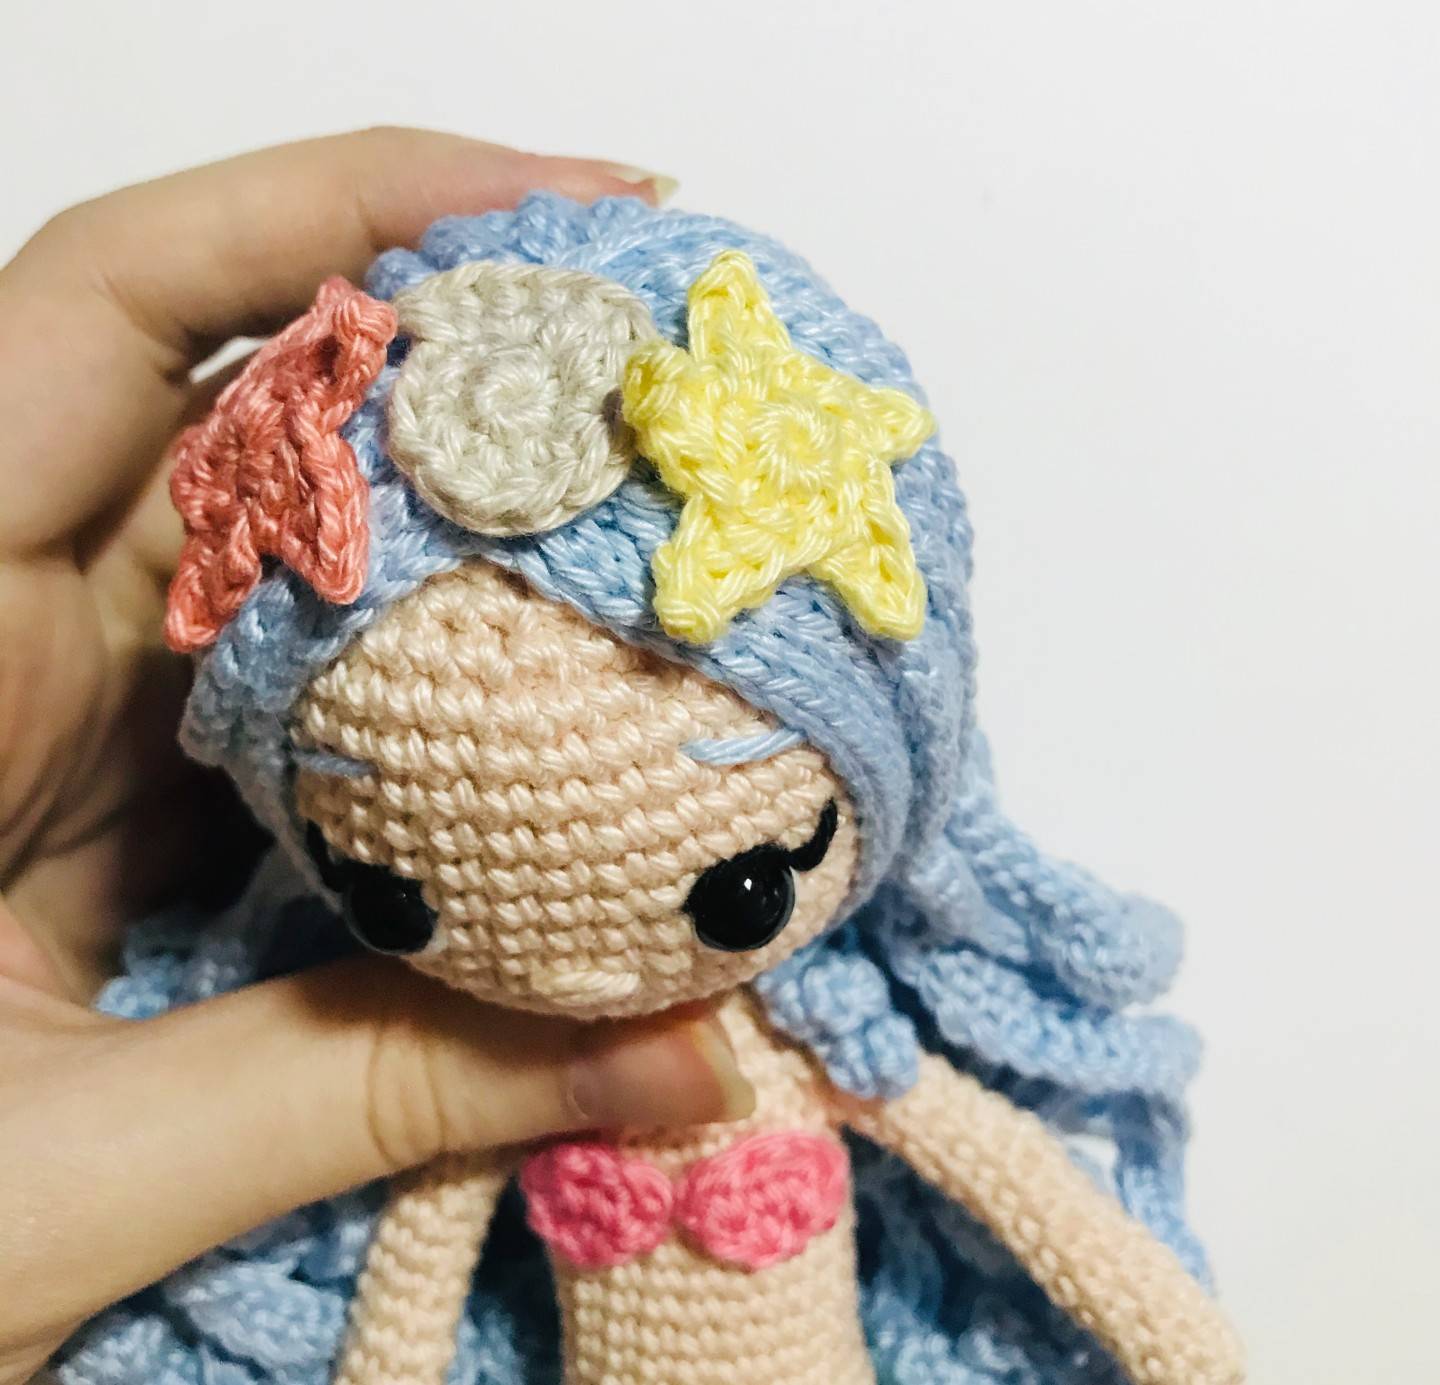
Glue the yellow starfish to the right of the seashell, leaving its left side without glue.
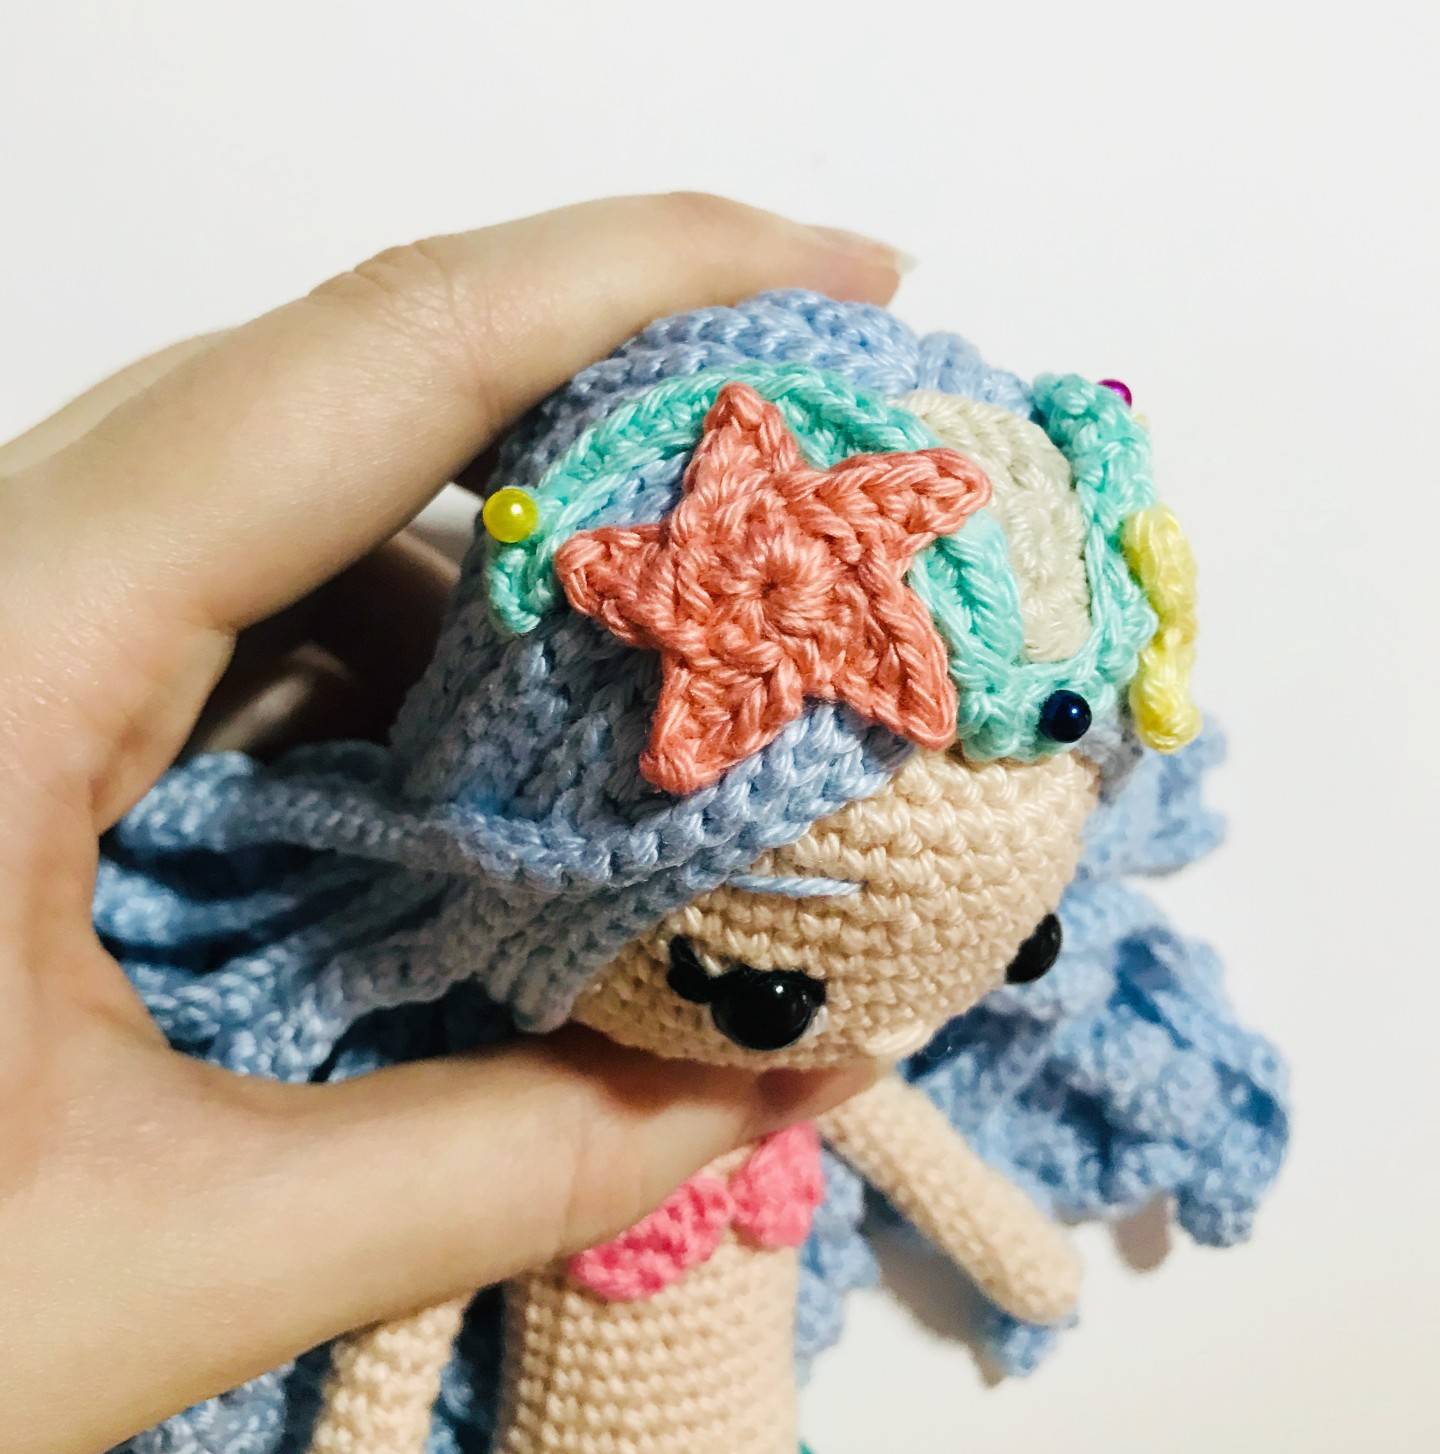
Position the seaweed so that it circles the coral starfish at the back, then passes in front of the seashell and then behind the yellow starfish.
Glue the first part behind the coral starfish.
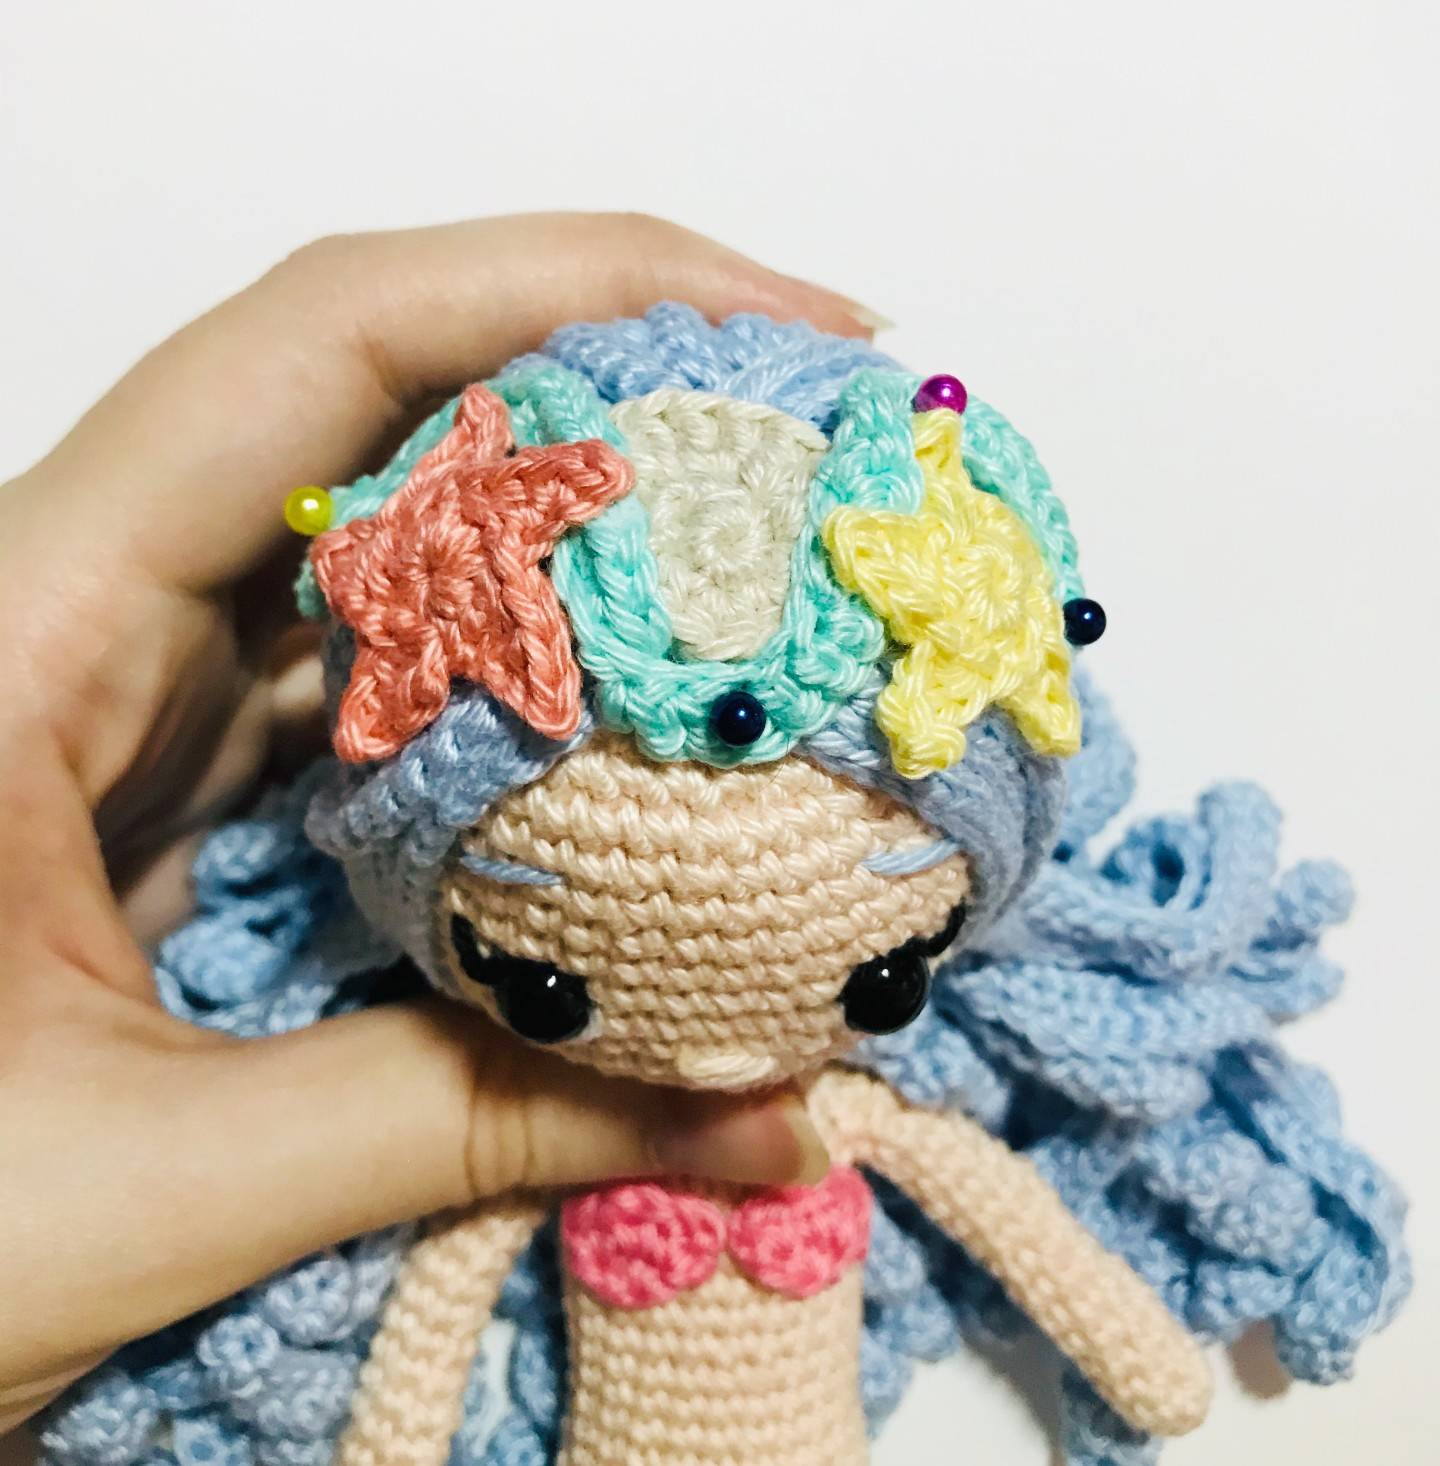
Pass the seaweed under the branch of the unglued coral starfish then continue to glue the seaweed to the front of the seashell.
Then glue it by passing under the non-glued branch of the yellow starfish and behind it.
Finish by gluing the two branches of the starfishes on the seaweed.
Use a pin to hold everything together when drying.
⭐ Arms bracelets
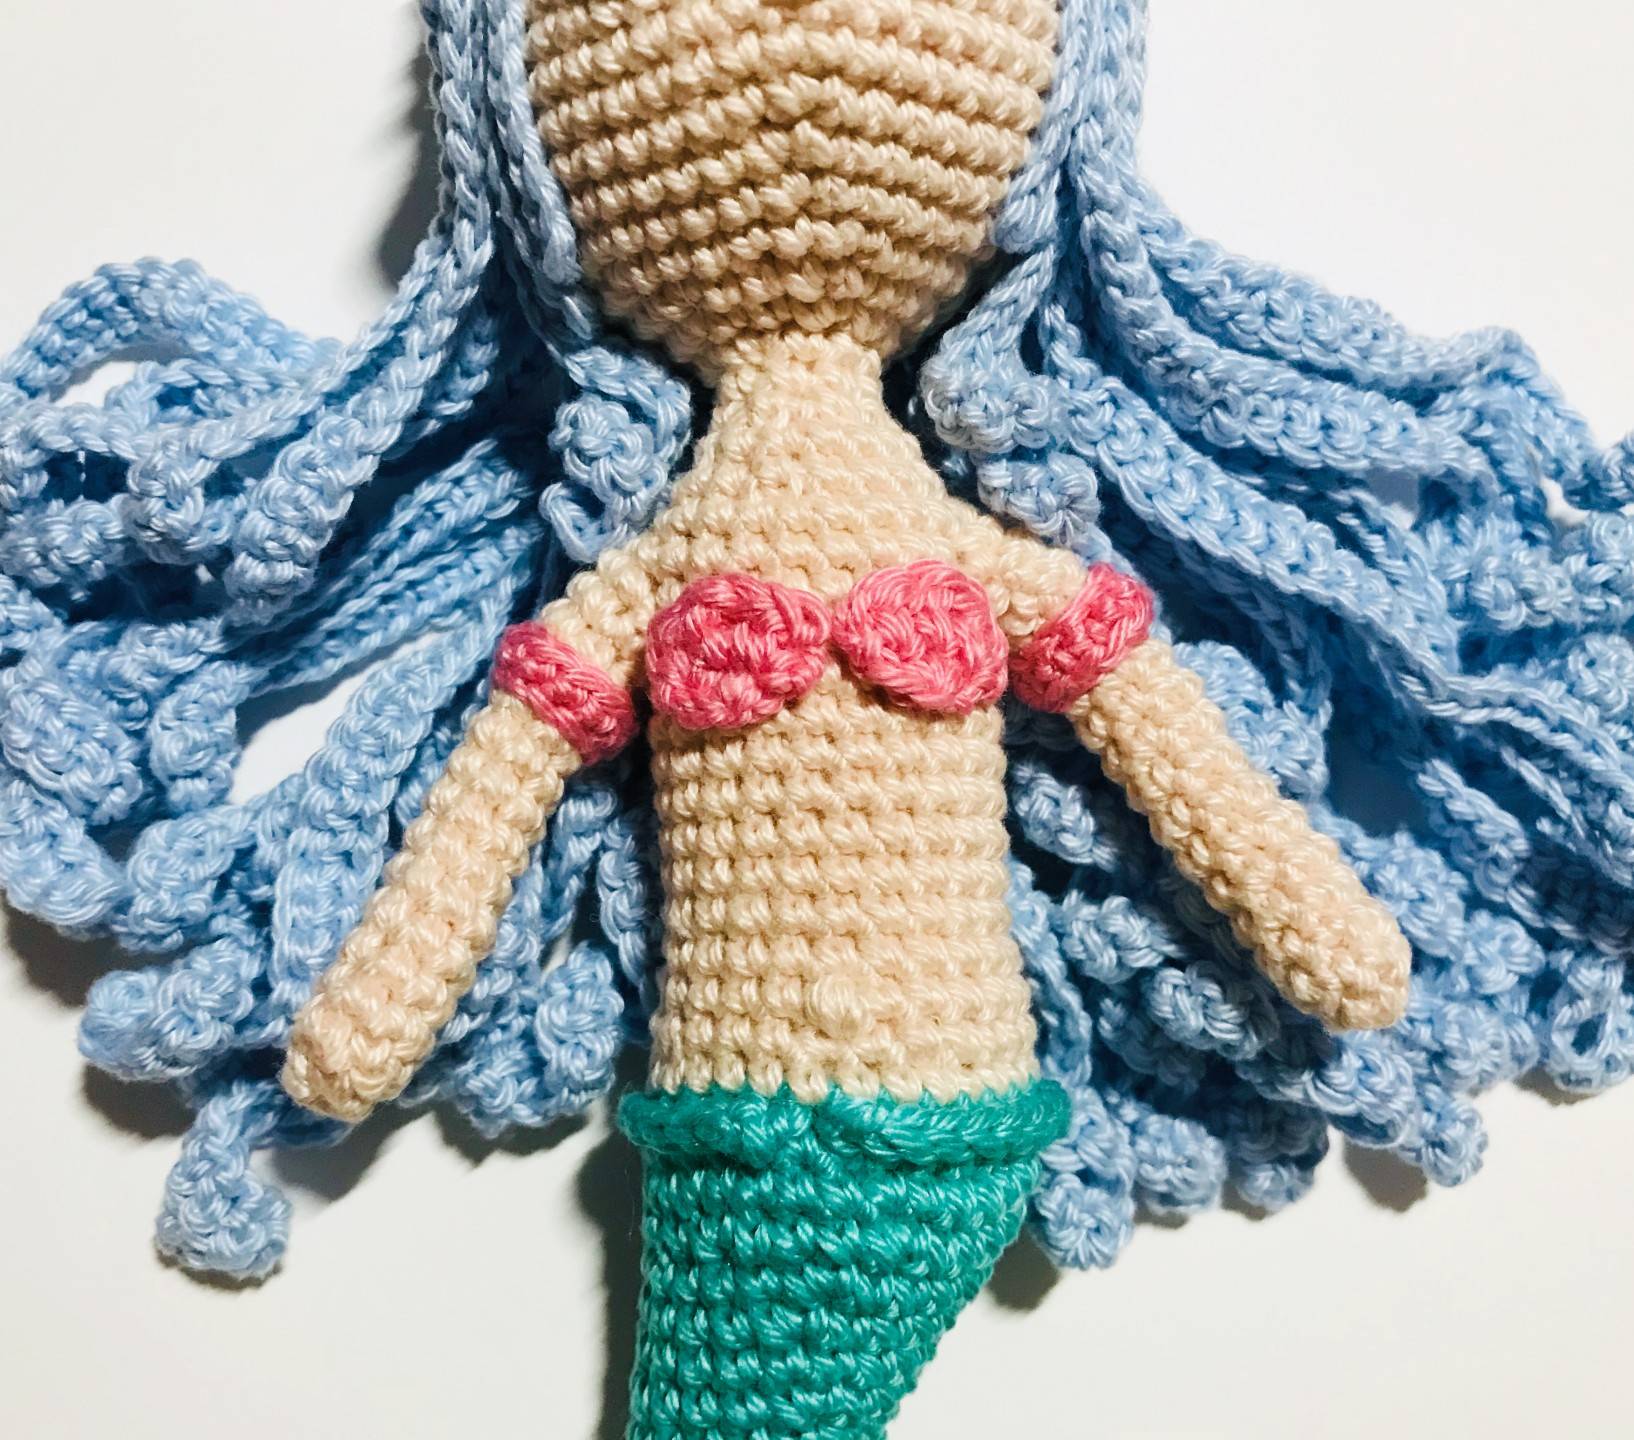
Place the 1st bracelet on the 4th row from the top of the arm and sew it to the back with your yarn needle.
Do the same for the other arm.
If you make this pattern, don’t hesitate to share it on Instagram by tag me @my_rainbow_crochet so that I can pass you on in my story or on Facebook to send me a photo of your achievement that I would incorporate into the album of your achievements!
Seeing your achievements is always a huge pleasure for me!
See you soon Rainbows ! 🙂🌈