This post contains affiliate links.
Hello Rainbows 🌈
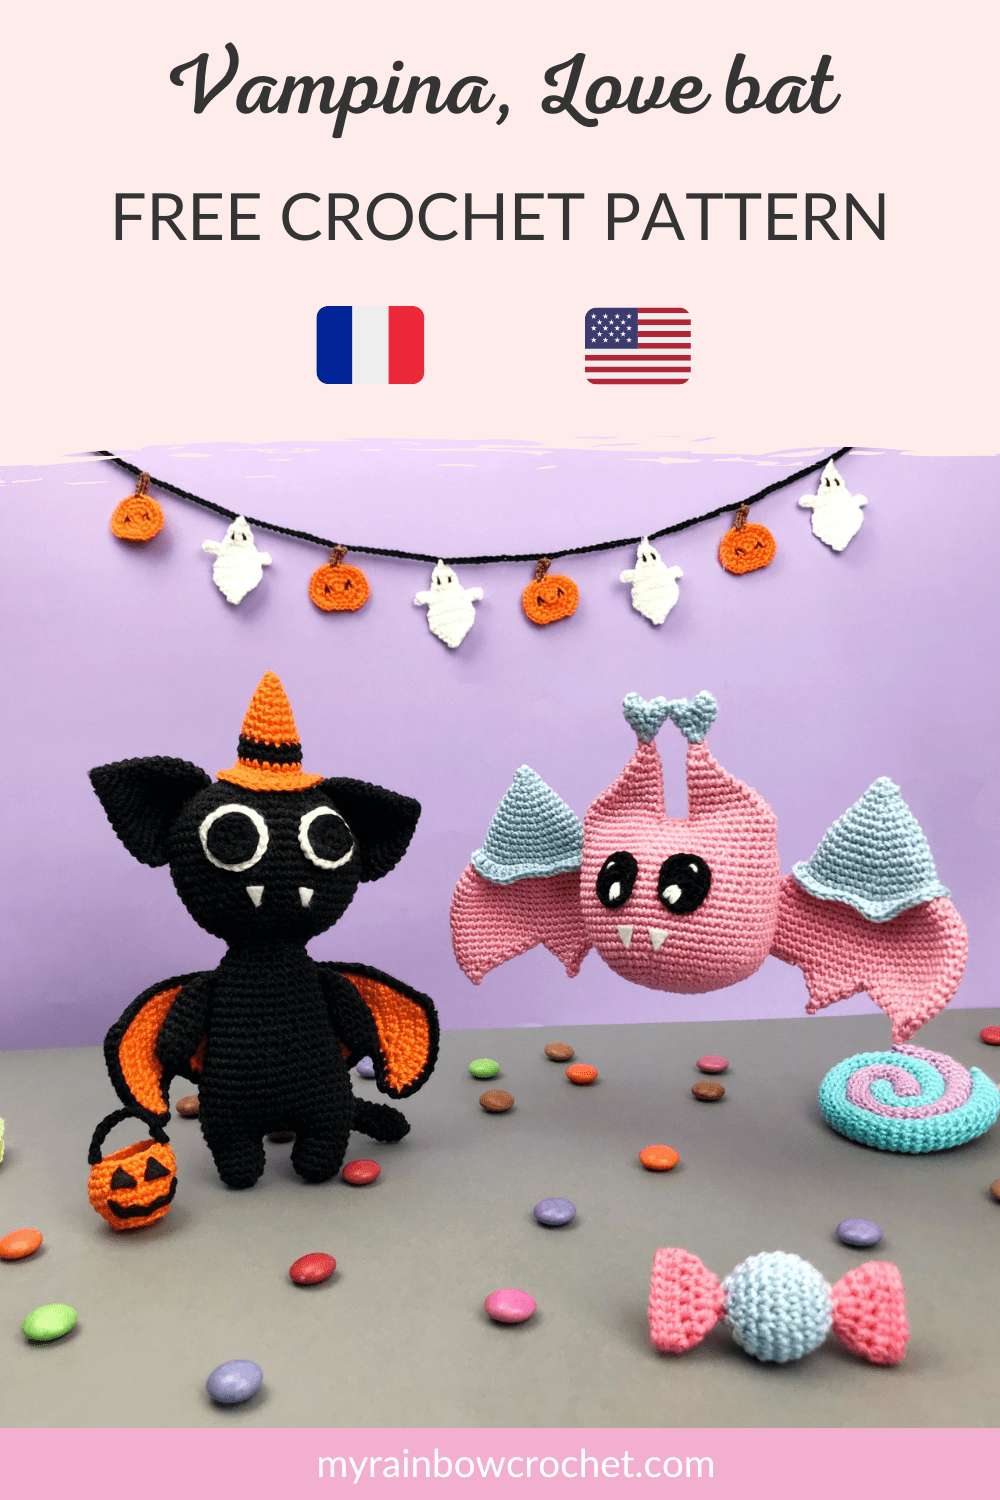
Generally, we associate the Halloween party with horror, characters that are scary or a little creepy. 🎃 With Vampina, I wanted to use a symbol that we use a lot for this party combined with my universe. And if you don’t know my universe yet, to sum it up in a few words: Love, Joy and Magic 💖
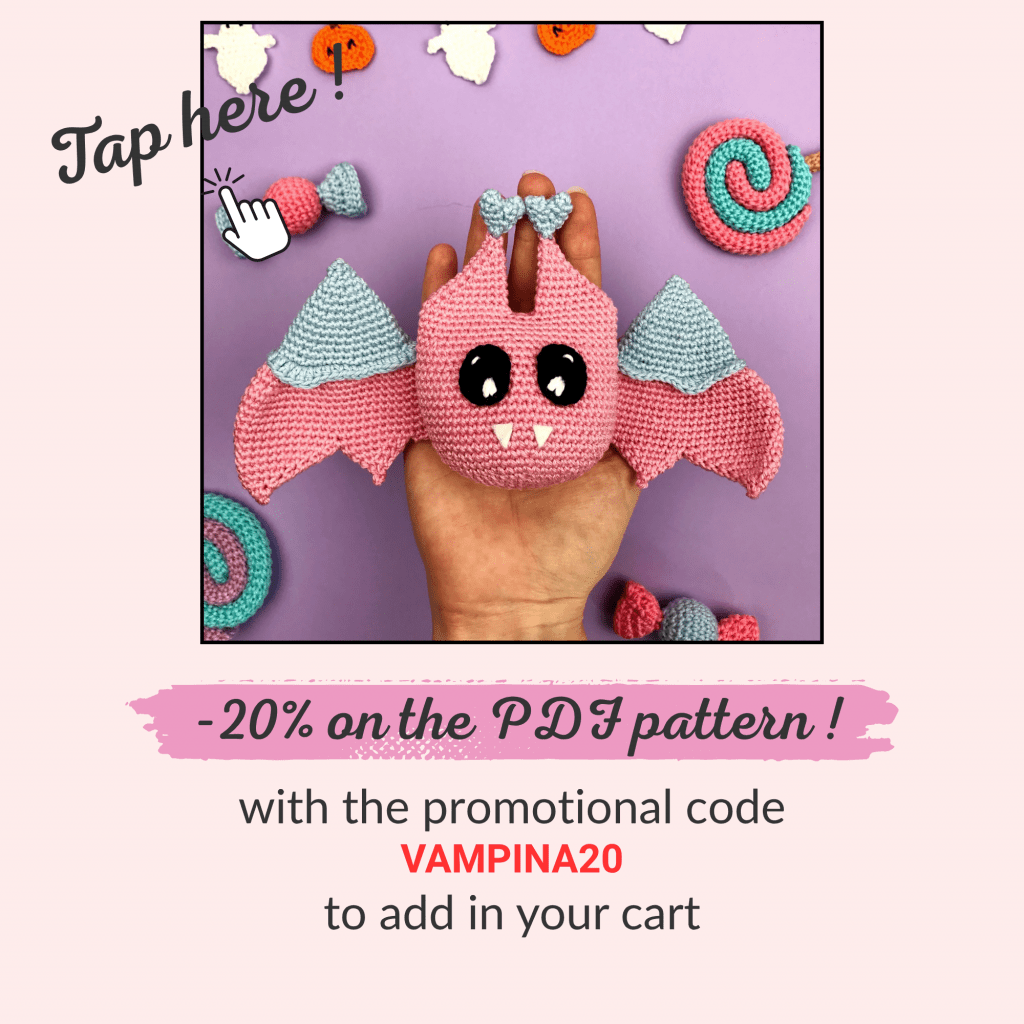
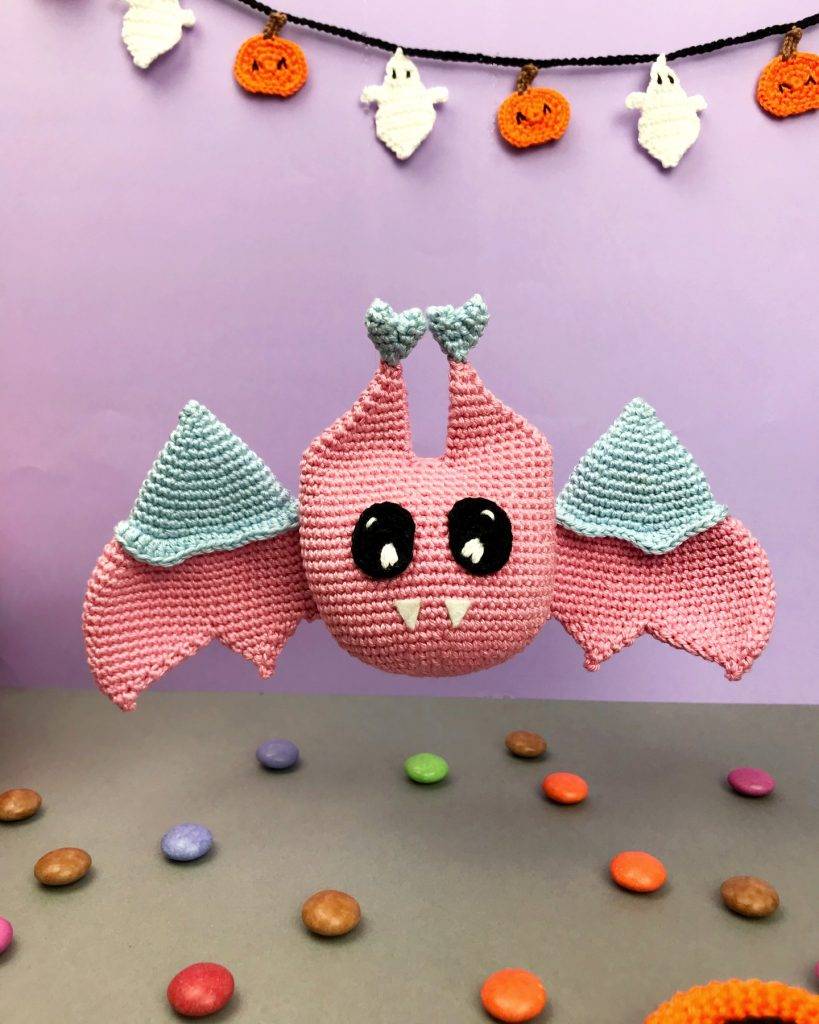
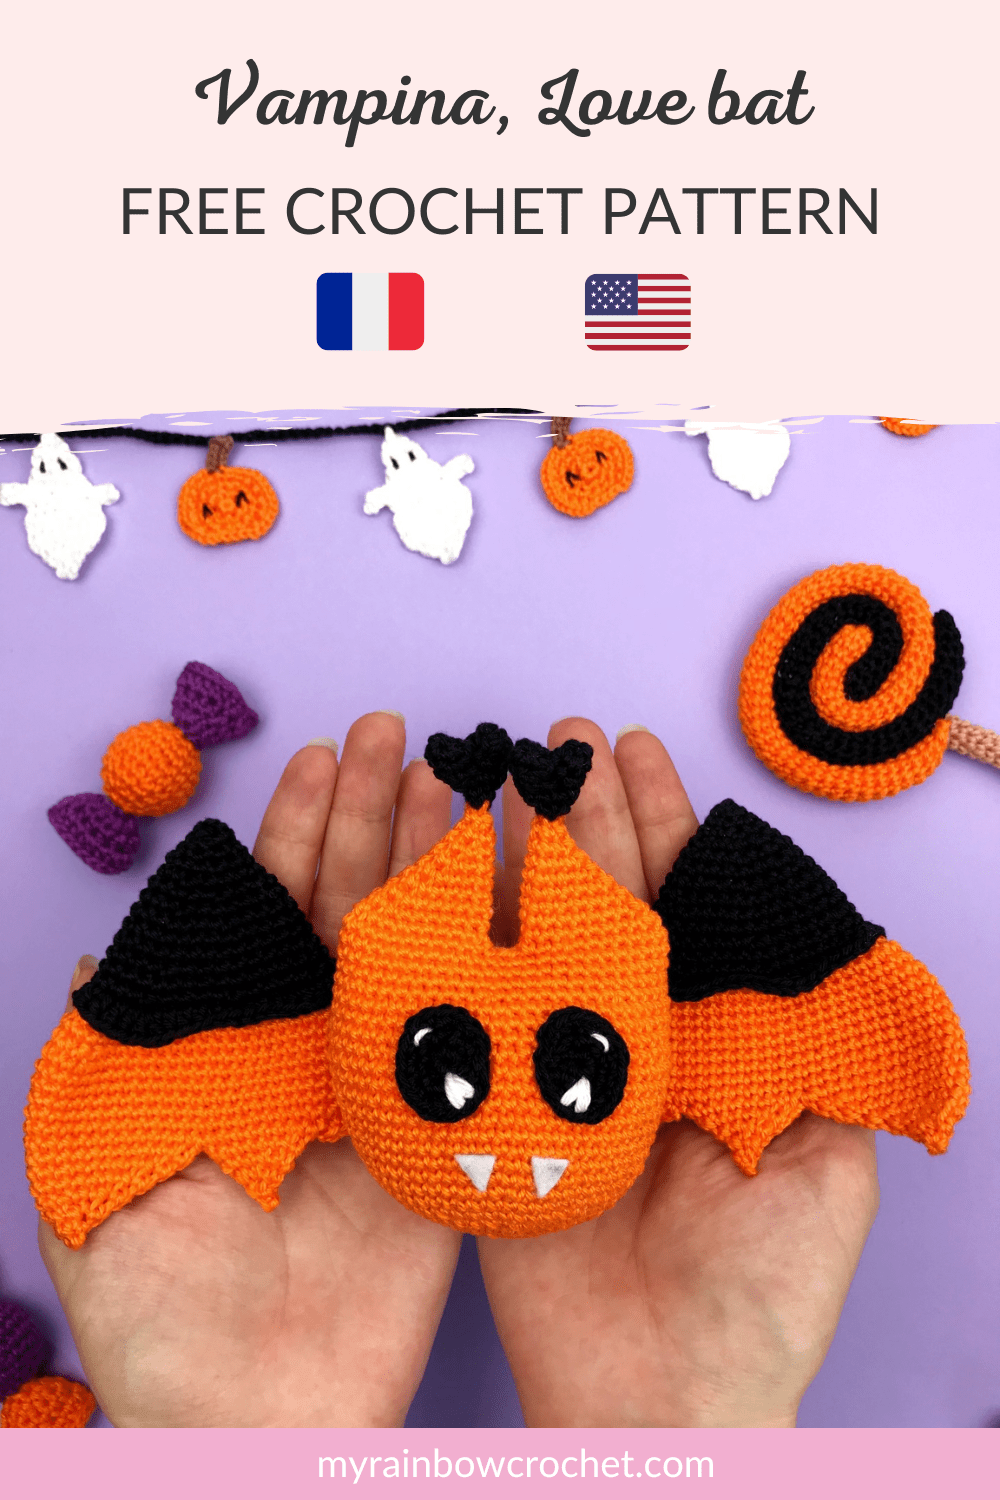
That’s how Vampina, the love bat, was born, and this is the pattern that I’m sharing with you today!
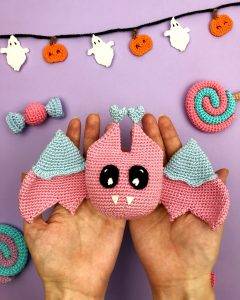
I am sharing with you today the pattern of Vampina, the love bat, which you can find for free below or in PDF format in my shop!
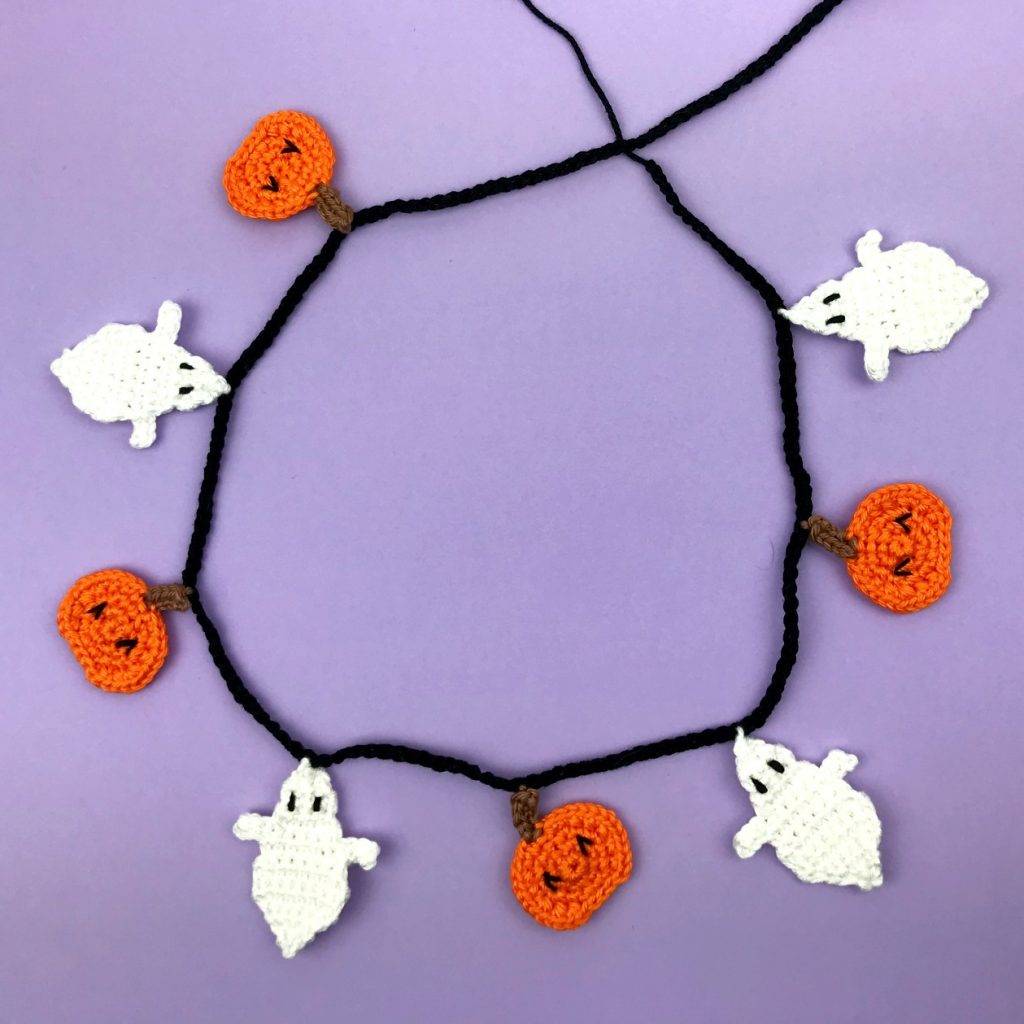
You can also find many other of my patterns in the Halloween theme on my site 🎃


🦇 Story of Vampina🦇
“Vampina comes from a rather special race of bats that we rarely see. It is a race that has an unusual
characteristic. With her little painless bites, she takes away the hatred and violence that a person may have and then injects them with pure Love. The bitten person then finds himself in a bubble of peace and love. They are little bats that somehow work for peace in the world!“
To see her in more detail, I made a little video for you 😊
🦇 Some technical details about Vampina 🦇

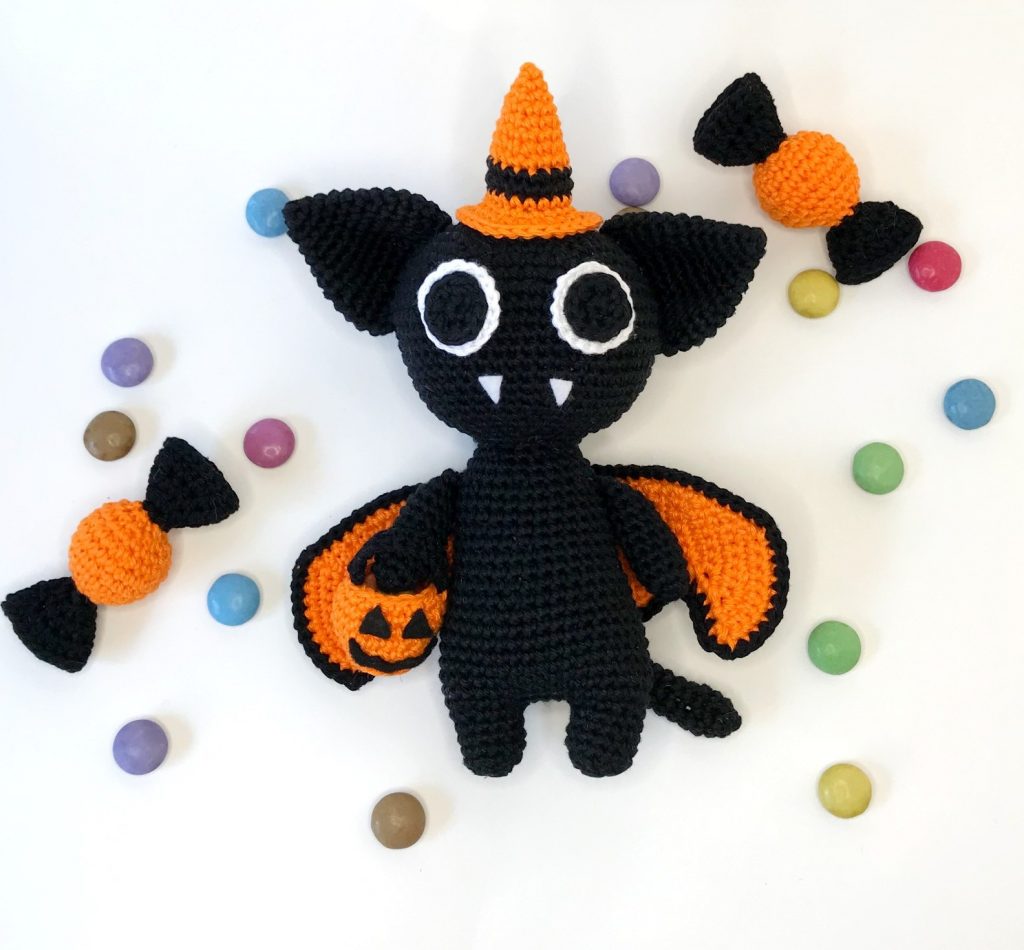
A perfect little bat for a Halloween decoration or to offer. To be made in all the color combinations you like. You can of course also make a version in more traditional Halloween colors like with black and orange. I also made one with these colors so that you can see the result it gives 😃
The pattern is quick and easy and is perfect for crocheters with an advanced beginner level.
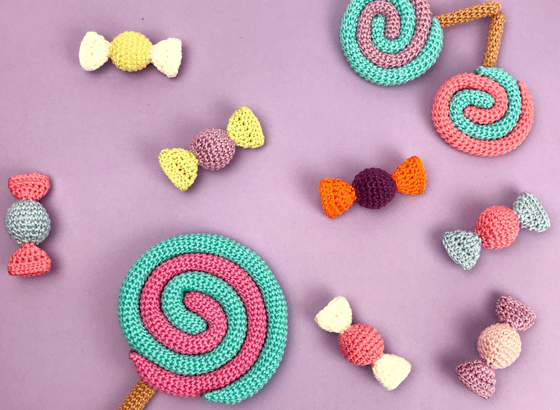
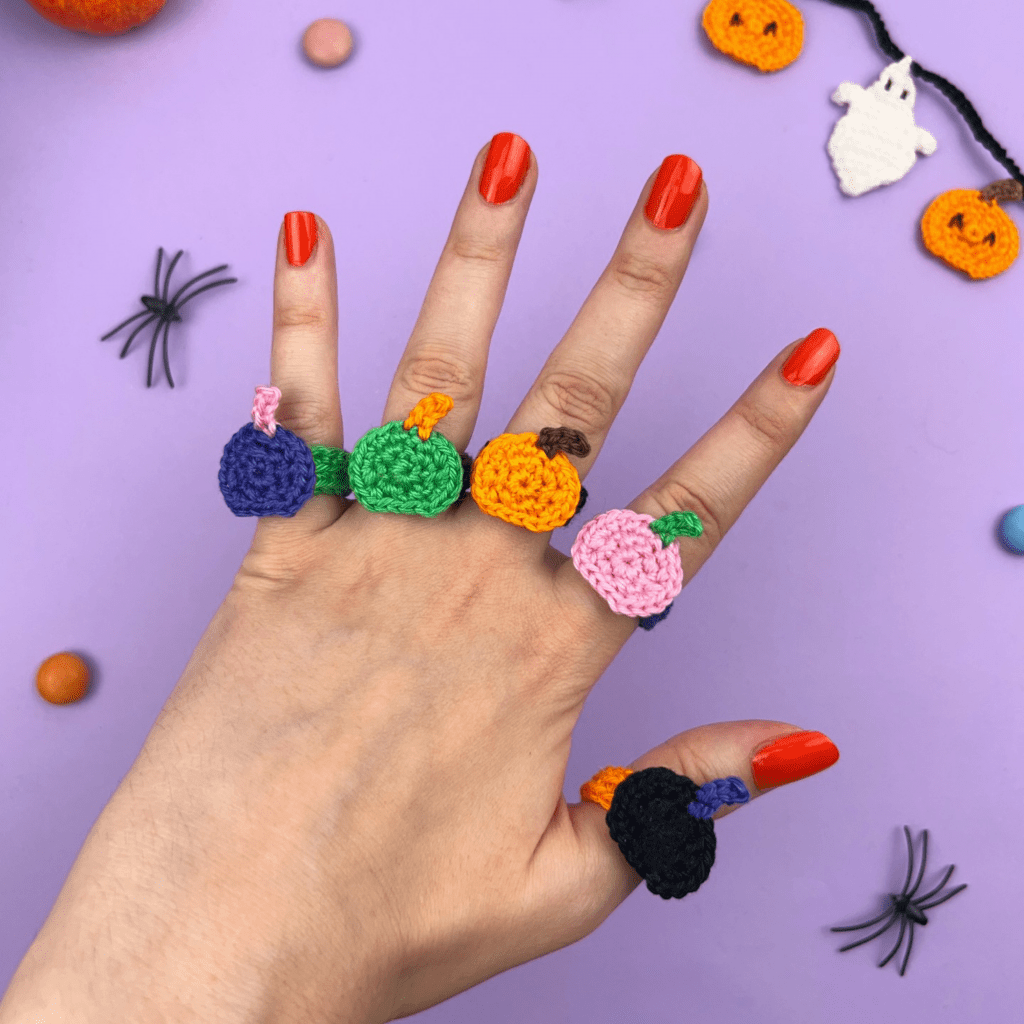
To stay in the Halloween theme and to add crocheted elements to your decoration, you can also find candies for Halloween on my website which are available for free by clicking on the image below! 🔽
🎃 Finished size 🎃
Height: 10 cm with hearts
Width: 20 cm with wings
💖 Material you need 💖
If you want to use the same material as mine, I am attaching few links below.
These are affiliate links on Amazon. As an Amazon Associate I earn from qualifying purchases.
- Crochet hook 2 mm or a crochet hook suitable for your yarn
- Cotton yarn (fingering) : Pink, Blue, White, Black
- Textile adhesive or glue
- Stuffing
- Wool needle
- Stitch markers
- A bit of white felt
🧛 Abbreviations used 🧛
R : Row
sc : Single crochet
Inc : Increase
Dec: Decrease
SlSt : Slip stitch
CH : Chain
hdc : Half double crochet
dc : Double crochet
ssc : Start in Single crochet
FLO : Front loop only
BLO : Back loop only
*…* : Repeat around the row
[…] : Work in the same stitch


🎃 The pattern in PDF format 🎃
🔽 The PDF file of the pattern is available by clicking on the image below 🔽
🐈⬛ Written explanations 🐈⬛
🎃 The body
(to be done with pink color)
R1: magic ring with 6 sc
R2: 1 Inc in each sc (12)
R3: *1 sc, 1 Inc* x6 (18)
R4: 1 sc, 1 Inc, *2 sc, 1 Inc* x5, 1 sc (24)
R5: *3 sc, 1 Inc* x6 (30)
R6: 2 sc, 1 Inc, *4 sc, 1 Inc* x5, 2 sc (36)
R7: *5 sc, 1 Inc* x6 (42)
R8: 3 sc, 1 Inc, *6 sc, 1 Inc* x5, 3 sc (48)
R9: *7 sc, 1 Inc* x6 (54)
R10: sc in each sc (54)
R11: 4 sc, 1 Inc, *8 sc, 1 Inc* x5, 4 sc (60)
R12 to R19: sc in each sc (60)
R20: 4 sc, 1 dec, *8 sc, 1 dec* x5, 4 sc (54)
R21 to R23: sc in each sc (54)
R24: *7 sc, 1 dec* x6 (48)
R25 to R27: sc in each sc (48)
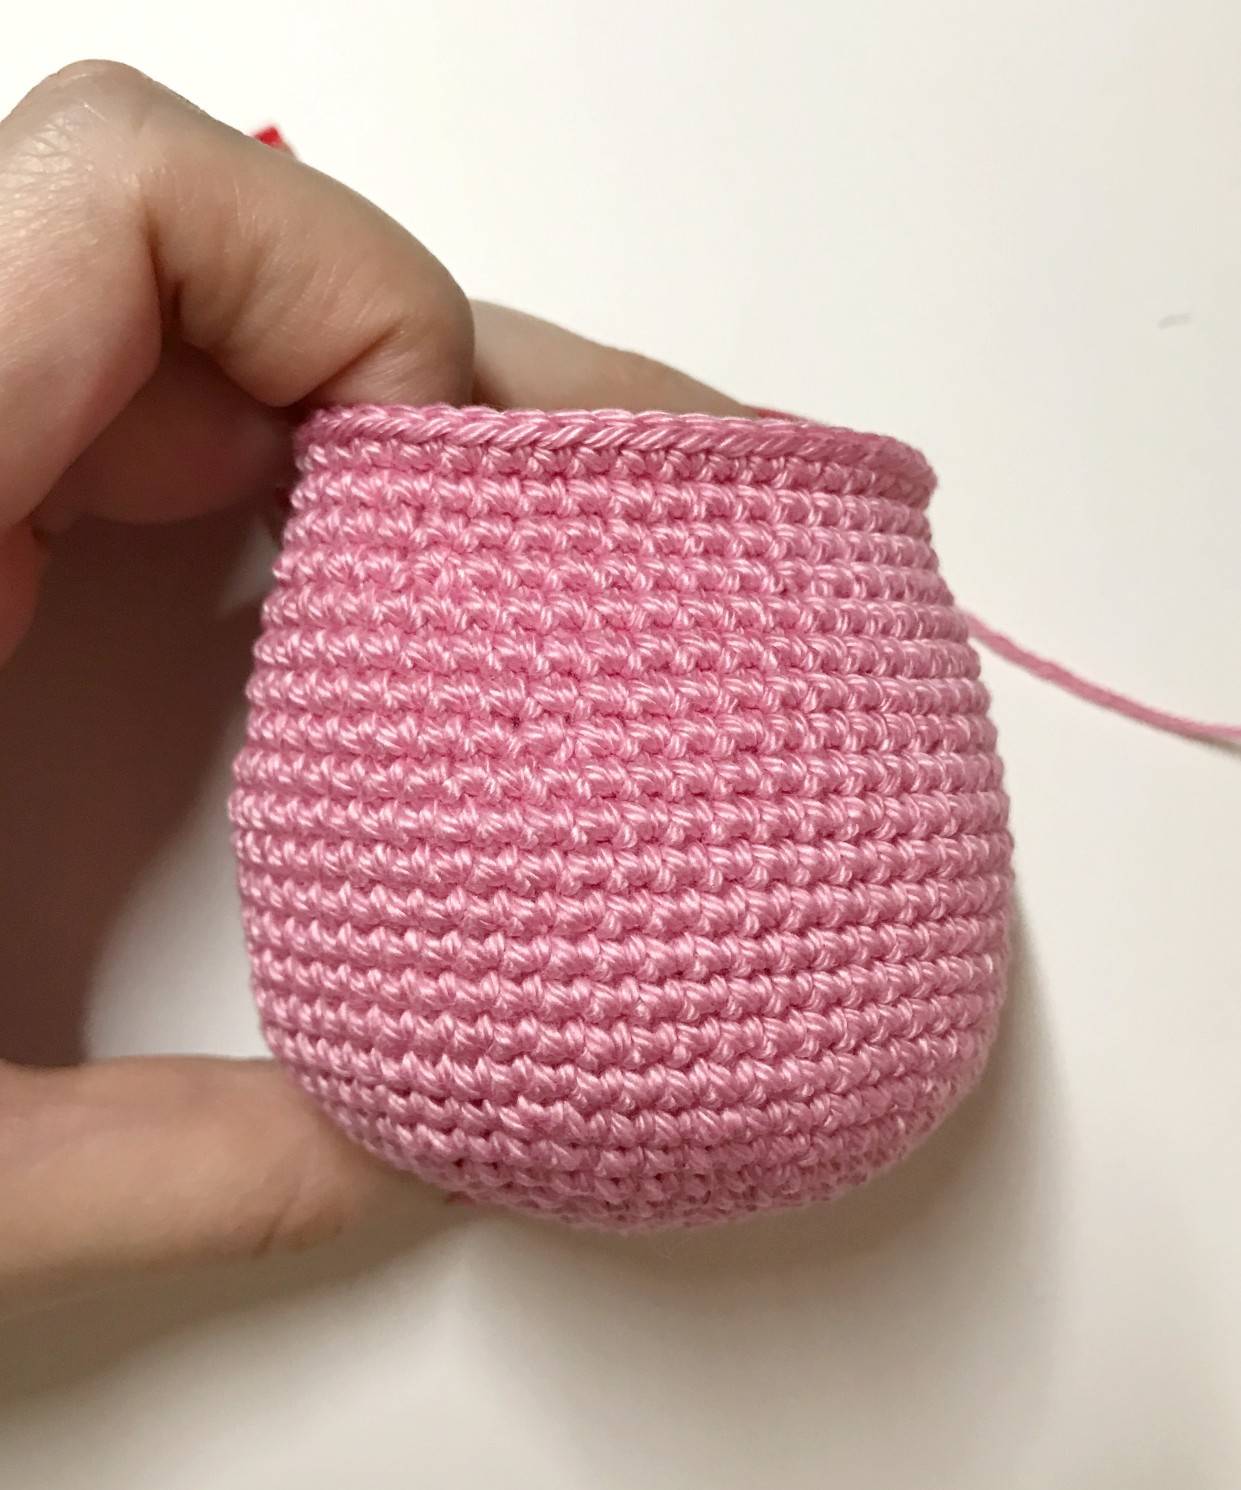
-> Start stuffing (not too much either otherwise it will be complicated to crochet the ears afterwards).
-> Keep the yarn to continue with the ears.
All rights reserved. You can not resell, share, modify or publish this pattern.
This pattern is for PERSONAL use only. The pattern may not be, in whole or in part, reproduced, published (online or printed), modified or resold according to article L.122-4 of the french intellectual property code.
You can sell the finished products, if they are made by you, in limited quantities and by providing the name of the designer. Please add the following information to the description of the amigurumi sold:
“This plush was handmade by … (your name) from a pattern created by My Rainbow Crochet”
Copyright 2022 MyRainbowCrochet
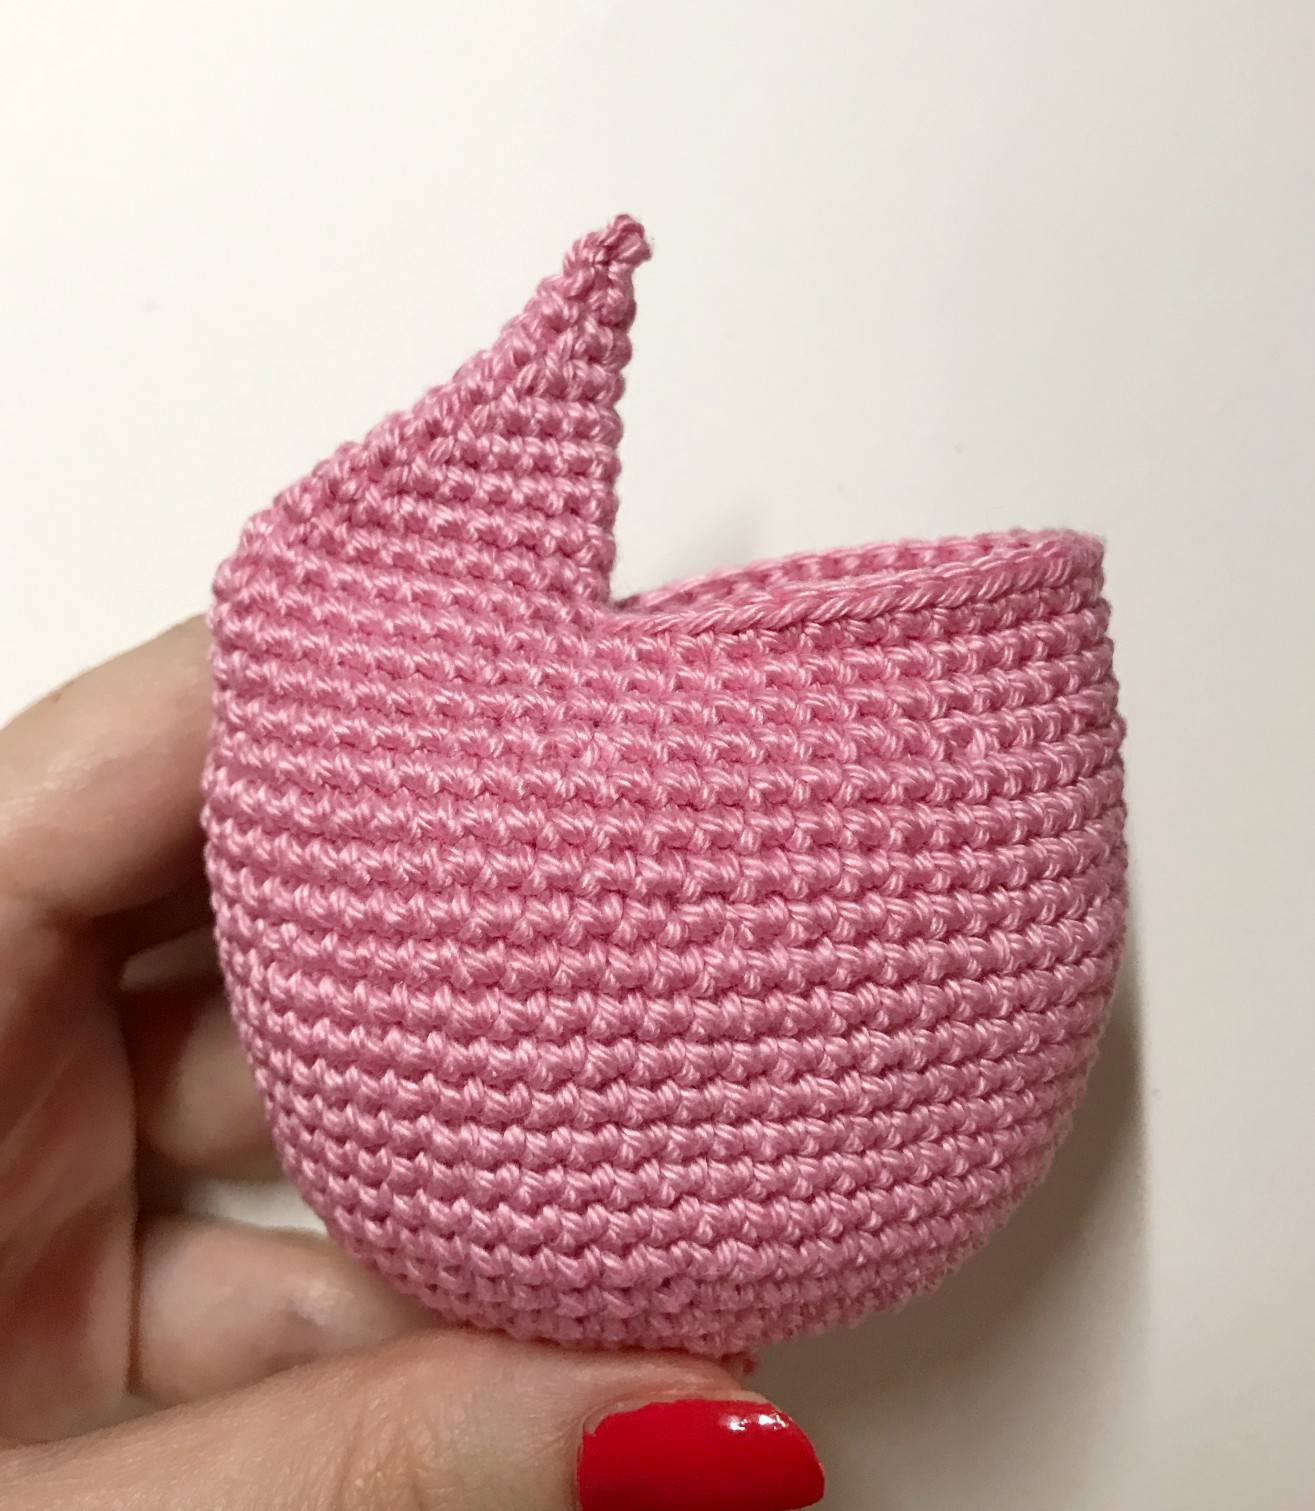
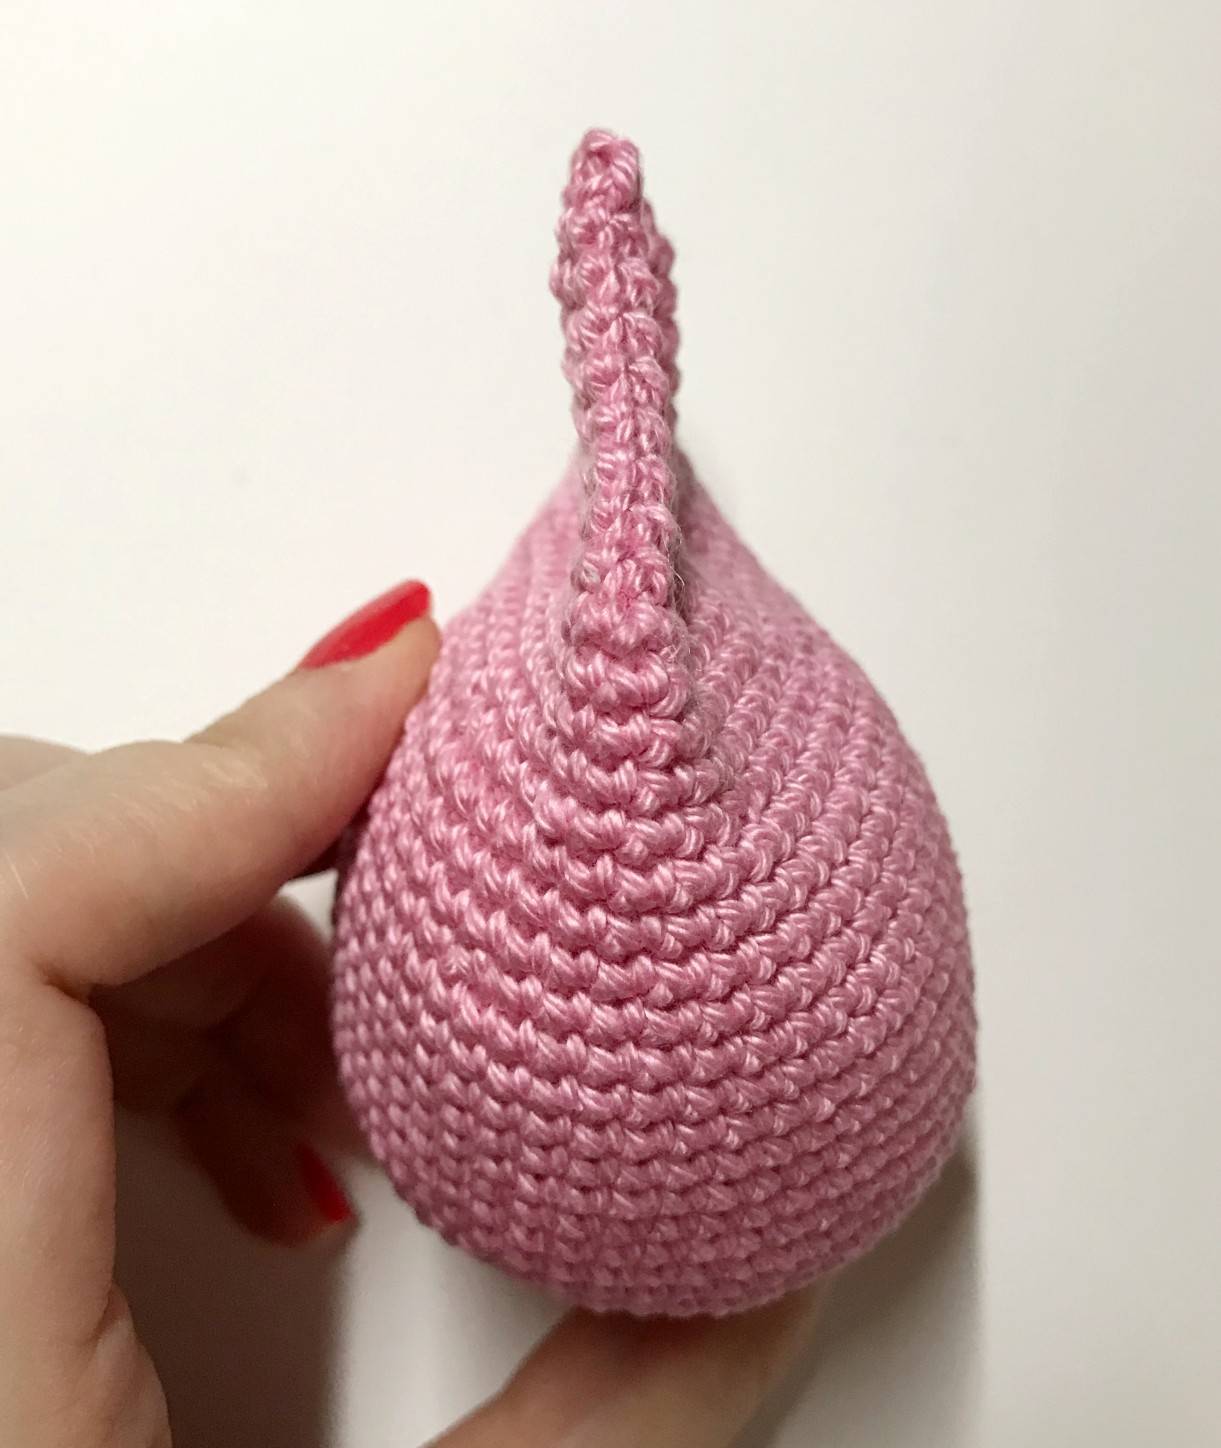
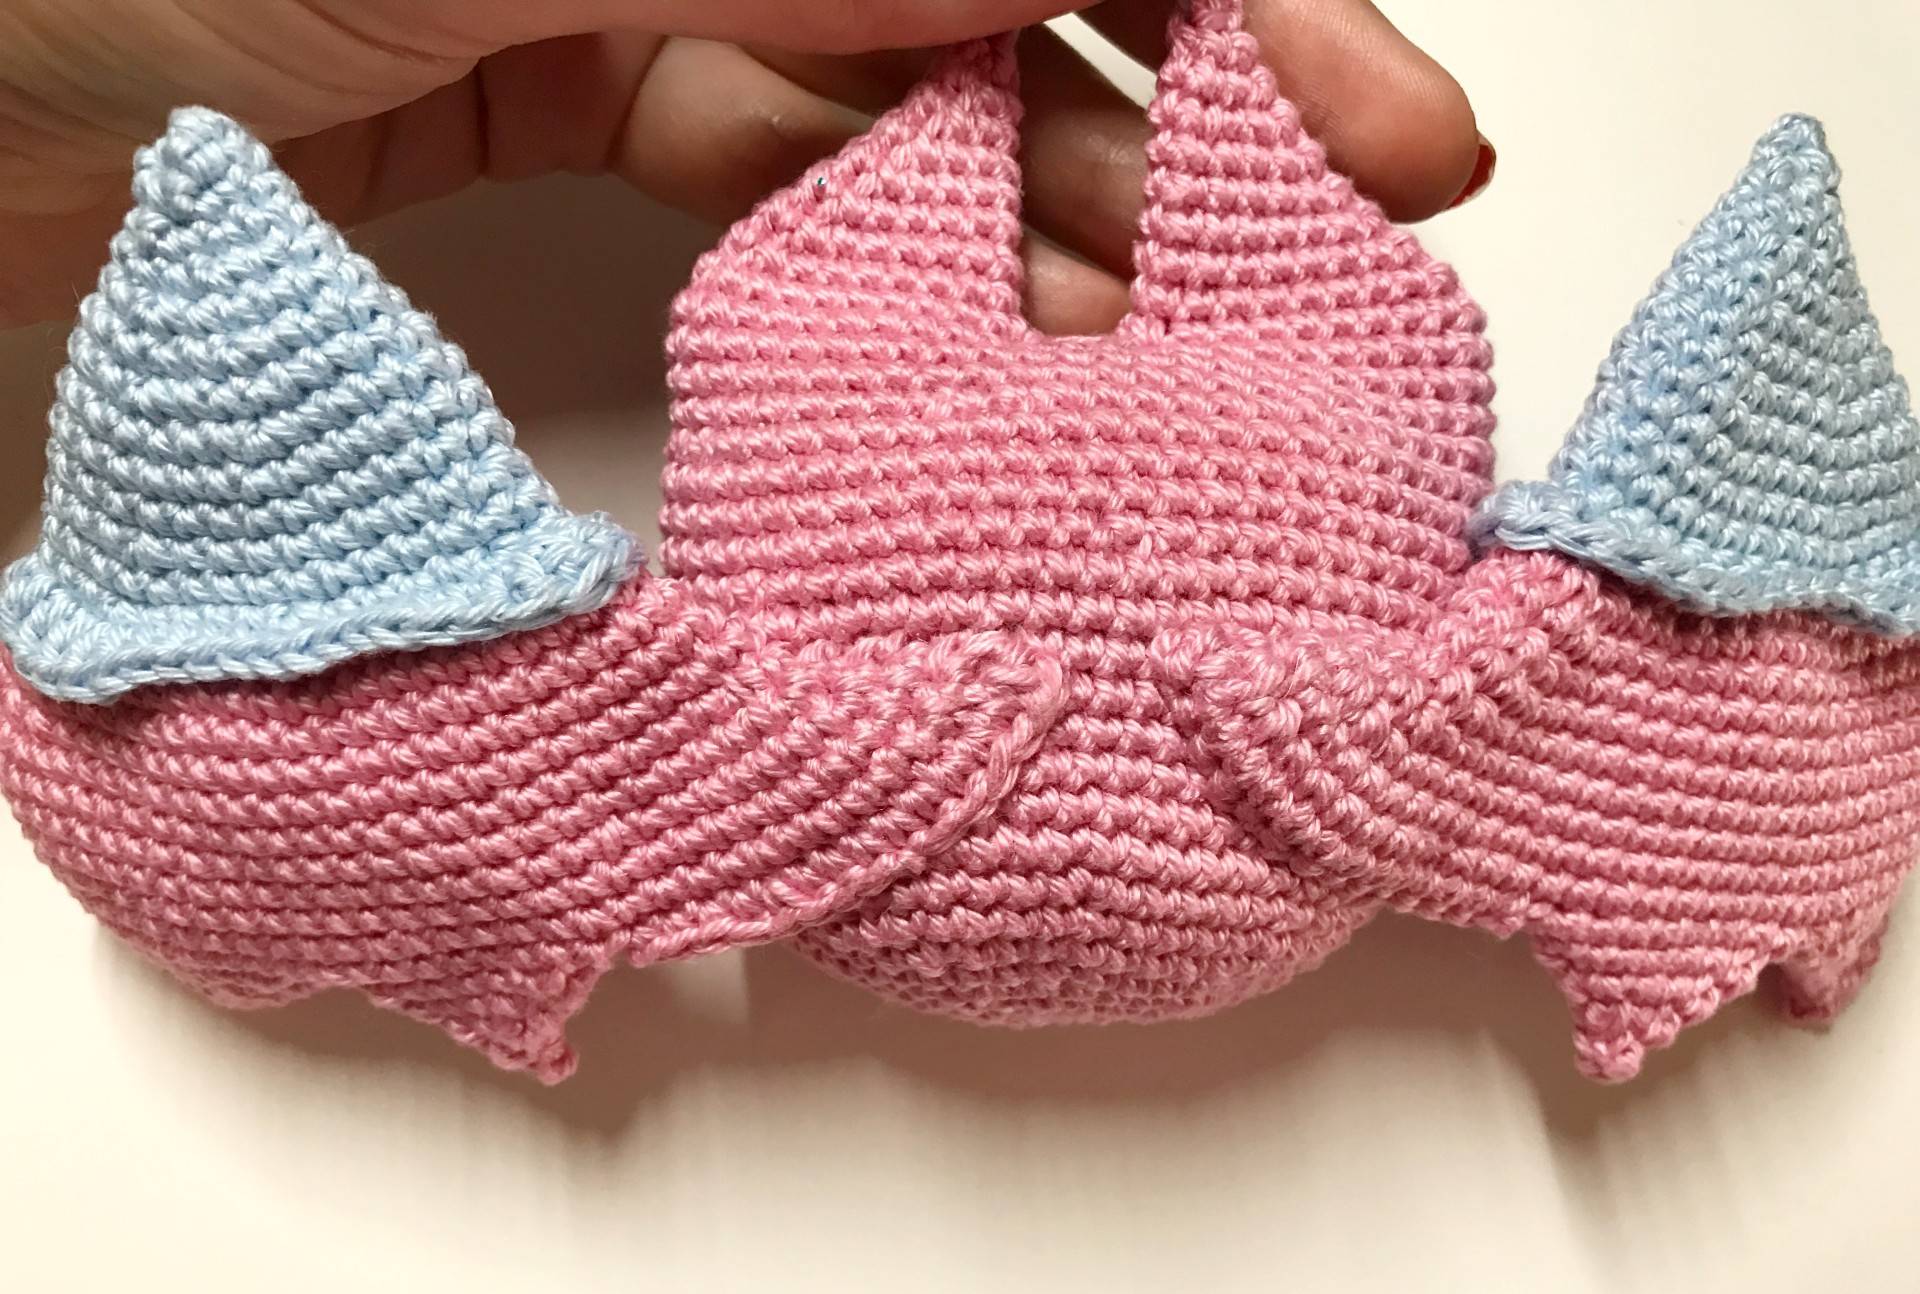
🦇 Ears
(to be done with pink color)
1st ear
-> Pick up where you left off and continue as follows:
R1: 21 sc then tuck into the 1st starting stitch of the row by first tucking your hook into this stitch to make 1 sc which now counts as the 1st stitch of the next rows
R2: 8 sc, 2 dec, 8 sc (19 counting the 1st starting stitch with the join to the previous R)
R3: 8 sc, 2 dec, 7 sc (17)
R4: 7 sc, 2 dec, 6 sc (15)
R5: 6 sc, 2 dec, 5 sc (13)
R6: 5 sc, 2 dec, 4 sc (11)
R7: 4 sc, 2 dec, 3 sc (9)
R8: 3 sc, 2 dec, 2 sc (7)
R9: 2 sc, 2 dec, 1 sc (5)
R10: 2 dec, leave the last stitch (3)
R11: cut the yarn and pass it through the front loops of the 3 stitches with your needle then tighten to close.
Weave in ends.
2nd ear
R1: Count 3 stitches after the 1st ear and return your hook to make 1 ssc (see tip on my website) then continue with 20 sc. Join the 2 sides by making 1 sc with the starting stitch opposite (by tucking your hook first into the stitch opposite) (21)
During the ssc, you can leave about ten cm of yarn
to sew the space between the 2 ears more easily
later.
R2: 8 sc, 2 dec, 8 sc (19)
R3: 8 sc, 2 dec, 7 sc (17)
R4: 7 sc, 2 dec, 6 sc (15)
R5: 6 sc, 2 dec, 5 sc (13)
R6: 5 sc, 2 dec, 4 sc (11)
R7: 4 sc, 2 dec, 3 sc (9)
R8: 3 sc, 2 dec, 2 sc (7)
R9: 2 sc, 2 dec, 1 sc (5)
R10: 2 sc, leave the last stitch (3)
R11: cut the yarn and pass it through the front loops of the 3 stitches with your needle then tighten to close.
Weave in ends.
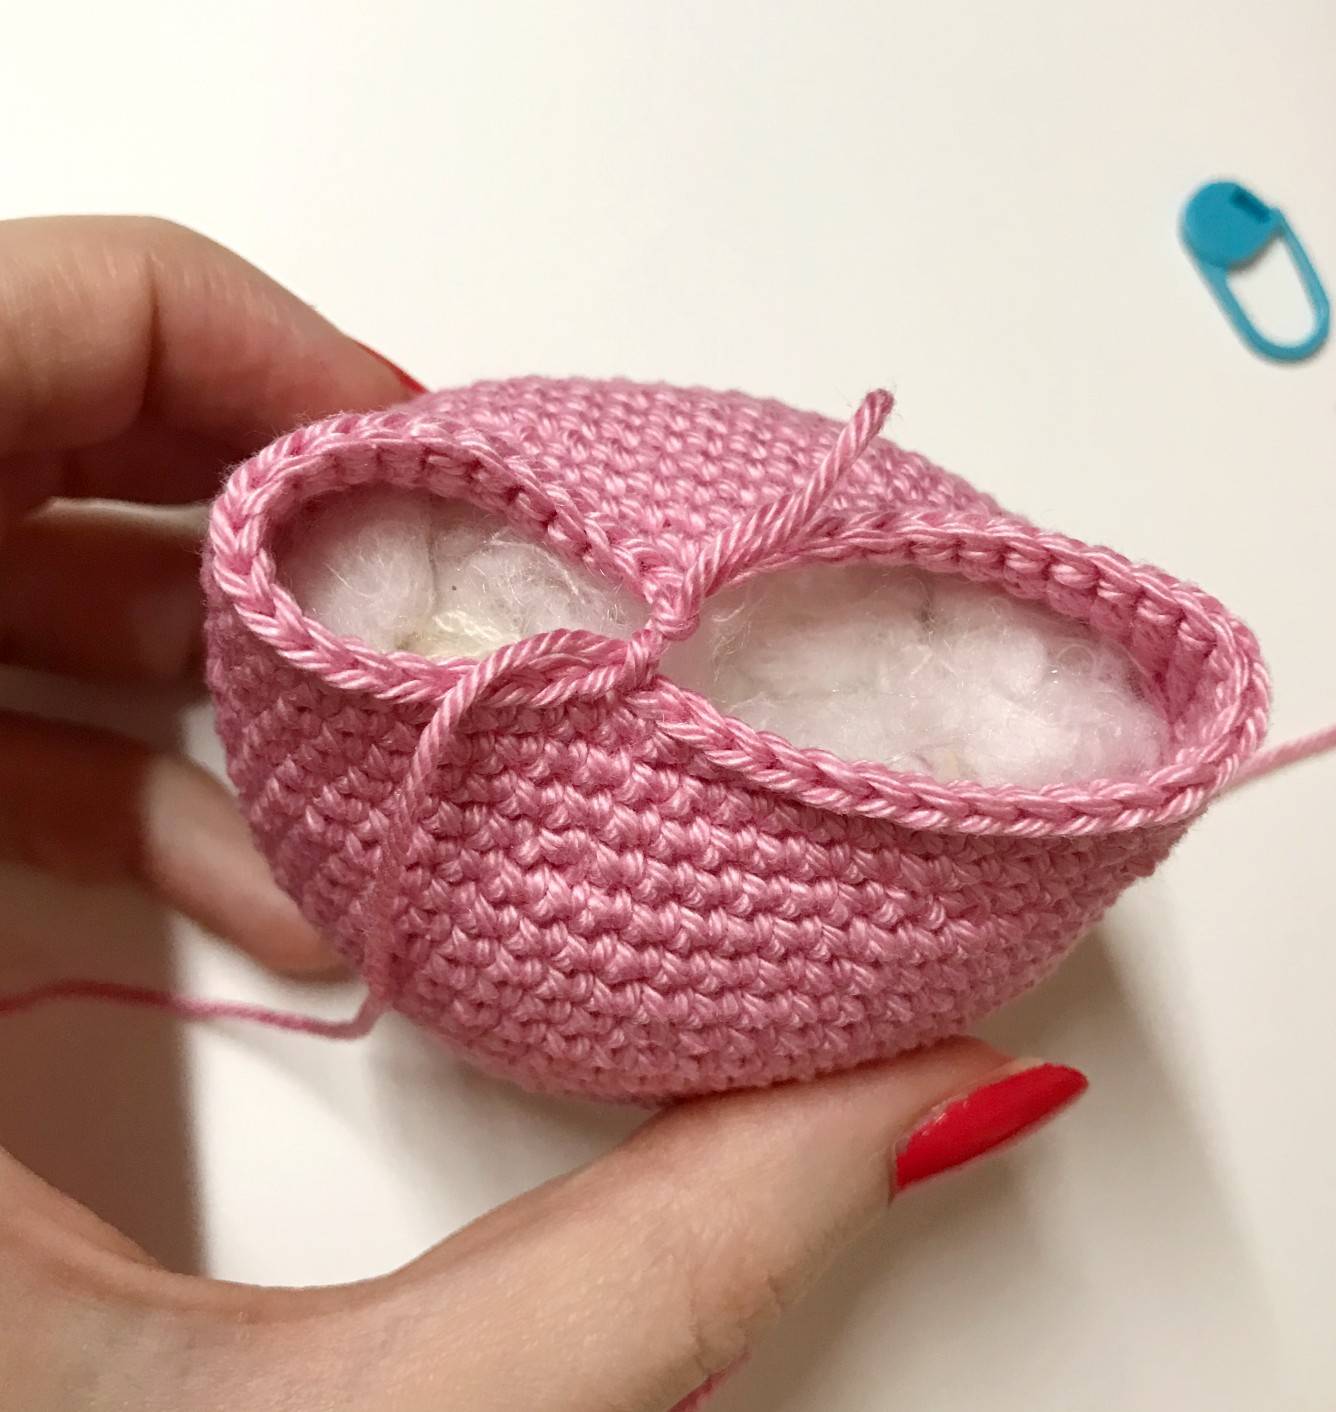
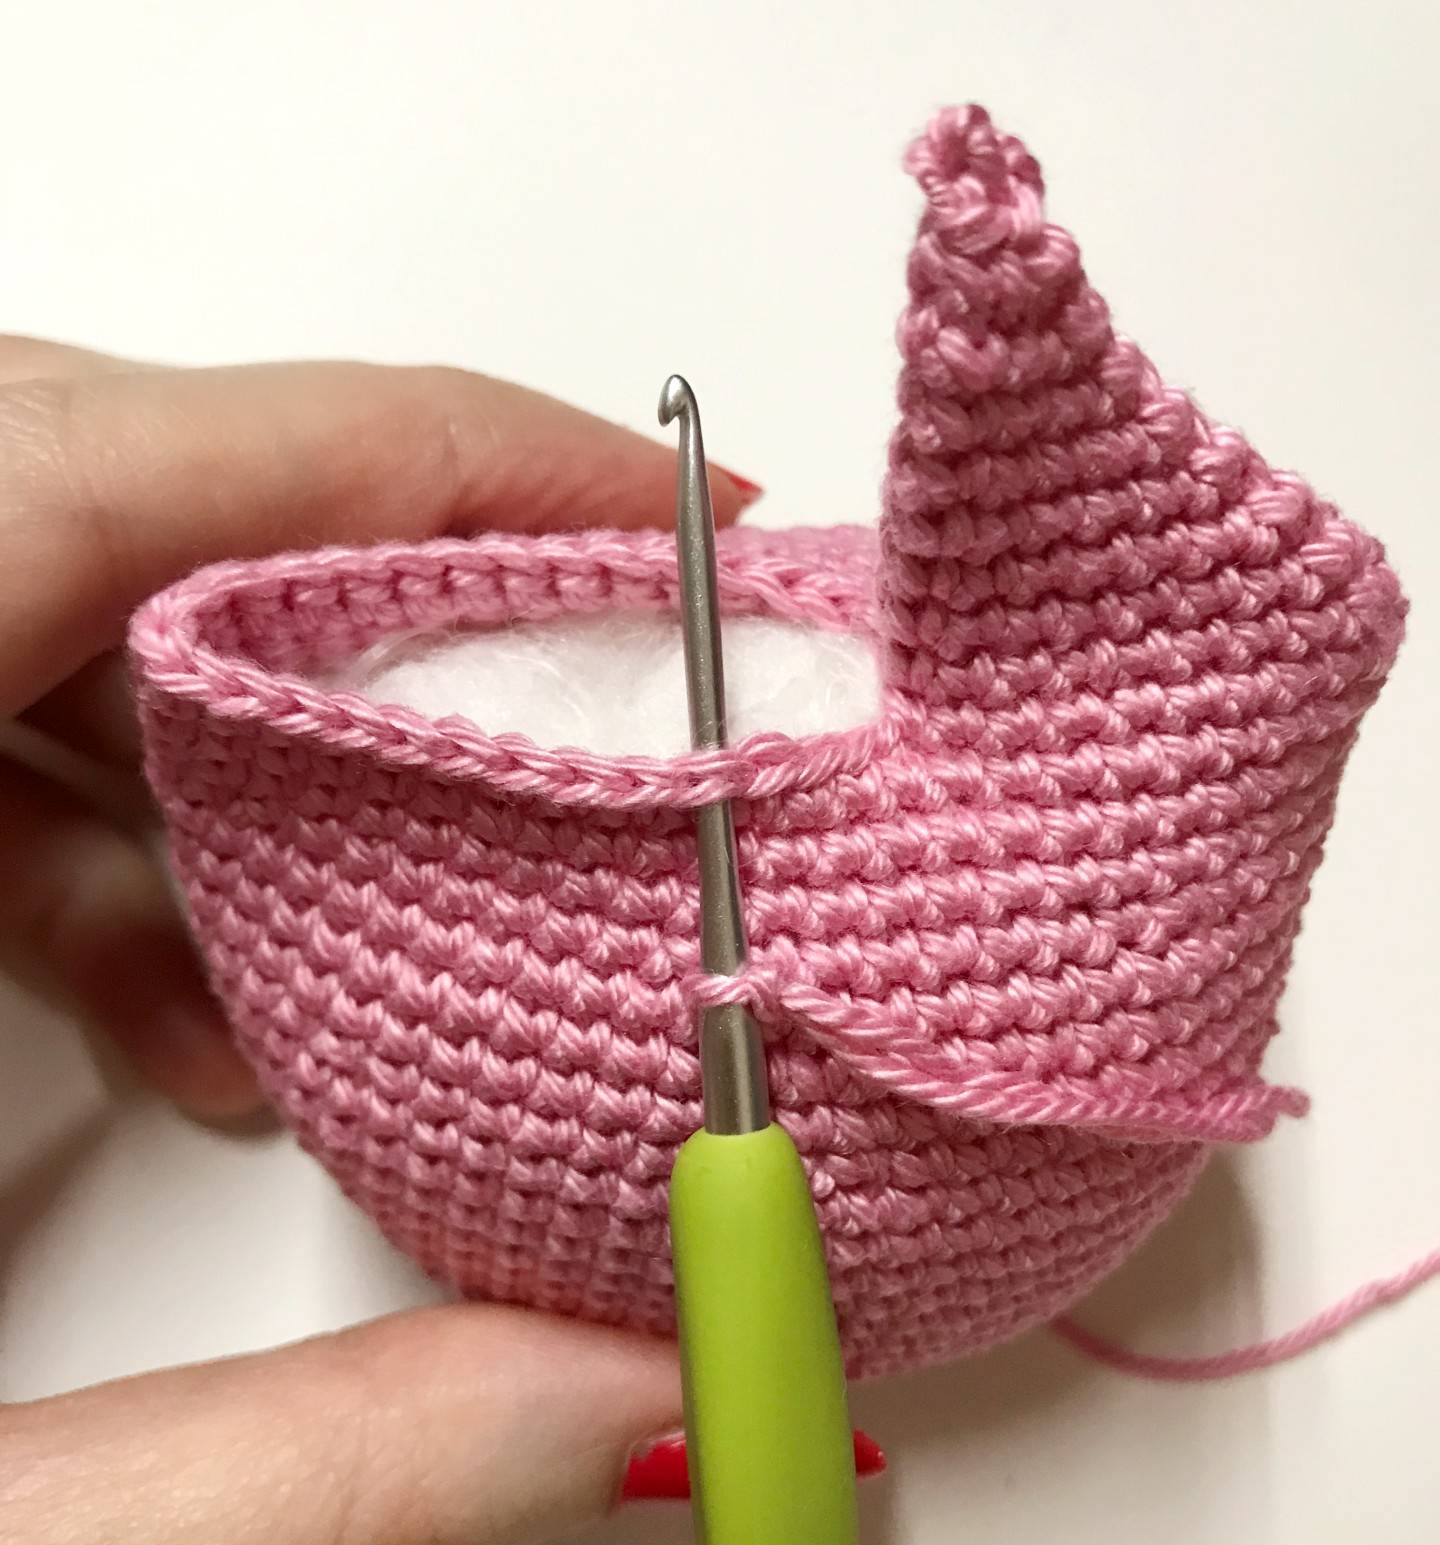
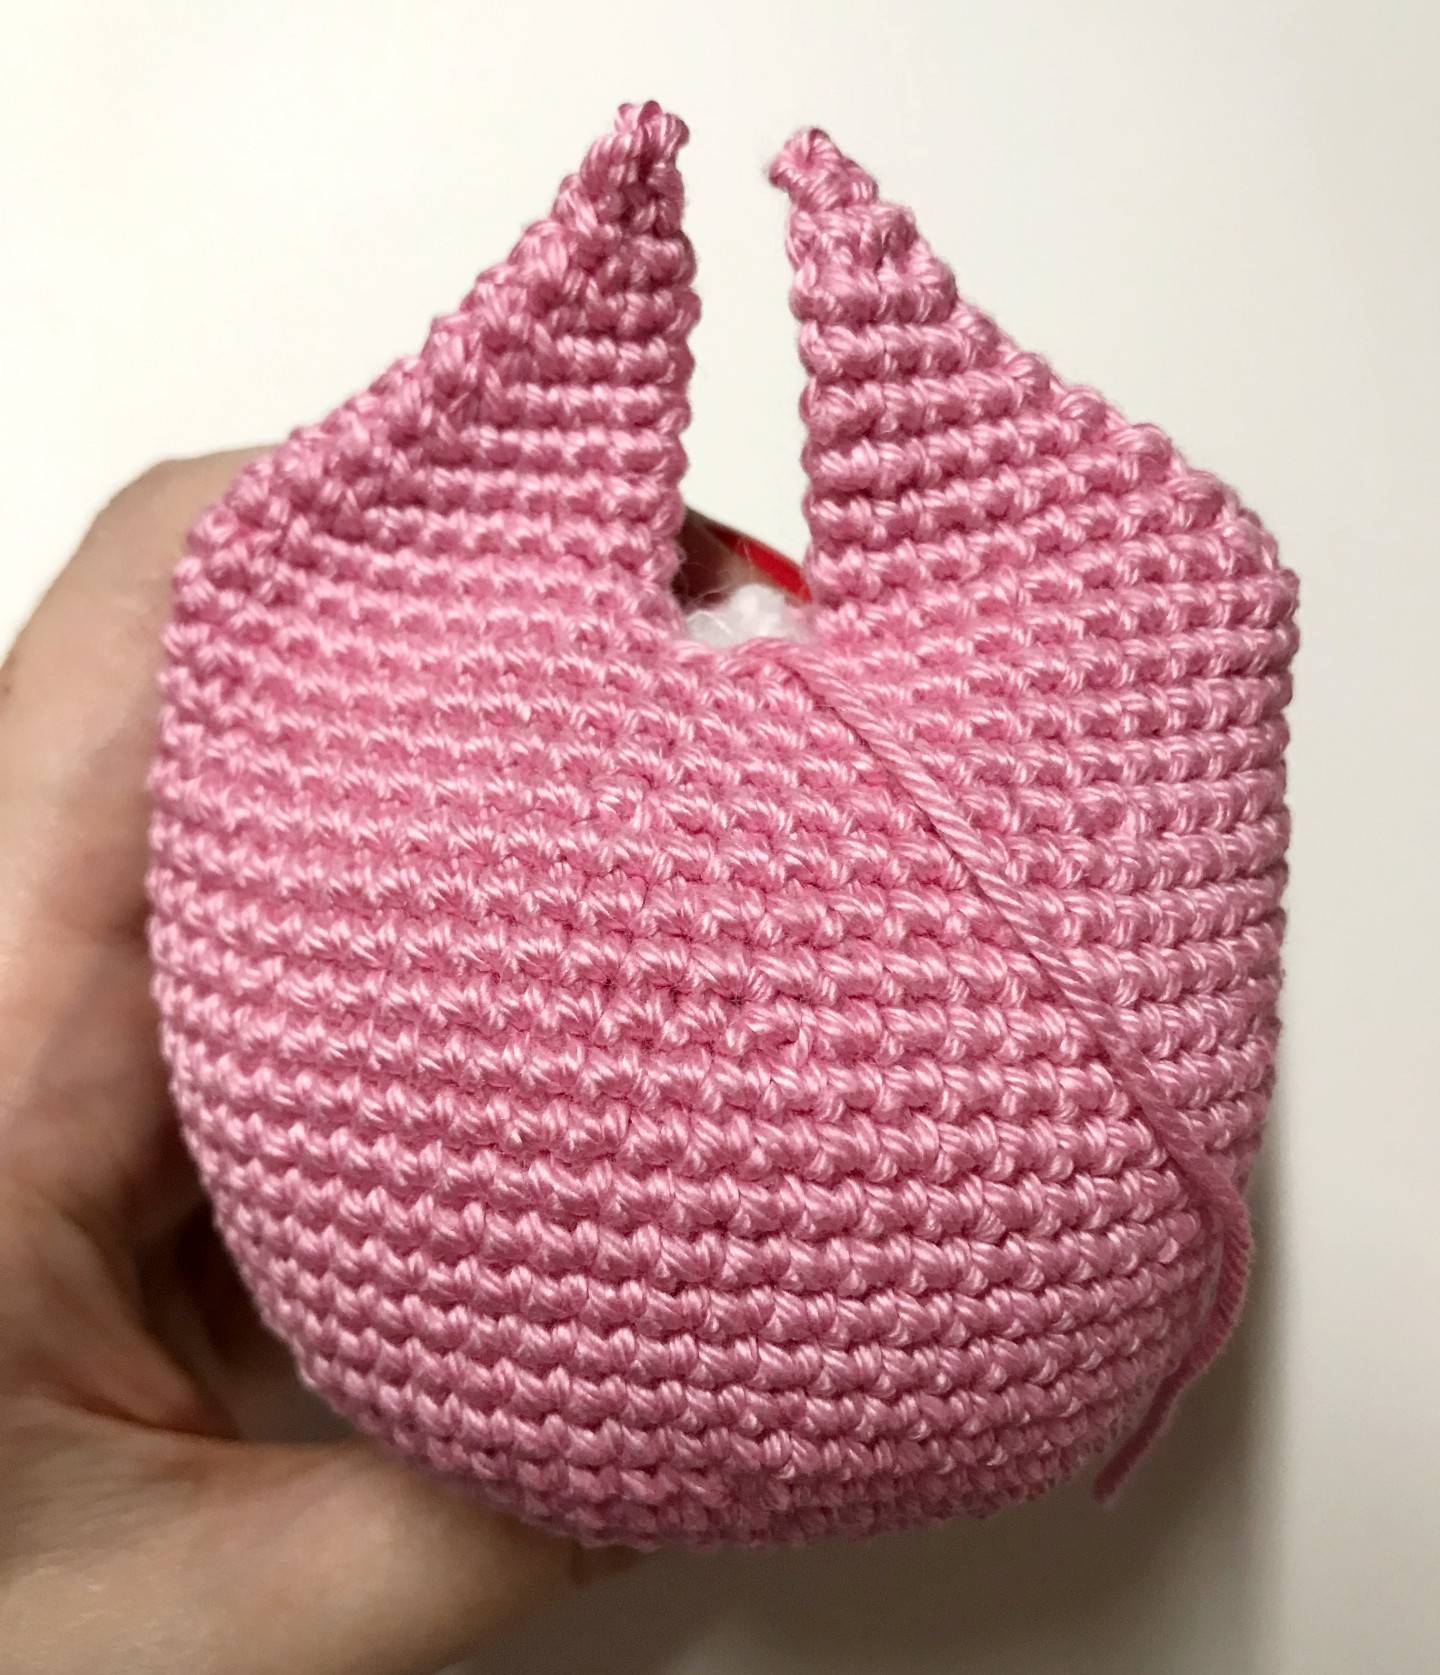
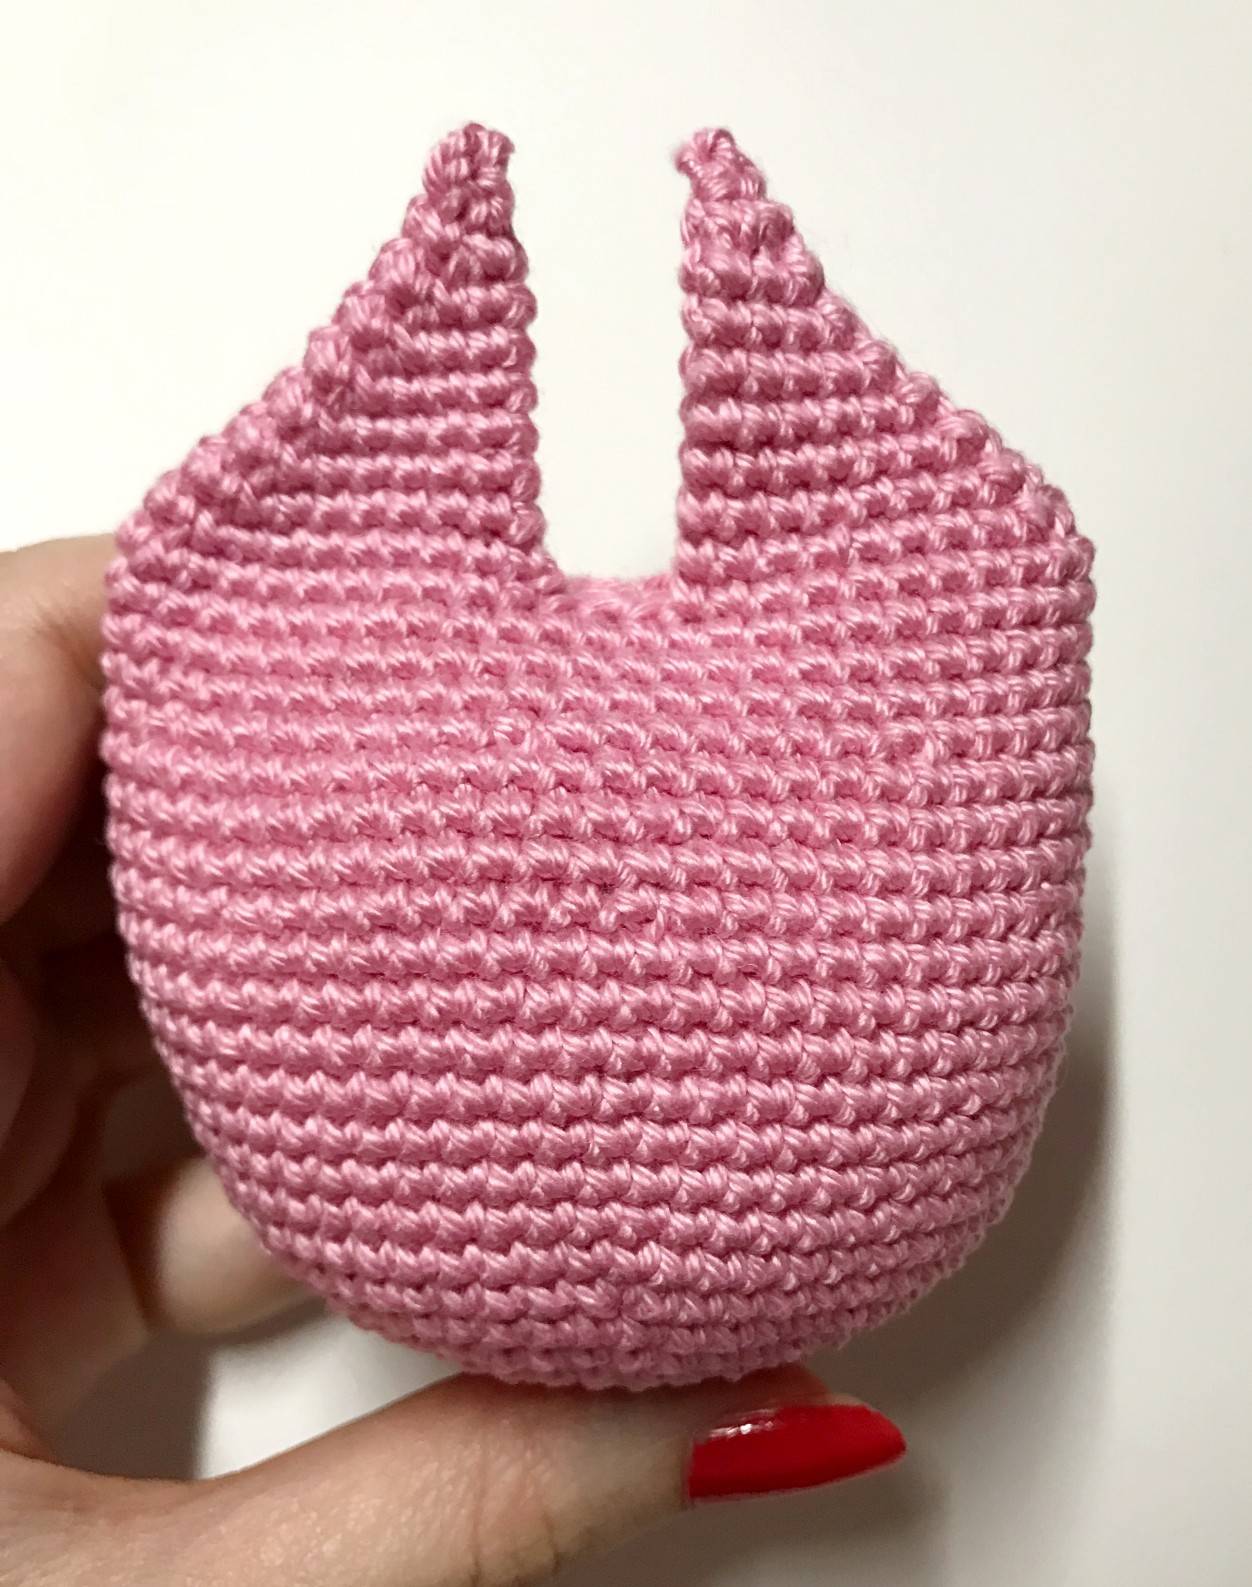
Finish stuffing the body so that the upper body is a little flatter to keep the shape of the ears (see photos below). Do not stuff the ears!
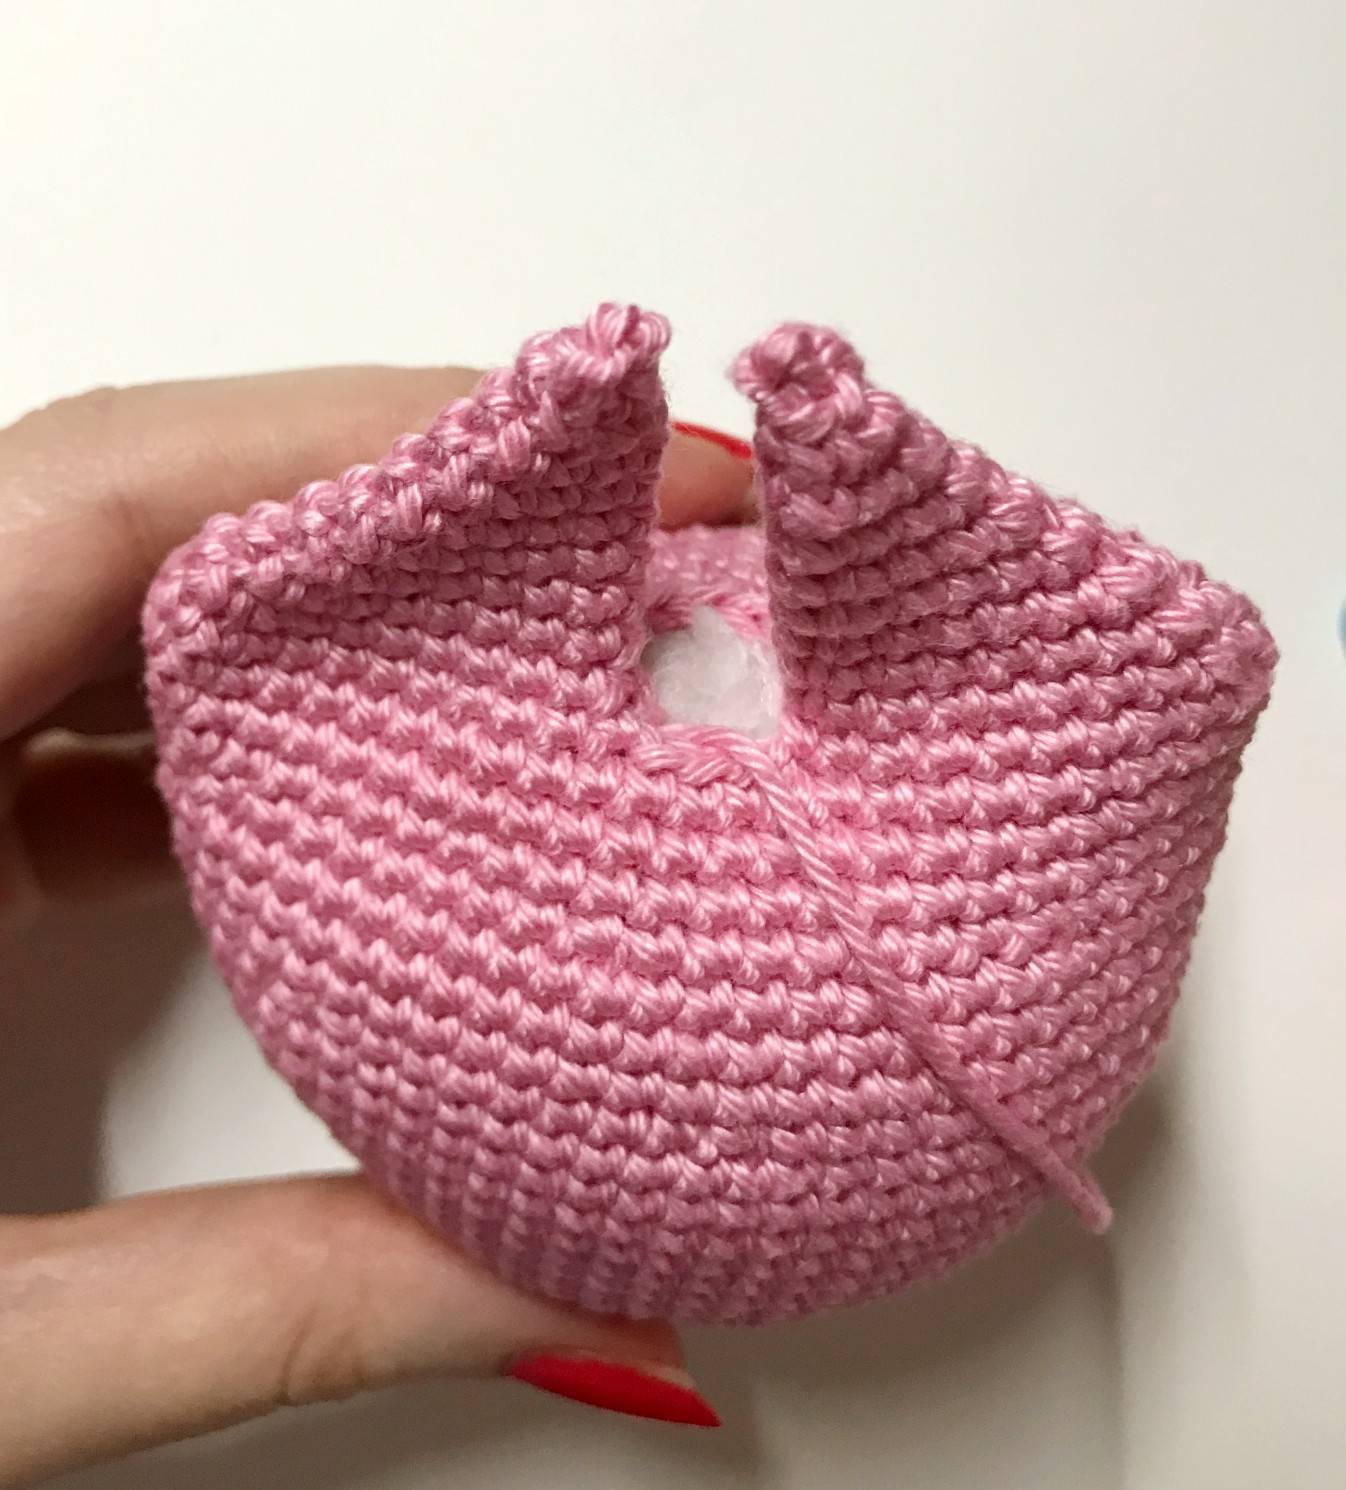
If you have kept yarn from the 2nd ear, take this one to sew the remaining stitches between the 2
ears.

Otherwise insert yarn to do so and tighten well so that the stitches on the two edges touch each other
well with a good tension.
Then tuck the yarn into the body, always keeping a good tension.
You have finished the body! 🙂
Find more magic patterns ✨
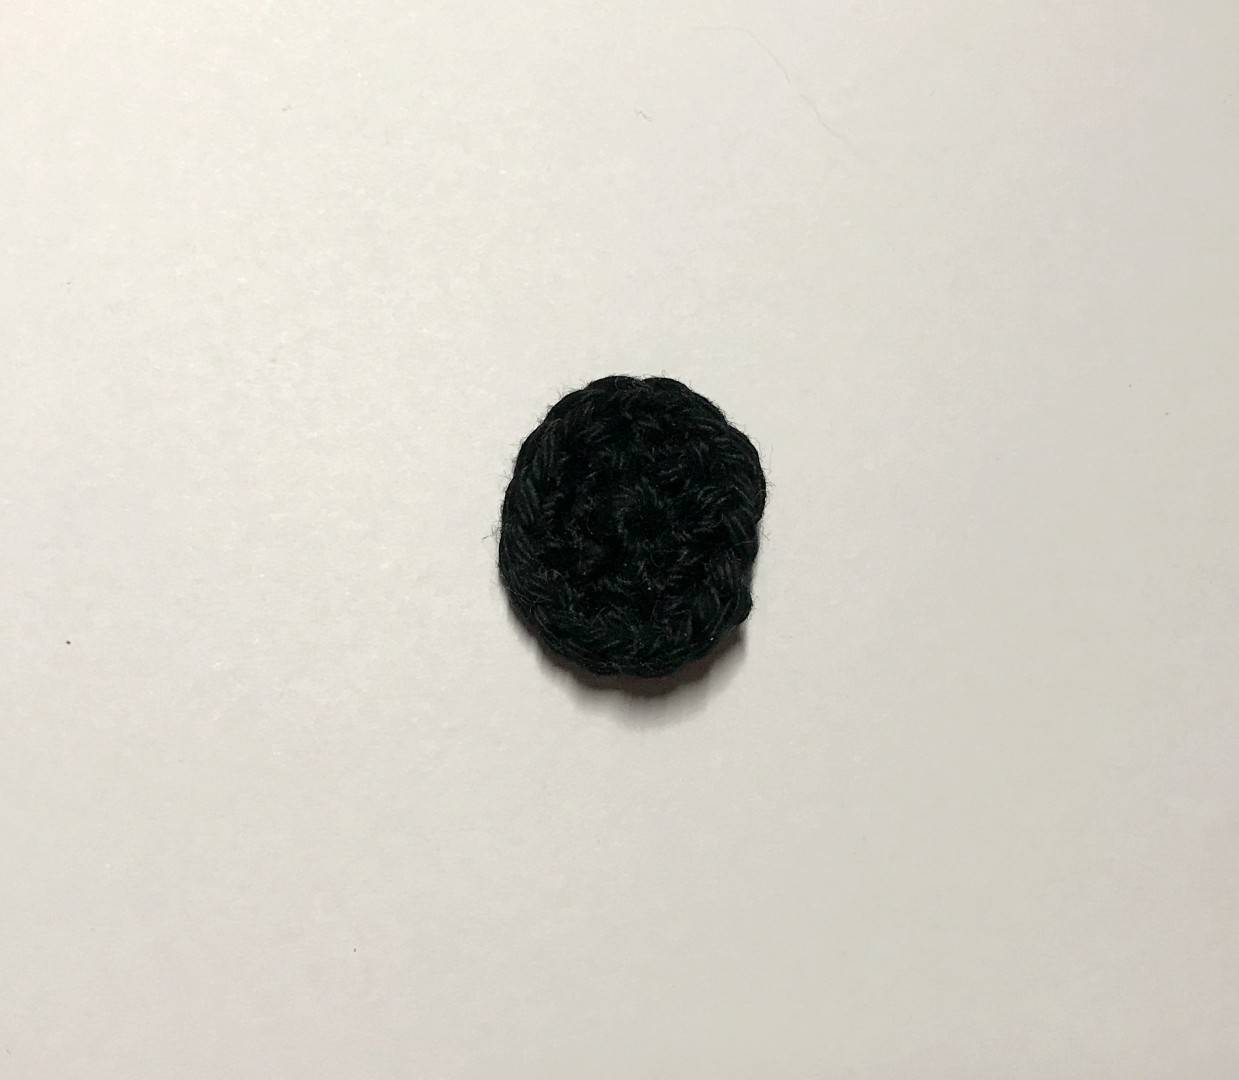
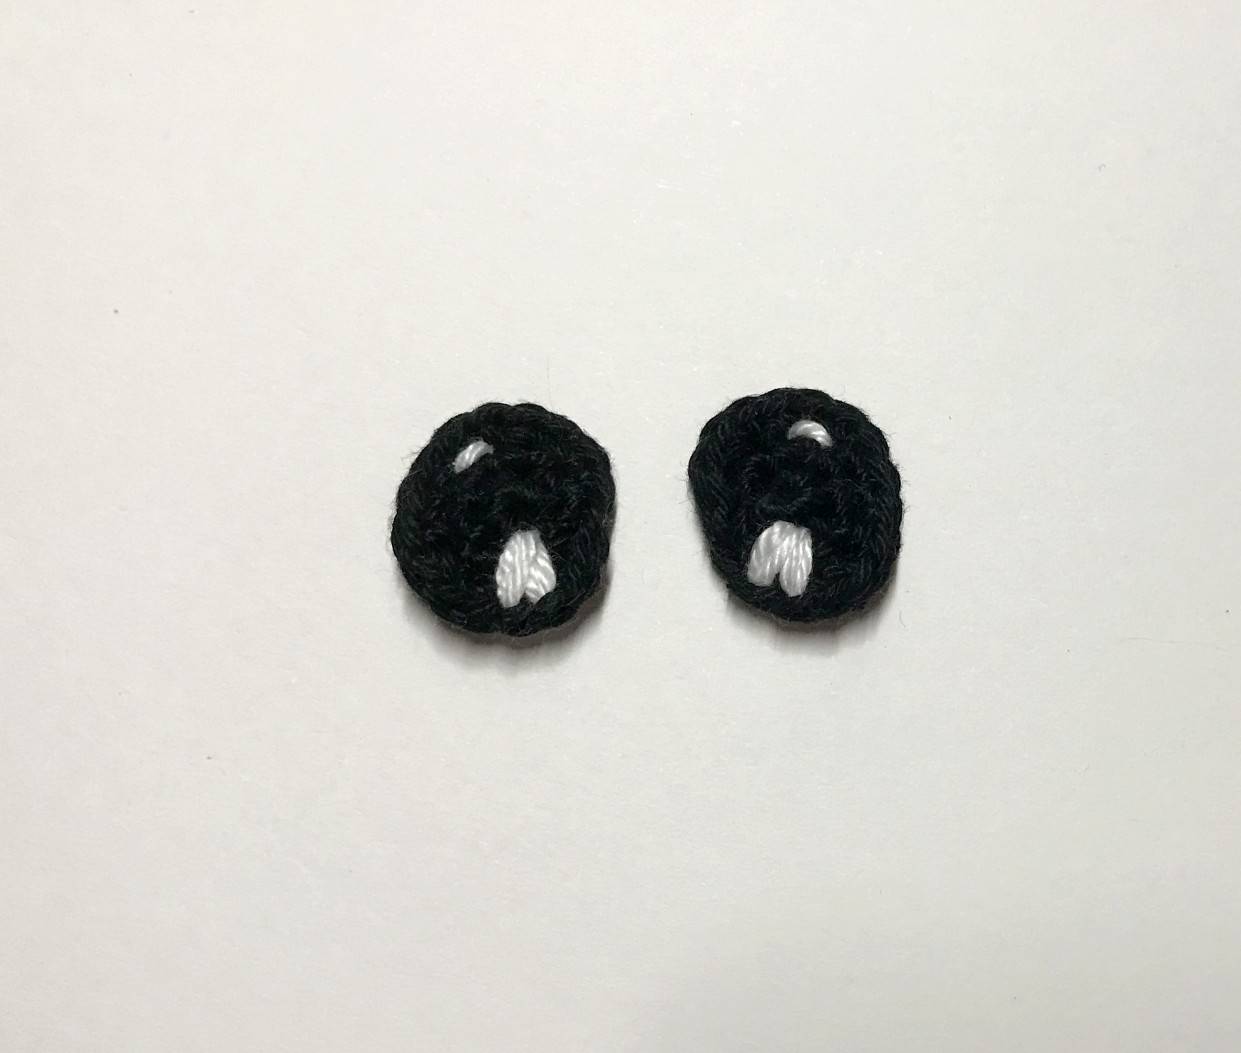
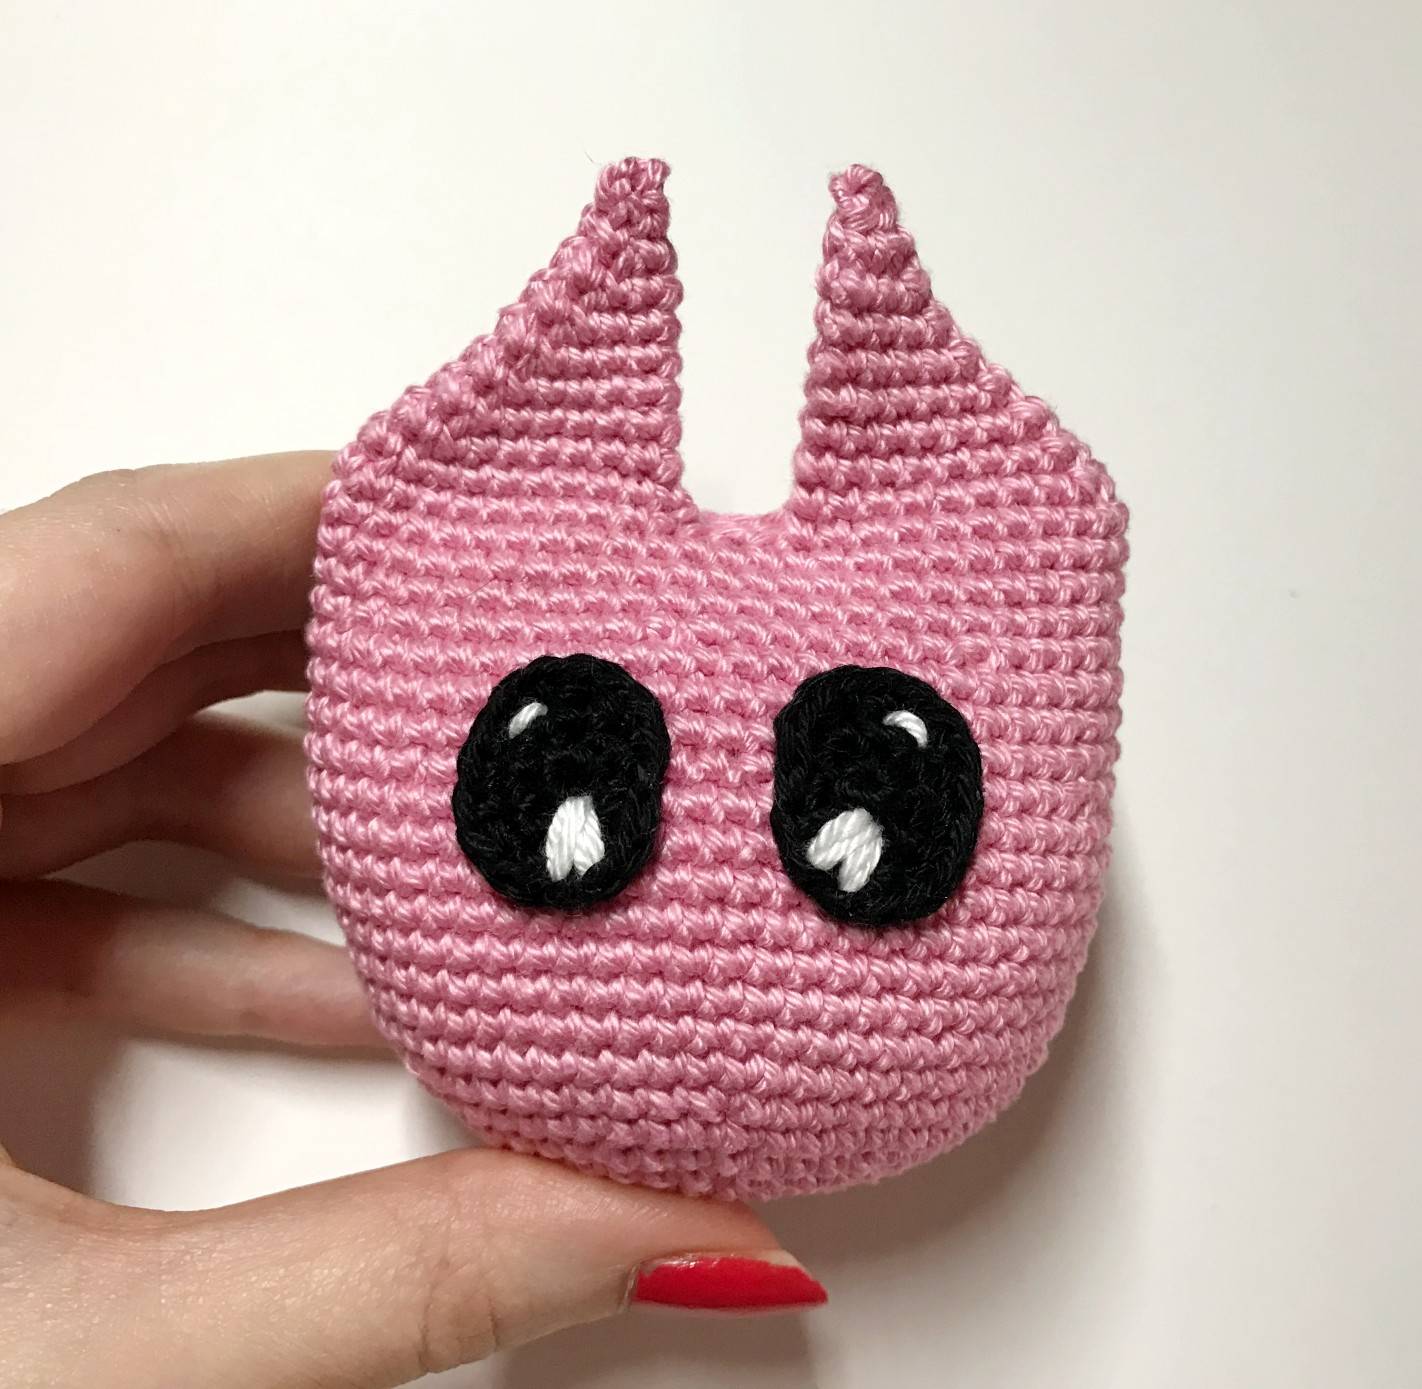
🧛 Eyes x2
(to be done with black and white colors)
With black color
R1: magic ring with 6 sc
R2: 1 sc, 2 Inc, 1 sc, 2 Inc (10)
R3: 1 sc, 3 Inc, 2 sc, 3 Inc, 1 sc (16)
-> Fasten off and make an invisible finish (see tip in video).
-> Tuck the yarn in the back and tie a knot to secure.
Eye details with white color
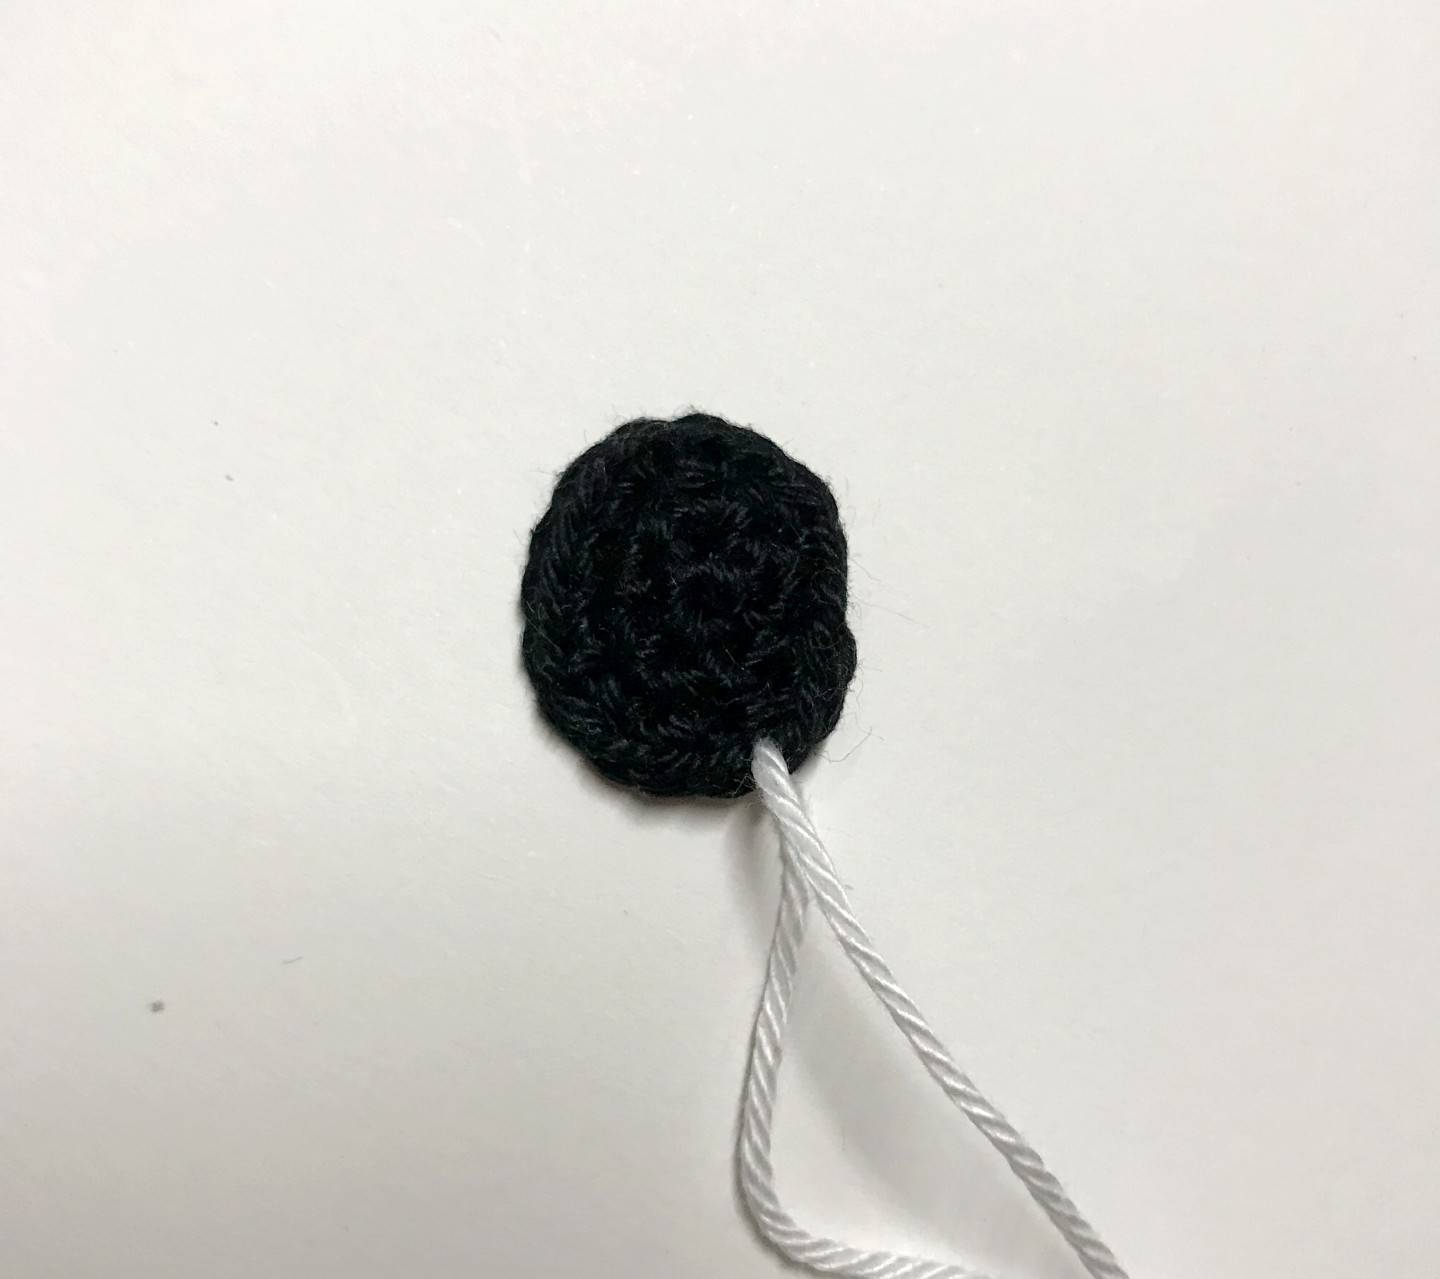
In one of the corners of the eye, tuck the white yarn from the back into a stitch of the last outer row as
in the photo.
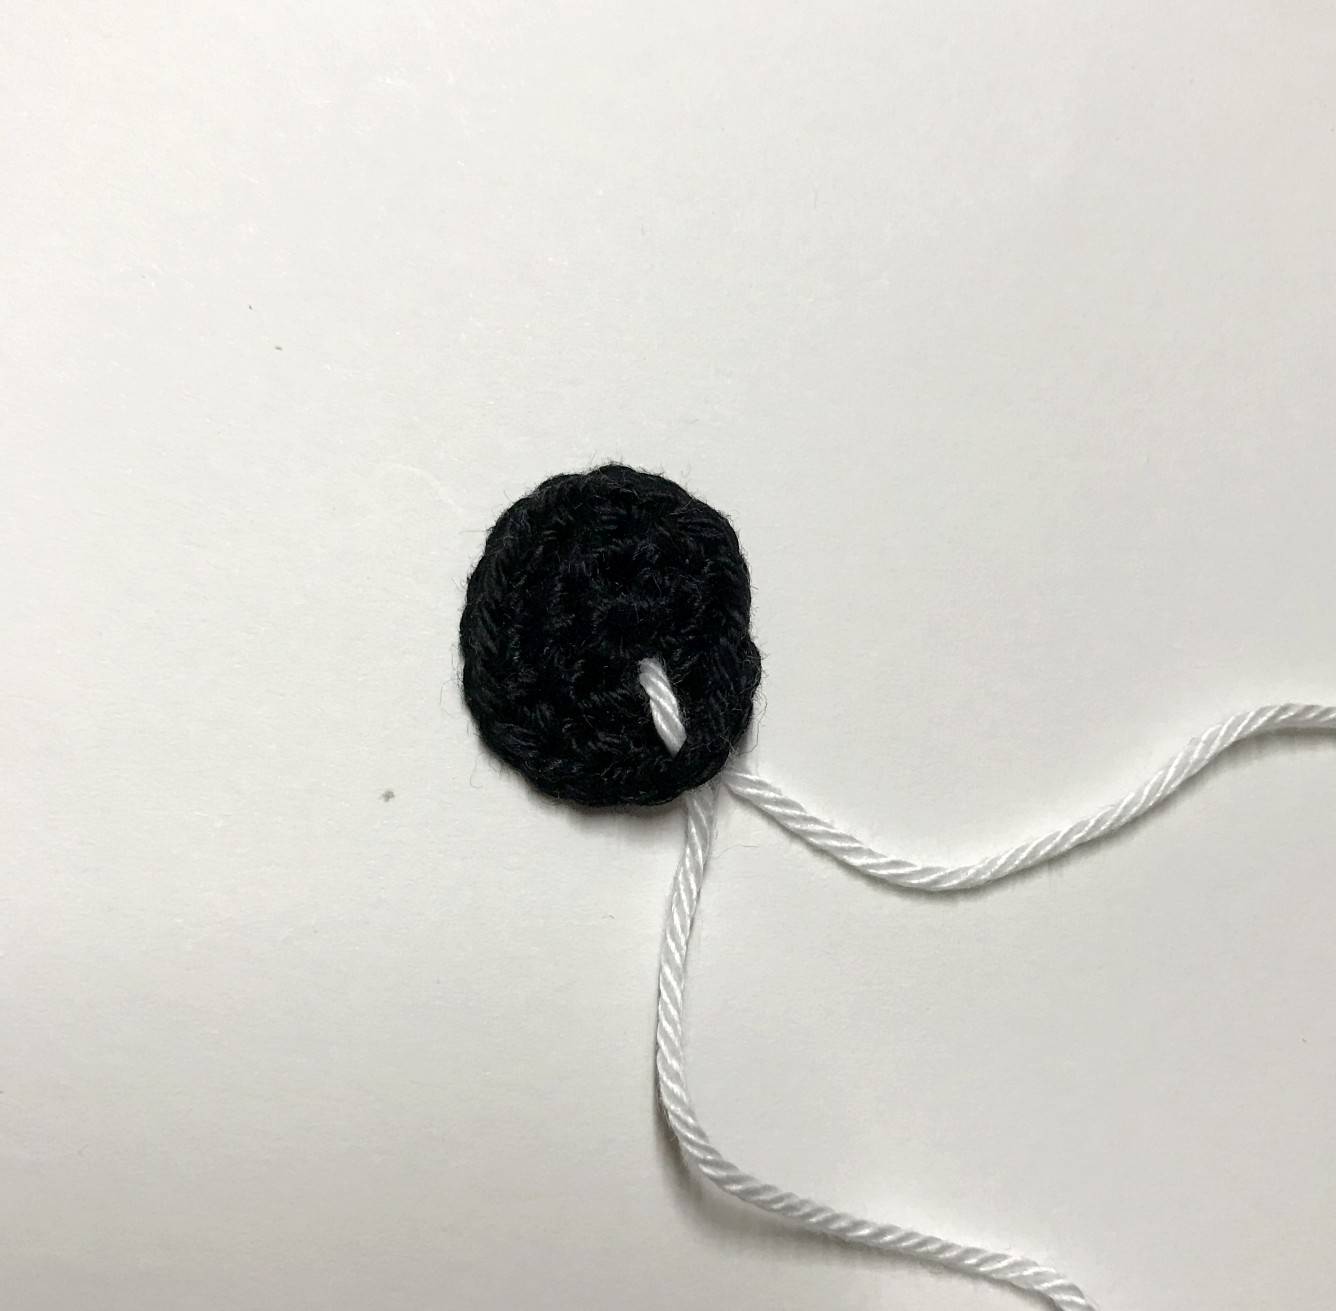
And tuck the yarn into the stitch 2 rows further inside the eye (the stitch that is closest to the starting magic ring of the eye).
Pass the yarn twice in this interval.
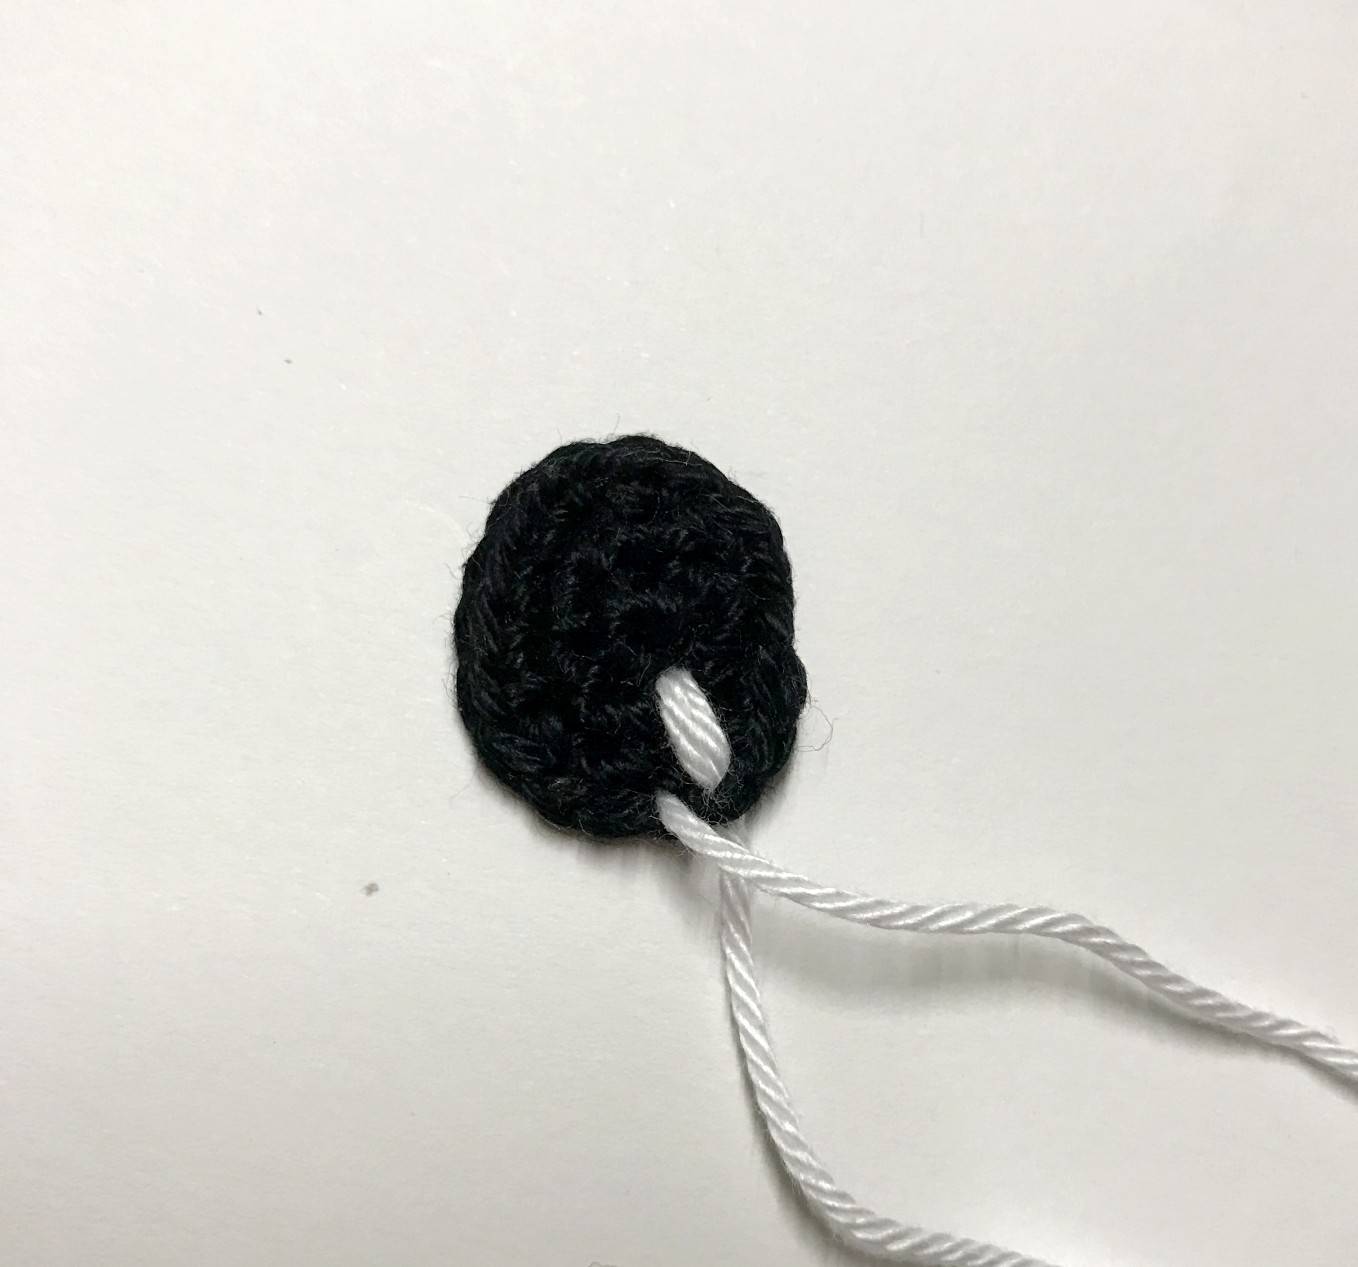
Then bring out the yarn in the stitch that is next to the starting stitch of the embroidery, still in the last
outer row.
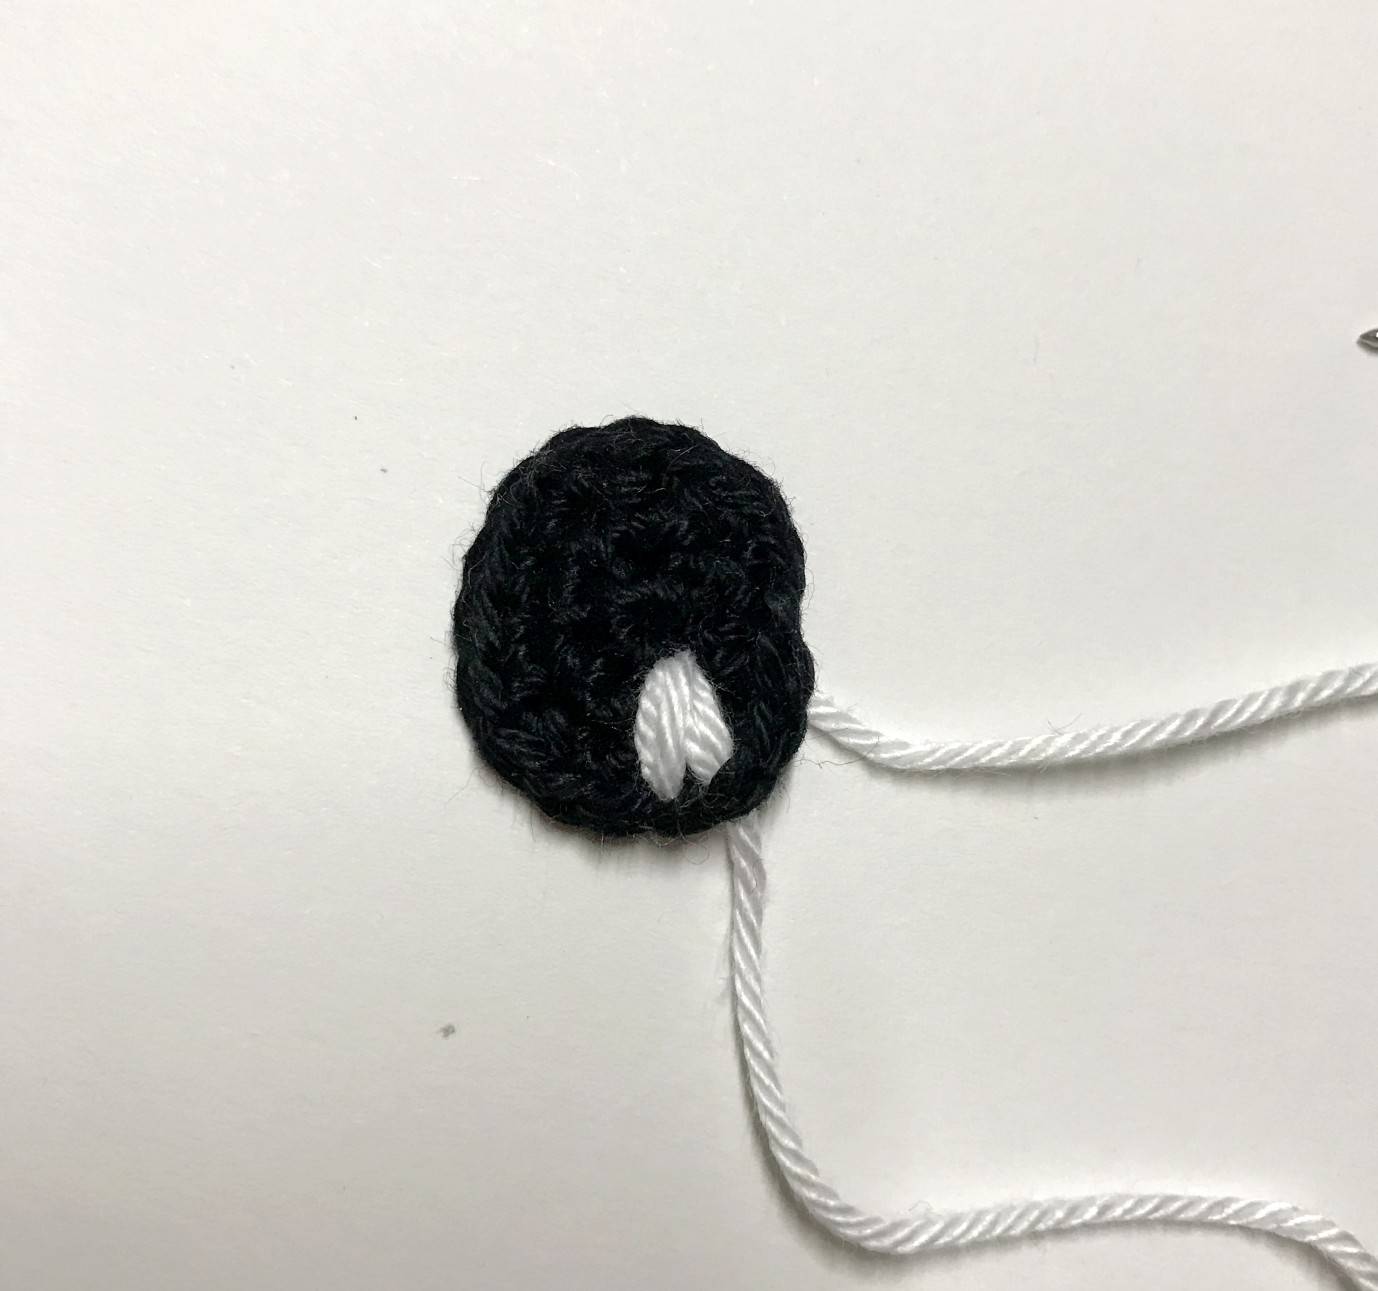
And tuck the yarn in the same stitch as for the previous interval and also pass it twice.

Then pass it in the opposite corner of the eye, once only, as in the photo.
Do the same for the 2nd eye.

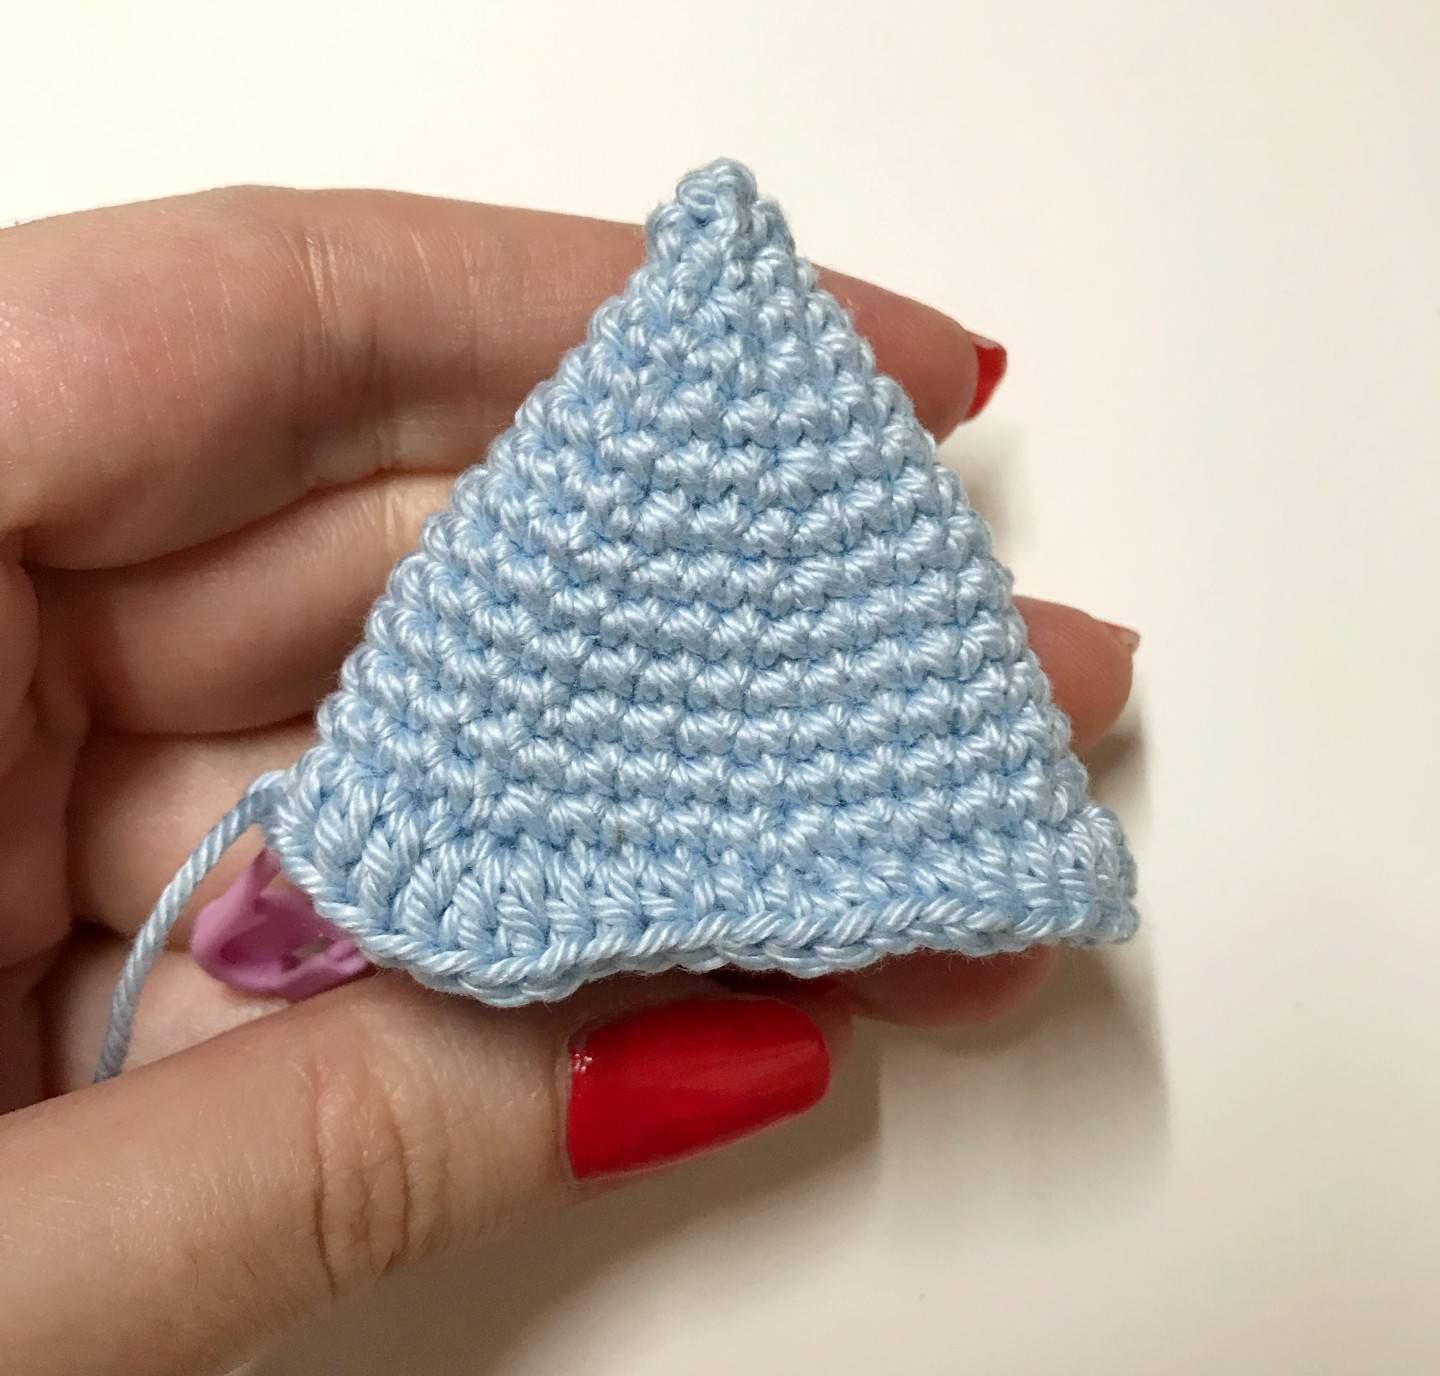
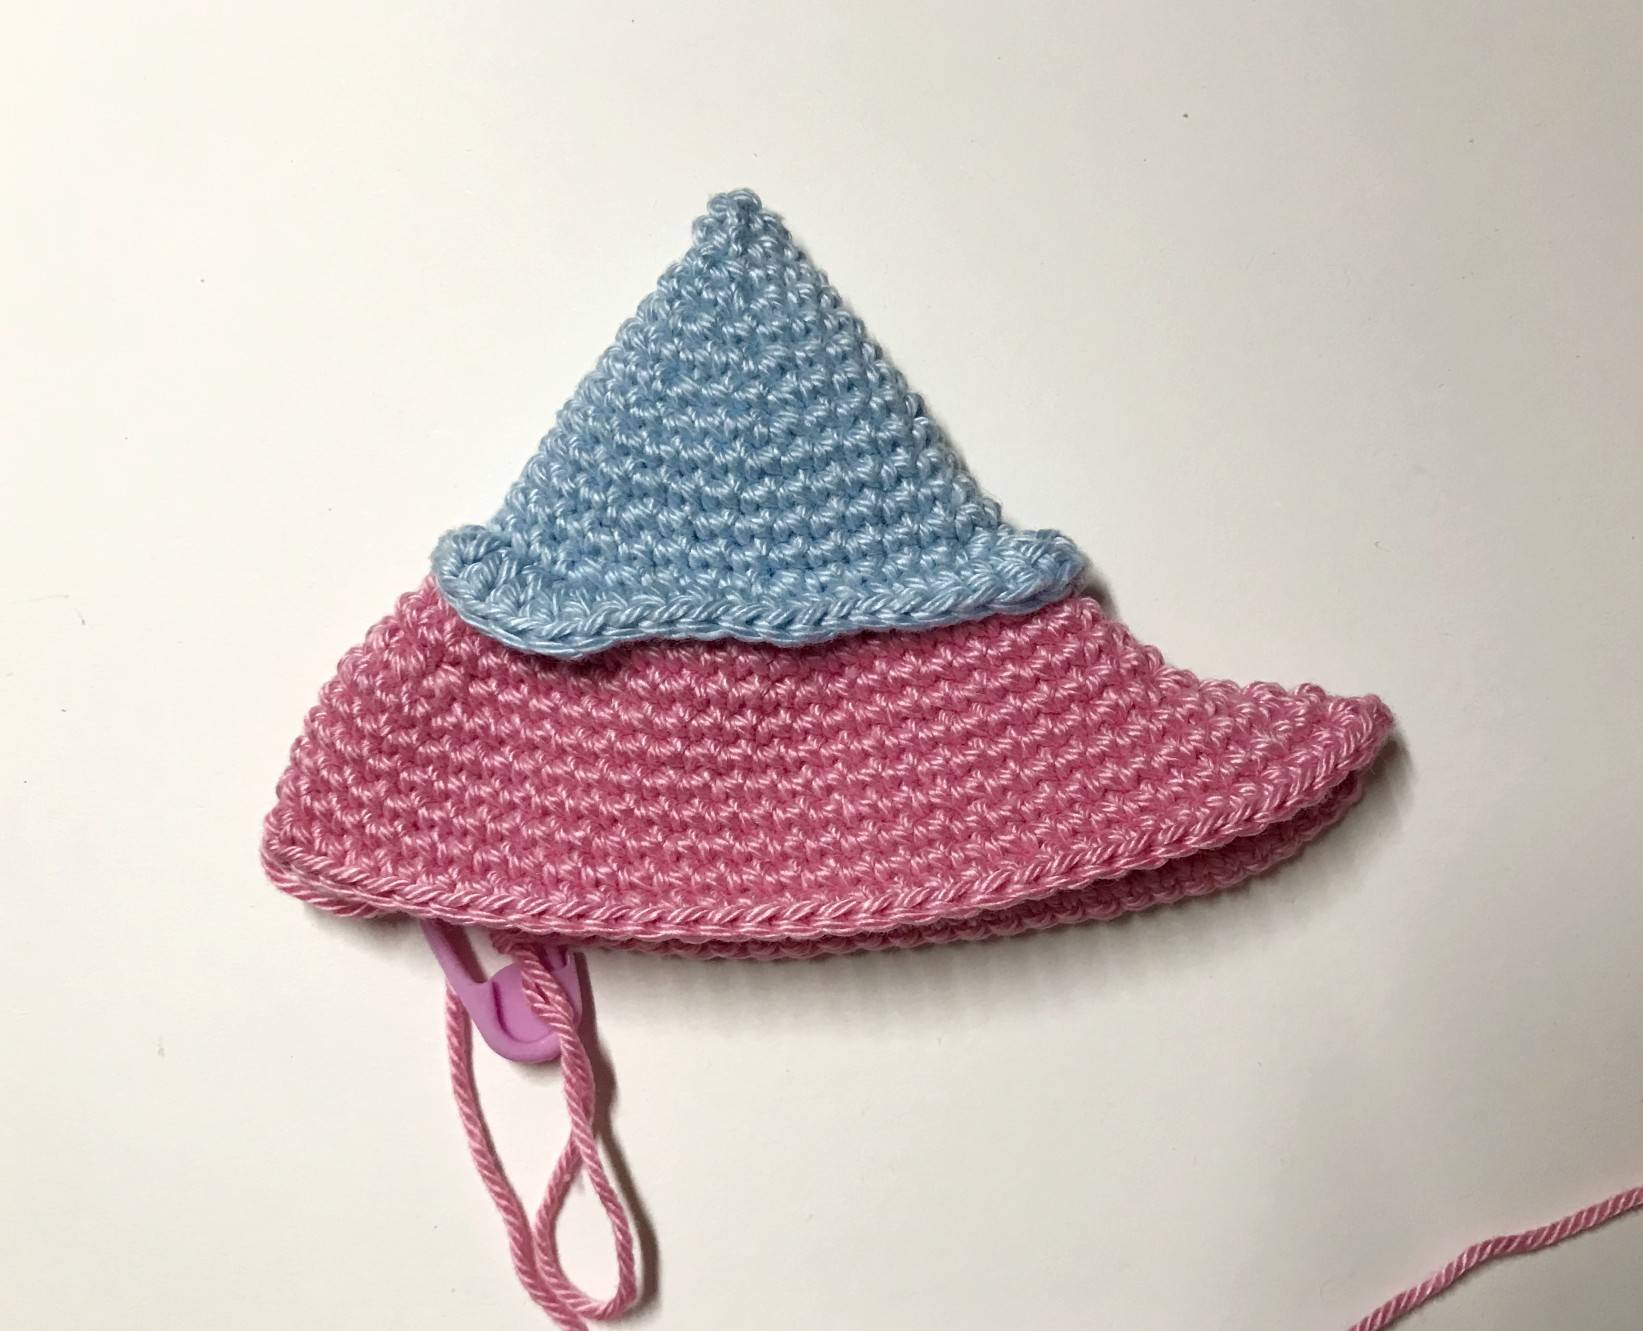
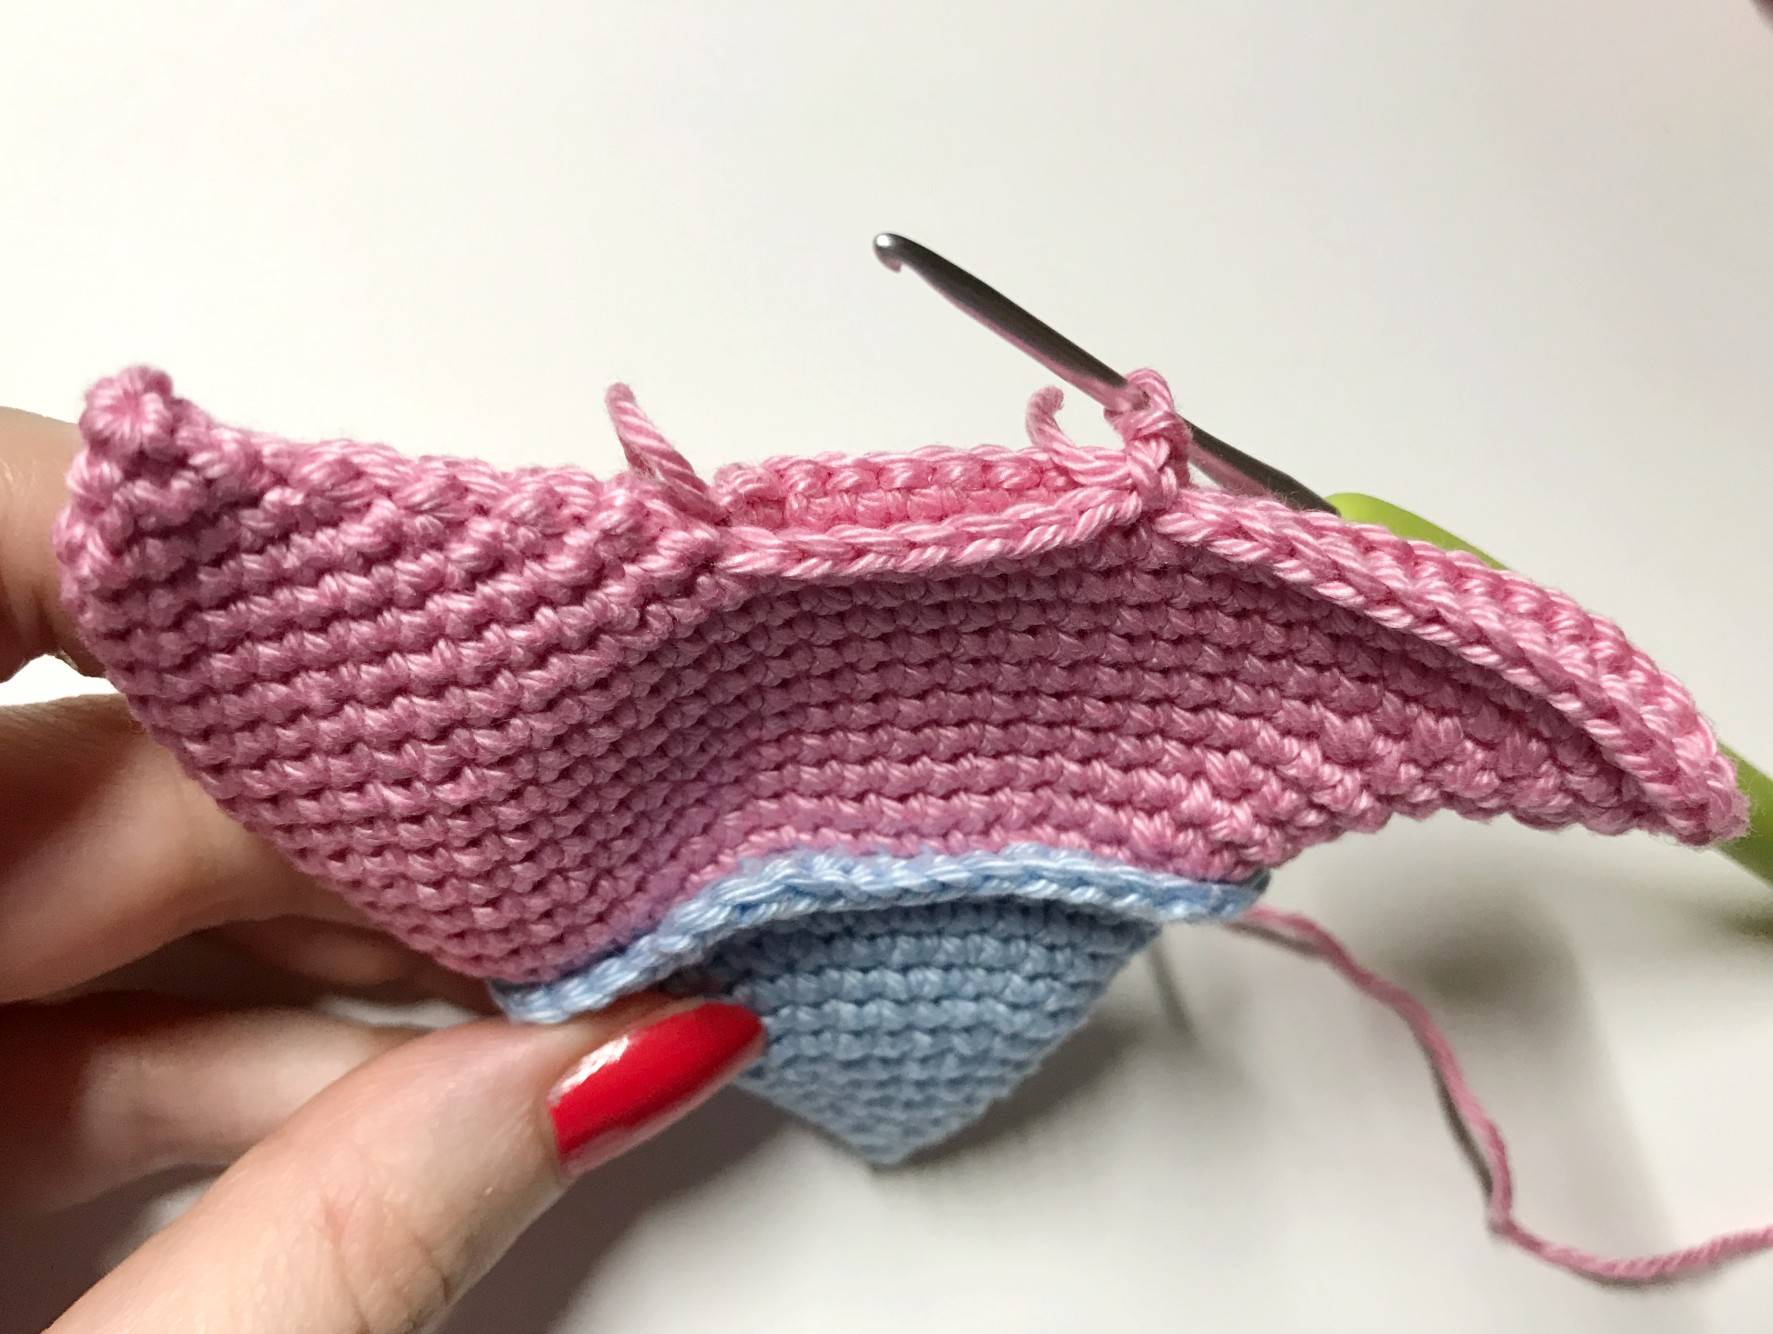
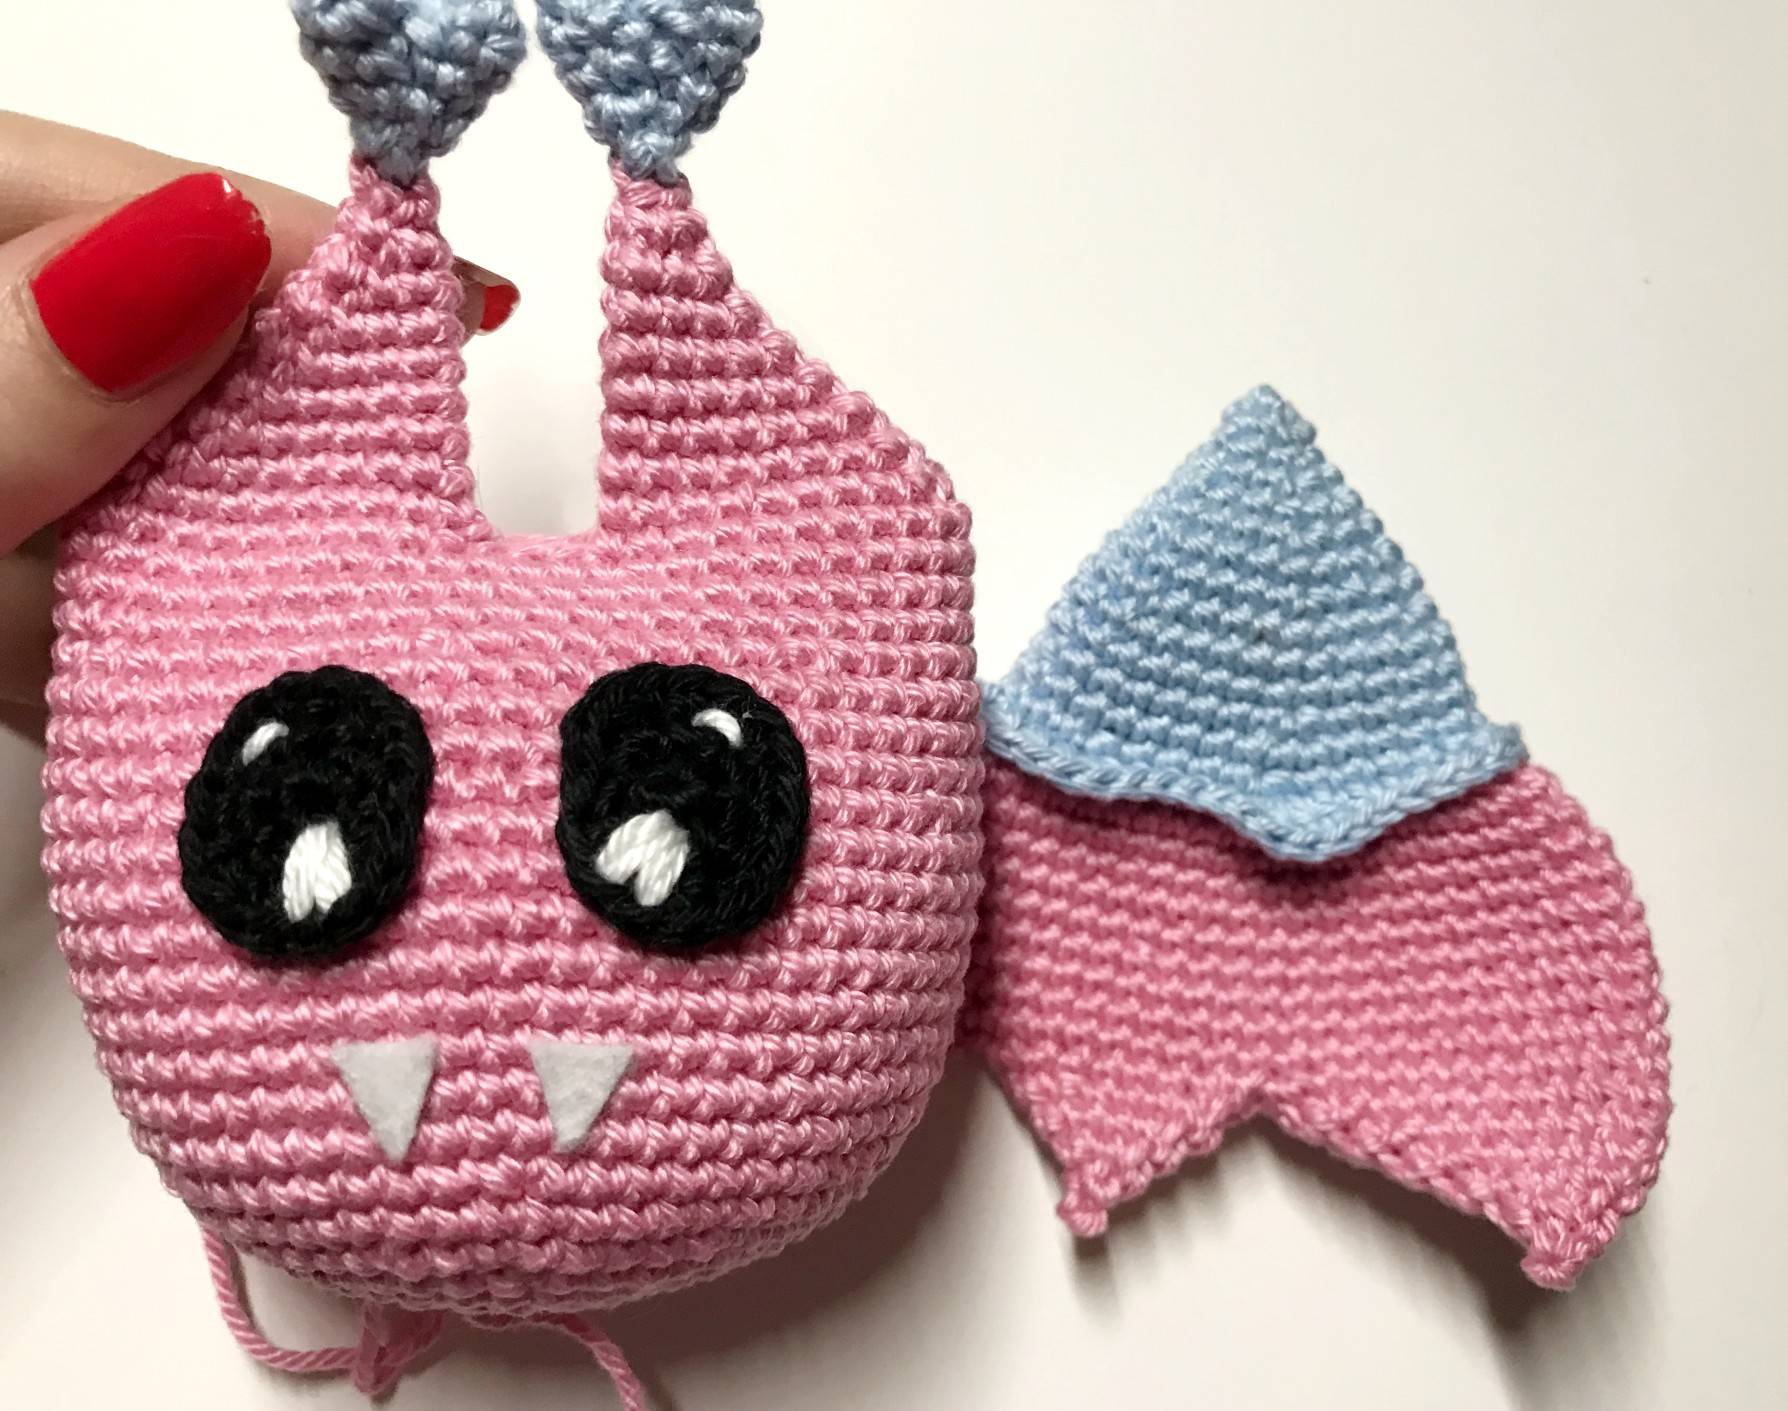
🎃 Wings
(to be done with pink and blue colors)
With blue color
R1: magic ring with 3 sc
R2: 1 Inc in each sc (6)
R3: *1 sc, 1 Inc* x3 (9)
R4: 1 sc, 1 Inc, *2 sc, 1 Inc* x2, 1 sc (12)
R5: *3 sc, 1 Inc* x3 (15)
R6: 2 sc, 1 Inc, *4 sc, 1 Inc* x2, 2 sc (18)
R7: *5 sc, 1 Inc* x3 (21)
R8: 3 sc, 1 Inc, *6 sc, 1 Inc* x2, 3 sc (24)
R9: *7 sc, 1 Inc* x3 (27)
R10 and R11: sc in each sc (27)
R12: 4 sc, 1 Inc, *8 sc, 1 Inc* x2, 4 sc (30)
R13: sc in each sc (30)
R14: *4 sc, 1 Inc* x6 (36)
R15: FLO all over the row, 1 sc, 1 hdc, 3 dc, [2 dc], 3 hdc, 2 sc, [2 sc], 2 sc, 3 hdc, [2 dc], 2 dc, 3 hdc, [2 hdc], 4 sc, 1 hdc, [2 dc], 1 dc, 1 hdc, 3 sc, [2 sc] (42)
Fasten off and make an invisible finish (see tip in video). Weave in ends.
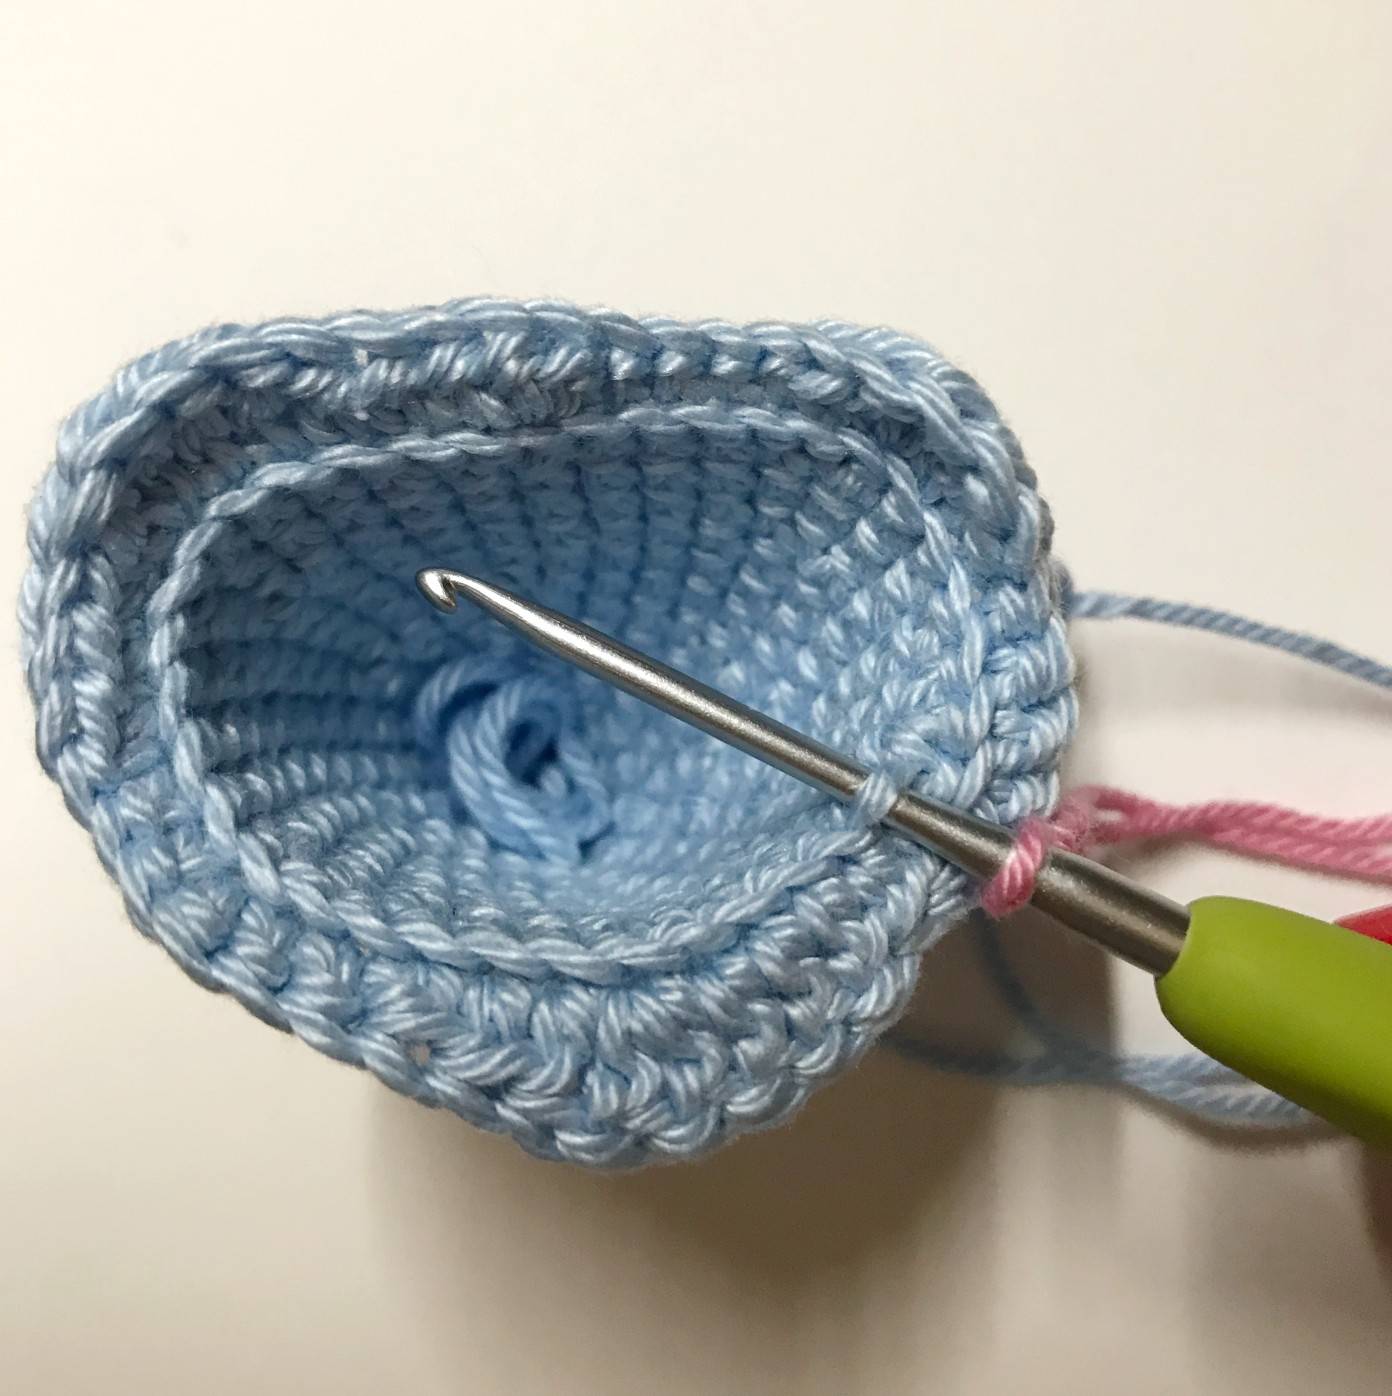
With pink color
R16: BLO from R14 all over the row, tuck in your yarn with 1 ssc, 4 sc, 1 Inc, *5sc, 1 Inc* x5 (42)
R17: 1 sc, 3 Inc, 18 sc, 3 Inc, 17 sc (48)
R18: sc in each sc (48)
R19: 3 sc, 3 Inc, 21 sc, 3 Inc, 18 sc (54)
R20: sc in each sc (54)
R21: 30 sc, 4 Inc, 20 sc (58)
R22: 32 sc, 4 Inc, 22 sc (62)
R23: 34 sc, 4 Inc, 24 sc (66)
R24: sc in each sc (66)
R25: 36 sc, 4 Inc, 26 sc (70)
Keep the yarn to make the 1st peak of the wing.
✨ Receive your Magic e-book with 5 free patterns! ✨
1st peak
R1: Leave your marker in the first stitch to
get your bearings.
Make 18 sc. (18)
R2: Count 7 sc in front of where you are, that is to say the 7 sts before the marker, and make 1 sc in the 7th stitch by first inserting your hook into this stitch to make your sc. This sc marks the 1st stitch
on the row, insert your marker here now.
1 sc in the same stitch where we joined the 2 edges, 22 sc, 1 dec (24)
R3: 2 dec, 17 sc, 2 dec (21)
R4: 2 dec, 13 sc, 2 dec (17)
R5: 2 dec, 9 sc, 2 dec (13)
R6: 2 dec, 5 sc, 2 dec (9)
R7: 4 dec, 1 sc (5)
R8: Cut the yarn and tuck it into the front loops of the remaining 5 stitches then tighten to close the hole.
Weave in ends.
2nd peak
R1: Enter in the same stitch as the last of the 1st peak (see photo opposite) and make 1 ssc then 8 sc.
Count 8 sc on the opposite edge from the last stitch of the 1st peak and insert your hook in this stitch first to make 1 sc.
Then make 7 sc and join with the opposite edge with 1 sc in the 1st starting stitch. This joining sc is our 1st stitch on the row, insert your marker here. (18)
R2: Start in this first stitch of the row with 1 dec then 5 sc, 2 dec, 5 sc, 1 dec (14)
R3: 1 dec, 3 sc, 2 dec, 3 sc, 1 dec (10)
R4: 1 dec, 1 sc, 2 dec, 1 sc, 1 dec (6)
R5: 3 dec (3)
R6: Cut the yarn and tuck it into the front loops of the remaining 3 stitches, then pull tight to close the hole.
Weave in ends.
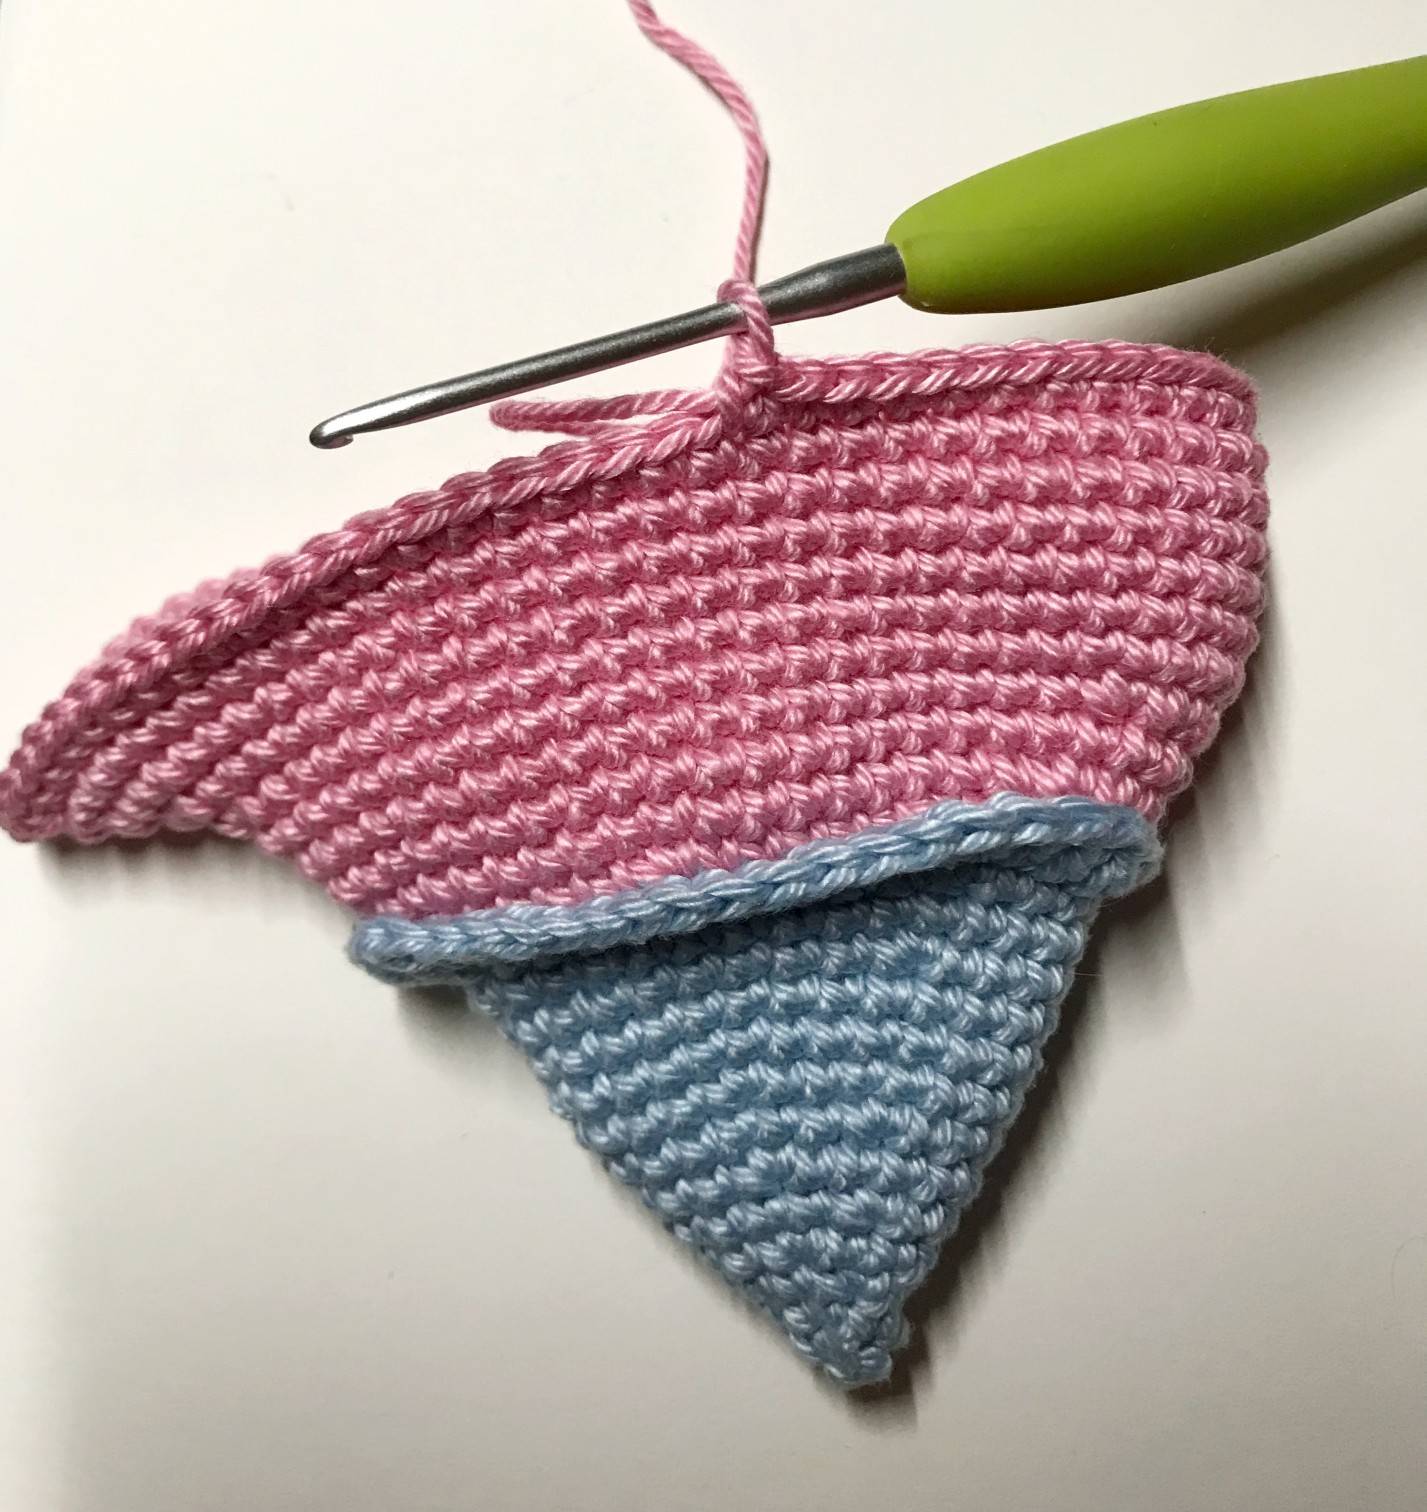
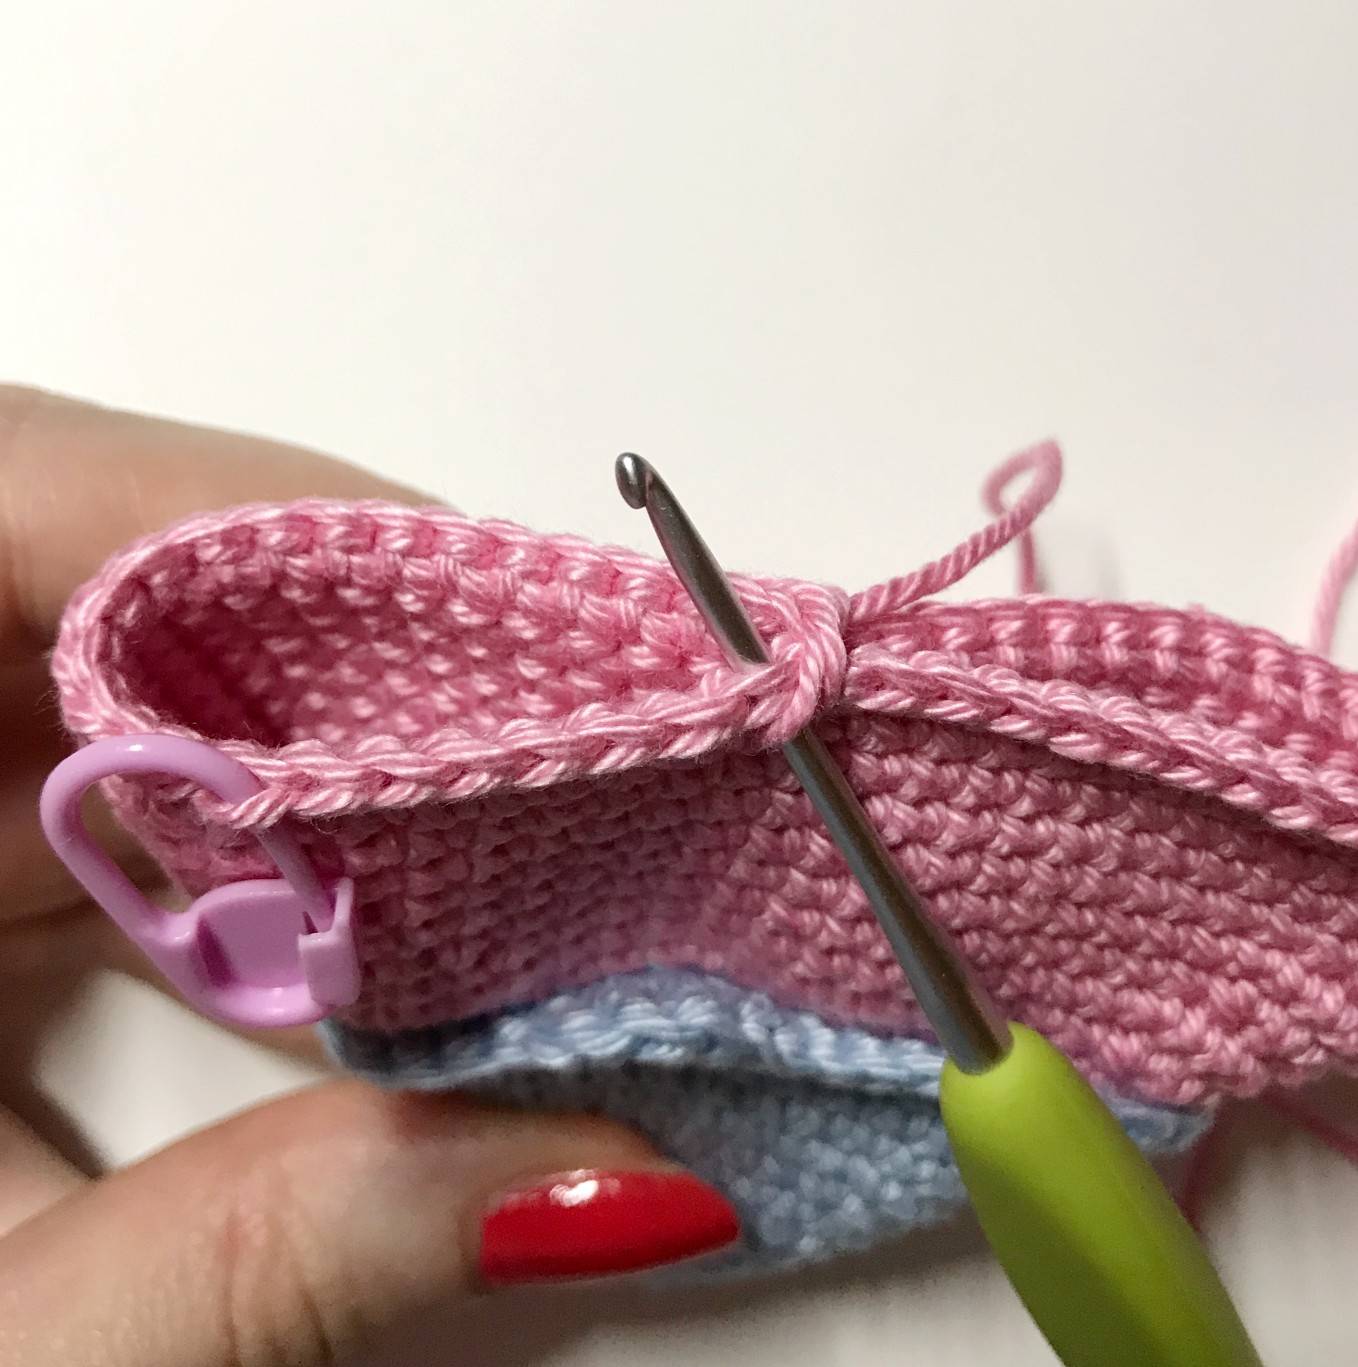

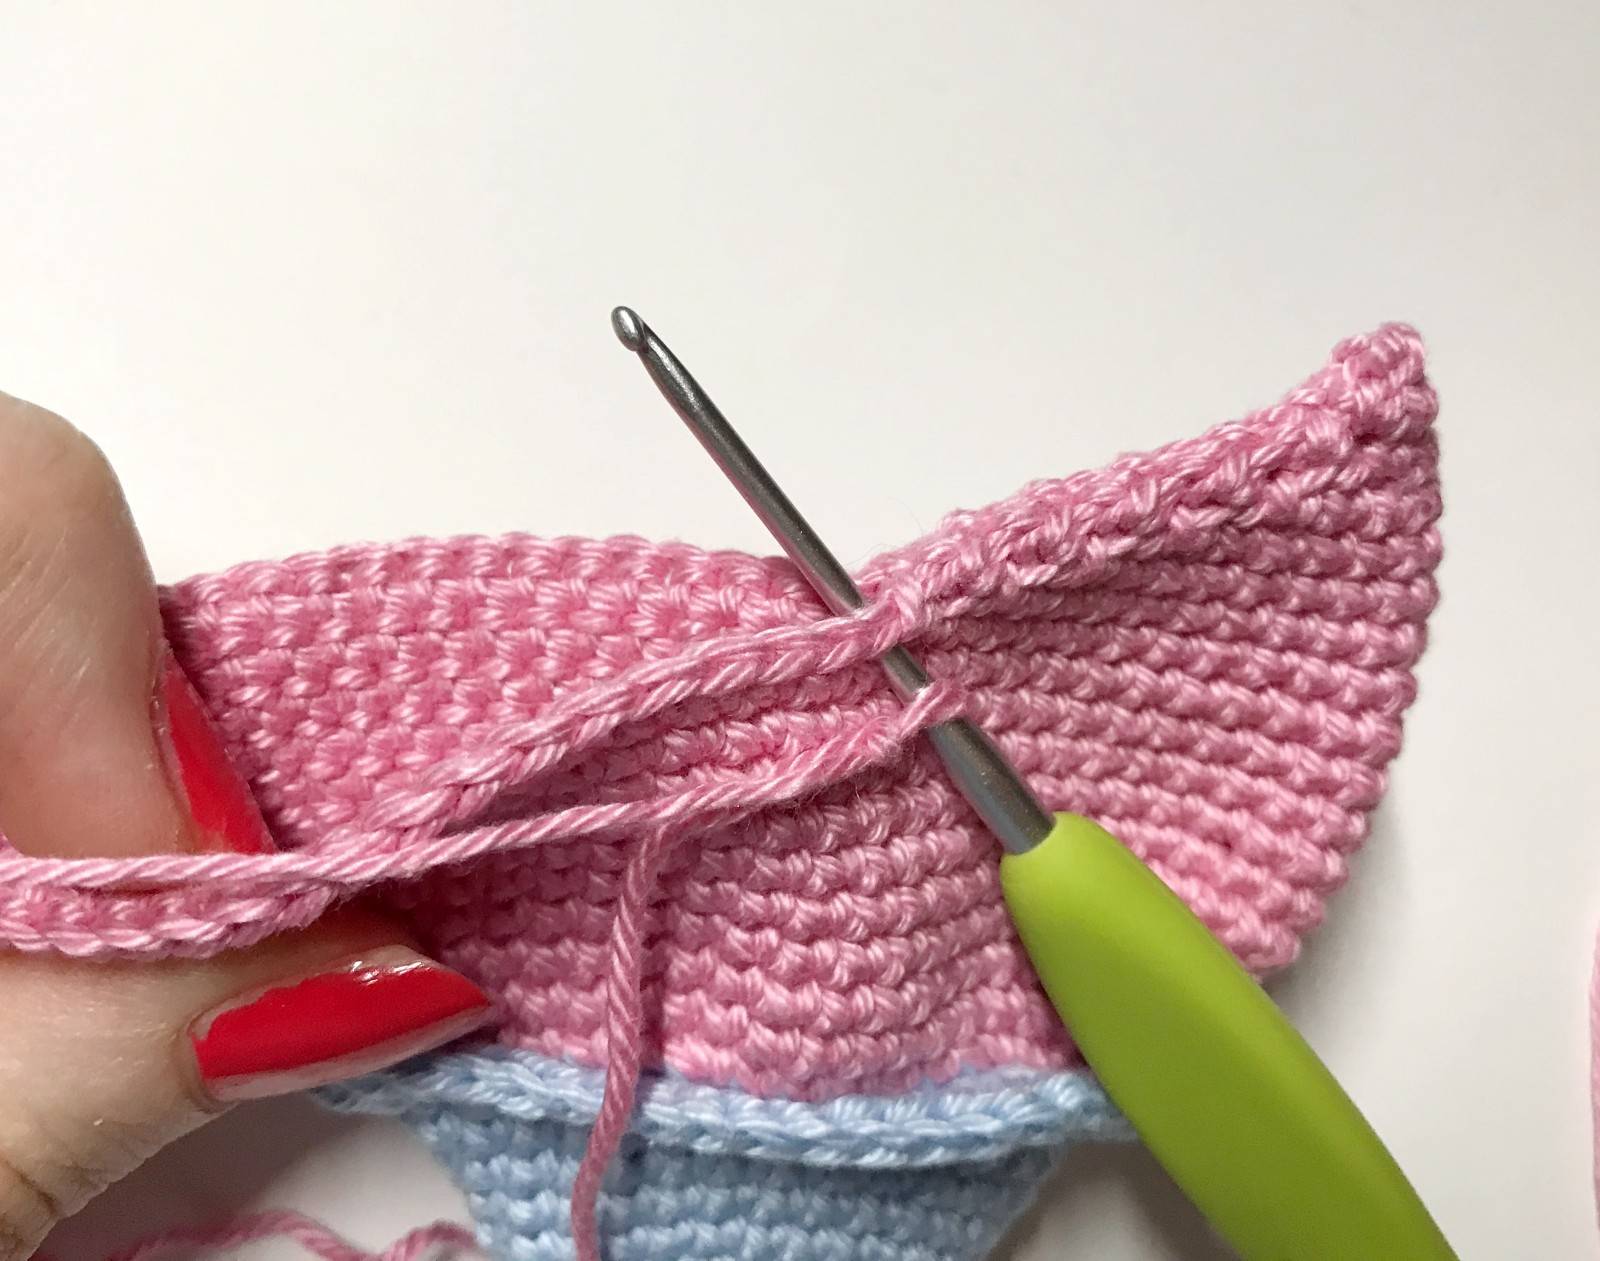
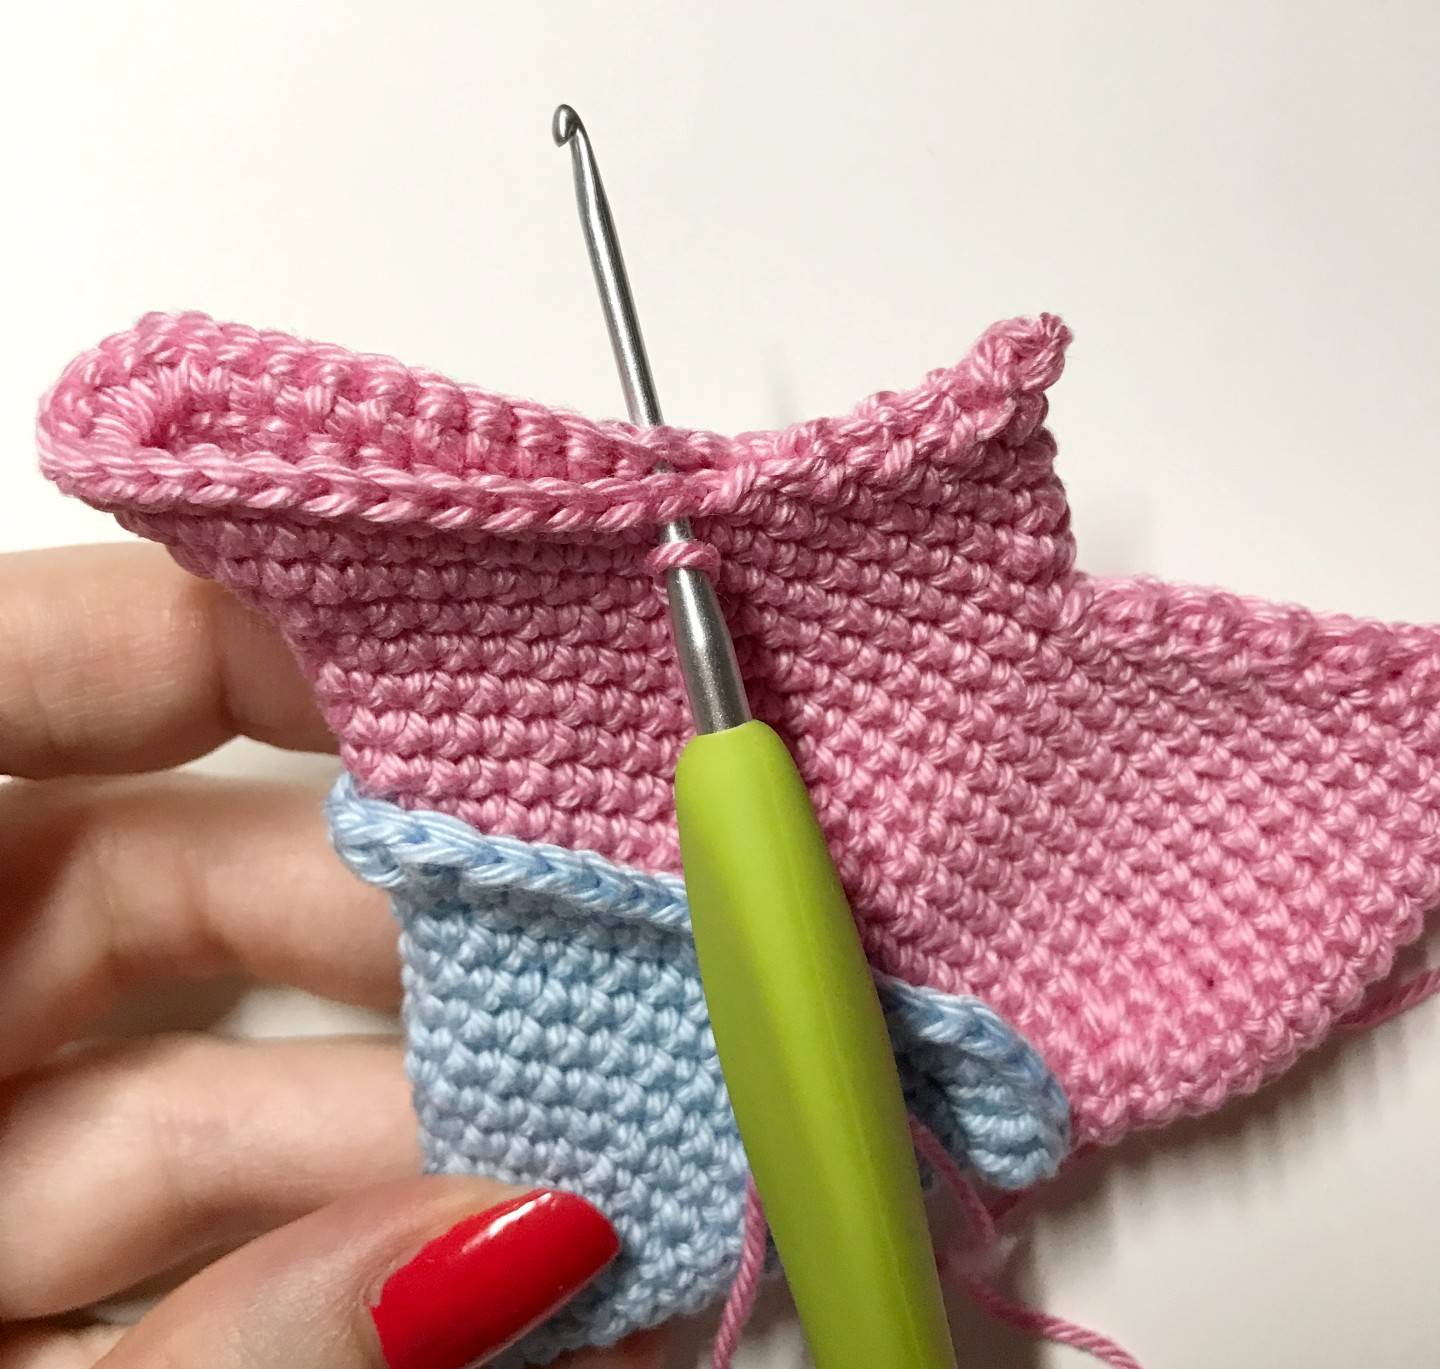
After the 2nd peak, tuck your hook into the 2 edges and make 1 ssc.
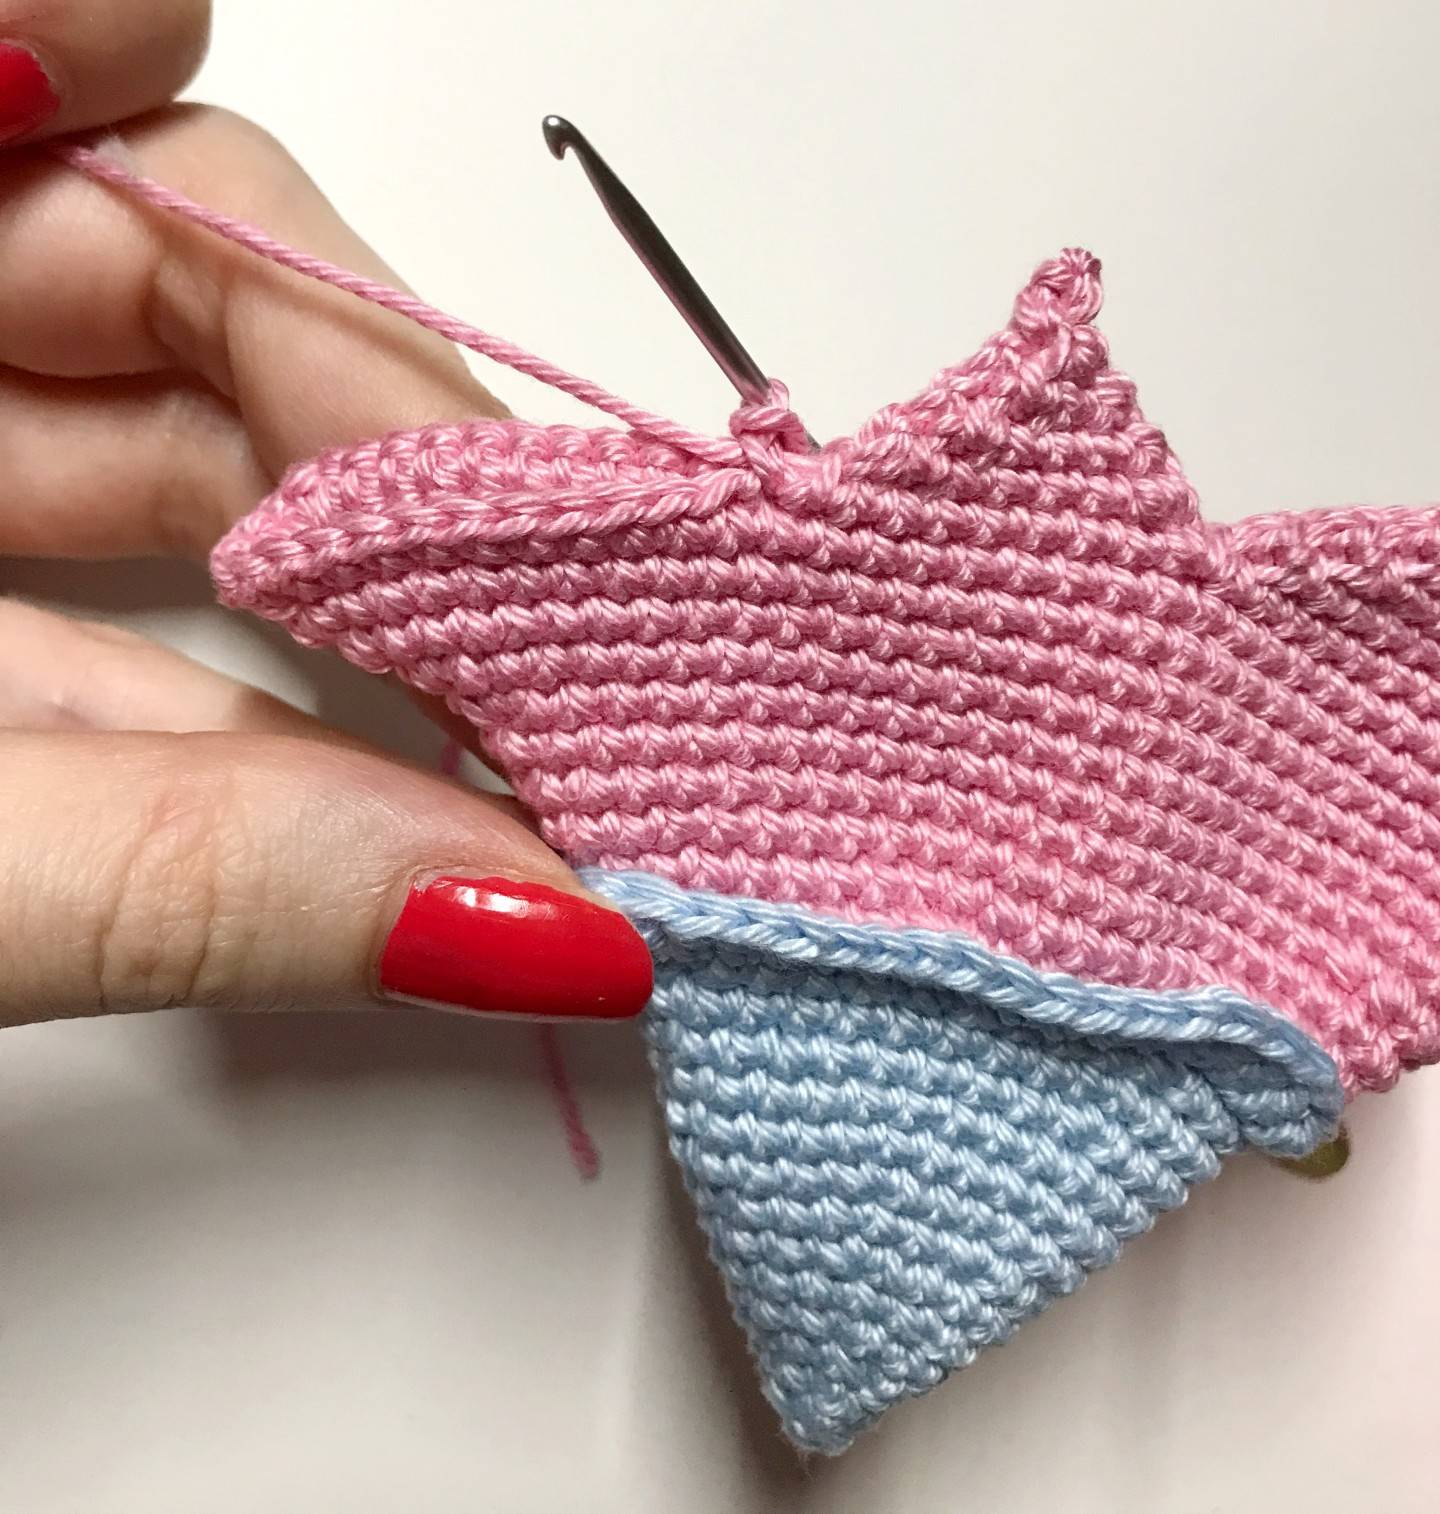
Then continue to join the 2 edges by making 14 sc.
Cut the yarn leaving a good 15 cm to sew the wing to the body later.
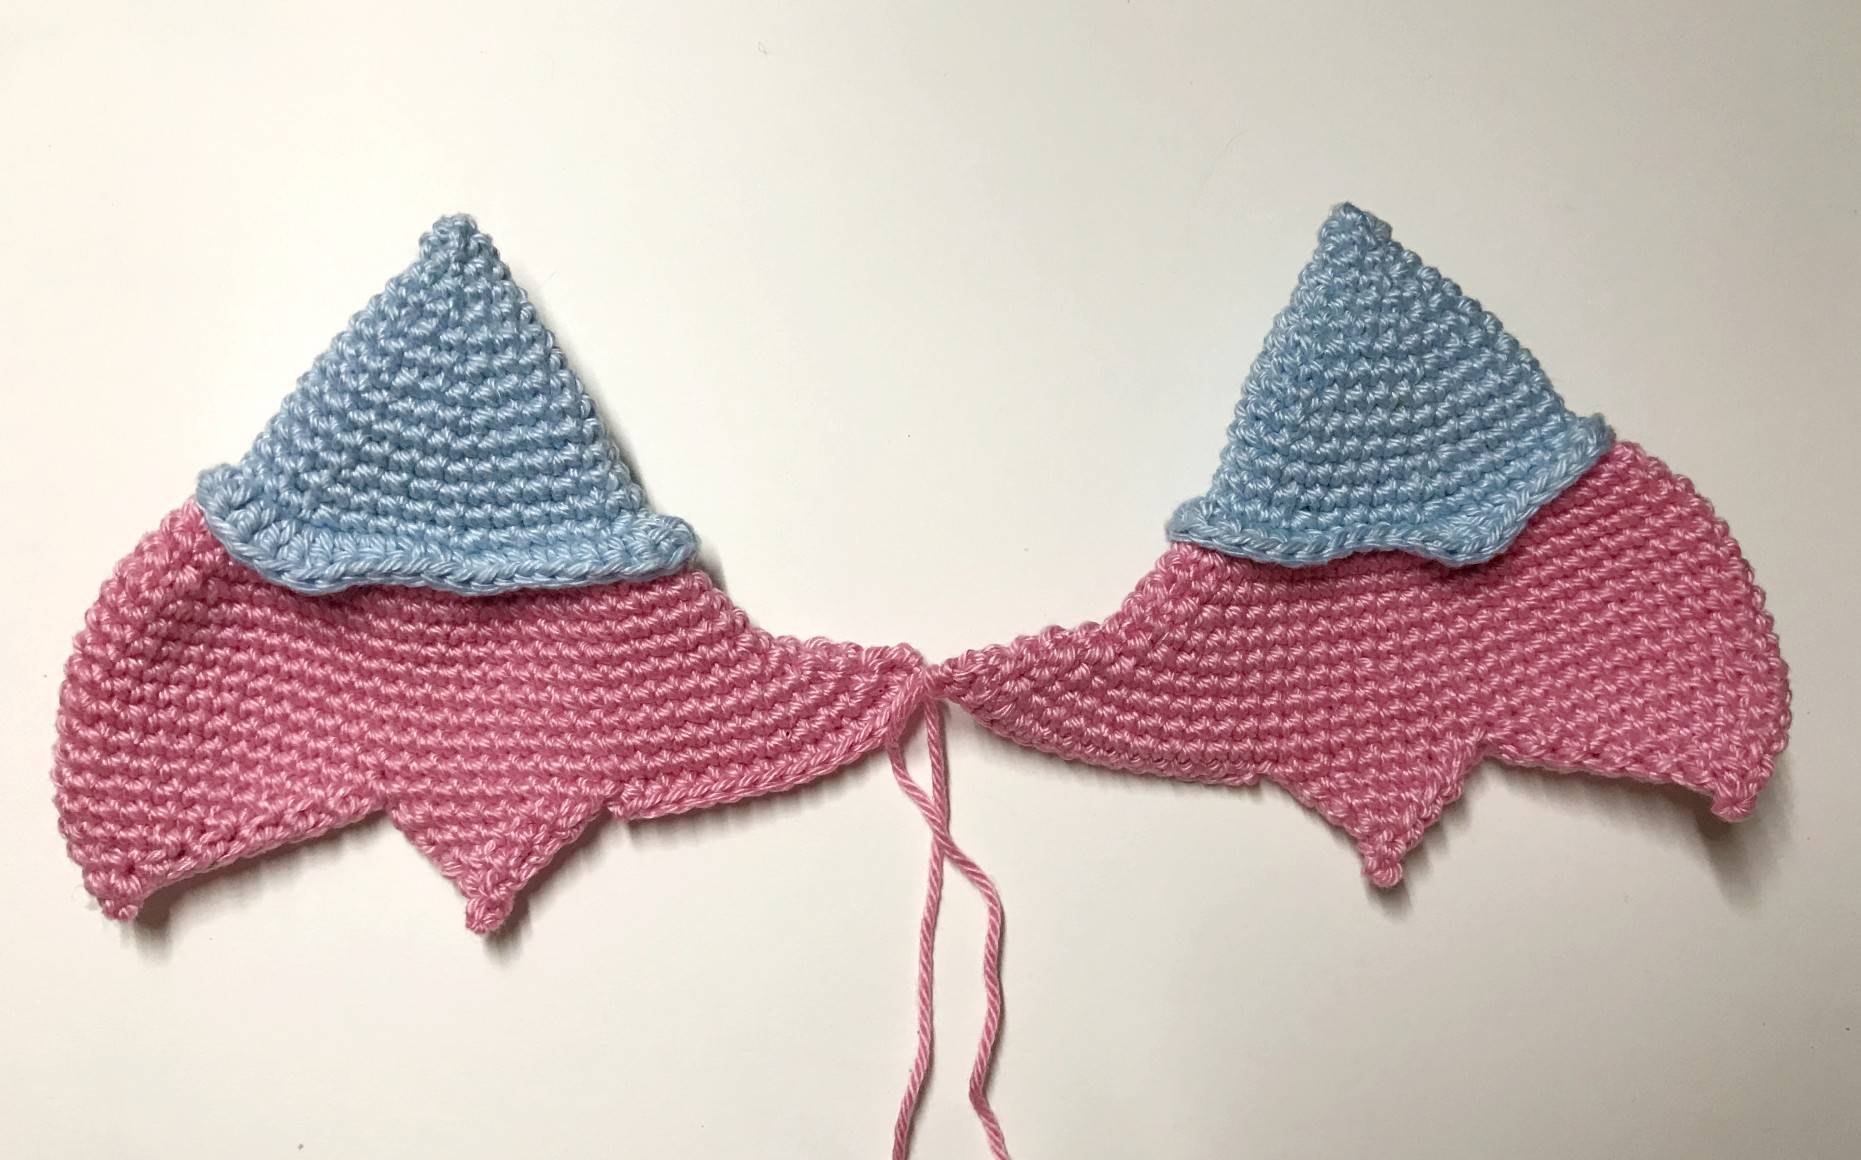
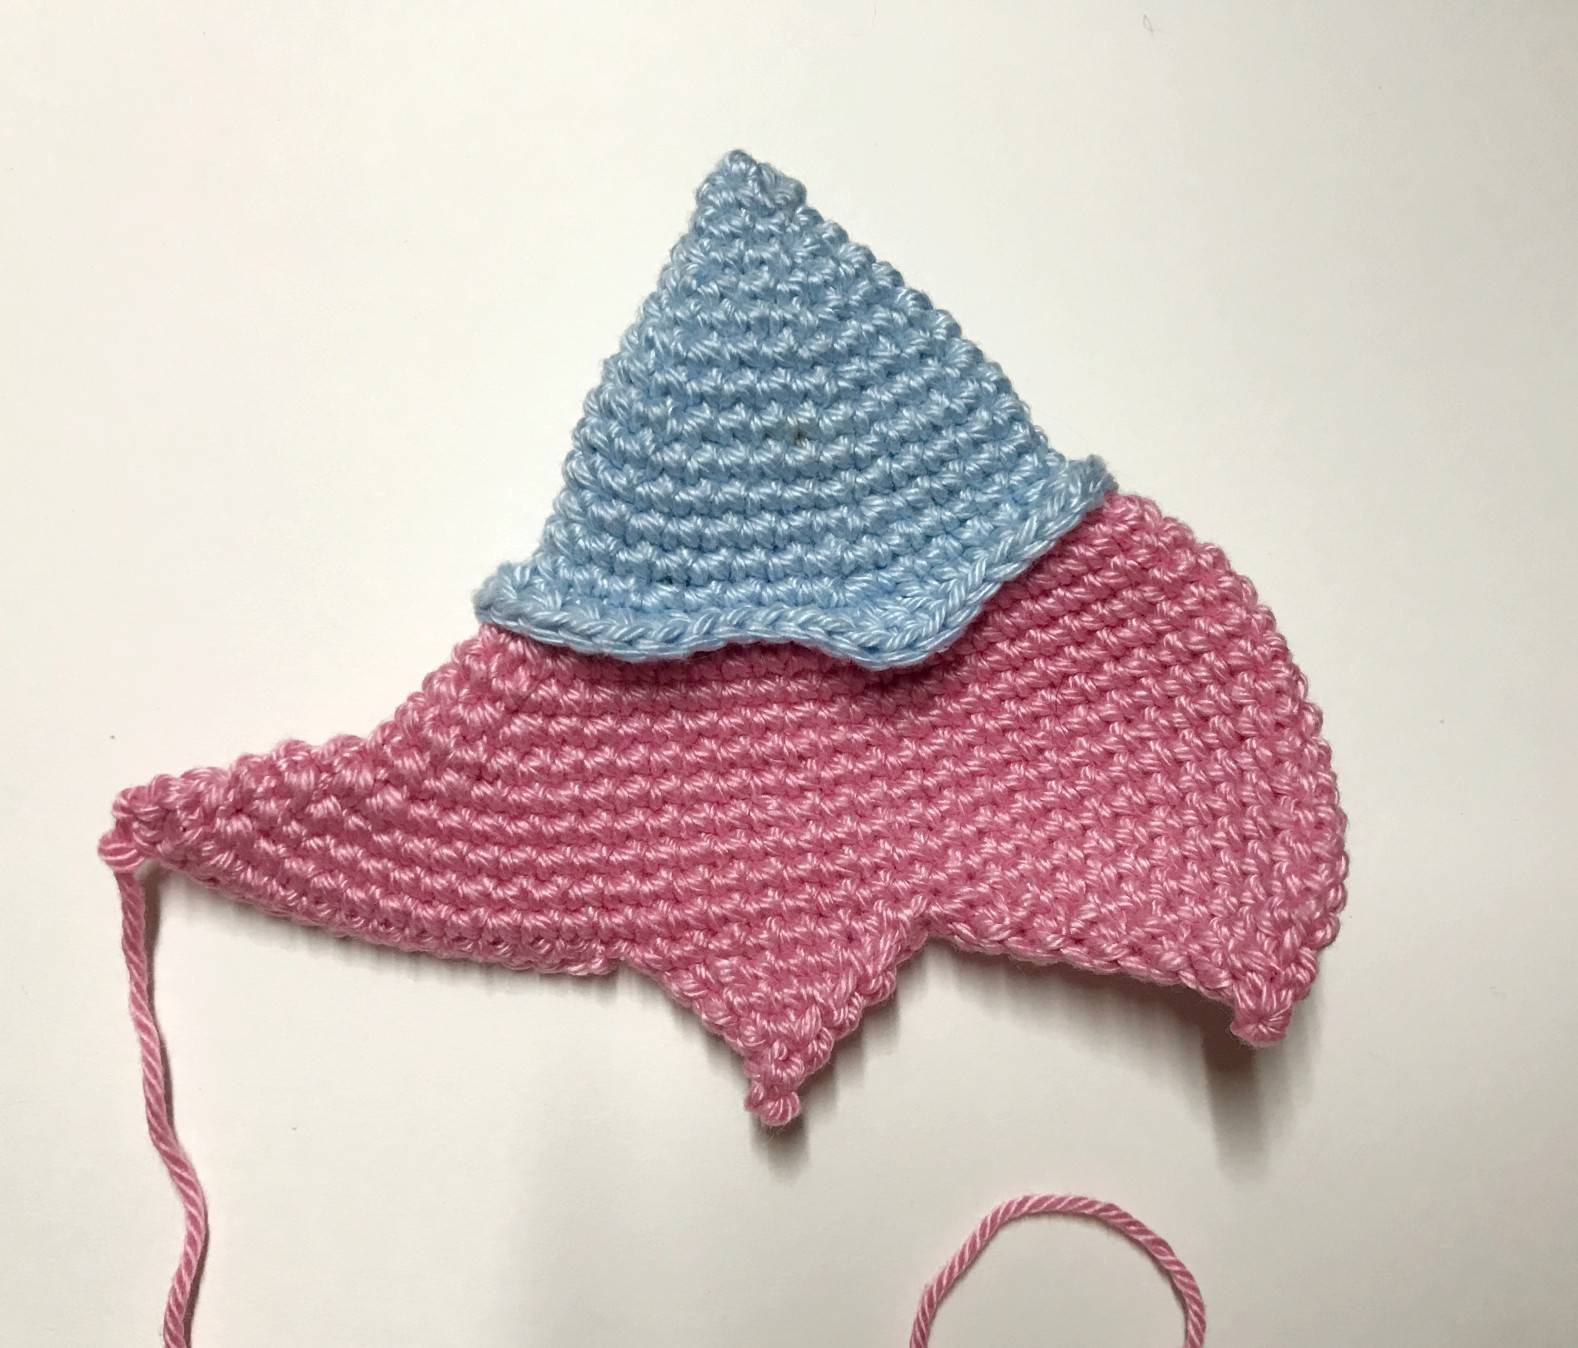
Result of the 2 wings.
Find more magic patterns✨


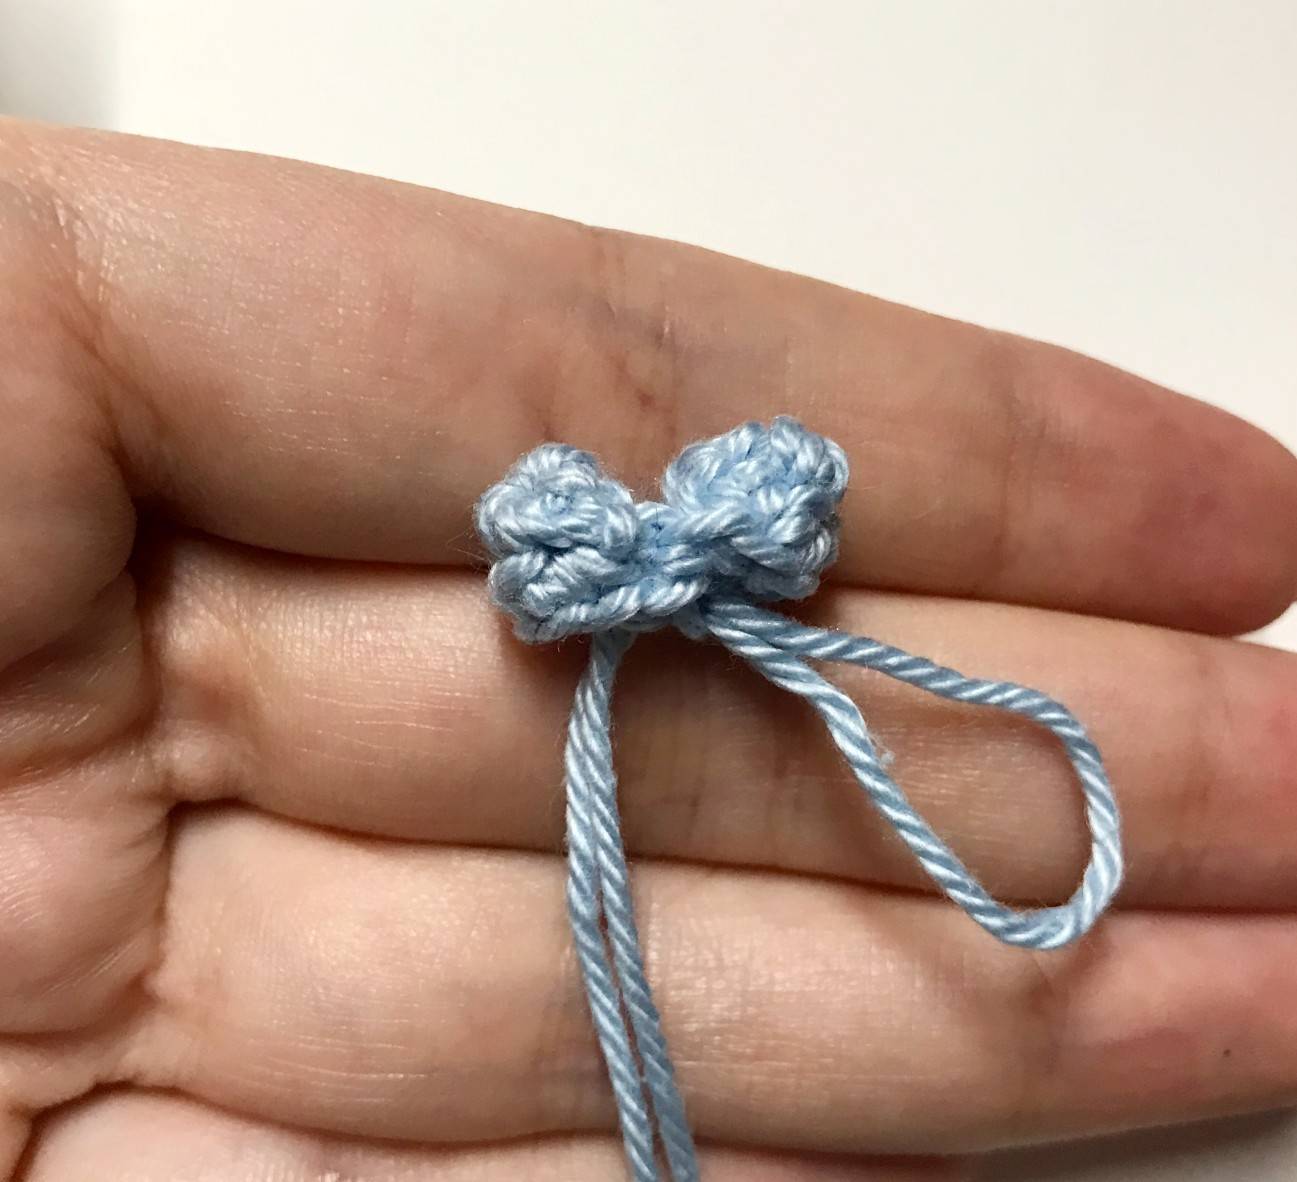
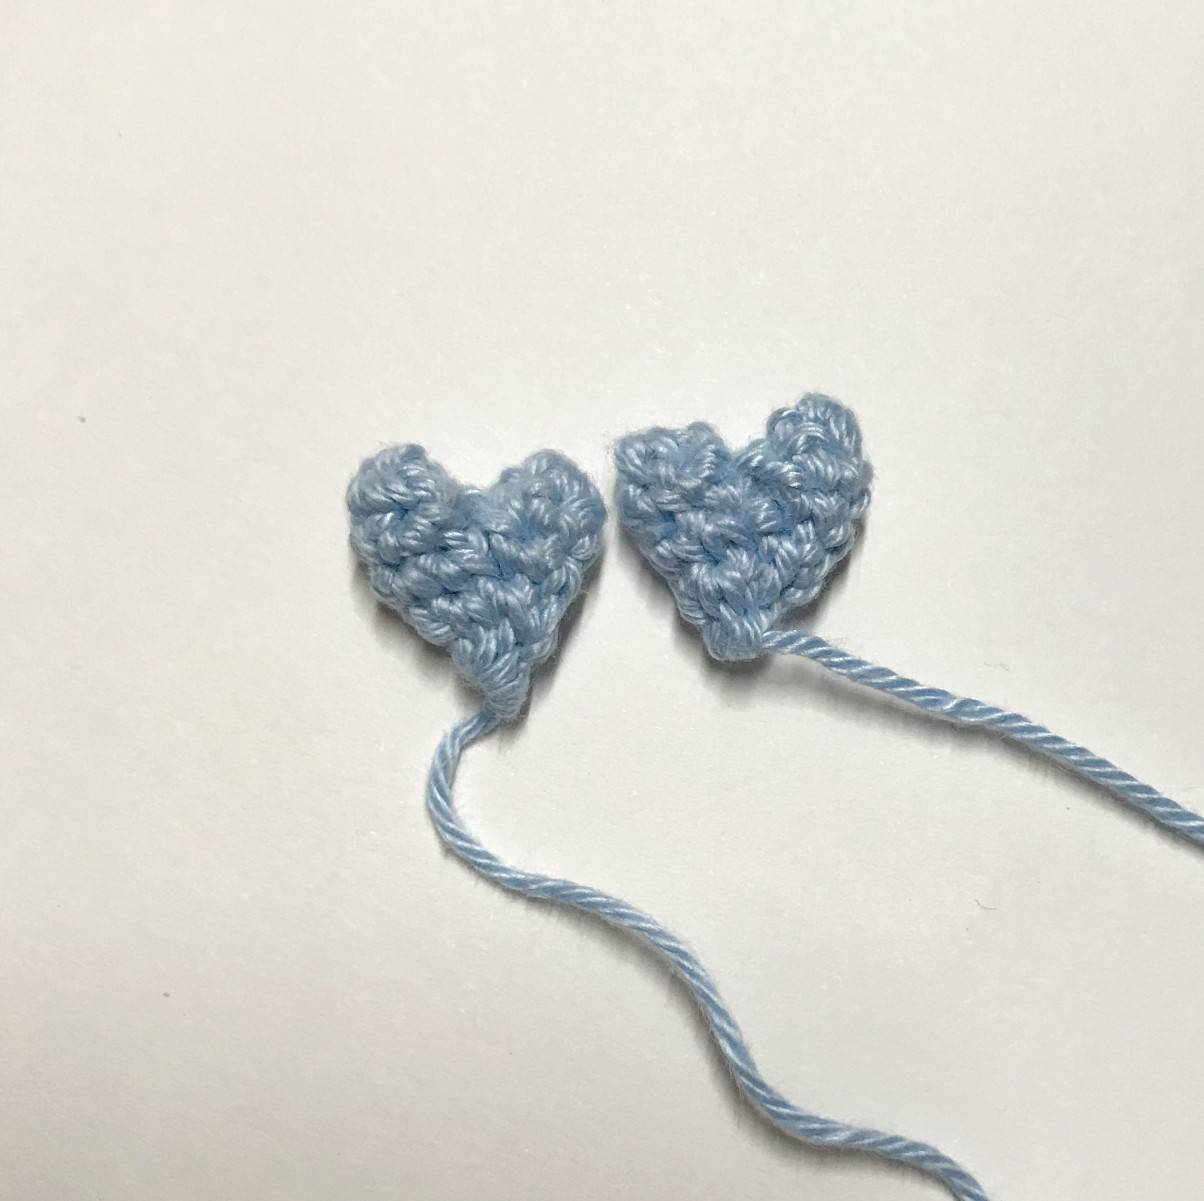
🦇 Hearts x2
(to be done with blue color)
Carry out the following steps 2 times to have the 2 mounts of the heart:
R1: magic ring with 4 sc
R2: *1 sc, 1 Inc* x2 (6)
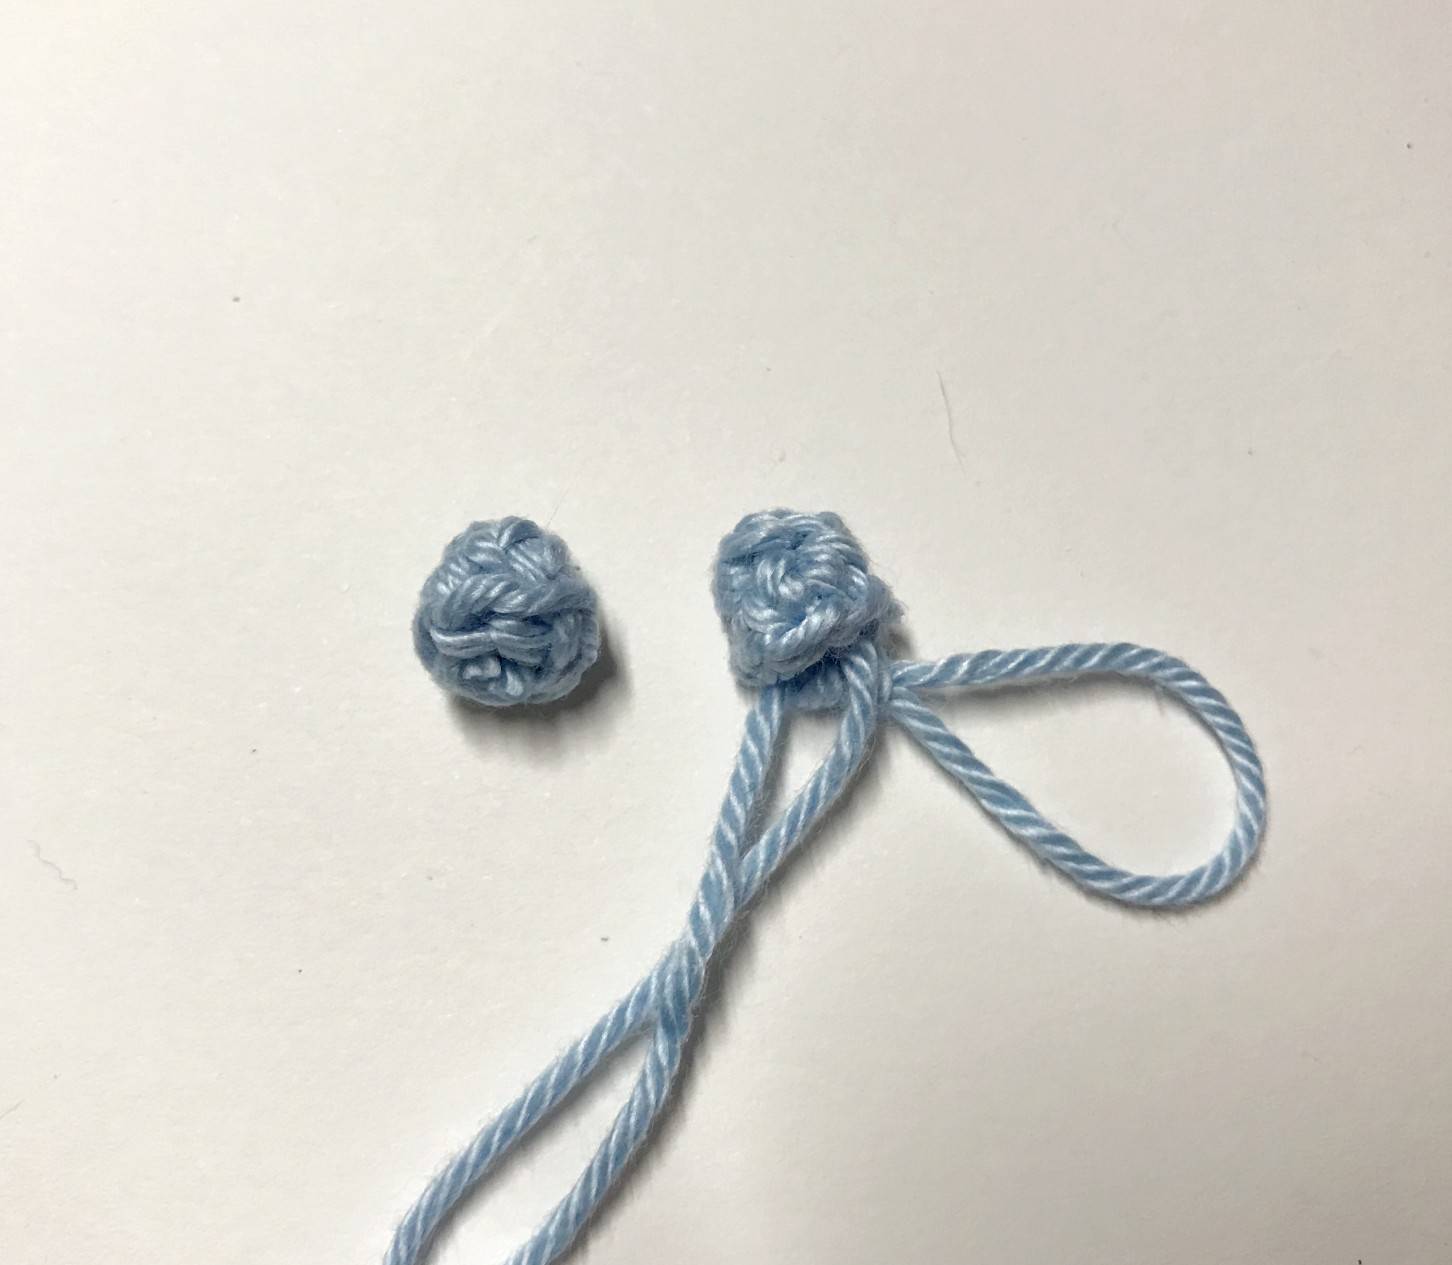
Fasten off and make an invisible finish for one mounts of the heart.
Keep the yarn with the second to continue as follows:
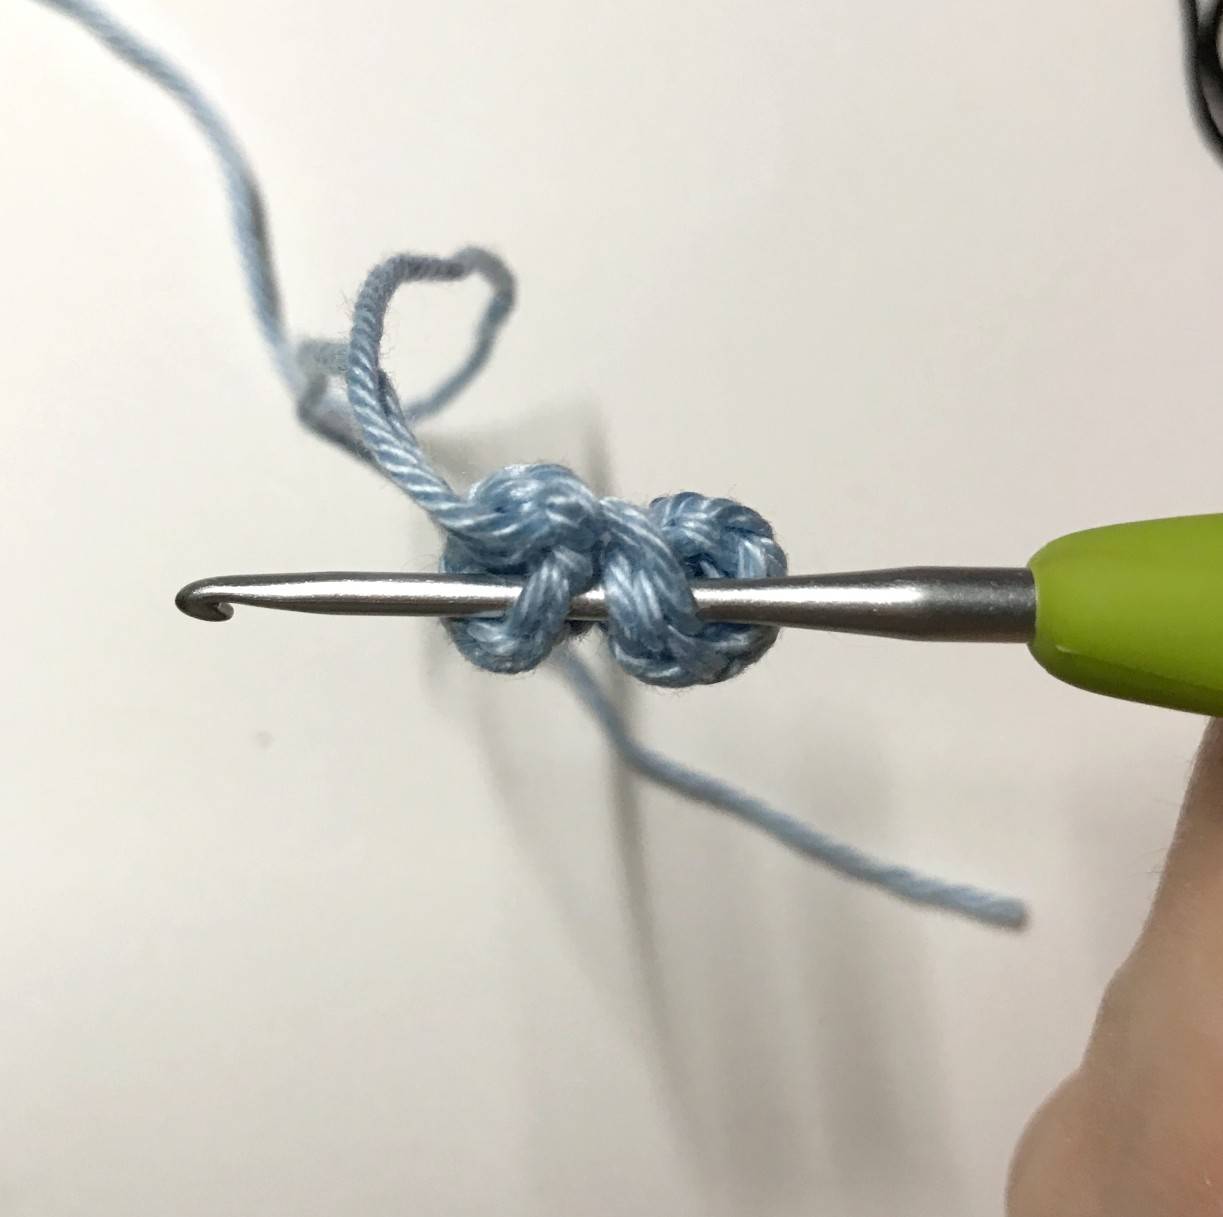
R3: Join the 2 mounts with 1 sc by taking the 2 edges (by entering your hook first in the part not connected to the wire then in the 2nd) then a 2nd sc.
Then, continue by going around the 2
mounts by doing 8 sc (8)
R4: 1 sc, 1 dec, 2 sc, 1 dec, 1 sc (6)
R5: Cut a good length of yarn and tuck into the front loops of the remaining 6 stitches then tighten to close the hole.
Keep the yarn to sew them later.
Don’t stuff.
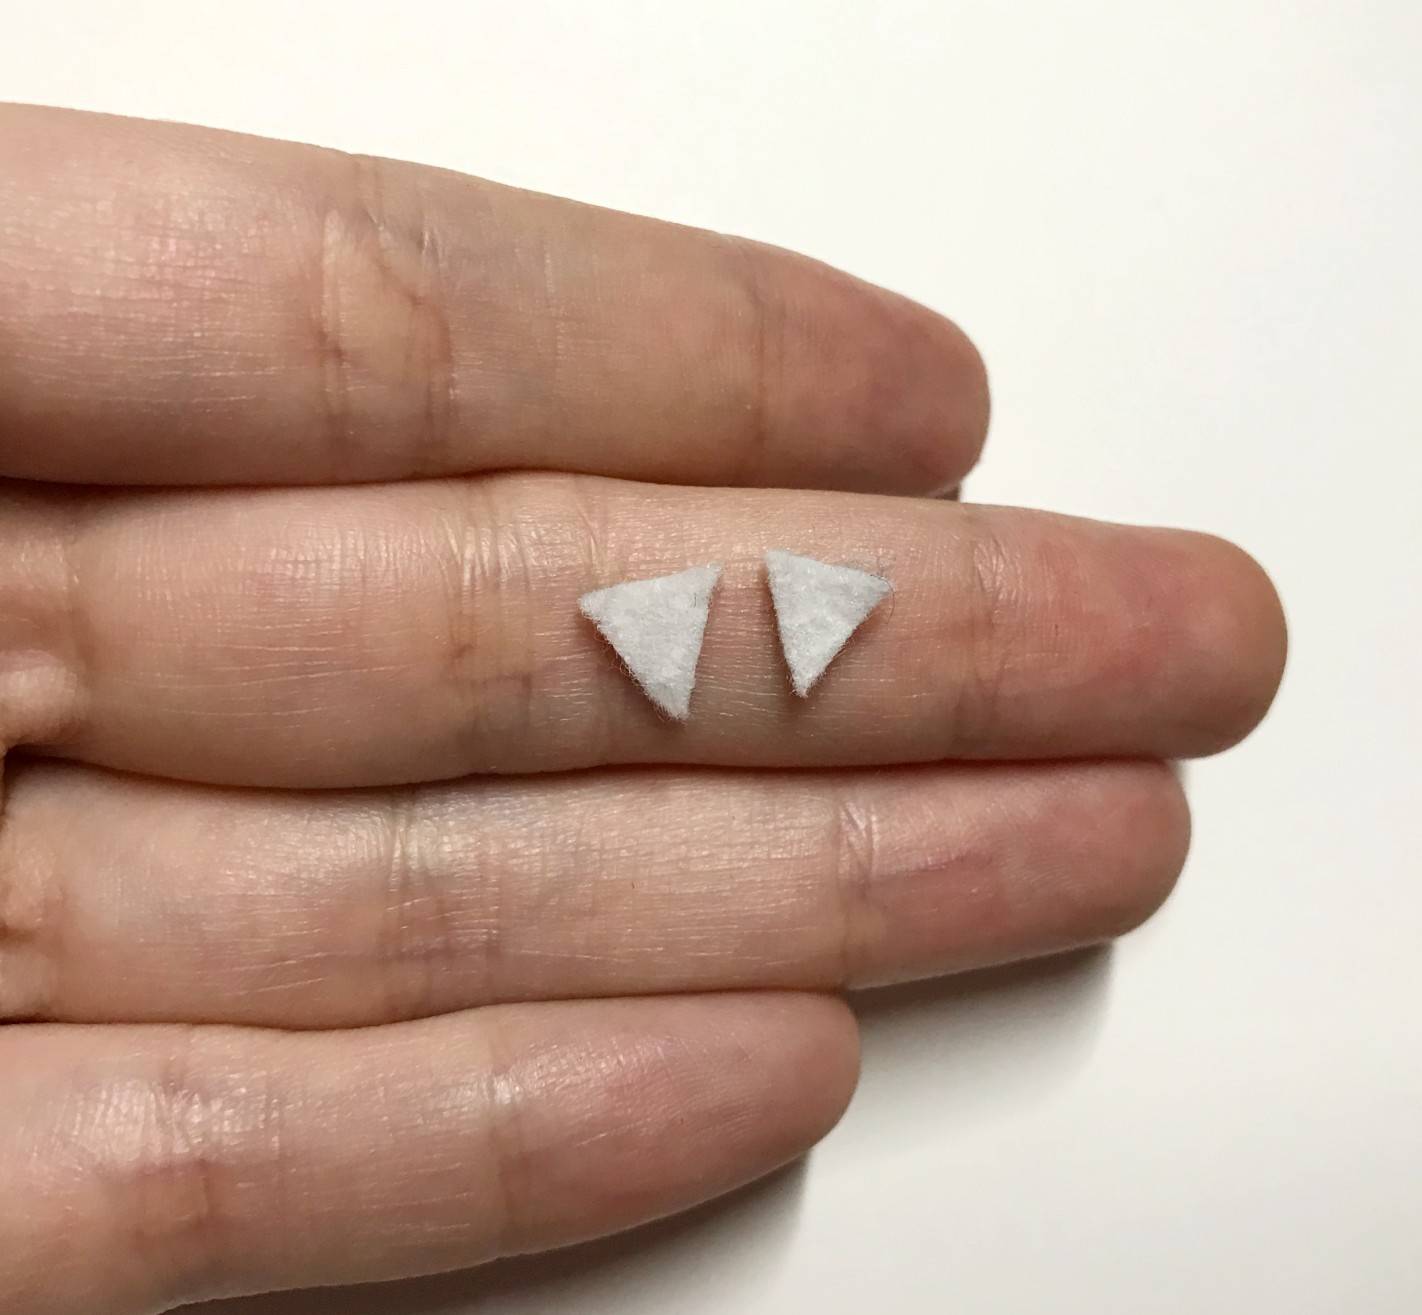
🧛 The canines x2
(to be done with white felt)
With your white felt, draw 2 triangles with 0.8 cm on
each side.
Then cut them out to have the same result as in the
photo opposite.
🦇 Assembly and finishes 🦇
🎃 Eyes
Position them in relation to the ears, in their vertical extension and 6 rows below the base of these. Glue them with your textile glue or glue.
There must be 3 sc gap between the 2 eyes.
Warning: Check that the eyes are well positioned in relation to their white details as in the photo opposite.
🦇 The canines

Glue them 2 rows below the eyes and with 2 sc between the two.
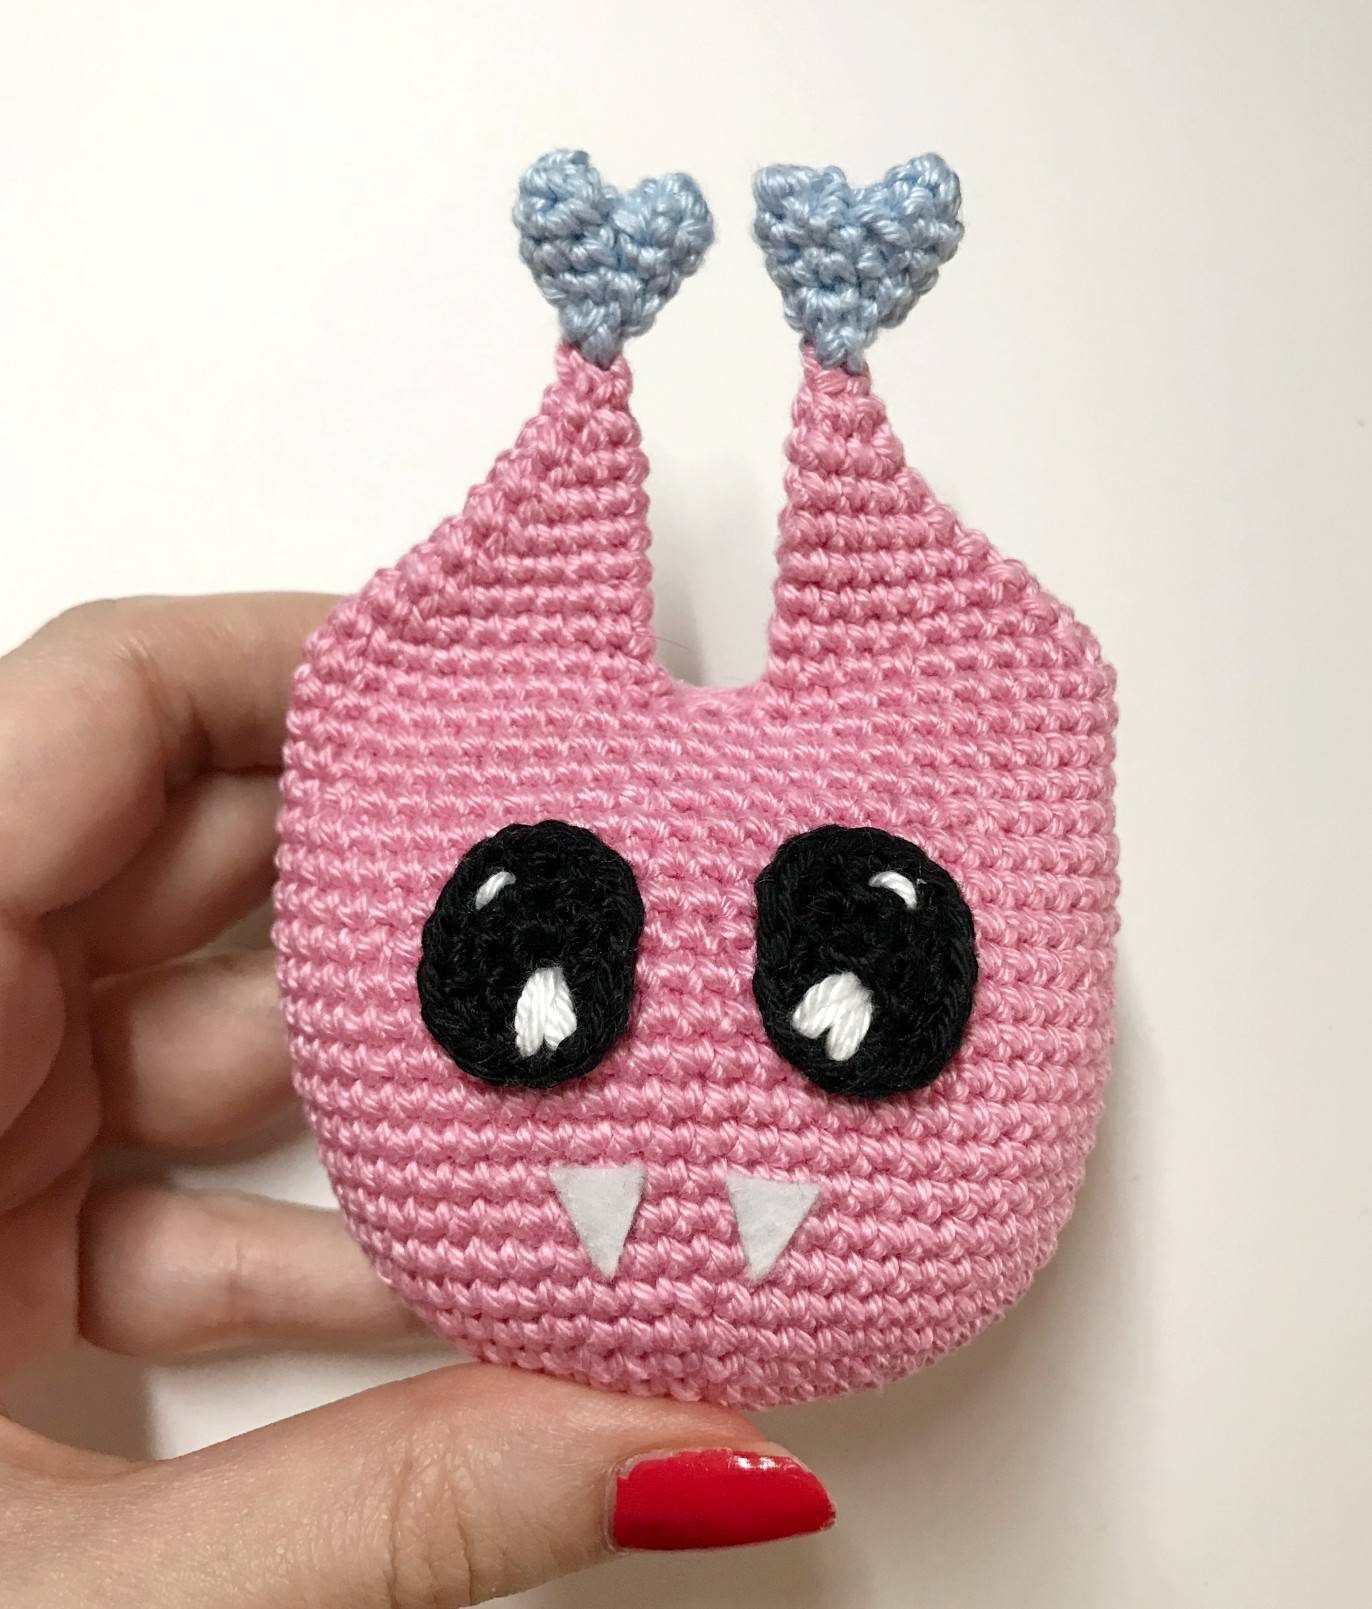
Sew the hearts at the tip of the ears so that they are very stable (do not hesitate to iron several times in your seams for this).
🦇 Wings assembly
Position the wings in such a way that its peaks touch the bottom when you place Vampina on a support and that the blue part is very close to the body as in the photo opposite.
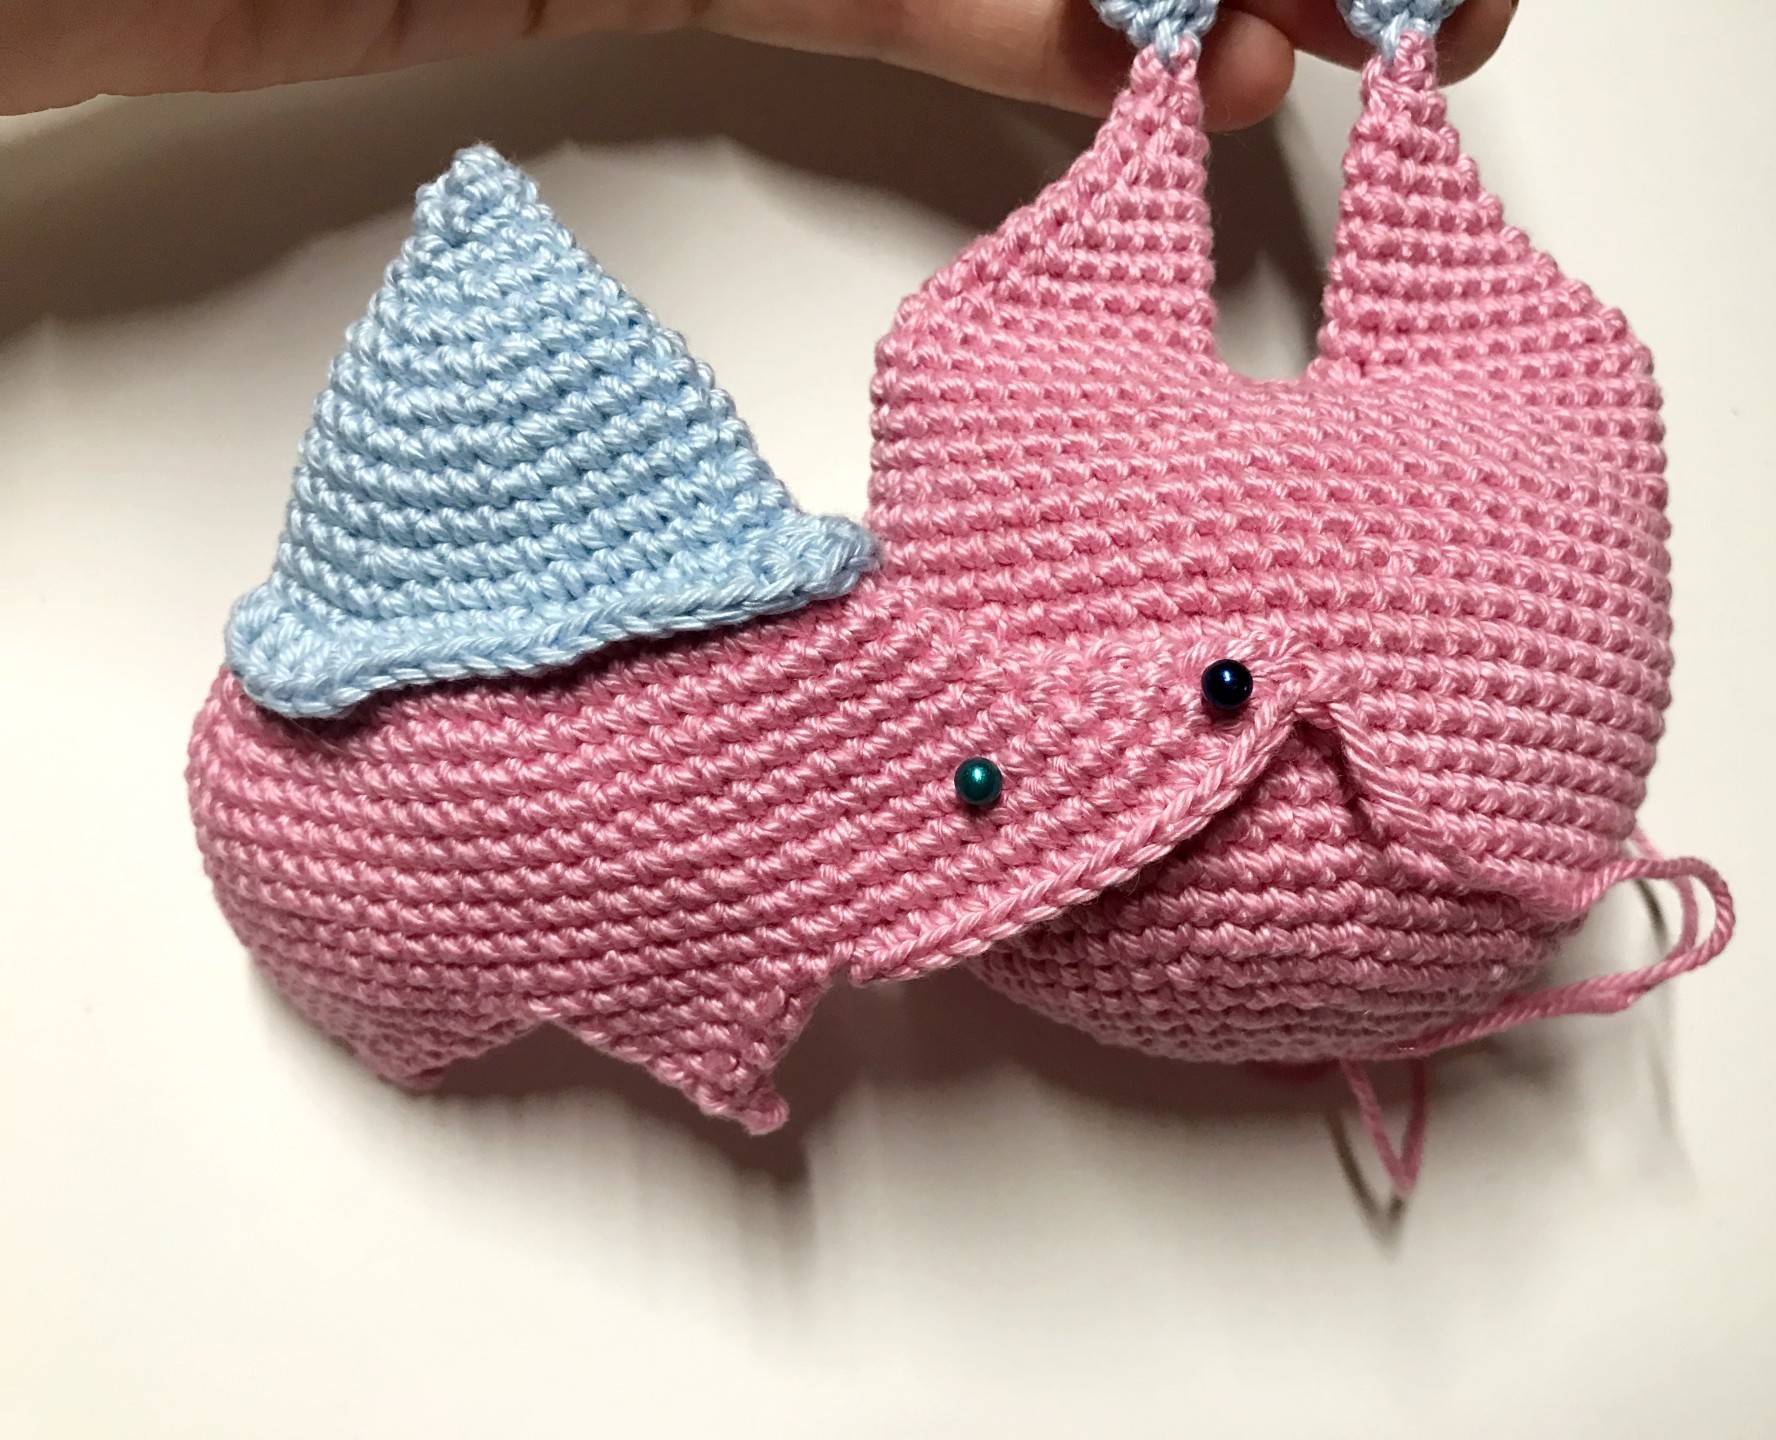
Use pins to position the wings and stabilize them while sewing.
Sew the top part up to 3 rows from the blue part. Then the bottom part up to 4 sc from the 1st peak.
Do the same for the 2nd wing to get the result above.Do the same for the 2nd wing to get the
result above.
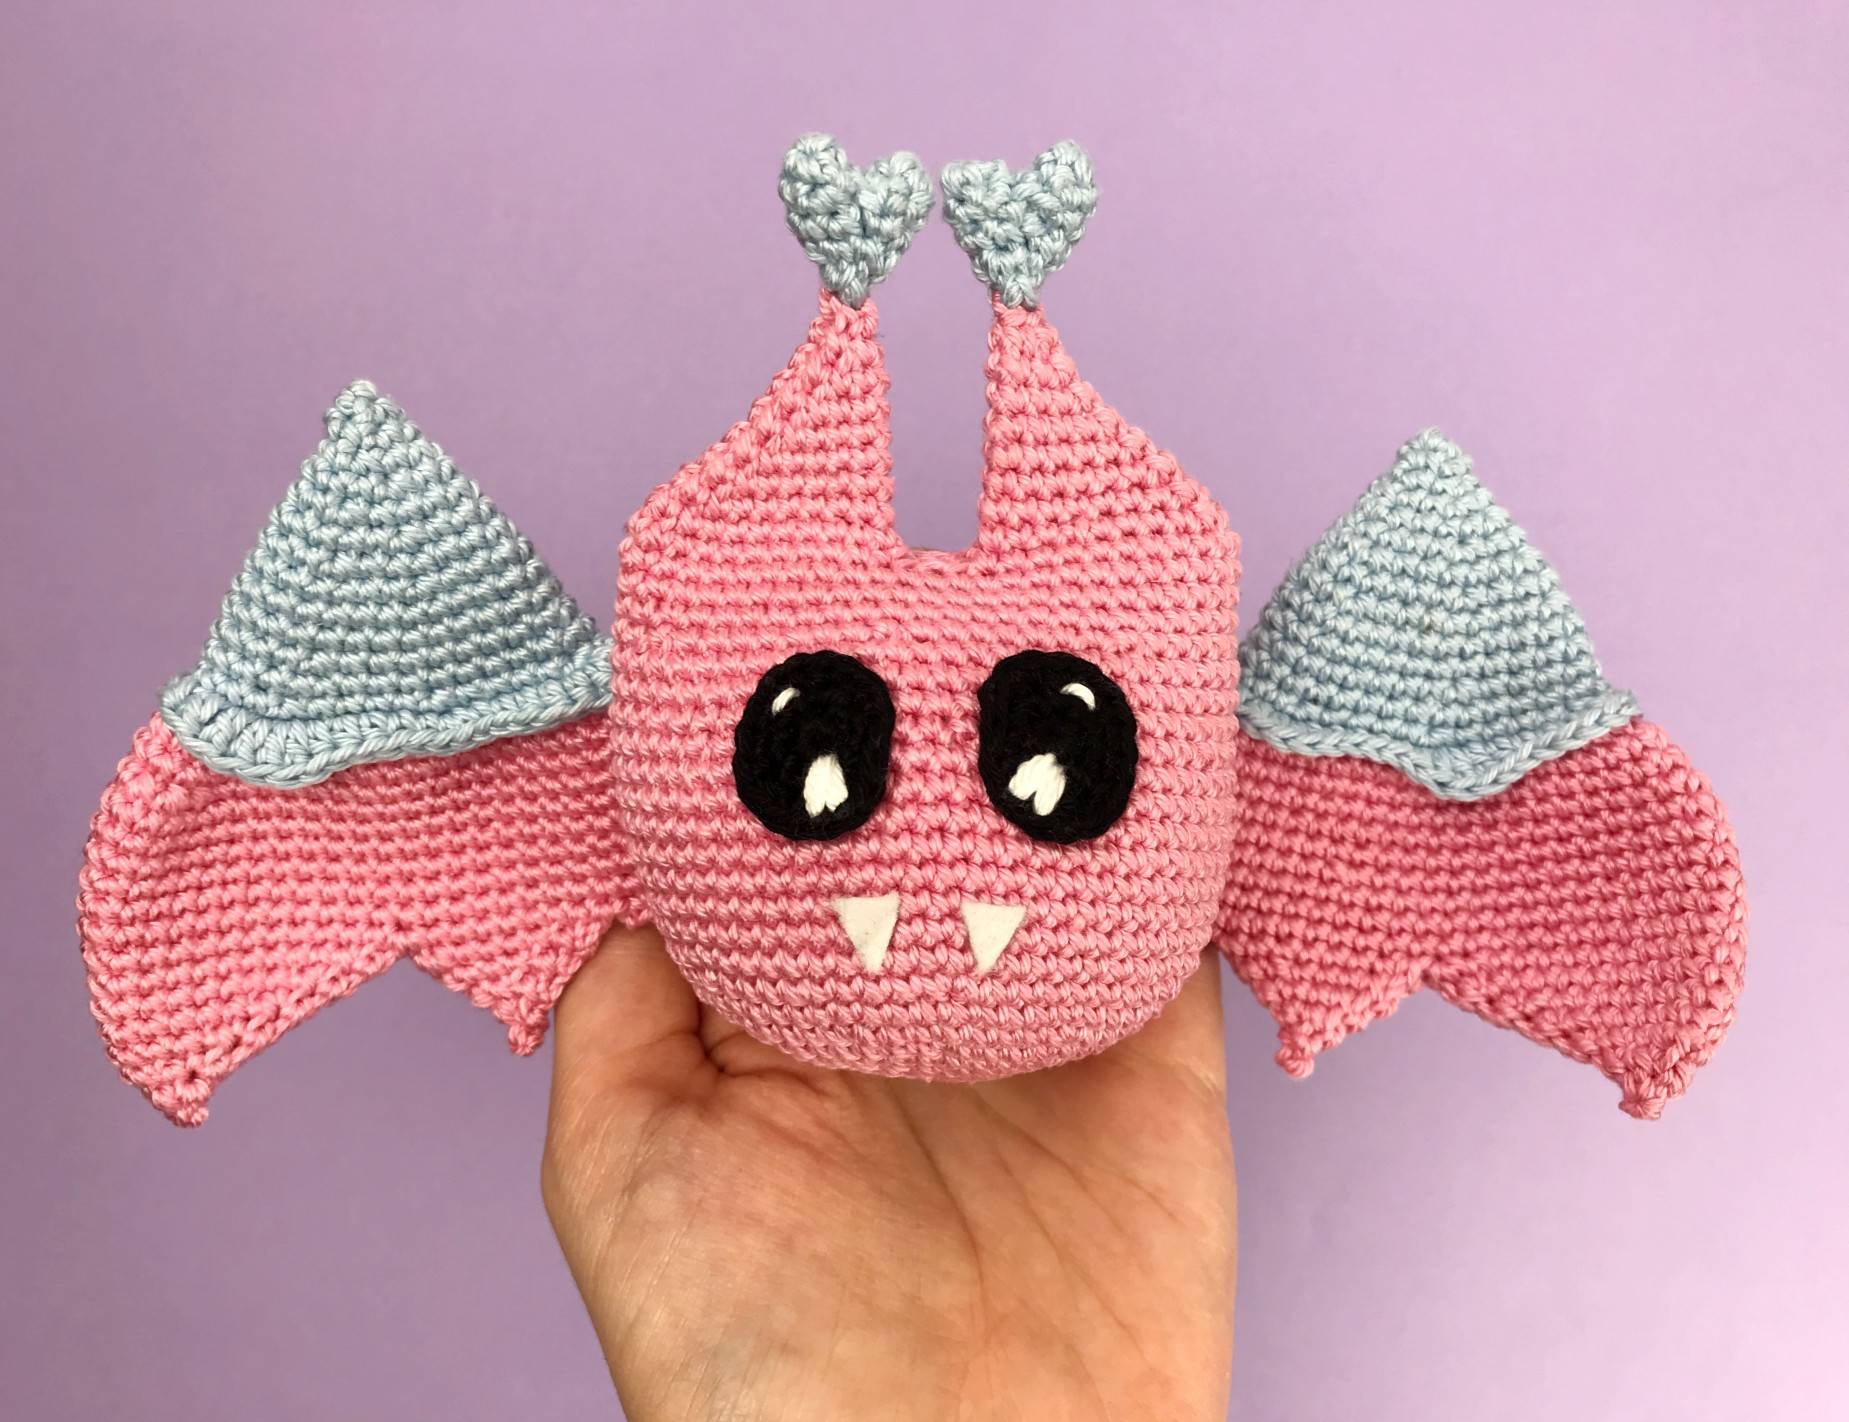
Vampina can now fly! 🙂

If you make this pattern, don’t hesitate to share it on Instagram by tag me @my_rainbow_crochet so that I can pass you on in my story or on Facebook to send me a photo of your achievement that I would incorporate into the album of your achievements!
Seeing your achievements is always a huge pleasure for me!
See you soon Rainbows ! 🙂🌈