This post contains affiliate links.
Hello Rainbows 🌈
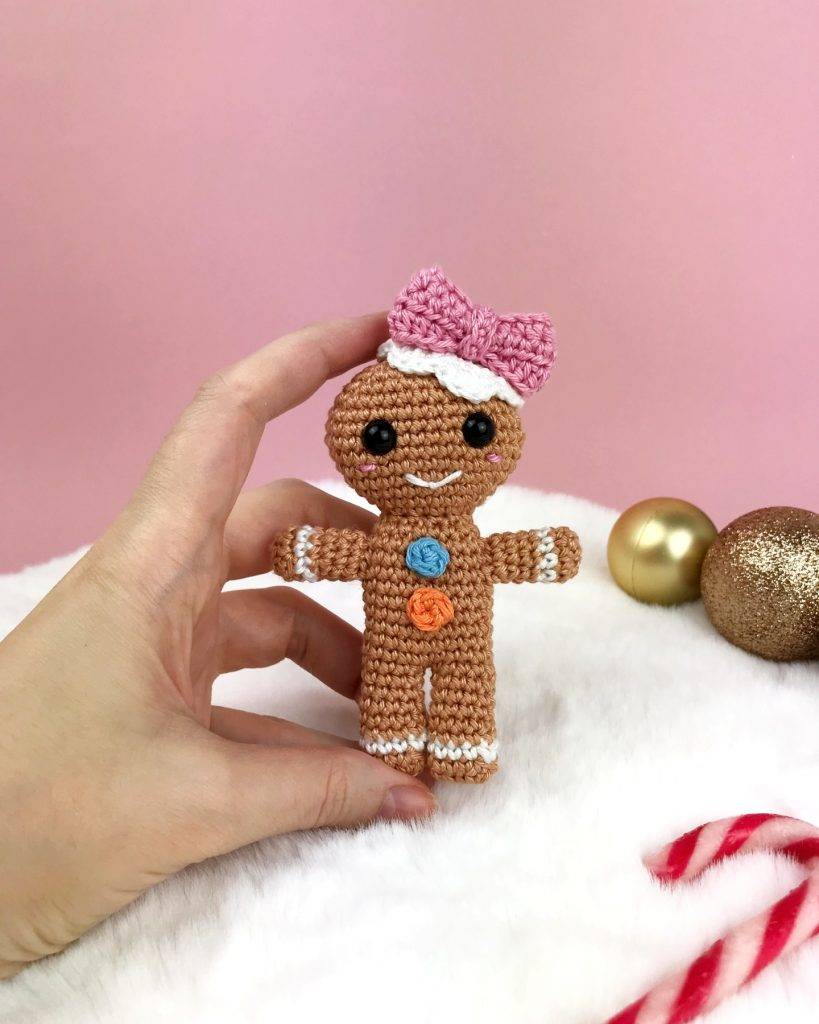
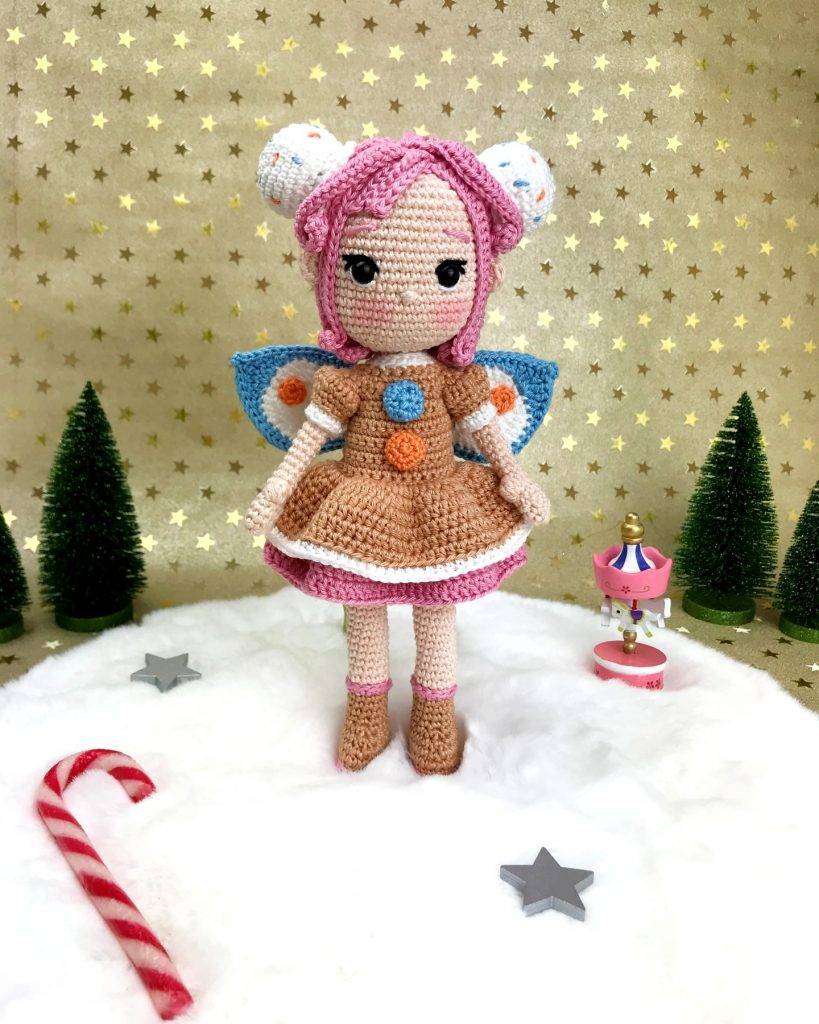
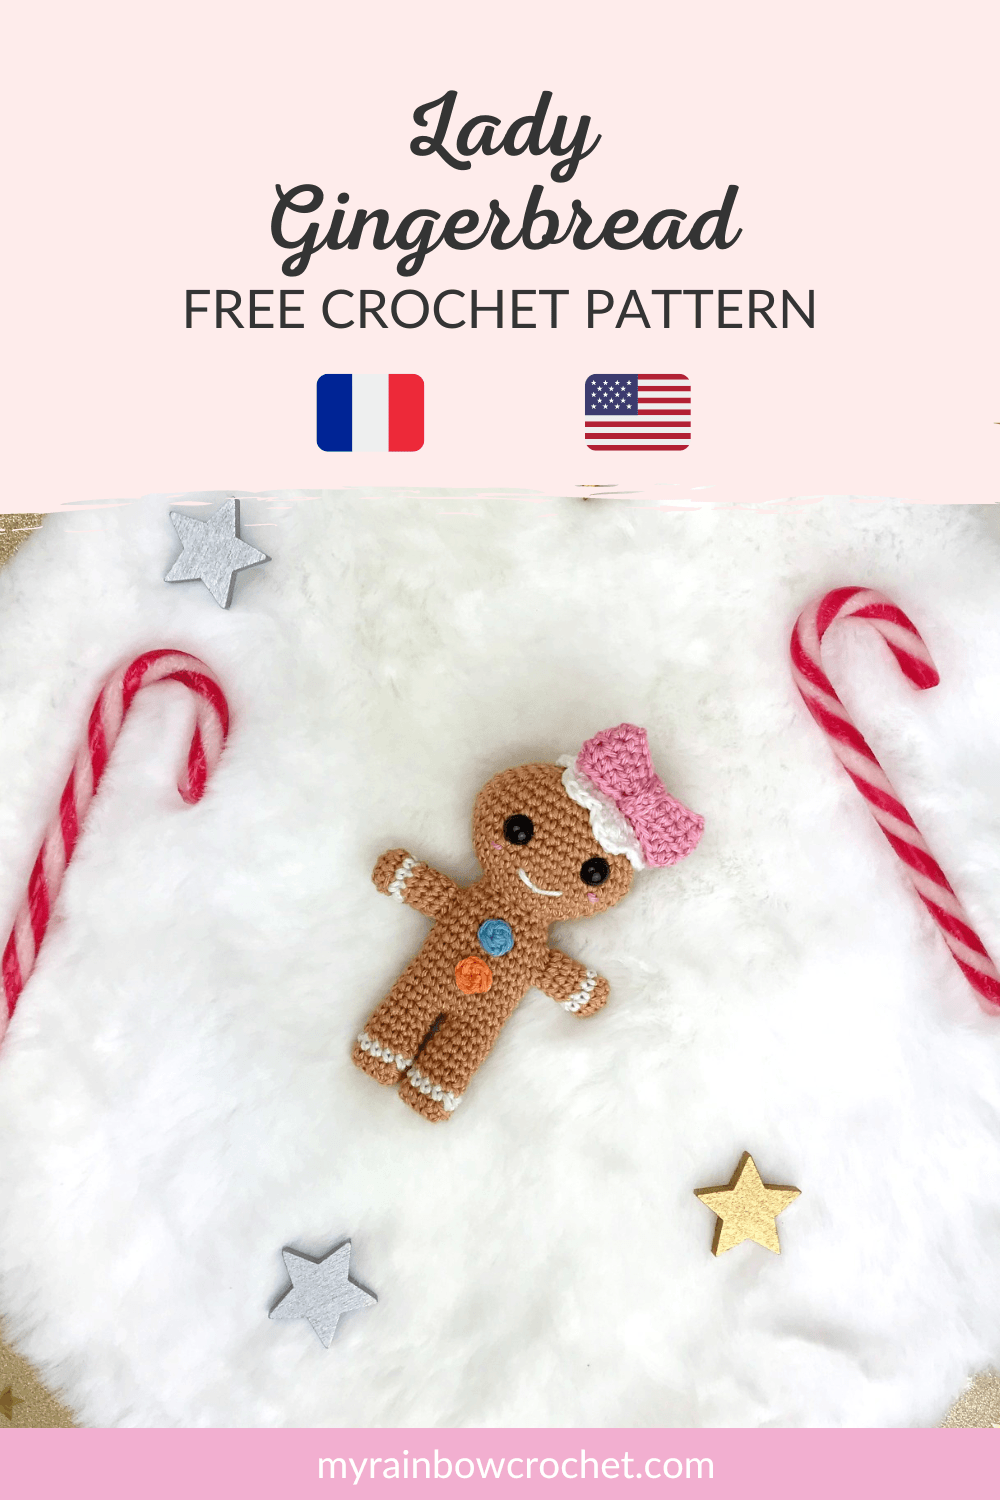
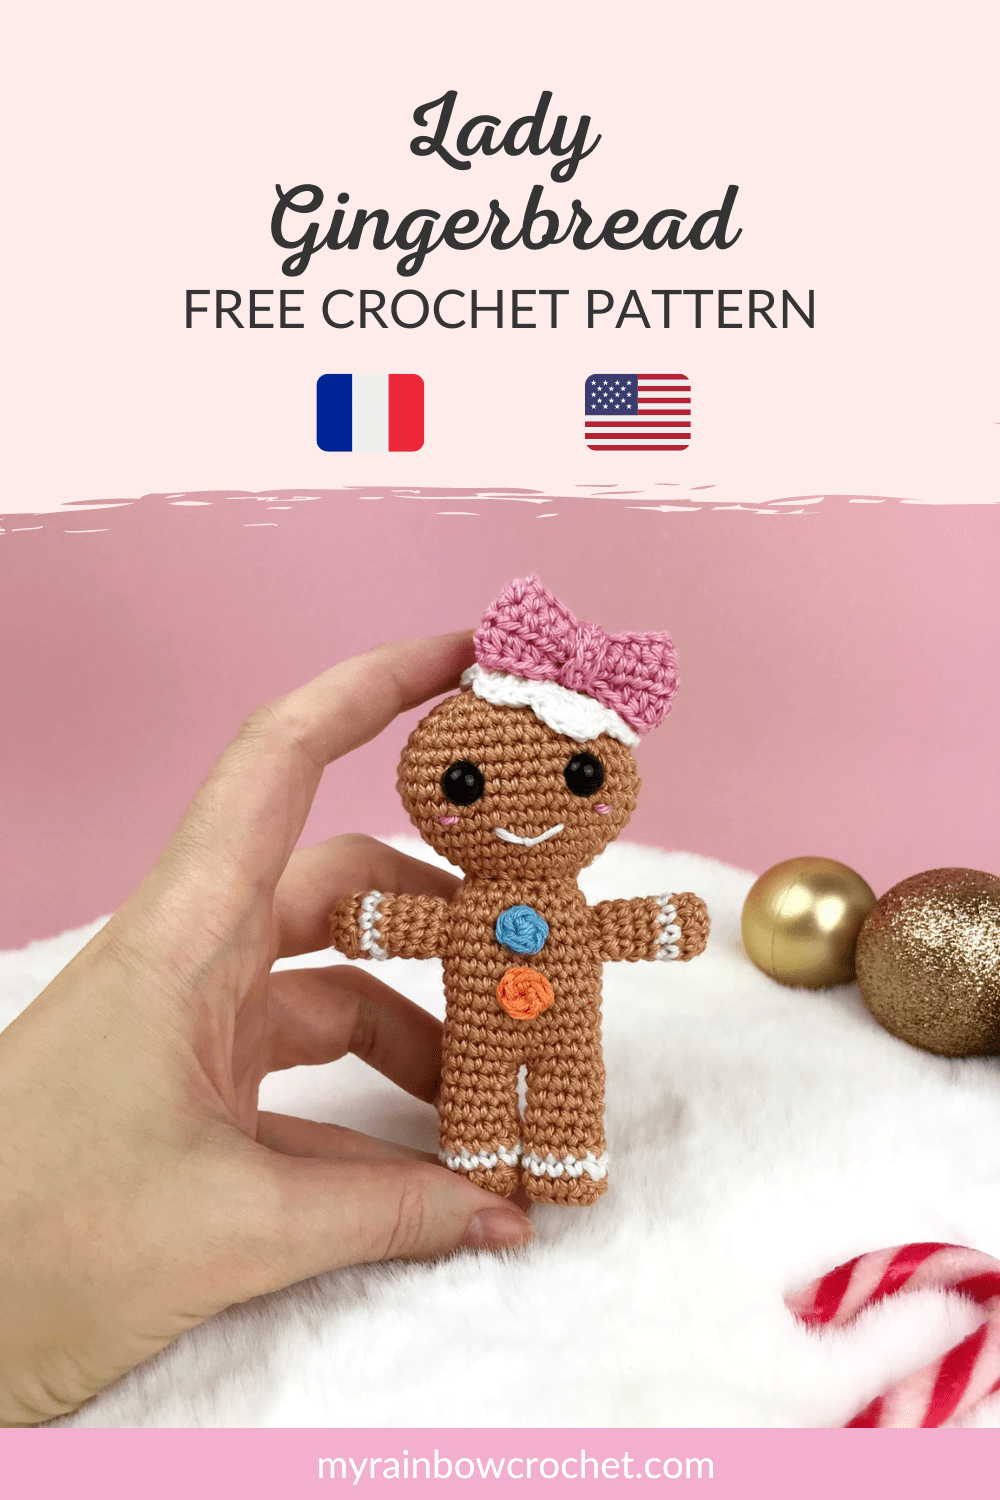
That’s it, it’s December 12! 🥳 It’s time to discover the first box of the Gourmet Advent Calendar 2022. And it’s Lady Gingerbread who opens the ball with her little face 🥰
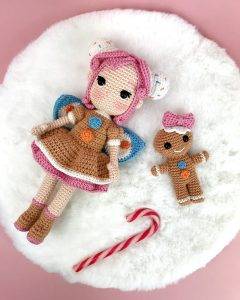
If you followed my December program, you will directly make the connection between Helenna, the gingerbread fairy, and Lady gingerbread 😋
I wanted to create a friend for Helenna who looks like her and they make such a beautiful duo!
Lady gingerbread will be perfect for your Christmas decoration, by hanging it on your tree for example, but also to offer as a gift. She will know how to sneak anywhere thanks to her small size and add that touch of magic and gluttony to your Christmas!
It is quick to make and is suitable for crocheters with an advanced beginner level.
What are you waiting for to crochet her? 😊
Find this pattern for free just below 🔽


🎅 Material you need 🎅
If you want to use the same material as mine, I am attaching few links below.
These are affiliate links on Amazon. As an Amazon Associate I earn from qualifying purchases.
- Crochet 2 mm or a crochet hook suitable for your yarn
- Cotton yarn (fingering) : Light brown, Pink, White, Orange, Blue
- A pair of 8mm safety eyes
- Glue or textile adhesive
- Stuffing
- Wool needle
- Stitch markers
🎁 Abbreviations used🎁
R : Row
sc : Single crochet
Inc : Increase
Dec : Decrease
SlSt : Slip stitch
CH : Chain
hdc : Half double crochet
dc : Double crochet
ssc : Start in Single crochet
[…] : Repeat around the row
*… * : Work in the same stitch
🎅 The written explanations 🎅
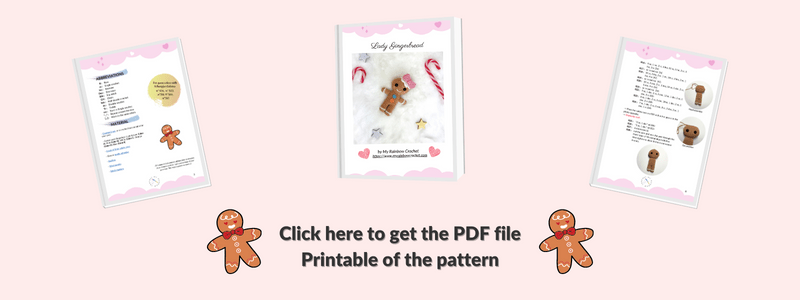
If you prefer to have the printable PDF file of this pattern and a more detailed pattern at each step, you can find it by clicking on the image below 🔽
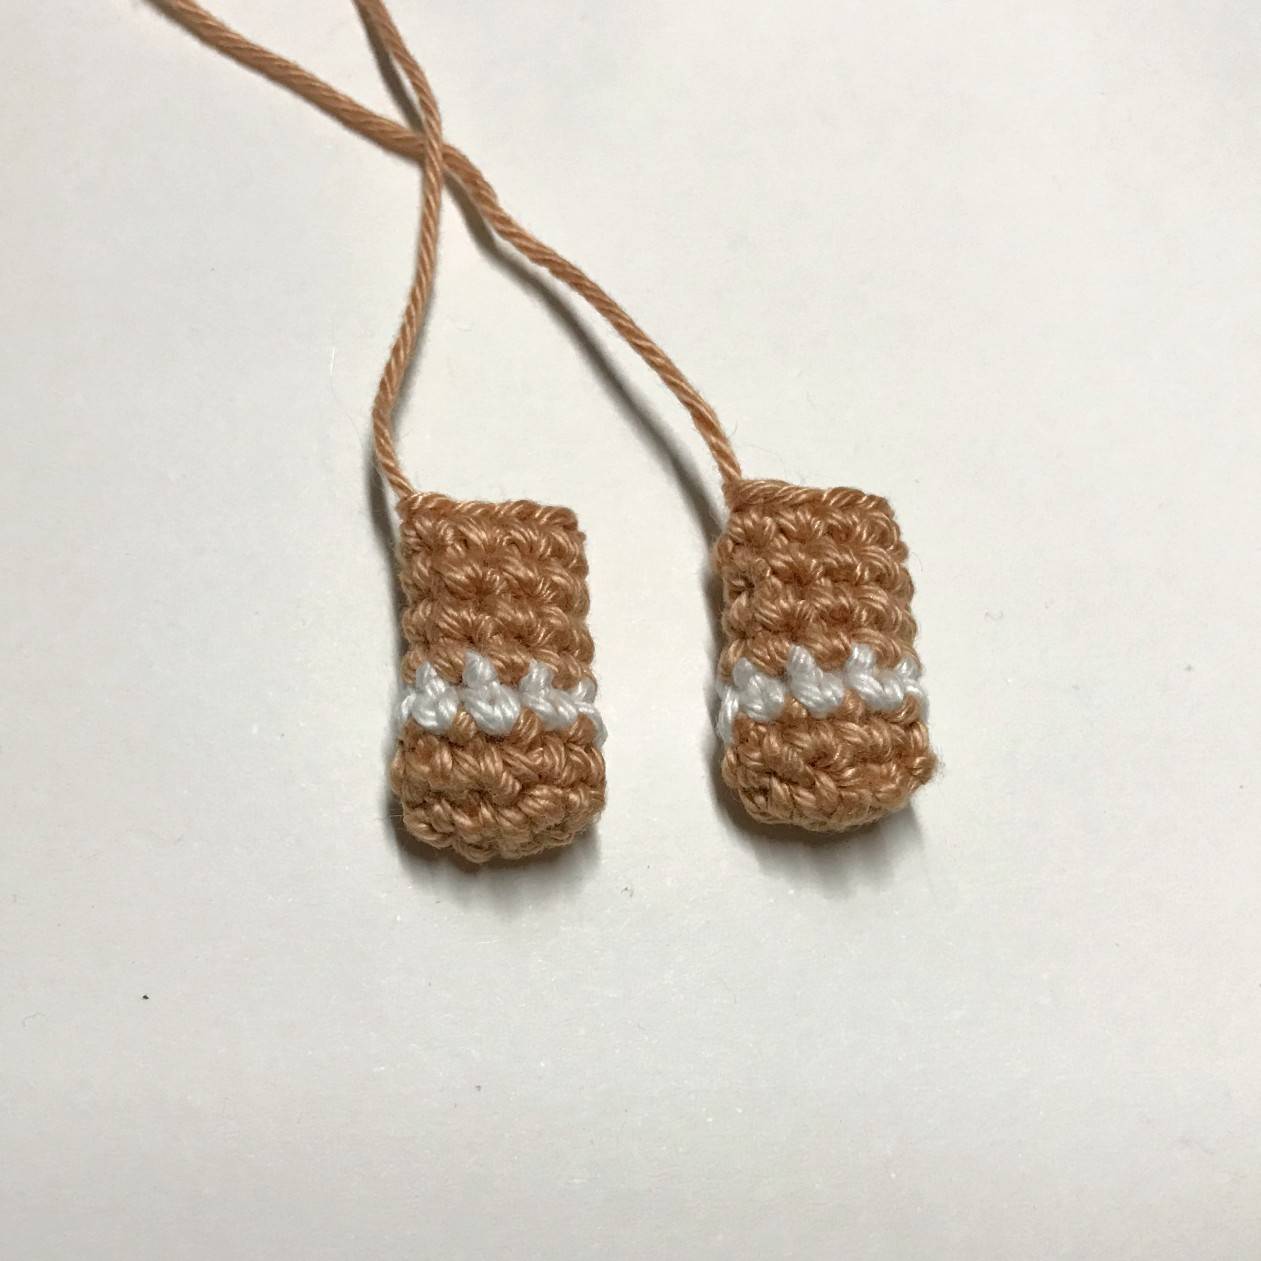
▶ Arms x2
(to be done with Light brown and white yarns)
➡ In light brown
We will work around the chain from the 2nd row.
R1 : CH 3 (3)
R2 : CH 1 and from the 2nd stitch, by only crocheting in the 3rd loop (the one at the back of the chain), 2 sc, 1 Inc, 2 sc, 1 Inc (8)
R3 : sc in each sc (8)
➡ In white
R4 : sc in each sc (8)
➡ In light brown
R5 to R8 : sc in each sc (8)
Fasten off keeping a good length to sew later.
Lightly stuff the arms keeping their flat shape.
▶ Legs x2
(to be done with light brown and white yarns)
➡ In light brown
We will work around the chain from the 2nd row.
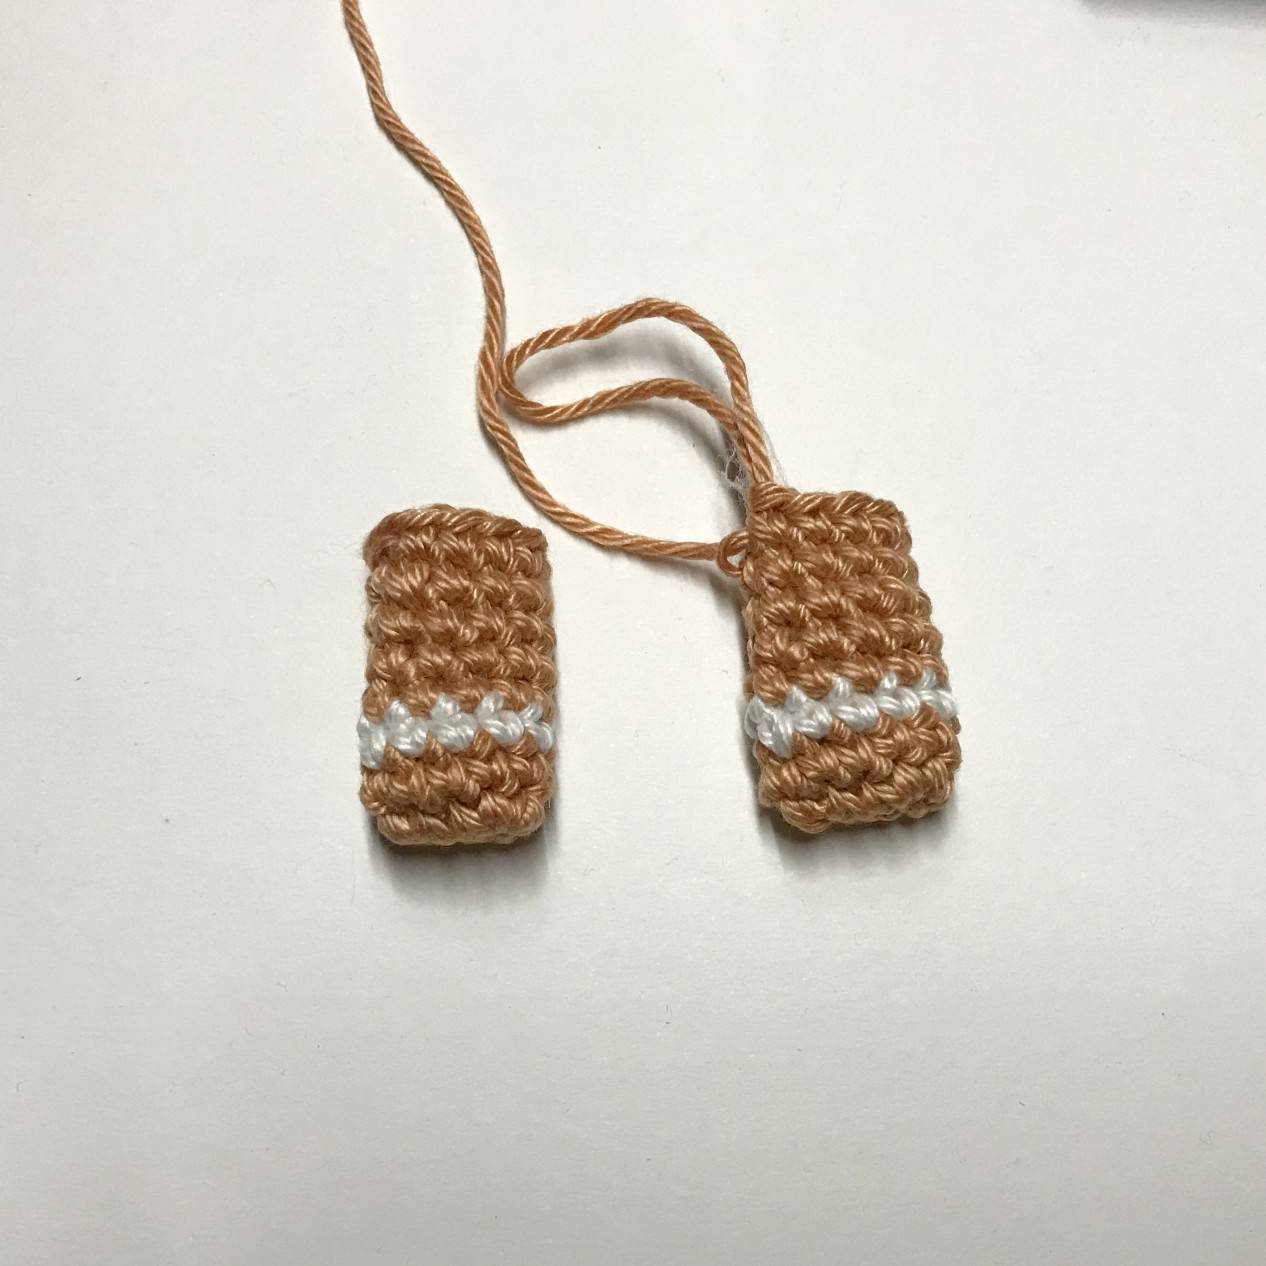
R1 : CH 3 (3)
R2 : CH 1 and from the 2nd stich, by only crocheting in the 3rd loop (the one at the back of the chain), 1 Inc, 1 sc, 2 Inc, 1 sc, 1 Inc (10)
R3 : sc in each sc (10)
➡ In white
R4 : sc in each sc (10)
➡ In light brown
R5 to R9 : sc in each sc (10)
Fasten off keeping a good length to sew later.
Lightly stuff the arms keeping their flat shape.
✨ Receive your Magic e-book with 5 free patterns! ✨
▶ The body
(to be done with light brown yarn)
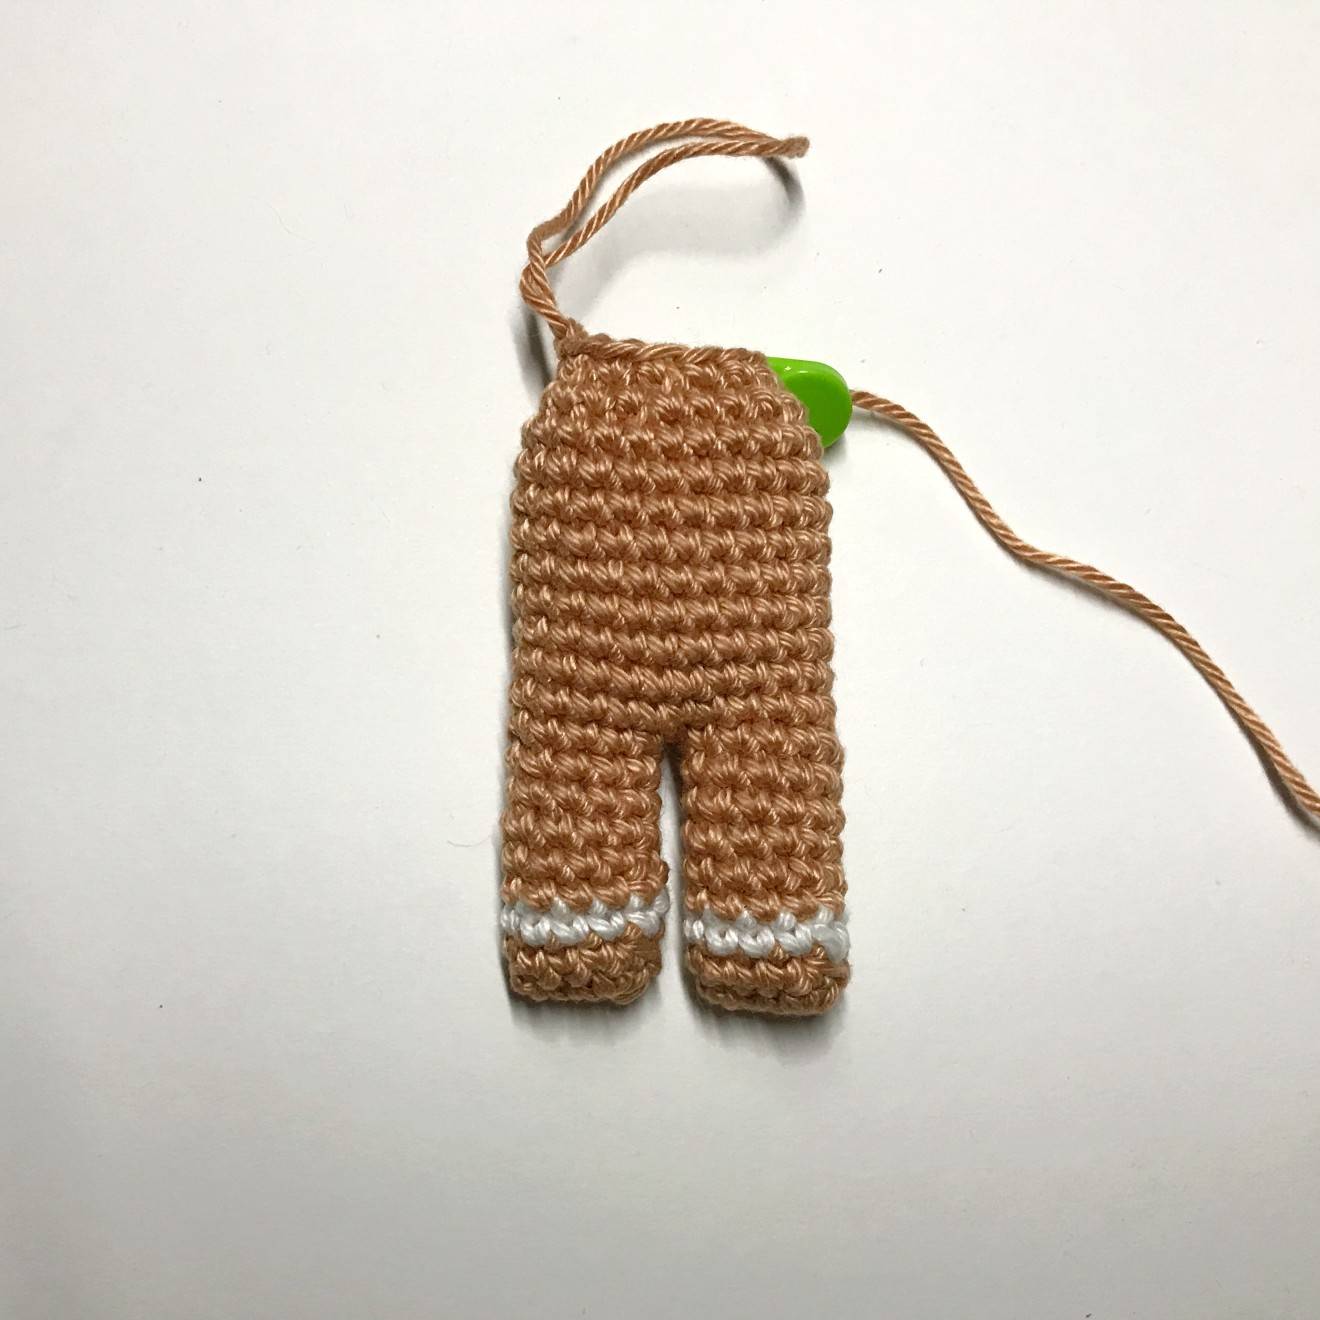
R1 : 1 extra sc on the leg where we kept the yarn to end up on the edge of the leg. CH 1 and 1 sc on the other leg to join both (be careful to join well on the side of the leg). This joining sc marks the 1st stitch of the row.
Continue with 9 sc on the 1st leg, 1 sc between the 2 legs, 10 sc on the 2nd leg, 1 sc between the 2 legs (22)
R2 to R10 : sc in each sc (10)
R11 : *3 sc, 1 dec * x4, 2 sc (12)
R12 : *1 sc, 1 dec * x6 (12)
Keep the yarnto continue with the head.
Gradually stuff.
▶ The head
(to be done with light brown yarn)
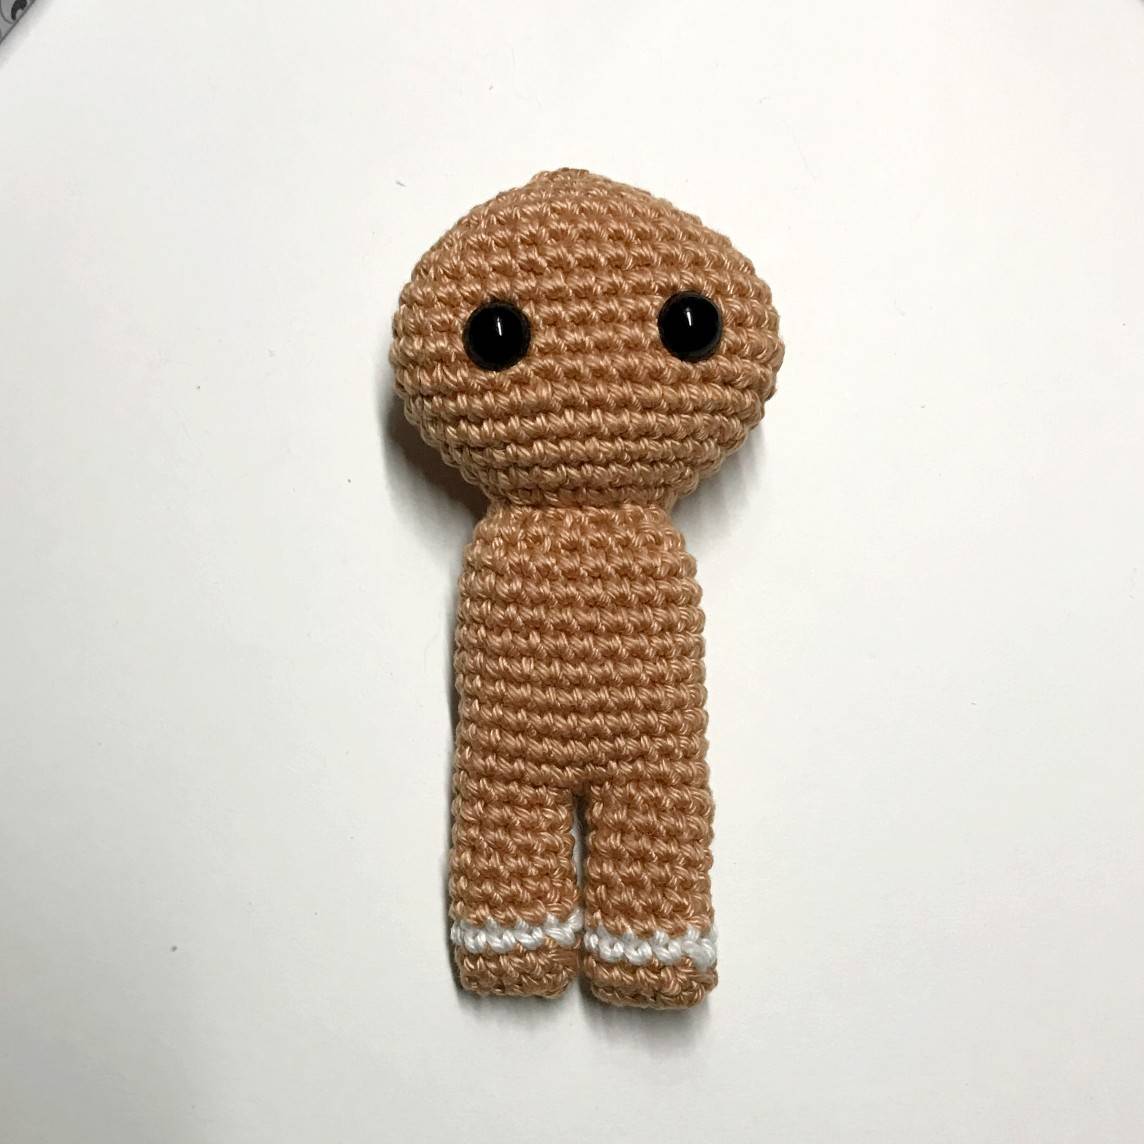
R13 : 1 In in each sc (24)
R14 : 7 sc, 1 Inc, 2 sc, 1 Inc, 8 sc, 1 Inc, 2 sc, 1 Inc, 1 sc (28)
R15 : 8 sc, 1 Inc, 2 sc, 1 Inc, 10 sc, 1 Inc, 2 sc, 1 Inc, 2 sc (32)
R16 : 9 sc, 1 Inc, 2 sc, 1 Inc, 12 sc, 1 Inc, 2 sc, 1 Inc, 3 sc (36)
R17 : sc in each sc (36)
R18 : 10 sc, 1 Inc, 2 sc, 1 Inc, 14 sc, 1 Inc, 2 sc, 1 Inc, 4 sc (40)
R19 : sc in each sc (40)
R20 : 10 sc, 1 dec, 2 sc, 1 dec, 14 sc, 1 dec, 2 sc, 1 dec, 4 sc (36)
R21 : sc in each sc (36)
R22 : 9 sc, 1 dec, 2 sc, 1 dec, 12 sc, 1 dec, 2 sc, 1 dec, 3 sc (32)
R23 : 8 sc, 1 dec, 2 sc, 1 dec, 10 sc, 1 dec, 2 sc, 1 dec, 2 sc (28)
R24 : 7 sc, 1 dec, 2 sc, 1 dec, 8 sc, 1 dec, 2 sc, 1 dec, 1 sc (24)
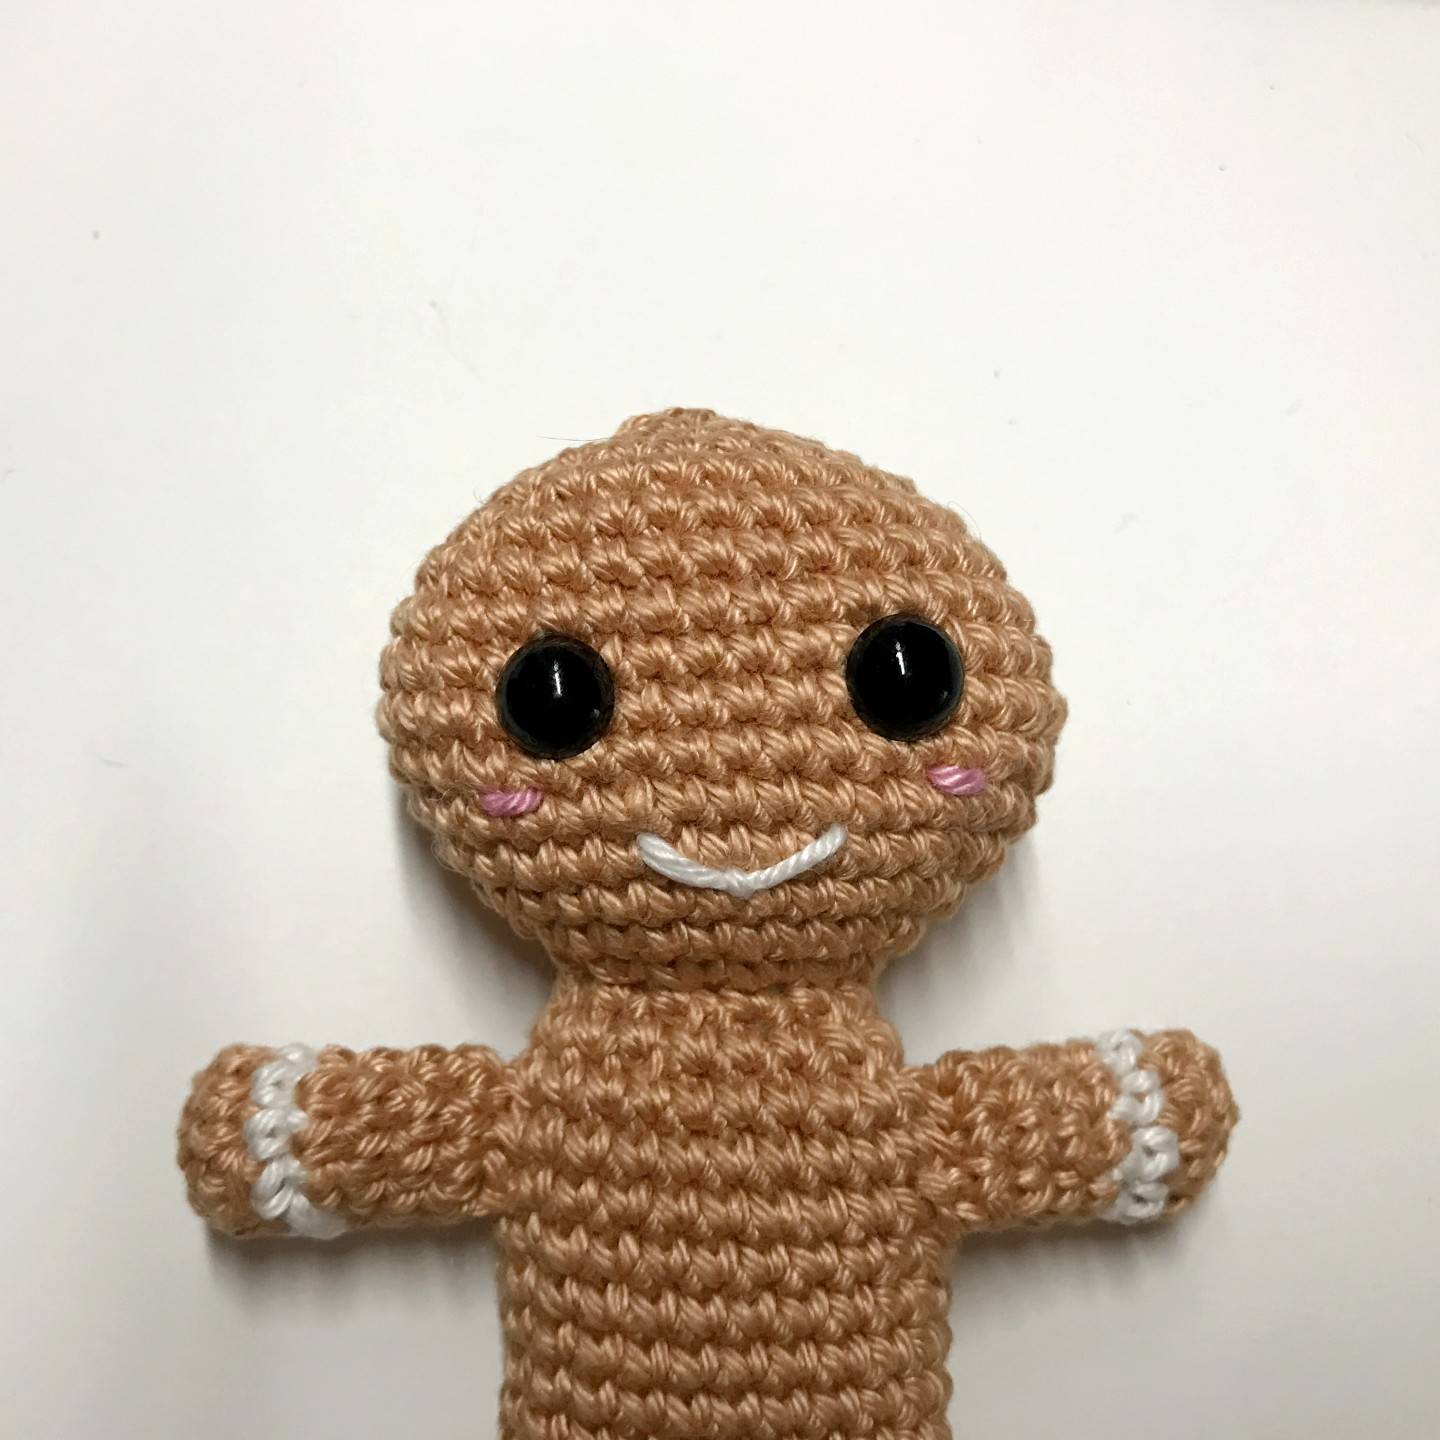
Place the safety eyes on R19 with a 6 sc gap as in the photo opposite.
Gradually stuff.
R25 : *2 sc, 1 dec * x6 (18)
R26 : *1 sc, 1 dec * x6 (12)
R27 : 6 decreases (6)
R28 : cut the yarn and pass the yarn through the front loops of the remaining 6 stitches then tighten to close the hole and weave in ends.
▶ The icing
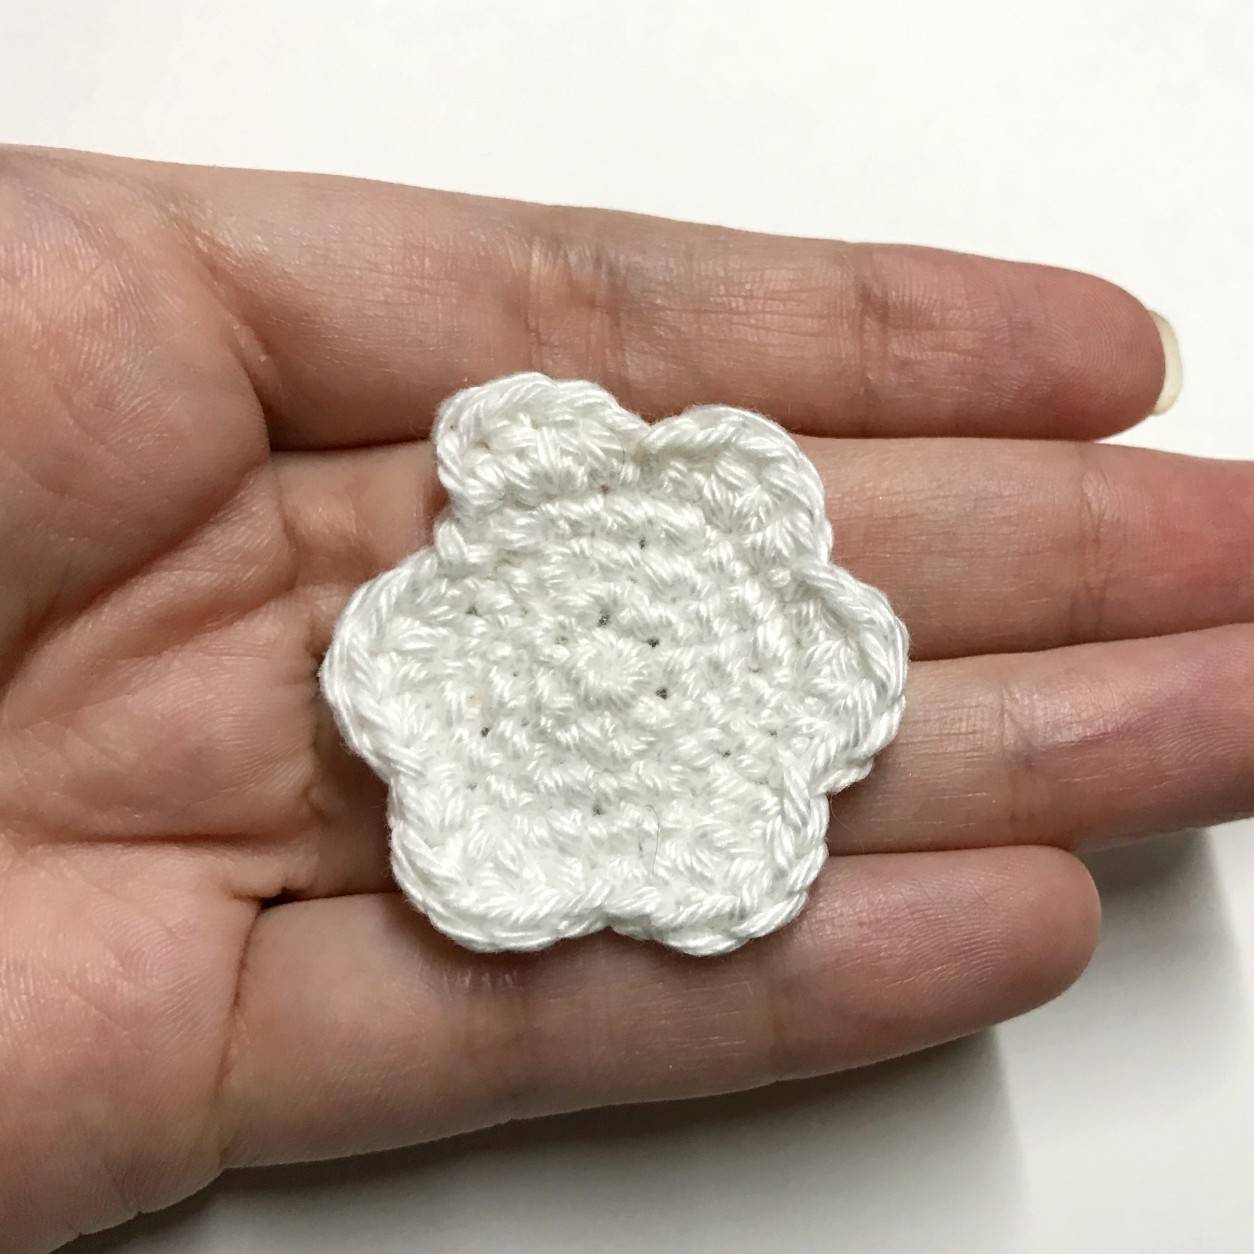
(to be done with white yarn)
R1 : magic ring with 6 sc
R2 : 1 Inc in each sc (12)
R3 : *1 sc, 1 Inc * x6 (18)
R4 : *2 sc, 1 Inc * x6 (24)
R5 : *1 SlSt, 1 hdc, [2 dc], 1 hdc * x6 (30)
Fasten off and weave in ends.
Find more magic patterns ✨
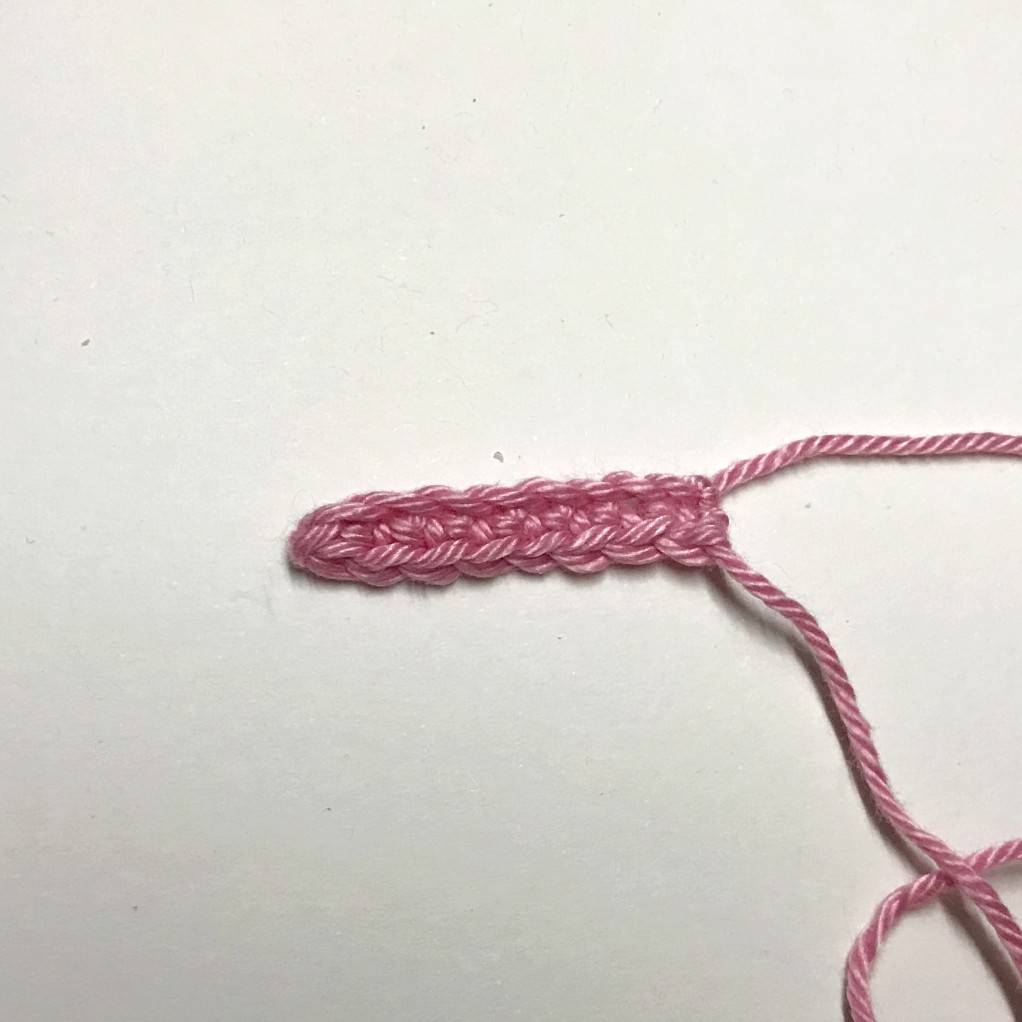
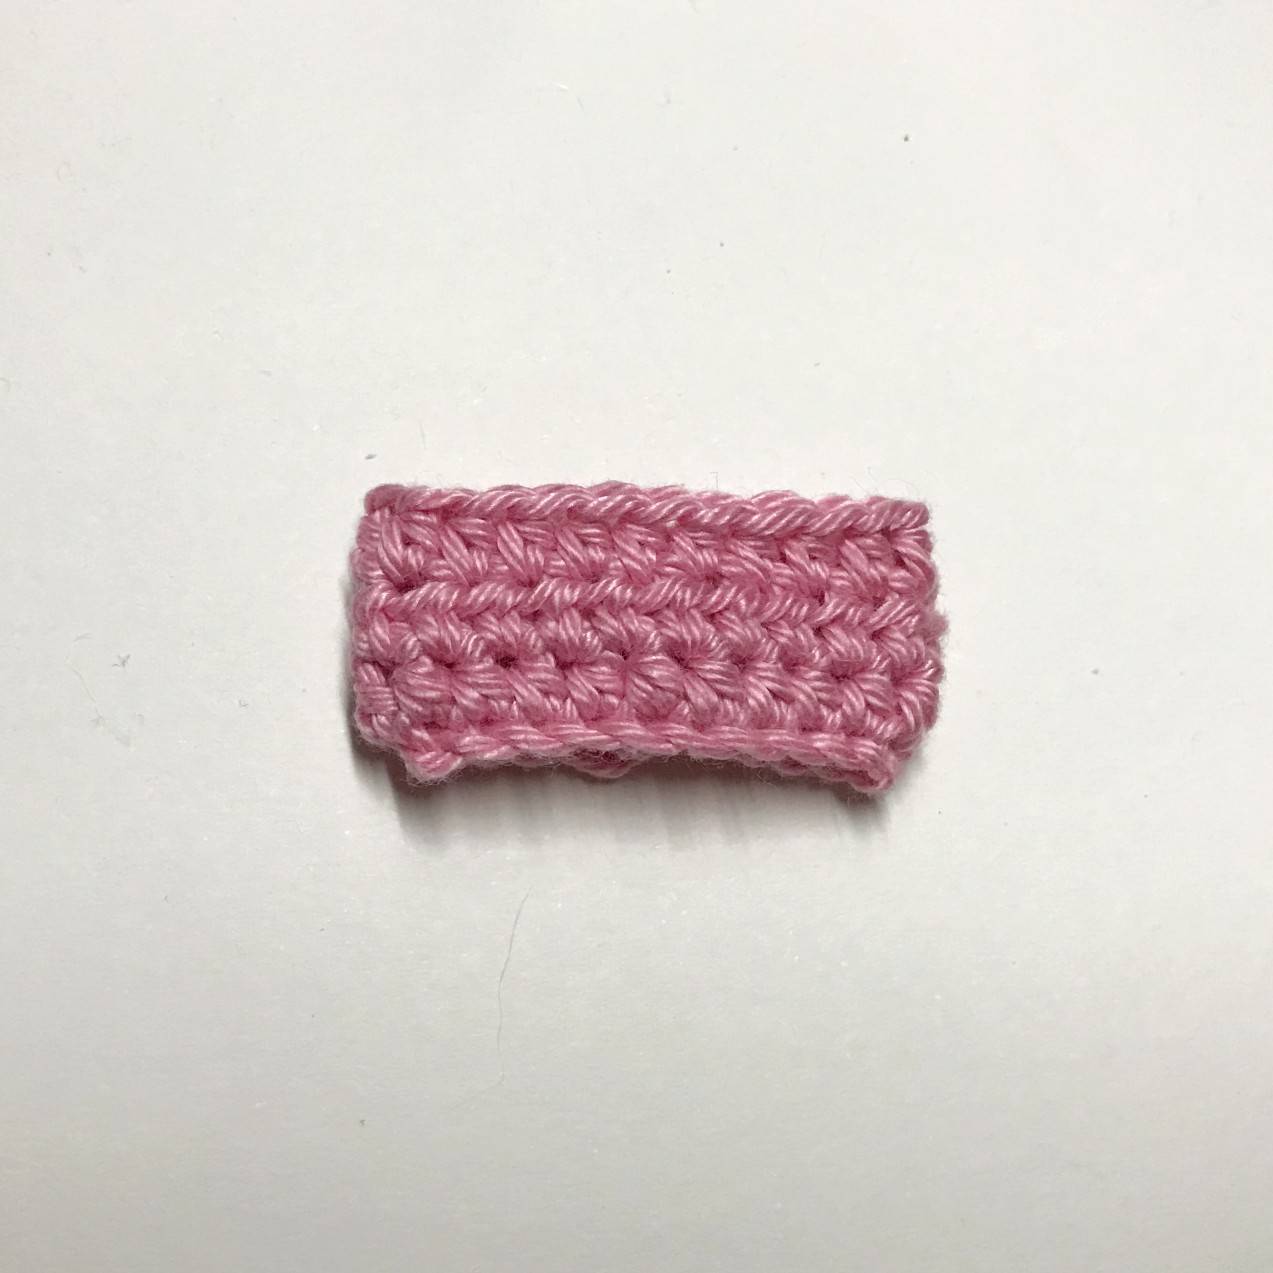
▶ The bow
(to be done with pink yarn)

➡ The base of the bow
R1 : CH 20
R2 : CH 2, and frome the 3rd stitch, hdc in each stitch (20)
R3 and R4 : CH 2, turn, hdc in each hdc (20)
Fasten off keeping a good length to sew later.
➡ The middle of the bow
R1 : CH 8
R2 : CH 1, from the 2nd stitch, sc in each sc (8)
Fasten off keeping a good length to sew later.
➡ Bow assembly
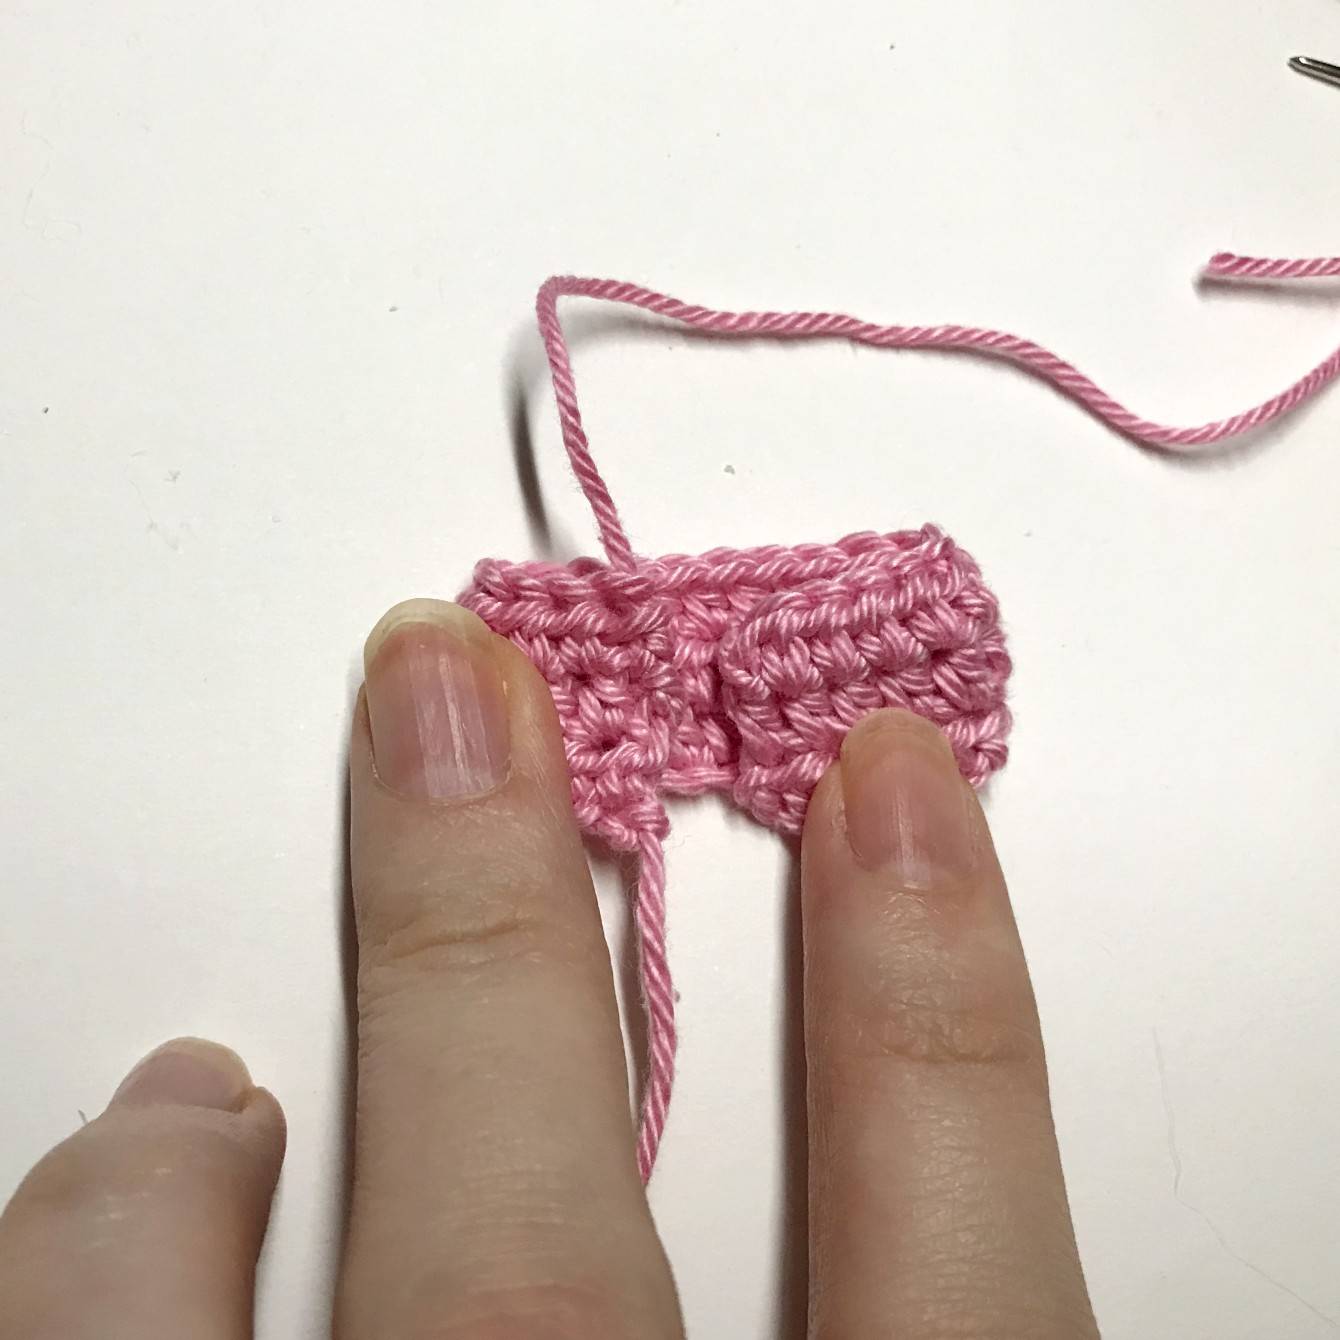
Fold the base of the bow as in the photo above with the 2 folded edges.
Sew the 2 ends of the strip.
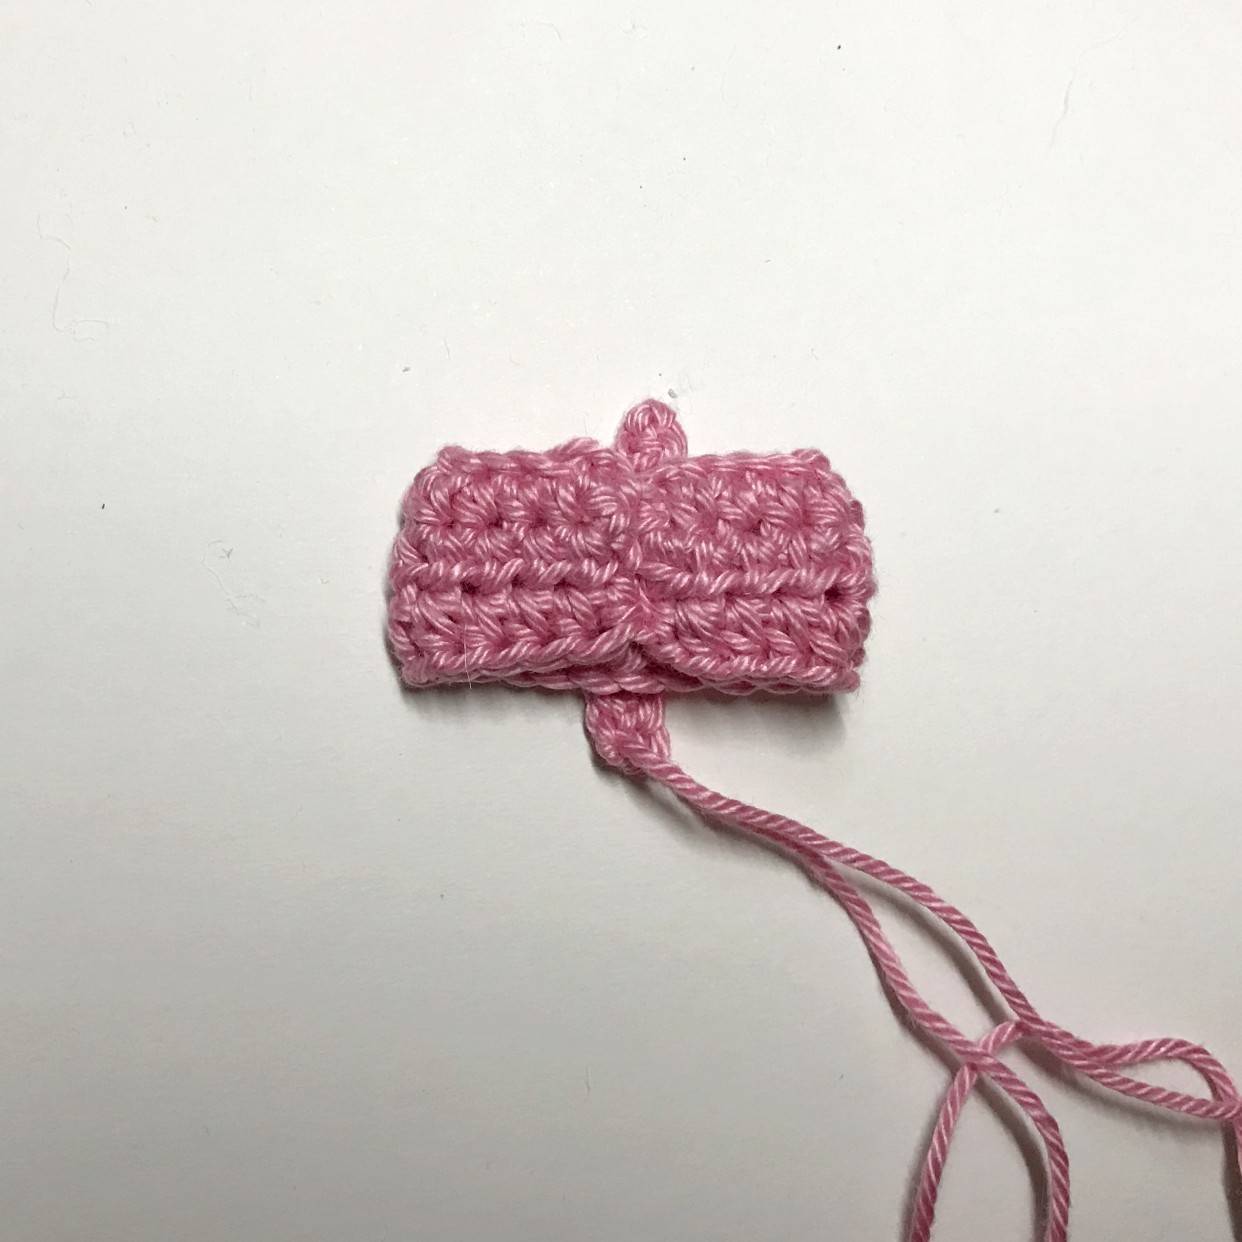
Pass the middle of the bow under the base in the middle of the unsewn side.
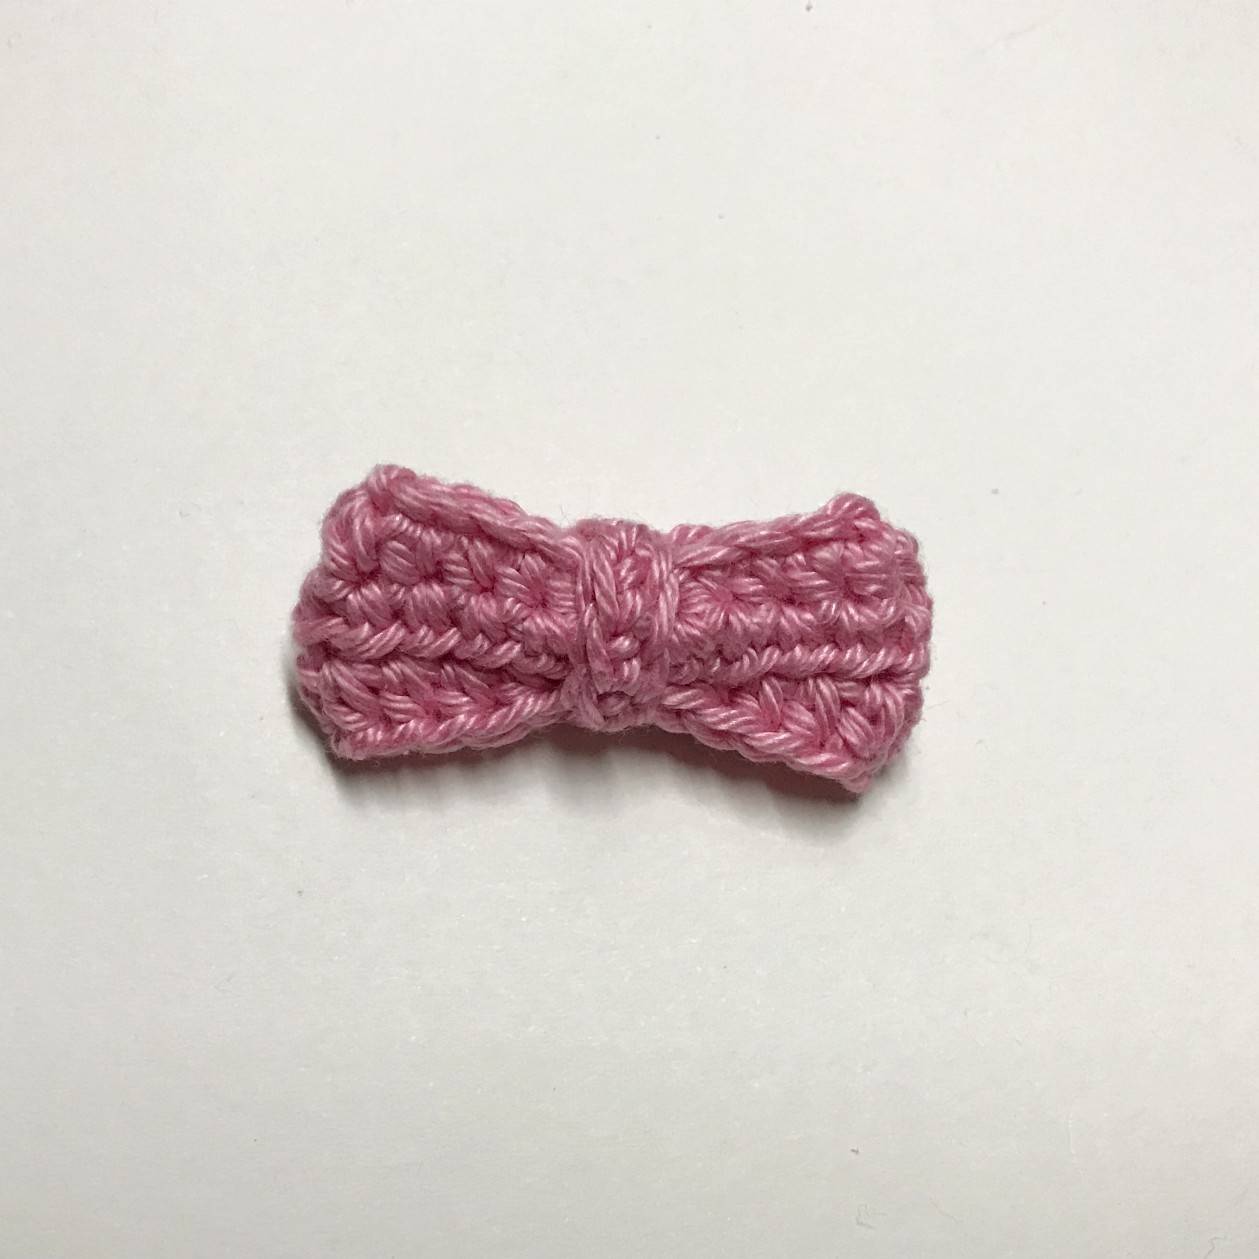
Sew the 2 ends of the middle together to obtain the result above.

▶ Buttons x2
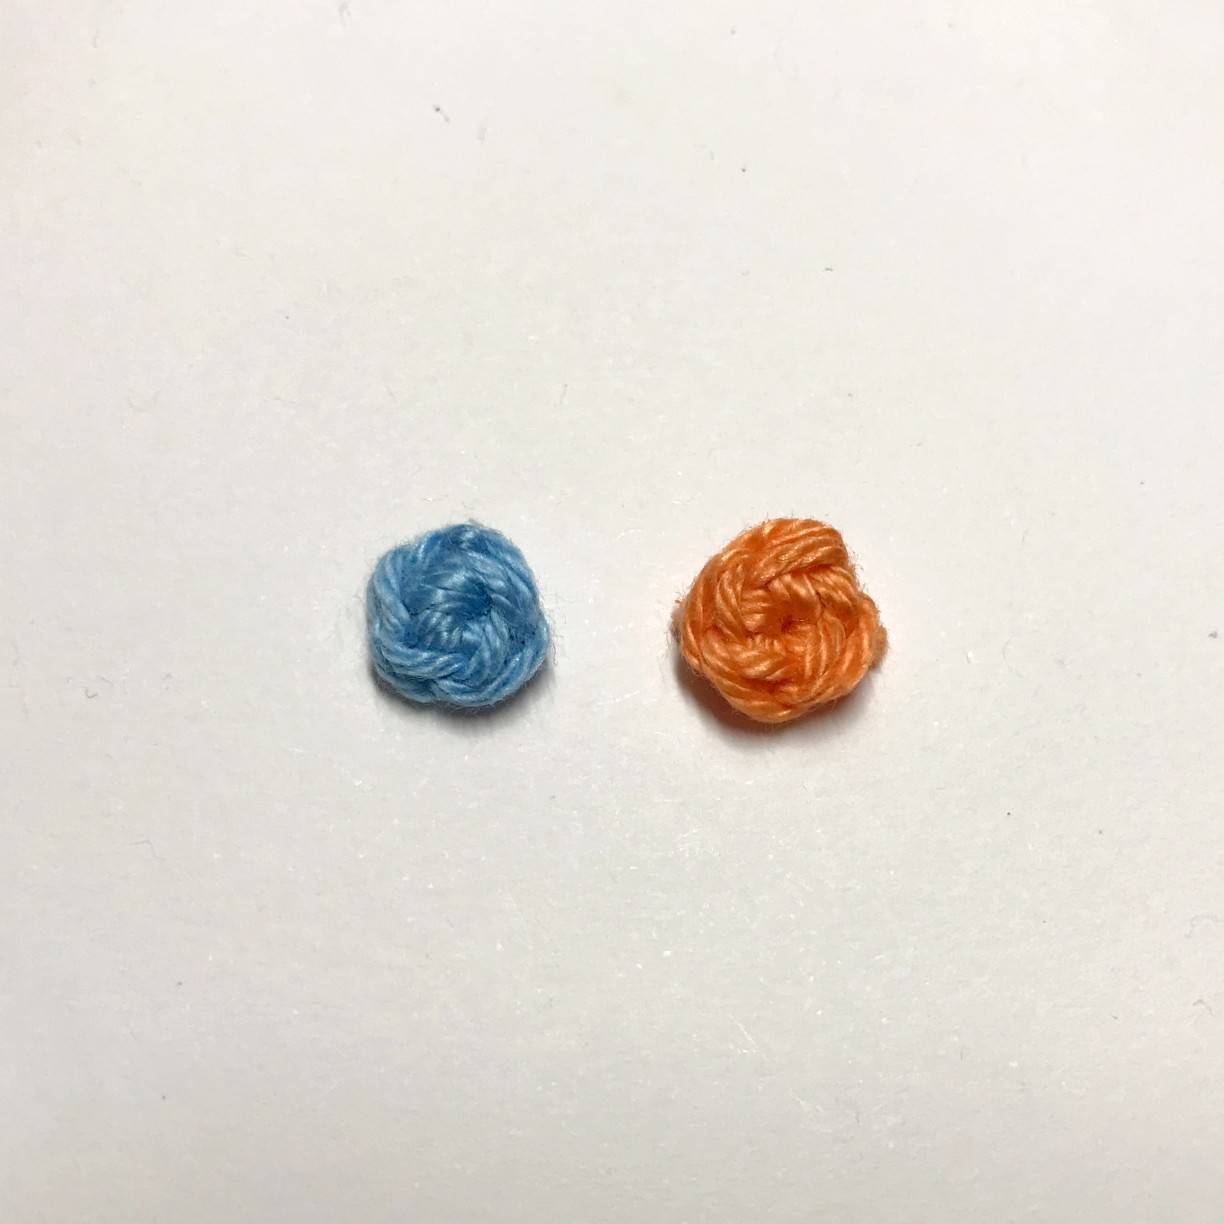
Crochet a button in orange and a button in blue according to the following process:
R1 : magic ring with 4 sc and 1 SlSt in the 1st sc to close the ring (4)
Fasten off and weave in ends.
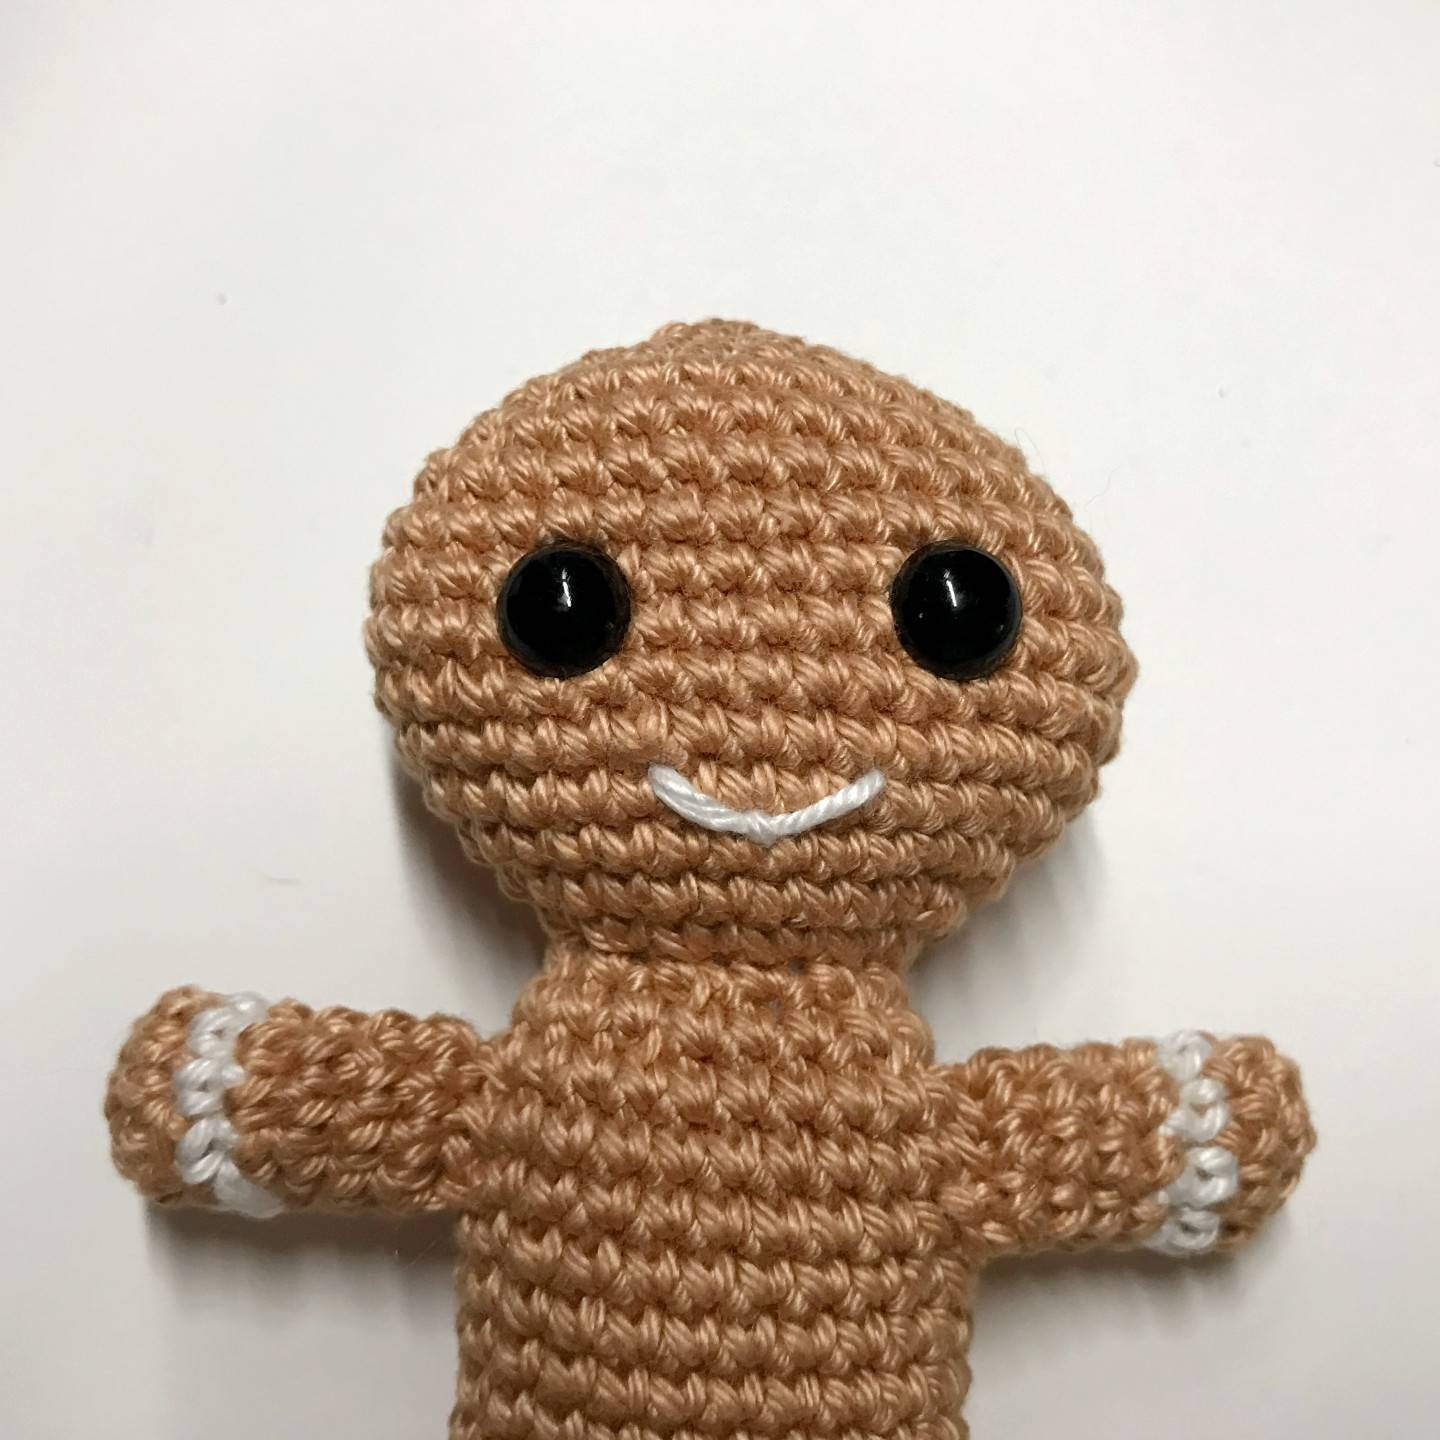
▶ Assembly and finishes of Lady
➡ Arms
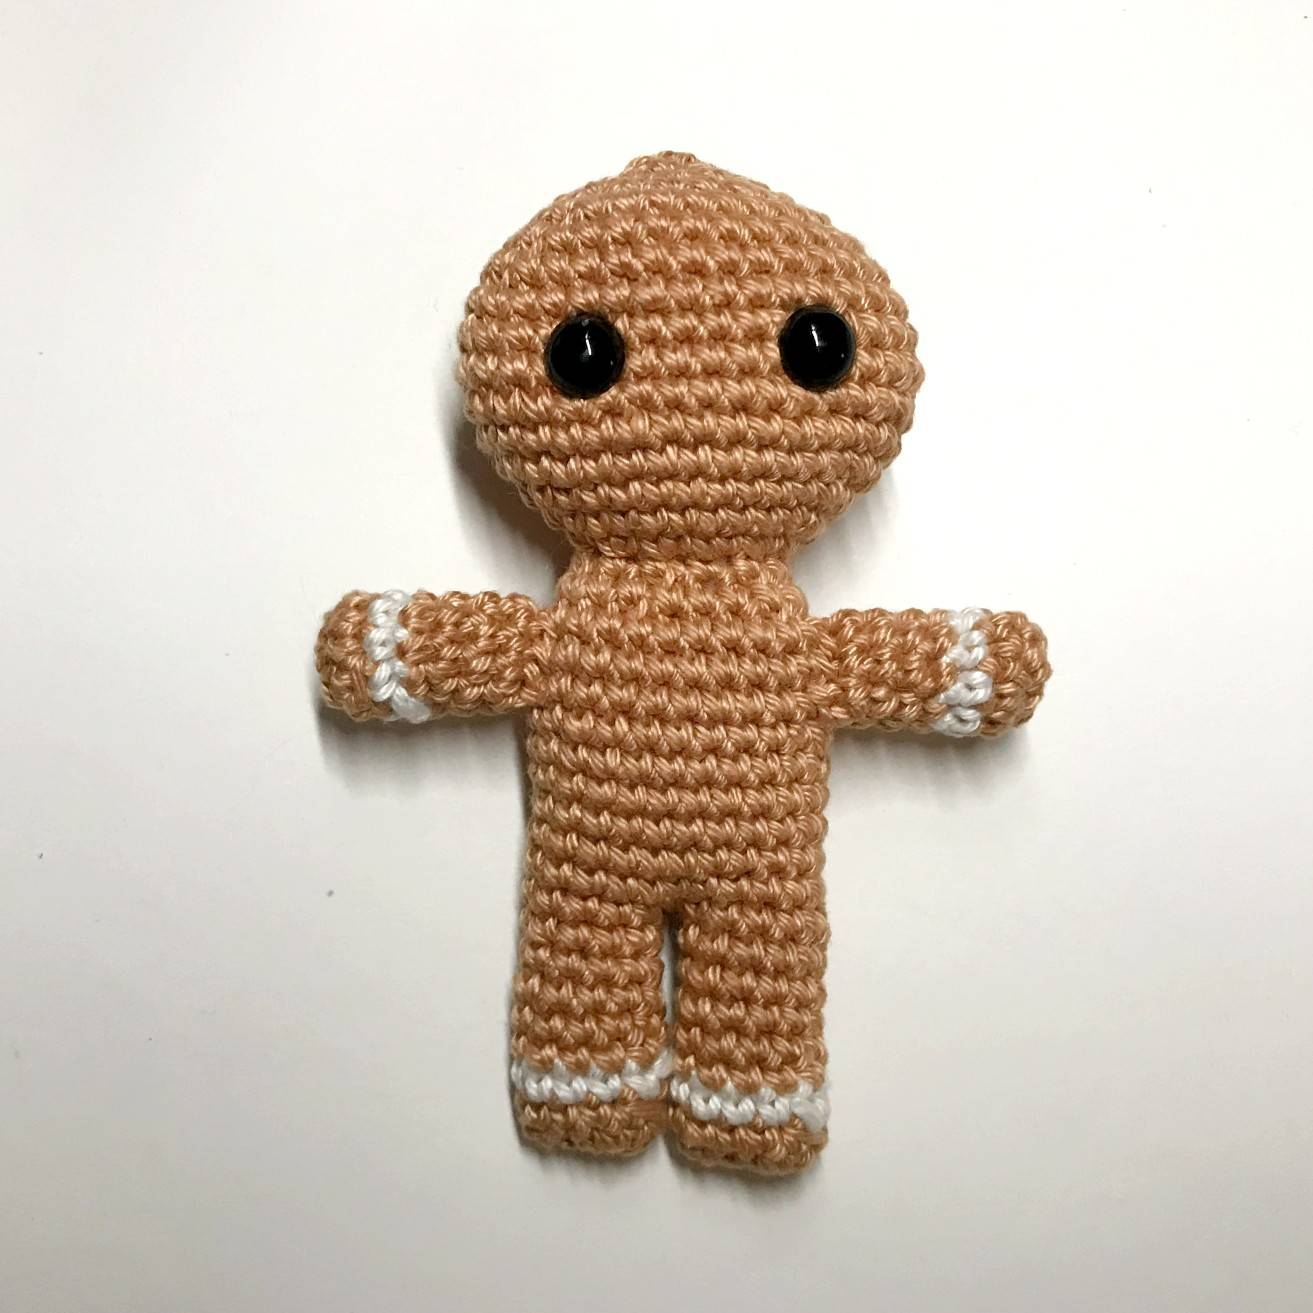
Sew the arms 2 rows from the neck, on the side edge.
The 2 arms have 8 sc between them on the front of the body.
➡ The smile

Tuck in your white yarn and bring it out 1 sc vertically from the eye and 2 rows under the eyes.
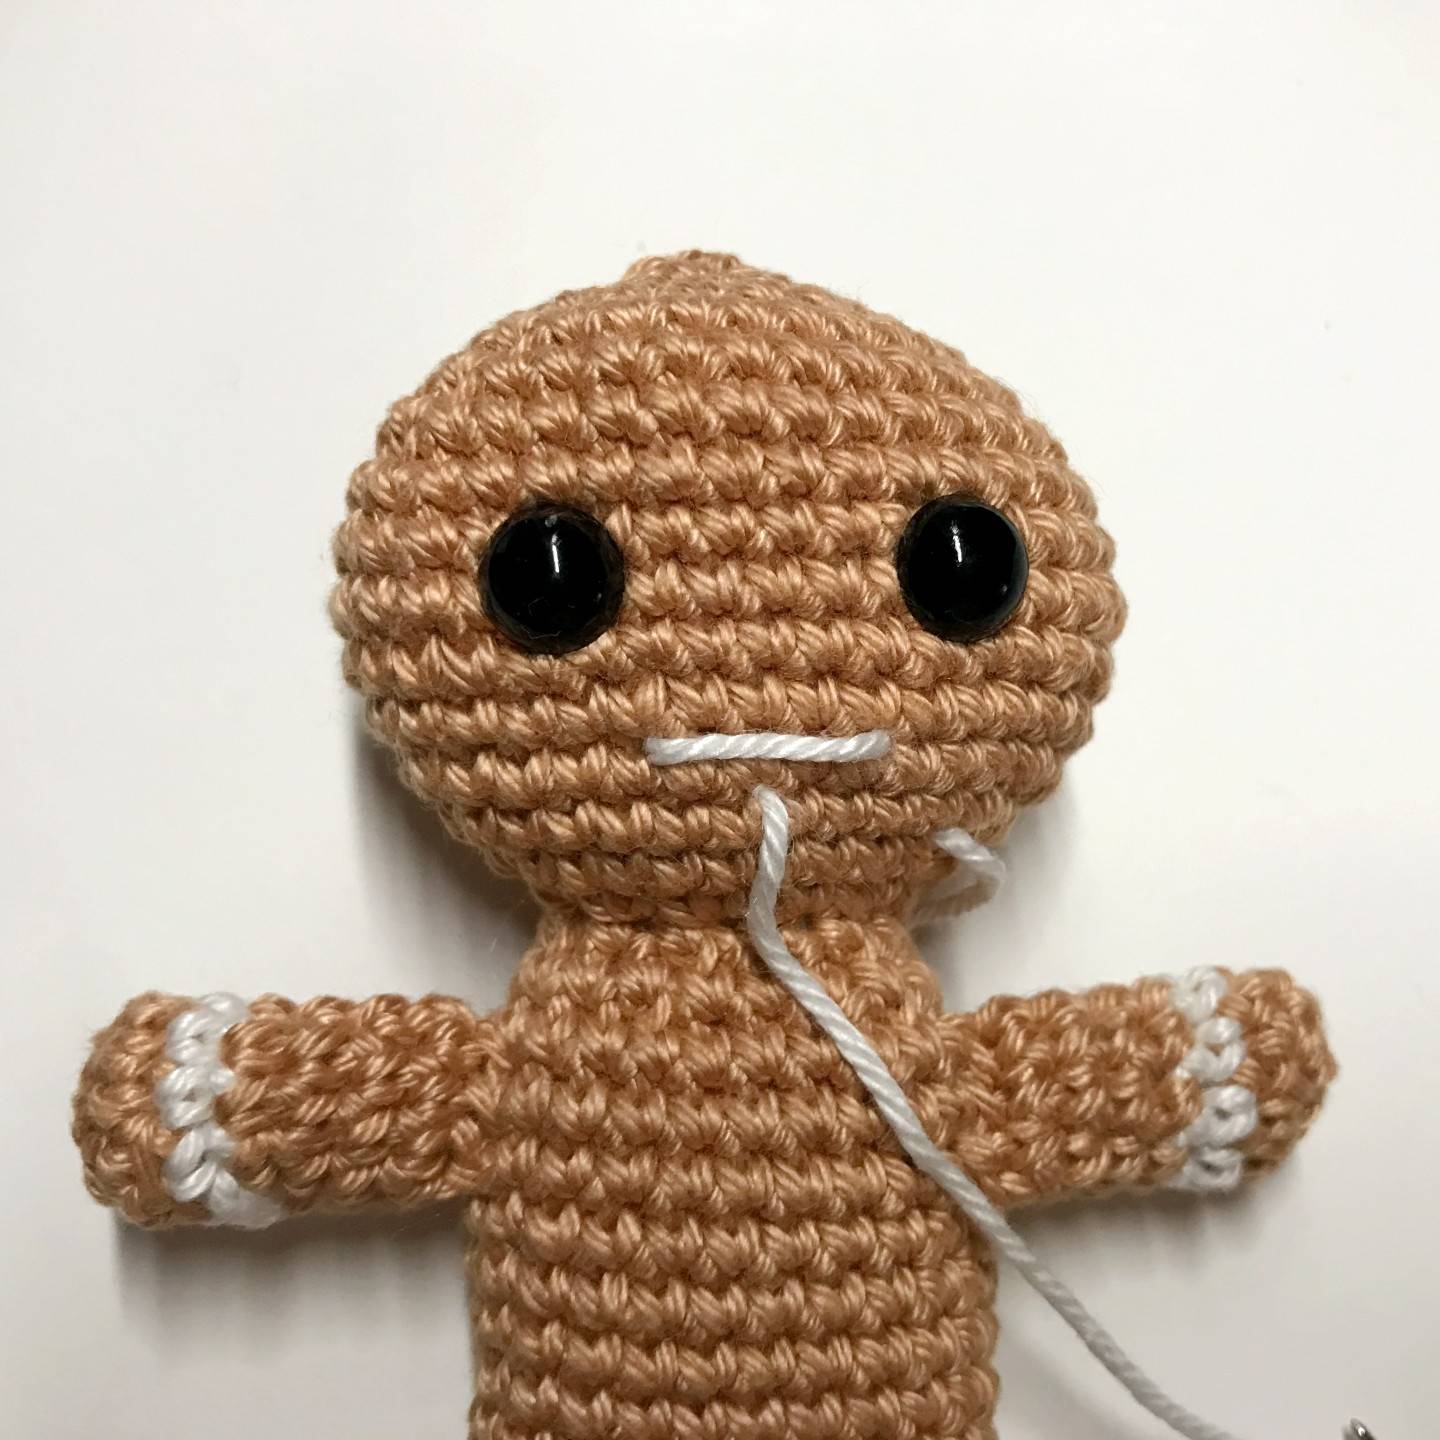
Then count 4 stitches and tuck the yarn in to bring it out 1 row below and 2 stitches back.
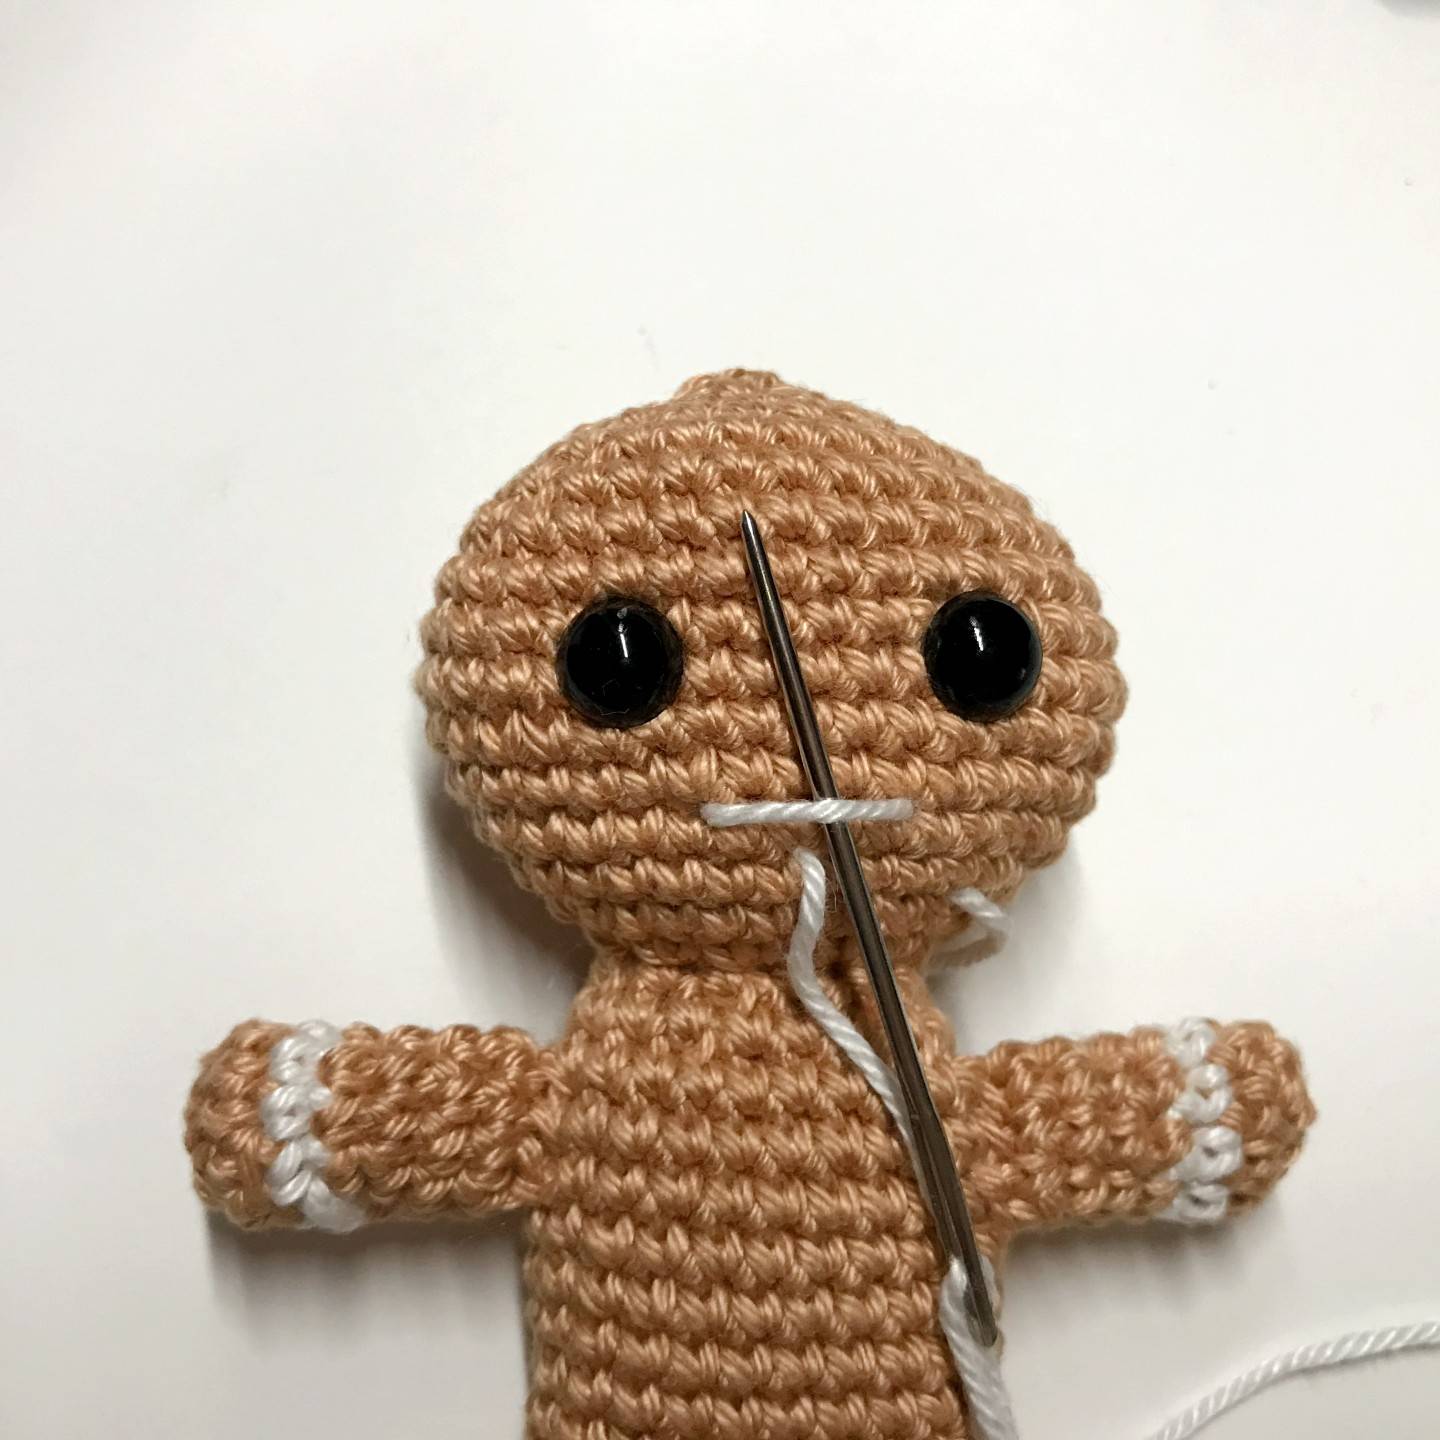
Pass the yarn around the bar formed above…
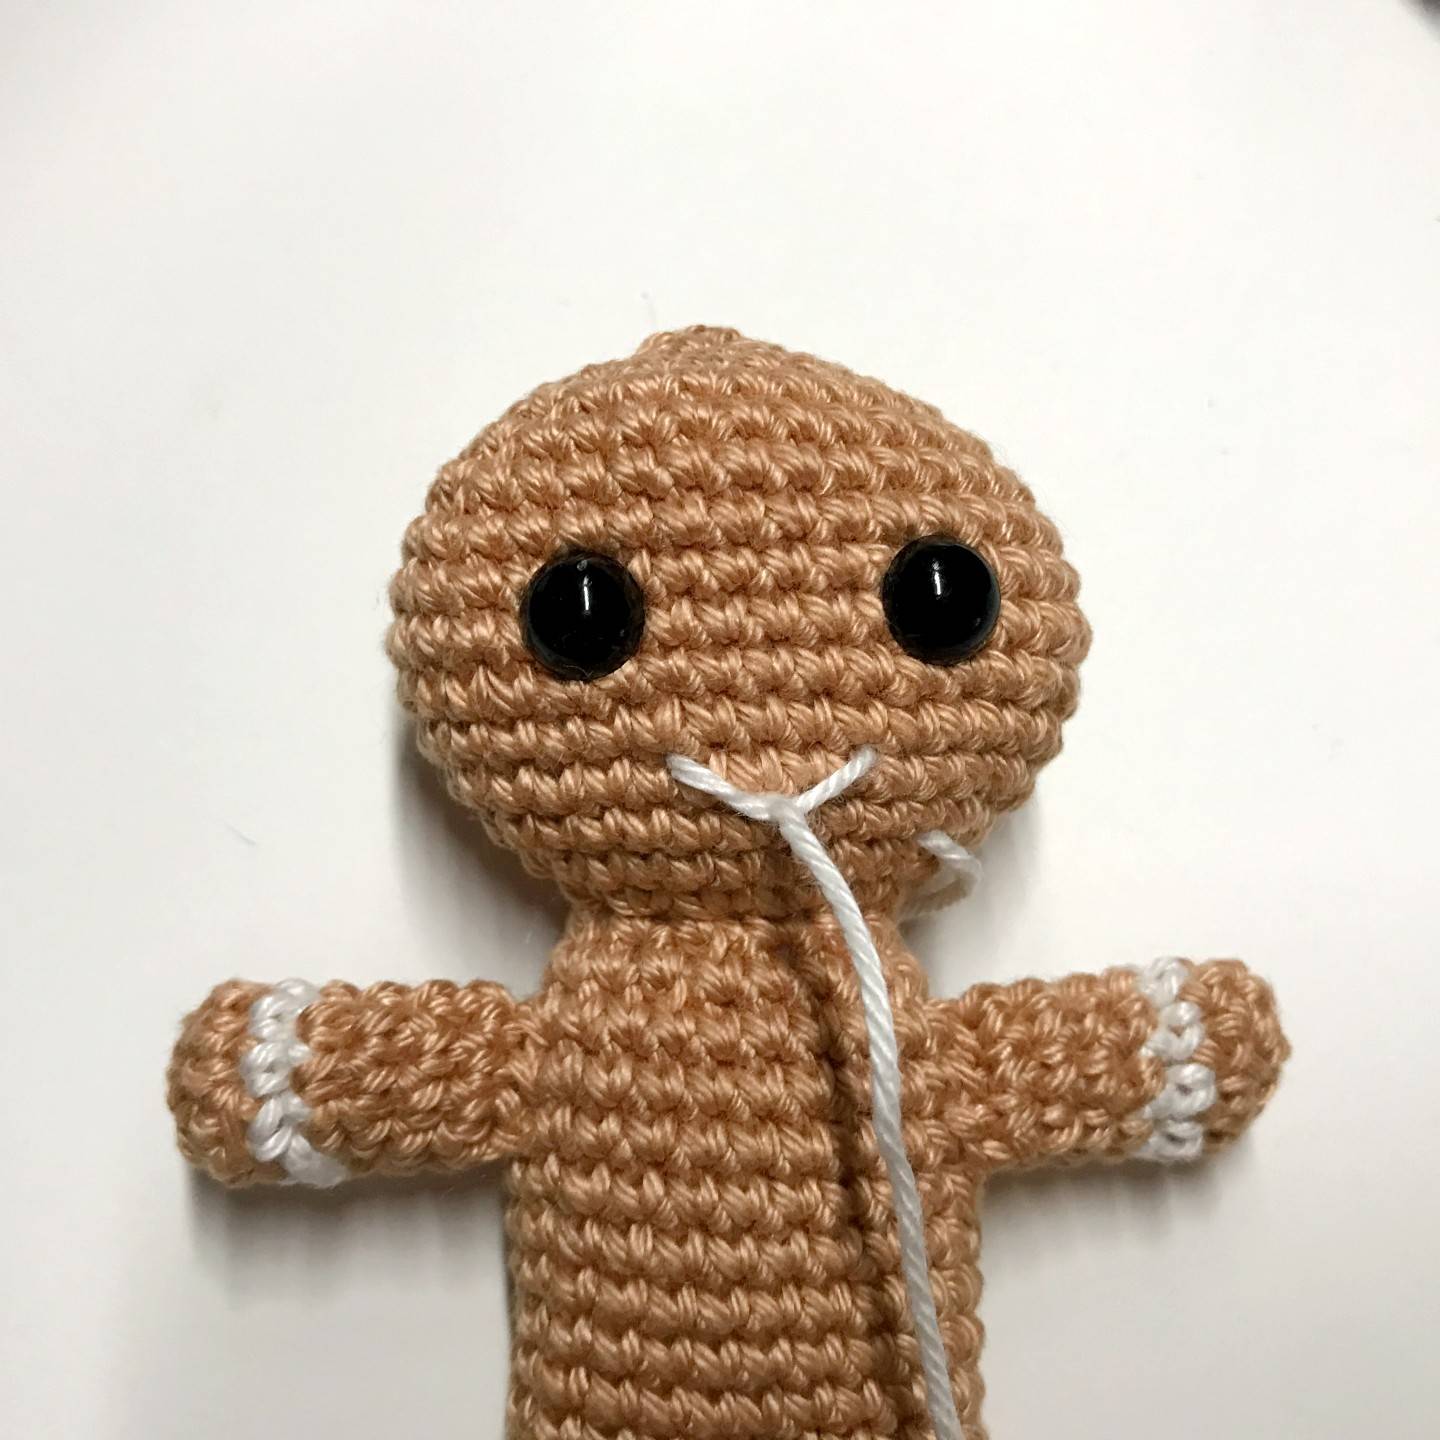
to bring it down to that level.
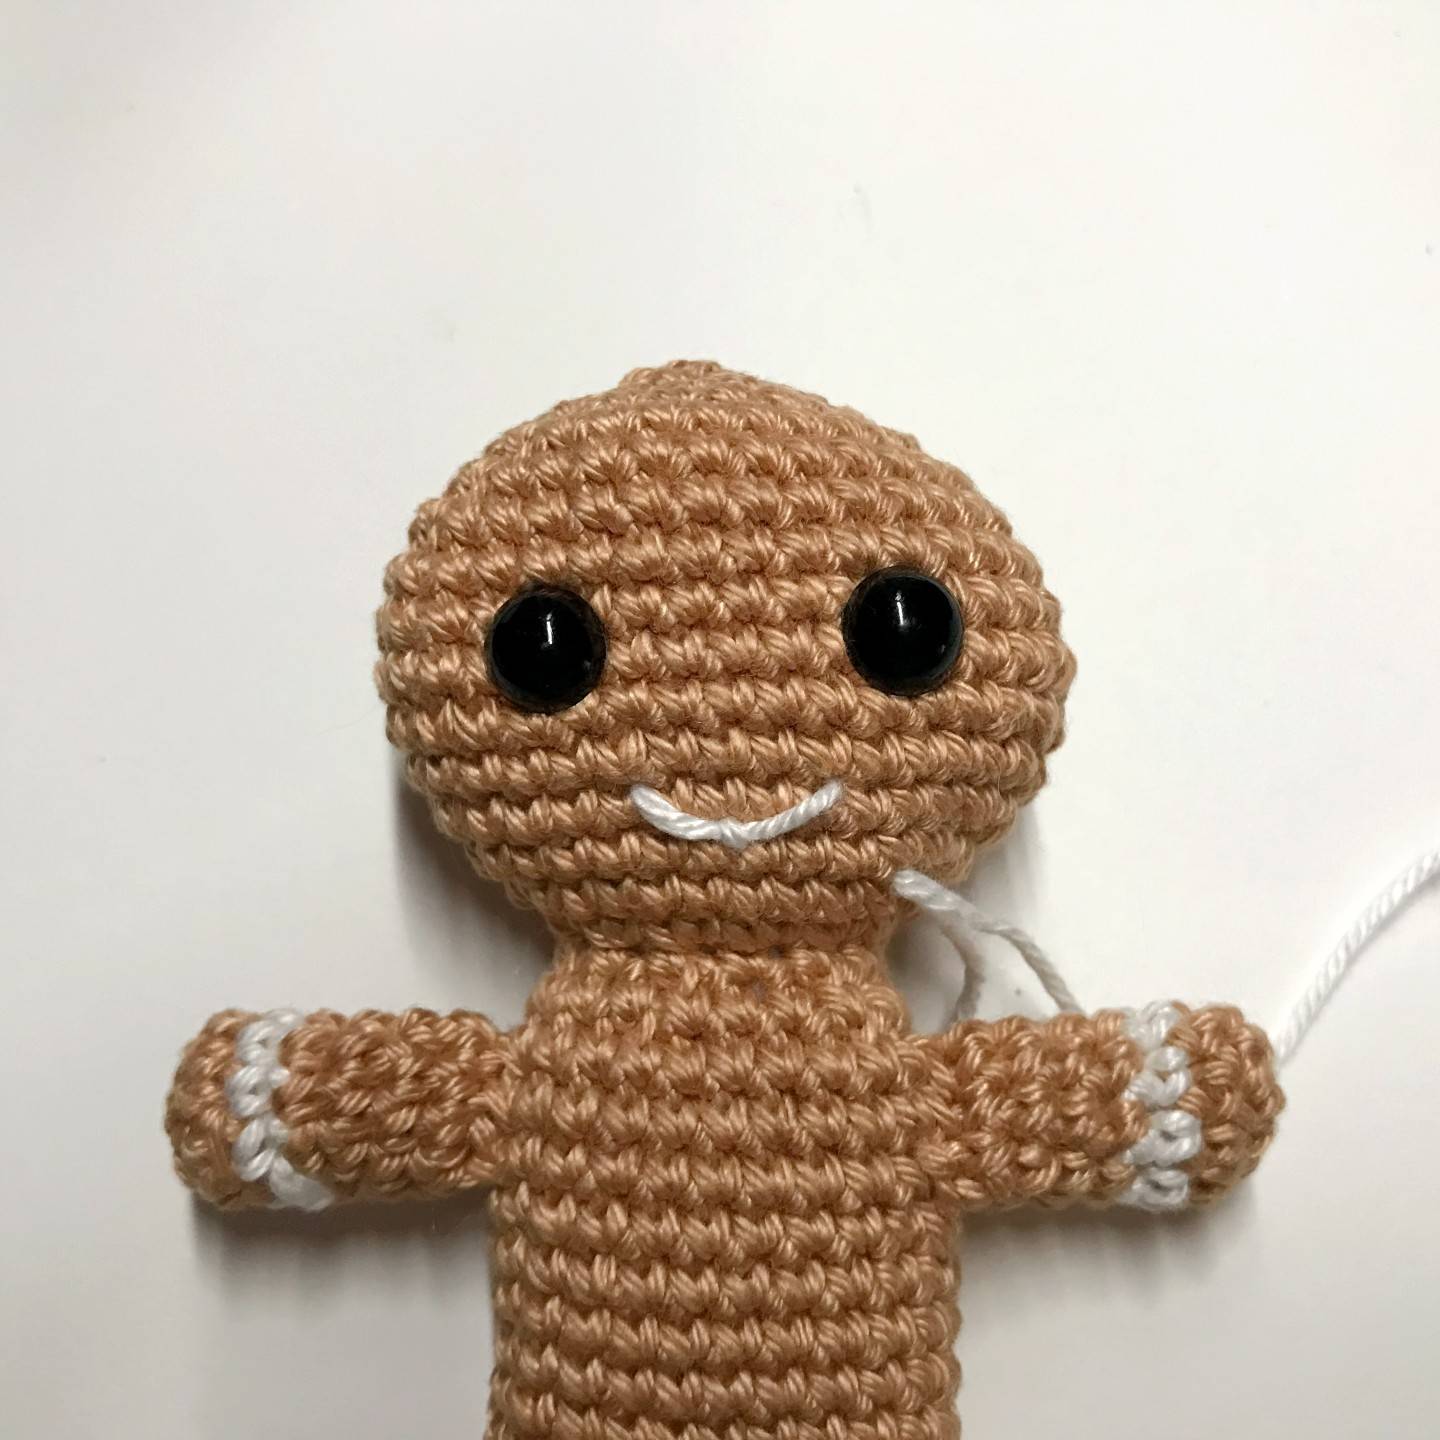
Return to the same stitch again and bring out the yarn at our starting entry.
Fasten off, tie a knot and weave in.
➡ Cheeks
With pink yarn, 1 row under the eyes and just outside each eye, embroider the cheeks by passing your yarn once over a width of one stitch.

Glue the icing leaning towards the right side as in the photo above.
Glue the bow by applying glue only to the middle of the bow and place it on the middle of the icing.

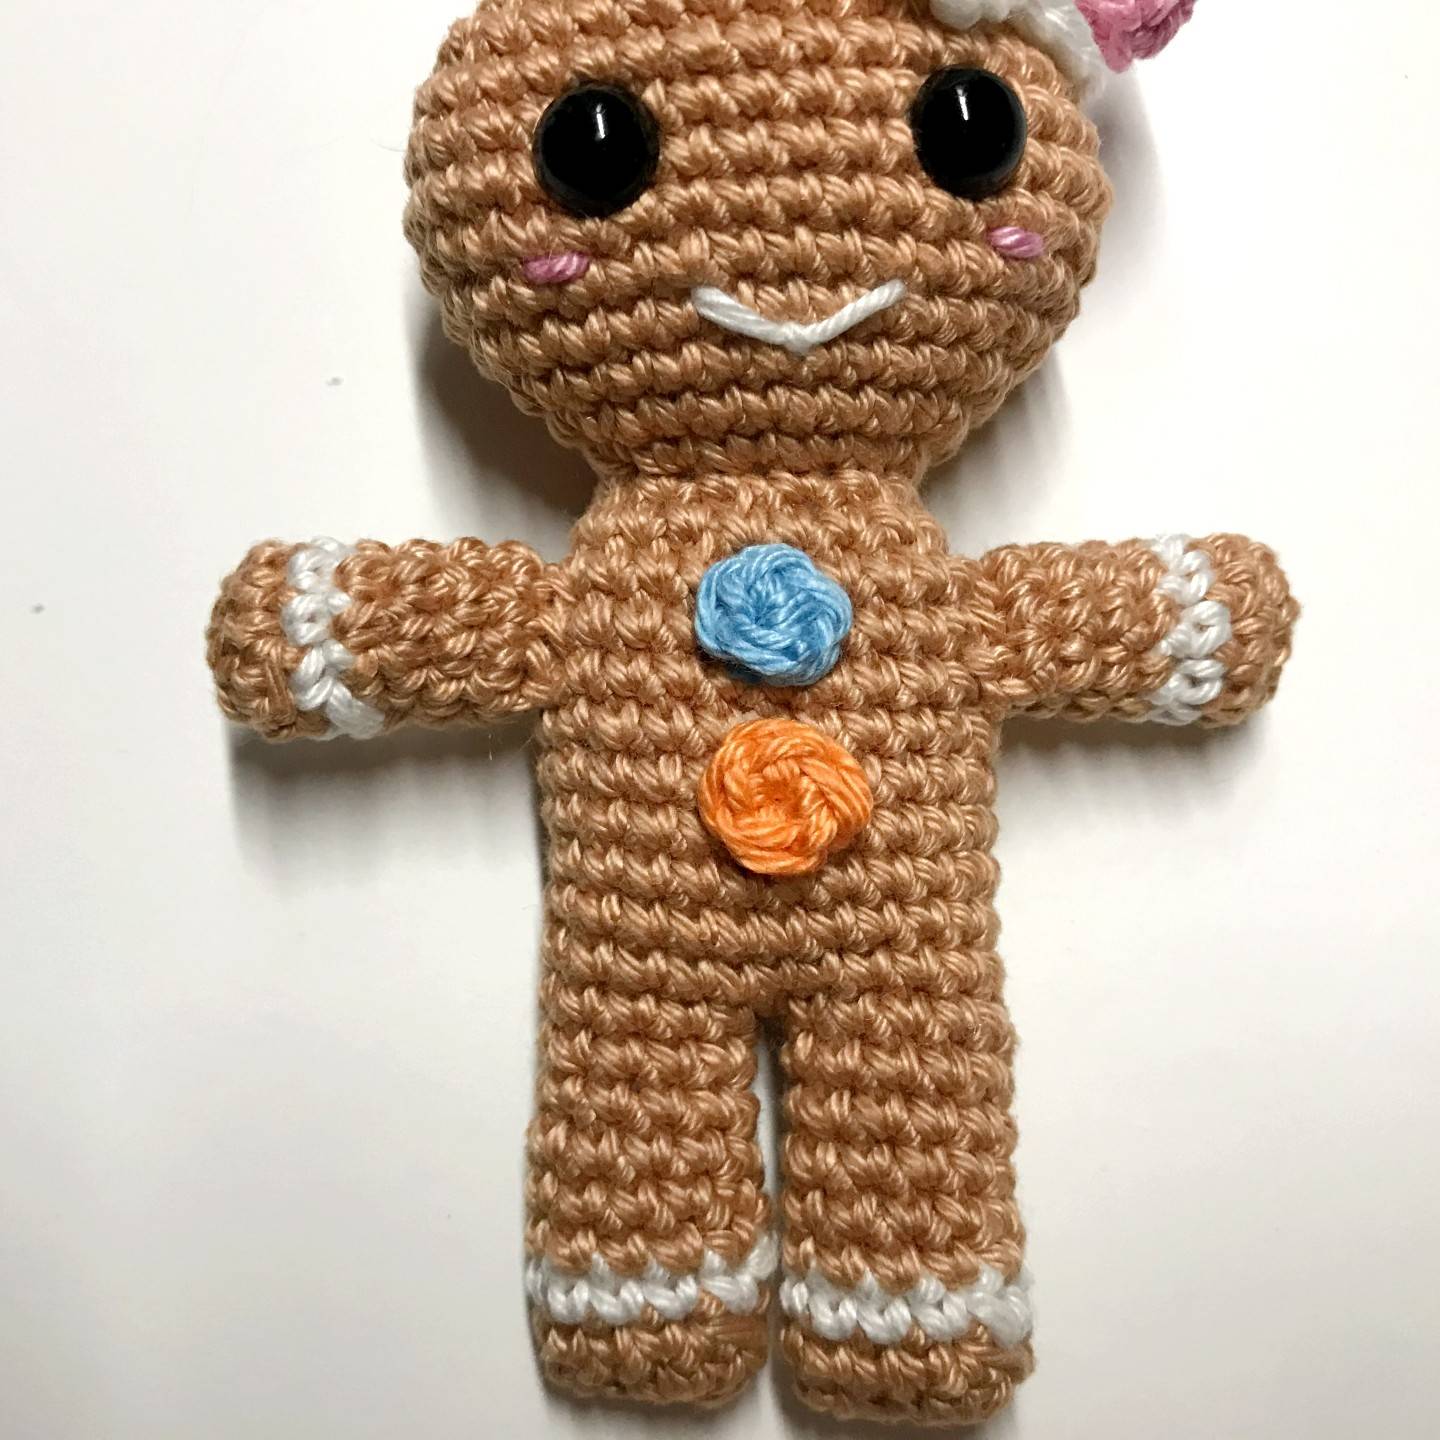
Glue the buttons as follows:
-> stick the blue in 1st 2 rows from the neck
-> glue the orange button 1 row below the blue one

I hope you like the pattern for this first box of my Gourmet Advent Calendar! 😊
See you on December 15 to discover the second box!
All rights reserved. You can not resell, share, modify or publish this pattern.
This pattern is for PERSONAL use only. The pattern may not be, in whole or in part, reproduced, published (online or printed), modified or resold according to article L.122-4 of the french intellectual property code.
You can sell the finished products, if they are made by you, in limited quantities and by providing the name of the designer. Please add the following information to the description of the amigurumi sold:
“This plush was handmade by … (your name) from a pattern created by My Rainbow Crochet”
Copyright 2022 MyRainbowCrochet
If you make this pattern, don’t hesitate to share it on Instagram by tag me @my_rainbow_crochet so that I can pass you on in my story or on Facebook to send me a photo of your achievement that I would incorporate into the album of your achievements!
Seeing your achievements is always a huge pleasure for me!
See you soon Rainbows ! 🙂🌈